Tag Archives: interior vintage camper photos

Party Time!

Party Time!

I’m a little overdue for this post, sorry!  I had my unveiling party last Friday, and I think it was a huge success!  The next day, I ran a 5K (Wicked Wine Run, 5K and then wine tasting at the end haha) and then on Sunday, I rested.  I had a pretty busy week at work, so I am just now getting around to writing an update on here about the festivities.  I will start by sharing some photos of Junebug after I got her all ready for the party.  I was very pleased with how she turned out, even though I still have a few more things to complete (screen door, baggage door, trim around bottom edge of exterior).  The day of the party, I hopped out of bed at 6am, eager to finish making all of the preparations.  I think that’s the first time in my adult life that I’ve ever gotten up that early on my own for something non-work related.  haha

+IMG_5078

View of the tongue with my custom painted tank. I still need to take it to a propane place to see if they’ll actually service this tank. If not, I guess I’ll have to resort to getting a new one. Fingers crossed they’ll accept this one since I put so much work into it!

+IMG_5082

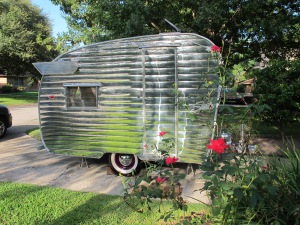
I think she looks quite pretty with my roses in the foreground. 🙂


+IMG_5090

Another view.

+IMG_5094

She had to have these little twinkle lights.

+IMG_5104

+IMG_5099

Street side. The new 30 amp stainless inlet looks pretty good here I think.

+IMG_5105

The wind chime hanging on the door was a gift from a coworker that she picked up in Alaska. My coworkers have been so supportive throughout this project!

+IMG_5122

Little measuring spoon set that a coworker gave me. They have owls on them!

+IMG_5121

A little more decor for the kitchen.

+IMG_5116

I added some magnets to the fridge and a larger magnet on the stove. Of course, it has an owl on it. 🙂

+IMG_5119

+IMG_5115

I think the starburst patterns on the benches turned out pretty cool.

+IMG_5114

The framed hipster owl. I also have a couple of fun books on glamping and trailer history.

+IMG_5112

+IMG_5111

A better view of the bed and benches. So cozy!

+IMG_5109

+IMG_5124

Little bathroom complete with vintage trailer reading material (not that I’ll be spending a lot of time in here). haha

I had about 40 people show up for the party, and it was a great time!  Everyone was very excited to see the finished product.  I asked everyone to dress up in 1950s/60s outfits to get in the mood.  I ordered my dress, shoes, and petticoat from www.pinupgirlclothing.com.  I love that site!  They have the cutest pin up clothes, and the quality is great.

pIMG_5135_edited-1

My best friend, Jennifer, and I all dressed up for the party!

pIMG_5142_edited-1

My coworker, Natalie, and her husband, Kevin.

pIMG_5145_edited-1

This is my friend and stylist, Josafatt. He did my hair! I wish I could do it this way every day, it was so fun!

Jen&Ayk

Jennifer and her boyfriend, Ayk.

IMG_5167

Everyone is gathered around for the big unveiling!

pIMG_5148

I had the tarp over Junebug so that I wouldn’t spoil the surprise.

pIMG_5163

And here she is!!

pIMG_5169_edited-1

I’m about to open the door to let everyone take a peek inside!

pIMG_5173

My friend, Thomas, spared no expense and brought multiple bottles of Veuve Clicquot to celebrate the big event!

pIMG_5179_edited-1

Cheers!! I’m overjoyed to be done (almost) with this big project!!

cheers_edited-1

I tried to give a speech here but it wasn’t the best since I didn’t prepare ahead of time, oh well, hoepfully no one cared. haha

pIMG_5198_edited-1

Here I am about to christen Junebug. I didn’t want to waste any Veuve Clicquot, so I used a bottle of beer instead. 🙂 To be safe, I wore my cut resistant gloves donated to me by my neighbor, Jarred.

pIMG_5187

Baxter loves a good party!

I was supposed to go to the TCT vintage camper rally in Lake Charles, Louisiana this weekend.  Unfortunately, I am having problems with my tail lights and I decided I couldn’t go.  I didn’t wire them myself, I had Oscar do that, and now they don’t work properly.  confused  The weird part is that they work fine when they’re plugged into Oscar’s Ford Explorer.  For some reason, they don’t work right when connected to my VW Tiguan.  I’m sure it’s some kind of compatibility issue, but I don’t know how to fix it.  I’m taking Junebug to the place that installed my wiring and hitch on the Tiguan either tomorrow or Saturday morning, depending on the weather.  I even ordered new tail lights from www.vintagetrailersupply.com and that didn’t fix the problem.

My plan for the weekend is to hopefully get the tail lights fixed, then finish building the new screen door.  I also borrowed a soldering iron from my friend Casey’s boyfriend, so that I could solder all of the wire connections together in the camper.  I am still a little nervous they might come loose while I’m towing the camper somewhere and then become hazardous when I’m camping due to exposed wires.  I thought if I really wanted to be on the safe side, I could solder the wires together and melt some shrink wrap over them to ensure they don’t come apart.

I am planning to go to Austin next weekend for a baby sprinkle, so I’m thinking I may take Junebug there for the first big trip since the restoration.  We’ll see, it all depends on the tail lights!  Either way, I’m definitely taking her to her first vintage camper rally the weekend of October 10-11 to join the Texas Vintage Trailer Club’s rally in Fentress, TX.  Can’t wait!


The Home Stretch, Part 3

The Home Stretch, Part 3

I had a rough weekend.  I didn’t even want to write a post yesterday because I was so frustrated, I just had to get away from it all.  I tried for a good part of Saturday to get the electrical system to work, and I felt like I wasn’t getting anywhere.  I didn’t want to get too far off track even though I couldn’t get the electrical system to work, so I still managed to cross a few other things off my list.

I had to run a few errands first.  I needed to pick up some Dicor lap leveling sealant to go around the seams on the Fantastic Vent on the roof.  Even though I sealed it first with putty tape, you still have to go over the top of that with the Dicor sealant to ensure it’s water tight.  I also had some seams that were exposed because my j-rail wasn’t covering them all the way so I got some Sikaflex sealant to cover those.  I don’t think it’s technically the way you’re supposed to do it, but I wanted the added protection since there were some areas exposed.  I got it in grey, so it doesn’t look too bad.  I still need to trim it in a few places where it got a little goopy.

IMG_5026

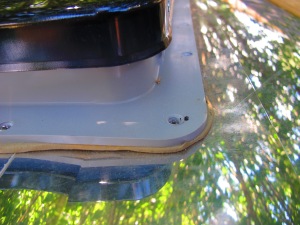
Here’s a pic before adding the Dicor. It’s just got the putty tape between the vent and the roof.

IMG_5027

I made this barrier to go around the vent because I wasn’t sure how much the sealant was going to spread and I didn’t want it going all over the place.

IMG_5028

Turns out I didn’t need the barrier. Oh well, better safe than sorry!

IMG_5029

Here’s a pic of the Sikaflex sealant I applied in the cracks of the j-rail. The top of the j-rail had a better seal because it was completely covering the seams. It was just on this side in some places where I had folded the roof over too far. I think I’ll trim it a little but it doesn’t look too bad.

It poured down rain today and I let Junebug get rained on for the first time in a long time.  I guess I figured I needed to test her seals out to see if anything leaked.  From what I could tell, everything stayed bone dry, so that was awesome!

I decided yesterday that maybe I wanted to put the old light fixtures back in the camper instead of the new crappy ones I bought.  I needed to clean up one of them because it had gotten rusty, probably due to getting wet because it was the one above the kitchenette.  While I was messing with the rusty fixture, the neutral wire broke off of the light socket.  ugh  Rather than throw out this fixture, which I still think is better than the new one, I decided to buy a new light socket and install it in the old fixture.  It worked great!

IMG_5024

Both old fixtures. The one on the right is rusted because it had been in the kitchen.

IMG_5025

One of the fixtures now has a new light socket.

I thought maybe my ground wire wasn’t getting a good connection with the frame of the camper, so I removed it and used my wire brush attachment for my drill to scrape off all of the paint from the frame.  I then reattached the ground to the frame and it didn’t help.  I decided to give up on the electrical after that and try again on Sunday.

Today, the first thing I did was go to Home Depot to buy a multimeter so I could start testing every connection of the electrical system to find the problem.  I didn’t want a really expensive one since this was probably the only time I would use it.  I ended up getting a Klein http://www.homedepot.com/p/Klein-Tools-Electrical-Analog-Multimeter-Test-Kit-69149/204367271.

IMG_5030


When I got home, I first tested the outlet in the garage that I was plugging the camper into.  It tested 120v which was the right voltage.  Then I went inside the camper and turned off both breakers inside the breaker box and tested the main power coming into the breaker box.  It also tested 120v, so I knew it wasn’t the power inlet or the cord I was using.  Since I have two circuits in the camper, one for the exterior plug and one for all of the interior wiring, I turned just the exterior plug breaker on first.  It was simpler since it’s only one plug for the entire circuit.  I did this on purpose because the AC will plug into this and it draws more power than anything else I will be using.  I tested the exterior plug and it worked great, showing 120v.  Next, I turned off that breaker and turned on the second breaker that powers the circuit for three outlets and two lights inside the camper.  I knew the problem was somewhere along this circuit.  I slowly went through the connections, one at a time, disconnecting the wires further down the circuit so I could isolate each one.  About halfway through, my stupid multimeter broke!!   At first I thought the outlet wasn’t working correctly, then I realized it was just the multimeter.  ugh.  I decided it was time for a lunch break so I could try to destress.  After that, I went back to Home Depot and returned the Klein multimeter and bought an even cheaper one made by Commercial Electric.  It worked just fine to finish the job.
IMG_5033


After disconnecting and reconnecting everything, the lights worked!!  I still don’t know exactly where the problem was.  It could have been the cheap fixtures I had in the camper before.  Or, it could have been a loose connection somewhere that I fixed when I reconnected everything.   Either way, I was just so relieved that it finally worked!!

After that, I knew I still needed to do a few more things.  I wanted to make a new garnish to go around the Fantastic Vent on the interior because I had done a crappy job trimming the plastic garnish that it came with.  I think my new custom garnish turned out much nicer than the plastic one anyway!

IMG_5040


I bought some nice birch wood for the screen door on Saturday, but I just didn’t have enough time to build it thanks to the stupid electric issues.  Oh well, I can always get to that later.

I also wanted to polish the wings today and install those, but I didn’t have time before dark.  Instead, I added a few more decorative items inside and then sat on the bed and had a glass of wine to celebrate.

IMG_5051

These owl glasses are actually from the 1960s, I picked them up at a vintage shop and love them!

IMG_5042

Owl never lose my keys again with this handy hook. 🙂


IMG_5054

This came on the vintage camper mug that my mom gave me for Christmas. I thought it was cute too so I saved it so that it could have a permanent home inside Junebug.

IMG_5056

I got this little sign when I was living in France. Since this is the bathroom (well…port-o-potty for nighttime emergencies only), I thought it was a cute little addition.

IMG_5055

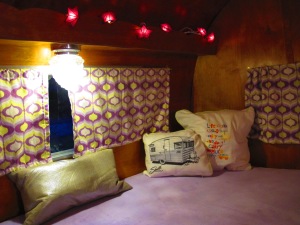
I added some purple star twinkle lights above the bed. It’s so cozy now! I can’t wait to spend the night in it.

Only a few more days until my big reveal party!!  After that, I will post more pictures of the entire exterior and interior.  I can’t wait to show off all of my hard work! biggrin


The Home Stretch, Part 2

I had a pretty productive day!  Unfortunately, I also discovered today that my stupid light fixtures inside the camper still don’t work!  I don’t know what is the problem this time.  There seems to be power going to them and the outlets on the same circuit work when I plug in the main power inlet, so who knows.  I called the guy from RV Masters, and he’s going to come by tomorrow to have a look at them.  He’d better fix it!

The first thing I did today was paint the wheels.   The thing I hate about painting is all of the preparation that it takes.  It took me much longer to prep the area for painting than it did to do the actual painting.  Oh well, in the end, it was worth it!  I think they look pretty.  smile

IMG_4998

First, I had to clean the wheels with degreaser.

IMG_4999

All clean!

IMG_5000

Taped off and ready for paint (this part took a while)

IMG_5001

After a coat of primer

IMG_5002

Three coats of purple

IMG_5003

Street side after 3 coats of purple

IMG_5005

All done!

IMG_5012

You can see my reflection in the baby moon hubcap 🙂

While I was in the process of painting the wheels, I finished painting the closet too.

Later, after the paint was dry, I installed the vinyl wall map of the US on the closet wall.  I think it looks pretty cool!

IMG_5018

I also finished moving the exterior outlet and patching the previous hole.  I added some flexible duct work to lead to the vent for the AC on the interior of the camper.  I still haven’t added a vent cover, I’m not sure if I will, or if I’ll just attach another piece of duct work when I’m inside the camper to make the air flow upward toward the bed area.

IMG_5007


IMG_5009

I added another piece of paneling in front of the AC duct to cover it when it’s not in use. I can remove that piece to reveal another piece of paneling with a hole in it so that the air can flow out from the AC duct when I’m using it.

After finishing those things, I finished securing the drawer under the bed and added some support to the beams that hold up the bed cushions.  I also hung some pictures and installed the closet door.  I don’t want to show a picture of the entire interior until after my big reveal party next weekend, but I’ll share one of the street side, just to give you an idea.  biggrin

IMG_5014

So, if I look at my list again, here’s what I still have left for this weekend:

  • Install interior crown around Fantastic Vent (I think I may make one instead of using the plastic one it came with)
  • Install two emblems (Trailer Coach Association & small Shasta emblem)
  • Seal cracks and staples on exterior as well as vent on roof with sealant (need to pick this up from RV Masters)
  • Polish WINGS and reinstall (This will be my favorite part!)

If there’s time:

  • Build new screen door (forgot this in my last post)
  • Install baggage door
  • Install trim around bottom edge of exterior

I’m getting so close!!

biggrin

Kodachrome


When I was in high school, we used to listen to Simon and Garfunkel almost daily.  My friends and I loved their song Kodachrome the most and would sing along to it all the time.  I don’t know why, maybe because they sing about high school or maybe just because it’s a happy song.  Either way, the song brings back happy memories.  I’m listening to the song now as I write this, and it has a slightly different meaning to me.  He sings about how Kodachrome makes every day look like a sunny day.  I can only assume he means the film, which they discontinued in 2010.  It makes me think of Facebook and how people usually tend to post only the best and happiest photos.  I guess Facebook is my generation’s Kodachrome. haha

The reason I chose to title this post Kodachrome was because I discovered the beauty of chrome spray paint today..and I will be posting photos, so it seemed fitting.  biggrin


I wanted to paint the spare tire today as well as the hitch and bumper.  While I was at it, I also painted the propane tank.  I think it turned out pretty cool!

IMG_4931

First, I went to AutoZone and got the spray paint. I bought some primer as well as the chrome and purple paint for the wheel.


IMG_4933

Next, I cleaned the spare tire with degreaser. It’s an old tire, so hopefully I won’t need to use it. I will likely get new tires for the trailer at some point, and then I can put one of those on the spare tire mount.

IMG_4941

I taped off the tire so it wouldn’t get paint on it.

IMG_4942

After primer

IMG_4946

Purple!

spare tire_blurred license

Mounted again and I also painted the bumper with the chrome paint.

IMG_4932

This is the piece that fits over the front of the spare tire to hold it onto the bumper.

IMG_4935

After two coats of purple. I also painted the nuts. 🙂


And now to the front of the camper.


IMG_4936

After painting the hitch with primer, I noticed some numbers on the side. This must be my VIN!

IMG_4939

Primed the propane tank too

IMG_4940

Hitch is primed

IMG_4943

After one coat of chrome paint


I wanted to do a similar design on the propane tank as my camper will have (once I get it painted).

IMG_4945

I taped off the stripe and coated the top half with chrome.


IMG_4955

Getting ready to paint on the purple.


IMG_4962

Both colors are on and waiting for them to dry so I can pull off the tape.


IMG_4963

Finished product! I think the stripe is a little too fat but that was the only size painter’s tape I had so oh well.

I also painted a few other details that needed to be installed.

IMG_4966

This is the door catch so the front door can be propped open.


IMG_4952

This is the Shasta emblem that I paid a lot for. I just had to have it!

IMG_4954

Not quite the same as getting it rechromed, but it looks pretty good and a lot cheaper too!

Next, I set out to install my new Fantastic Vent.  It proved to be a difficult task (what a surprise), because I had inserted some additional framing pieces underneath the skin to make it sit a little higher (to help the water run off) and they were making the hole too small for the vent.  I couldn’t just take them out because they were all attached to make a square.  So…I had to get out my oscillating tool and saw away at the sides until I got it to be big enough for the fan to fit inside.  It took a while, but at least I finally got it installed!

IMG_4967

Hole from the interior.

IMG_4968

After trimming away at the edges and cutting out the hole in the skin.

IMG_4969

And it’s finally in!

I still need to seal it again with Dicor lap-leveling sealant. http://www.amazon.com/Pack-Dicor-Self-leveling-Lap-Sealant/dp/B00H554R98/ref=sr_1_2?ie=UTF8&qid=1409626405&sr=8-2&keywords=dicor+lap+sealant   I don’t have any, so I need to pick some up at the RV shop.  I’m keeping the cover on Junebug now anyway so I’m not in a rush to finish sealing it just yet.

IMG_4970

Here it is from the inside. I still need to add the frame piece to cover up the edges and tuck the wires in.

IMG_4996

The interior frame piece that fits around the hole for the fan sticks up too high, so I needed to trim it. Unfortunately, I didn’t have a good tool for this and ended up using my tin snips. It made the edges all jagged. I haven’t installed it yet because I want to see if I can smooth the edges first.

IMG_4997

I had to order a 12v to 115v converter so that I could power my Fantastic Vent since I don’t have 12v set up in my camper at the moment. Luckily, this part went better than my overall electrical wiring experience, and it worked the first time!

The fan works great, and I can’t wait to use it when I’m camping and don’t need the AC.

IMG_4973

My newly painted hitch and propane tank look pretty snazzy. 🙂

IMG_4979

Here’s a pic with the vent hood open. It’s translucent, so it adds a little light in the camper even when closed.


I installed the Shasta emblem and I think it looks really cool!  I was worried maybe you couldn’t see it very well since it’s silver and the skin is silver.  I think it still shows up just fine though.  I think I’m on the right track to finish on time now!   The electrician is coming tomorrow to make sure my wiring is done well, and then I’m on the home stretch!  smile  Have a good week and I’ll be back next weekend!

shasta emblem_edited

Sigh of Relief

Posted on

Today went much better than yesterday, all I had to do was stay AWAY from the electrical wiring.  haha  I went back to doing some other things in Junebug that I’m much better at.  I feel like I got a lot done and am feeling pretty good about how things are looking!

It was raining this morning, so I decided to run some errands before getting started.  I needed to return some things to Lowe’s and pick up some new items, plus go grocery shopping.  I finally found the other matching mirror at Target that I had been searching for so that I could install it behind the star cutout in my bench.  I already had one and needed another one.

When I got home, I started working on finishing the benches.  I also bought some spray foam gap filler so I could fill in the holes in the closet where the drains used to be.   I thought about closing the holes some other way, but this seemed like the easiest.   It worked great!  Later I will sand it down and paint over it.

IMG_4879

Here’s the hole where the power inlet used to be.

IMG_4880

These holes were for the sink drain and vent. There were galvanized pipes here, and I promptly did away with those. They were taking up way too much space!

IMG_4882

The hole after spraying some foam into it. It expanded into a bubble, it was kind of funny.

IMG_4899

After it dried, I cut the excess off with a kitchen knife. This stuff works great!

After installing the mirrors behind the star cutouts in my benches, I noticed the mirror was reflecting the backside of the wood, and it wasn’t pretty.  I decided to remove the mirrors and paint the backside purple so it would look better.  Then I reinstalled the mirrors and secured the benches to the floor.

IMG_4891

While the purple paint was drying, I decided to hang the curtains.  You can see them in the above photo, but I’ll post another one here at a different angle.  I think they look so nice against the shellacked wood!

IMG_4911

I also finished adding some wood trim around the window in the kitchen.

IMG_4904


My friend, Tracy, gave me this doormat with a J on it.  I’ve been using it for the house, but now I can also use it for Junebug, how perfect!  biggrin

IMG_4894


Next, I needed to add some vinyl welt in the seams between the walls and the ceiling.  I was supposed to do this before I attached the ceiling panels, but I totally forgot.  oops  My cutouts for the wall panels weren’t exactly the right size, so I needed to add the welt (similar to the original design) to cover up the gap.  I nailed it in using tiny nails so they weren’t too noticeable.  It isn’t perfect, but I think it looks pretty good and it covers the gap.   I actually found this welt through a boat supplier.  It’s meant for marine upholstery, but it works great for this purpose too!   http://veada.com/marine-vinyl-boat-upholstery/vinyl-welt-cord-piping.html.


IMG_4897

Before

IMG_4912

After

IMG_4913

Street side – after

I also added some trim pieces to the door frame.

IMG_4909

Here’s a picture of the exterior street side.  Can you spot the mistake I made cutting the new skin and had to cover up?  I don’t think it looks too bad.  You can see it, but it’s not a glaring mistake at least.

IMG_4916


While I was at Target, I picked up a couple of frames for my owl art that I plan to hang in Junebug.  Oh yeah, in case I didn’t mention it before, I’m obsessed with owls and plan to have an owl theme in Junebug. smile

IMG_4918


I was really hungry after doing all of the things I just mentioned, so I took a break and made myself a filet mignon with grilled okra and portabella mushroom.  I burned my filet a little because the grill’s fire was too hot.  Luckily, the flavor was still awesome and I thoroughly enjoyed it.  After eating, I got back to work.  I wanted to finish making the bench seats today.

In order to make the seats, I had to take apart the seat backs that I had made back in December.  I wanted to reuse the foam and material since it was so expensive.   I also removed the material from the long seat cushions since I didn’t need those to be purple anyway because they’ll be covered up with bedding.  The foam wasn’t the right size, so I had to cut it and piece together a couple of different sizes to get it to work.   Once wrapped with the batting and material, I don’t think the seam in the foam will be noticeable.


IMG_4917

Foam cut and ready for the batting.

I discovered that my good serrated kitchen knife worked great to cut through the foam!  I wish I would have discovered that the first time I was making these seat cushions.   Live and learn I guess.

IMG_4919

Batting is stapled down and the cushion is ready for the material.


IMG_4920

Adding the material.


IMG_4921

Seat cushion is complete!


IMG_4922

All the seat cushions and seat backs are now complete! The black cushions in back are the original ones from the camper and will be used for the bed. They are actually pretty comfortable!

IMG_4930

Seat on curb side. I added my Shasta pillow for the full effect. It looks pretty cute!

IMG_4929

Here’s the street side seat. I sat on it to try it out and it’s quite comfy!

Tomorrow, I’m planning to finish the bed and closet, then install the Fantastic Vent if it’s not raining.  If it’s raining, I may only be able to do interior work.  I also need to finish moving the hole in the floor leading to the exterior plug underneath the camper.  This wasn’t an urgent item, but it needs to be done, especially with the electrician coming on Tuesday.

I’m feeling pretty excited now that everything is coming together!  I can’t wait to get more done tomorrow.  smile


Let There Be Light!

Posted on

I think there have been a few days where I was really frustrated and wanted to quit, but today takes the cake.  I knew I wasn’t talented at electrical work and today proved me right.  After spending quite a while hooking up all of the new fixtures and outlets last weekend and during the past week, I was ready to finish hooking up the breaker box, power inlet, and ground wire so I could plug the camper in.  I managed to finish the breaker box and shore power inlet pretty quickly, as well as drilling a hole in the floor for the ground wire and attaching it to the frame below the camper.

In order to figure out how to wire the new breaker box in the first place, I consulted my favorite forum, http://vintagetrailertalk.freeforums.net/thread/2368/71-shasta-loflyte-amp-upgrade.  The thread I just linked is one that includes step by step instructions on how to upgrade your standard 15 amp system to a 30 amp.


IMG_4865

I followed the instructions from the forum on my iPad while I worked.

IMG_4866

I removed the 60 amp breaker that this box came with and replaced it with two breakers, one 20 amp (left) and one 15 amp (right).  In this pic, I have already connected the 20 amp circuit to the breaker.  It will feed the lights and outlets inside the camper.

IMG_4867

In this picture, I have connected the 20 amp circuit (seen on bottom of pic) and the shore power inlet. I used 10 gauge wire for the shore power inlet and 12 gauge for the other wiring.

IMG_4869

And here’s the box with the last circuit installed that will go to the external outlet for the AC (and twinkle lights :)). Since the AC draws 7 amps of power, I thought it would be best for it to run on its own circuit.   You can see that I used a jumper wire to complete the circuit from the 20 amp to the 15 amp breaker. I used 10 gauge wire for the jumper wire.

After connecting all of the circuits, I went outside to hook up my shore power inlet.  I had to buy another hole saw for the job.  Not sure what I’ll do with these hole saws when I’m done!  I ordered my stainless steel 30 amp power inlet from http://www.vintagetrailersupply.com/.  I looked around online and they actually had the best price on these.  I also ordered a 30′ cord to connect to the shore power plug at the campground.  Both of these items are made by the same manufacturer, Furrion.  The cord even has an LED light on the end near the plug to indicate if polarity is reversed.  If it’s lit blue, that means the trailer is wired correctly and if it’s red, that tells you that the electrical current is not running as it should be, which is probably due to incorrect wiring.    I thought this was handy seeing as how there was a good chance I did something wrong on the trailer wiring!

IMG_4870

Here’s my stainless steel power inlet and the 2 3/4″ hole saw I needed to make room for it.

IMG_4871

Hole is cut and ready to install power inlet.

IMG_4874

All installed! It’s nice a shiny, just like Junebug’s skin!

IMG_4873

Here’s the interior pic of the power inlet. I accidentally removed a little too much of the sheath over the wires, so I added a bit and taped it down, just for added protection. I’m pretty sure it will be fine but I wanted to be safe. I used screws that were a little too long and they poke through the wall, oops. Luckily this will be hidden by the bed anyway.

IMG_4872

I used some insulated staples to secure the wires.

IMG_4875

The final task was to connect the ground wire (seen in green). I drilled a hole through the floor and ran it down below the camper and wrapped it around a bolt attached to the frame.

After hooking everything up, I was ready to plug it in!  I was so nervous that my knees were literally shaking.  I don’t like to mess around with electricity.  I went in the garage and plugged in the end of the cord.  I went back over to the camper and didn’t see that the light had come on.  I stupidly went to the fixture and pulled the chain.  It shocked me! eek  And.. it didn’t turn on.  ugh  I went back and unplugged the cord.   So disappointed…  I got online and posted some pictures on Vintage Trailer Talk to see if anyone could help me.  I also chatted briefly with a guy who works at RV Masters here in Houston to see if he could help me troubleshoot.  We both agreed it was either a problem with the ground or there was a piece of hot wire touching something.  I went back outside to check all my connections.  I disconnected the light fixture above the bed and then noticed that my ground wires had come loose inside the j-box near that fixture.  I reconnected those and everything worked!  I unplugged the cord again and reconnected the light fixture above the bed.  When I plugged it back in, everything wasn’t working.  ugh  Back to square one!  After at least an hour of messing with it, I realized that one of the hot wires inside the fixture was exposed and was touching the ground wire.  This was causing the whole fixture to be live.  Once I fixed that, everything was working again, yay!

I screwed a light bulb into the fixture above the sink and it worked!

IMG_2460

Then I went back to the troublesome fixture above the bed.  I put it back together and screwed a light bulb into it.  I went back out to plug in the cord, and when I returned it was on!!

IMG_2461

Unfortunately, even though it was working, the stupid fixture and the j-box next to it were electrified when I touched them with my voltage sensor.  ugh.  At this point, I was fed up.  I called the guy from RV Masters, and he said he could come by next week with his electrician to take a look at it.  I can probably fix it, but I’m wasting a lot of precious time on this when I need to be finishing up other items!

I’m so disappointed that I couldn’t get this all working perfectly on my own.  I’m so close I can taste it!  That being said, I really don’t want to hurt myself or my camper.  I’d better leave it to the professionals.

After giving up on the electrical, I finished a few trim pieces around the kitchen window and secured some smaller pieces of countertop that go around the stove.  I also hung some curtains in one of the windows.  I didn’t get pictures of these two things.  I guess I was too annoyed about the electrical work not to mention I was running out of daylight.   I think the curtains are going to look really cute in there!

Here’s the list of everything I still have left to do before the party (in no particular order).  The list looks relatively short, but I know how long it takes me to do things so I’m sure it will take me right up until the party to get these things completed.   I hope I can do it!  I’m starting to feel the pressure..

  • Install mirrors in benches (behind starburst cutout)
  • Secure bed and benches to floor
  • Make cushions for benches
  • Finish painting closet and patch holes
  • Get electrical system working properly (electrician will take care of this!)
  • Install Fantastic Vent
  • Paint tongue and bumper (maybe wheels too if time), also paint propane tank
  • Install Shasta emblem and other little emblems as well as door catch
  • Finish installing vent for AC to go on cabinet face
  • Install baggage door
  • Polish wings and reinstall
  • Seal cracks and staples on exterior with gutter seal
  • Finish hanging curtains and add other decorative items

Tomorrow is a new day and I’m not going to let my electrical system woes get me down.  I will ignore that for now and get busy on the other items.


Determination

Posted on
Determination

I can’t remember what life was like before Junebug.  What did I do with all of my time??  Sure, I had other hobbies, but I didn’t do anything nearly as obsessively as I work on this project.  It’s kind of like trying to imagine my life before the internet or my iPhone. haha  Maybe I was just relaxing more or perhaps watching more movies.  

Both of my neighbors admitted yesterday that they doubted me in the beginning and didn’t think I could do this project on my own.  Little did they know, I am a very determined person, and when I put my mind to something, I will do it no matter what!   One of my neighbors also said that I had done a good job for a girl.  rolleyes  That offended me, and I told him so.  He then backtracked and said he meant that he didn’t think there were many girls who would take on this sort of project.  He might be right, but I’m hoping maybe some other women who aren’t sure about doing something like this will come across my blog and see that they can do it!  All you need is time, money, and a lot of determination. 

This weekend, I got a lot done, but I still didn’t completely finish my electrical system like I had planned.  I had no idea how difficult 12 gauge wiring was going to be to deal with.  I still feel pretty good about where I’m at, although I’ve only got two weekends left until the unveiling party, so I am a little worried about time.  I will probably have to work on a few things during the week just to be sure I finish in time!  Luckily, my next two weekends are three day weekends, so that really helps.

I think I mentioned in my last post that I had lost my keys.  Wouldn’t you know, they were hanging on a nail in the garage the whole time!  I have become so disorganized with this project, this is unlike me!  I now have a little camper key cover on my keys.  Maybe this will help.  If nothing else, it’s cute. smile

IMG_2446

I was off on Friday, so I got up early and started working on finishing the exterior of Junebug to get her ready to take to Oscar’s shop to finish the bumper and spare tire mount.  I had to finish stripping the paint off of the drip rail, and of course, it took forever!  I don’t know how that paint was so stuck on there.

After doing that, I polished the eyebrows and installed them over all of the windows.  
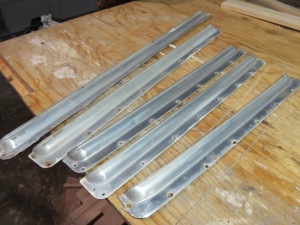
IMG_4841

Before

IMG_4842

After

 Oh, by the way, I’m not going to post any more full exterior or interior pictures until after my unveiling party on September 12th.  I don’t want to ruin the surprise for my friends who will be coming to the party and also read this blog.  For anyone who can’t make it to the party, sorry, but I promise to post lots of pictures after that!  

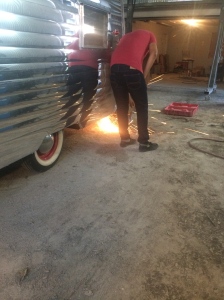
It took me most of the day on Friday to finish up the exterior, and around 6pm, I started getting Junebug ready to go to Oscar’s shop.  I noticed that my jack had become really hard to turn.  I got the camper out of the driveway and hooked up to my car, but I couldn’t get the jack to go back up so I could get on the road.  Apparently, it had decided to break on me. grr  My nice neighbor came to the rescue, and he helped me remove the jack and put it in my car.  I went on my way to Oscar’s place to see if he could help me with it.  Once I arrived at Oscar’s shop, he immediately got ot work on my bumper with his son and his friend as his assistants.   I got really nervous with the welding so close to my beautiful pre-polished aluminum skin.  That stuff scratches so easily!!  They put a few new scratches in it, but in the end, it turned out fine.  I snapped a couple of photos while they weren’t looking. hehe

IMG_2441IMG_2438


I’ll wait to post a pic of the finished bumper with the spare tire mount.  It still needs to be painted, and I want to wait until after the unveiling to show it off anyway.  

I noticed that my side running lights and license plate light didn’t work properly when plugged into my car.  I was really worried I had wired them wrong, but when Oscar hooked Junebug up to his two vehicles, everything worked great!  

Since it was late on Friday when I took Junebug to Oscar’s place and my jack had quit working, I decided to leave her overnight at his shop and pick her up in the morning.  On Saturday morning, I took my VW to Master Hitch since that’s where I got the wiring installed, and they said everything was working perfectly in it.  ugh  I guess I’m going to have to take my VW and Junebug to Master Hitch because it doesn’t seem like the problem is my camper.  Luckily the most important lights are working, the brakes and blinkers.   I went ahead and bought a new jack while I was at Master Hitch, and Oscar installed it for me.  It only cost $29, so that was a relief.  It works great too!

IMG_4844


I’m planning to paint it when I finish painting the hitch.  I can’t decide if I want to paint it silver or purple.  

On the drive home from Oscar’s shop, I noticed Junebug was swaying a little bit.  She didn’t sway at all before, so I’m wondering if it’s the new bumper and spare tire.  I had to install the spare tire to the side in the rear so it wouldn’t cover up the license plate.  I’m thinking this is messing up the weight distribution.  Hopefully by the time I install the propane tank and fill up Junebug with stuff, it will all even out.

After getting home on Saturday, the first thing I did was install the two holes for the AC.  I wanted to finish wiring the receptacles inside the camper, but I knew it would be way better to do that with the AC on!  

I got my AC from ClimateRight.  It’s an 8200 btu unit that is AC only, no heat.  A little space heater warms up Junebug just fine, so I didn’t need a heater.   This little AC sits outside the camper and connects via two hoses that are actually the hoses you would use for a dryer exhaust.  Their website said to install the two holes for the hoses on the side of the camper, but I thought that would be ugly.  I decided to drill two holes in the floor underneath the kitchen cabinets for my intake and output.  I haven’t finished making it look pretty yet, but it’s working great!  I got this kind because a window unit would look ugly (in my opinion) and Junebug’s frame isn’t strong enough to support a roof unit.  Other people have installed a window unit under the bed and vented it through the baggage door or through the floor, but I didn’t really want to go that route either.  This seemed like the best option for me, and so far, I’m happy with the decision.  It has a little infrared remote control that serves as the thermostat so it knows the temperature inside the camper at all times.  

IMG_4846

I had to buy a hole saw and the attachment to go with it. It cost around $40 for both so it wasn’t cheap!

IMG_4849

One of the holes I had to cut was going to go through the old asbestos tile. I was a little nervous about this, so I wore my mask and kept spraying the floor with water while I was cutting. I then carefully gathered up all of the shavings after I was done.

IMG_4847

The one on the right will be under the fridge when I put it back in its spot. It’s for the output. The one on the left will be the return air vent, which is under the sink.

IMG_4848

Here’s a pic of the one on the right after I drilled the hole and put the attachment in it.

IMG_4851

And both are installed! I added some ductwork to the output and a screen to the return to keep particles out. The ductwork is a little too long since I will be putting a piece of wood back in the space below the fridge. I am still trying to decide how to cover the space and have a vent. None of the vents at Lowe’s were exactly what I was looking for.

IMG_4852

Here’s the unit hooked up outside. I am going to find a base for it with little wheels. I also need a way to secure it to the hitch so someone doesn’t steal it from the campground. I will worry about those things a little later.

Once I got the AC hooked up, I got to work on the electrical.  Unfortunately, it was late in the day, so I didn’t really get anywhere.  I made more progress today. 

I ended up deciding to replace both the fixture and the fixture box above the dinette.  I didn’t like the idea of having the plug on the fixture itself like the original, it didn’t seem as safe.  The wires in the original fixture were old too.  The only thing I don’t like about the new fixture box is that it’s blue, and you can see the top of it when standing over by the kitchenette.  I may go back and replace it with a different one later, I don’t know. I also had to add a j-box between the outlet and the fixture above the dinette and pigtail the wires from the outlet.  It was too difficult to get two sets of 12 gauge wire into the little outlet box because it’s so thick.  I also had so much trouble accessing the boxes in this space because the ceiling is curved.  

IMG_4854

Before connecting the wires inside the j-box. The old fixture box is still here.

IMG_4856

With new j-box and wires all connected and stapled down. I really hope this works when I hook it up to power!

The 12 gauge wire was so difficult to work with!!  It took me forever to hook up each receptacle thanks to the 12 gauge wire.

After finishing the dinette, I installed the outlet under the sink for the fridge.  It was an easier one because I only had one set of wires connected to it since it was the end of the circuit.  

IMG_4855

I then moved over to the closet.  I wanted to add an outlet here for general use, but also because I ran the 12v wires from the Fantastic Vent over to this area.  I bought a voltage converter and a plug so that I can plug the Fantastic Vent into a normal outlet(it comes in 12v only).  Later down the road, I plan to upgrade my system to include a battery so that I can have electricity off grid.  That’s too much to take on right now though, so I’m just hooking up the fan this way for now.

IMG_4859

I bought some fancy new wire cutters, specifically made for stripping 12 and 10 gauge wire. They really made my life a lot easier.


IMG_4860

Here’s the closet receptacle. I bought a double outlet box so I would have room for the wires to the side. I put a cover over this so you can only see the outlet now.  I will also be painting the box and area around it purple.

And the pictures below are the fixtures all hooked up again!  

 IMG_4861IMG_4862

I also installed an outdoor plug underneath the camper to plug my AC into.  It has its own dedicated circuit (15 amps).  It only draws 7.2 amps, but I wanted to be on the safe side and let it have its own.  I accidentally picked a spot for the outdoor plug that was too tight initially, so I had to move it, and in doing so, I exposed some of the wire (rated for interior wiring only).  I may need to go back and redo it later.  I’m going to leave it for now because I have so many other things I need to finish first.

The pictures below are the underside of the camper.  On the left, you can see the outdoor plug I installed.  Above that is the air vent for the AC.  It didn’t come with a cap, and I really needed one, so I was excited to find this adjustable cap at Lowe’s.  It expands when you turn the wing nut so that it fits snug inside the opening.  I bought two of these to cover the holes where the AC hoses connect when it’s not in use.  They worked perfectly for this task!


IMG_4864 IMG_4863 

All that’s left of the electrical system is the power inlet and the breaker box with corresponding wiring.  I also need to run a new ground wire.  I ran the old one and bolted it to the frame, but it’s a really high gauge and won’t work for my new system.  I bought a piece of 8 gauge wire to use for the new ground wire, so I’m going to have to fish it down to the frame, hopefully using the old piece.  If that doesn’t work, I may just drill a hole through the floor and run it to the frame that way. I hate to drill more holes in the floor though, I think I may have reached my quota! 

Hopefully I’ll have some time during the week to finish installing the breaker box and inlet, otherwise I will start out next weekend a little behind schedule.  We’ll see how it goes!   Two weeks to go until I need to be finished…deep breaths…. 


Light at the End of the Tunnel

Posted on

I’m finally able to see the finish line!  I still have quite a few things to do before I’m totally done, but I can finally look at the list of things left and not feel overwhelmed.

I took last weekend off because I went to my grandma’s near Austin and spent time with my family.  My brother and sister in law drove down from Kansas with their two kids and my parents were there as well. I don’t get to see all of my immediate family together very often, so I really enjoyed spending time with them.  The picture below is the morning sun rising over the lake from my grandma’s boat dock.  Pretty nice scenery to wake up to!


IMG_2006I came back from my grandma’s feeling refreshed and rested.  I had a busy Monday and Tuesday at work, but toward Tuesday afternoon I starting feeling a little sick.  By Wednesday lunchtime, I had to go home and was stuck there for the rest of the week thanks to whatever illness I had contracted.  I don’t know how I managed to get sick right after a nice relaxing weekend.  confused emoticon

By this weekend, I was finally feeling better, so I slowly got back to work on Junebug.  Even though I got off to a slow start, I did finally end up making quite a lot of progress.

First, I went by a metal fabricator in town to see if they could make some new pieces for the door frame out of my pre-polished aluminum skin I had leftover.  They said that they could, but unfortunately it would cost me around $400.   Yikes!  I decided I would pass.  I then spent several hours trying to fabricate my own pieces.  They looked pretty good, but today I made up my mind that I’m just going to strip the paint off the old pieces and polish them.  It was too hard for me to get the new pieces to look exactly how I wanted.  Oh well..

I finished the wood part of the new door this weekend.  First, I needed to glue a few more support pieces to the frame.

IMG_4783


I then shellacked the interior part of the door.  It’s going to look so pretty!

IMG_4785

Natural without shellac

IMG_4786

After one coat of amber shellac

IMG_4805

After 3 coats of amber shellac and 3 coats of clear shellac

I then stripped the paint off of the hinges to the door and screen door.  I still need to polish them so they shine like the new skin.

While I was stripping paint, I also started stripping the paint off of the drip rails and the baggage door.  I had to pull all of the old skin out of the garage so that I could actually find the stupid drip rails.  They were buried under all of the crap in my garage.  I can’t wait until I can clear it all out and actually park my car in it again!

IMG_4803

Pile of old skin. I think I’ll take this to the metal salvage place when I’m done to see how much money I can get for it. Some of the pieces are still good but others, not so much. There’s no way I could sell it to someone for their camper.

IMG_4802

I chopped up some of the old pieces of wood I won’t be reusing and am putting them in the garbage. I had to get rid of some of the clutter in the garage.

IMG_4801

Here are the drip rails – paint stripping in progress

I will have to coat the drip rails again with more paint stripper next weekend and scrub them.  I’m hoping one more coat will do the trick.

IMG_4818

Still a little paint left but I got most of it.

IMG_4819

It was hard to get the paint out of the awning rail so I might end up just leaving a little there. I don’t think it will be that noticeable.

IMG_4820

There were already some scratches on the baggage door, so I went ahead and scratched it some more with my wire brush while I was getting the paint off. It will just have a nice brushed aluminum look!


Next, I cleaned the jalousie windows, polished them, and then installed.  They turned out really nice!

It was so hot outside, I decided to do the window cleaning inside.  I turned my bathtub into the cleaning area.  It made quite a mess, but I cleaned it all up later.  I got most of the grime off but the window screens are still rusty.  I figured I can replace those at some point if it bothers me.


IMG_4779


I was really pleased with how shiny I was able to get the jalousie windows!

IMG_4784


Before installing the window, you have to apply putty tape around the back edge of the window to seal it water tight.  After screwing it down, I came back and cut the excess with a razor blade.  Fingers crossed it sealed properly!  I don’t want any leaks in my “new” camper!


IMG_4788

IMG_4789


I also started peeling back a little more of the protective film.  I needed to remove it from the window before installing and then I guess I got carried away.  smile emoticon  I also finished installing the taillights.  I haven’t checked them again to make sure they work.  I hope one of the wires didn’t come loose when I was securing the covers or something horrible like that.

IMG_4794

IMG_4791


After installing the windows, I moved inside and finished making the bed and benches (mainly the benches).

IMG_4804

Finished making the frames for the benches.

I already did one cutout a while back, so I just needed to finish the cutout for the other bench.  I used my oscillating tool to cut out the shape after tracing it onto the wood.

IMG_4800

And after applying 3 coats of amber and 3 coats of clear shellac, they’re all done!  Now, I just need to finish making the cushions for the tops and secure the benches to the floor.   I laid down on the bed today to see what it felt like and it was pretty comfortable!  I can’t wait to spend the night in Junebug again!

IMG_4822

I still need to add the mirror behind the starburst cut out.

IMG_4827


Next weekend, I will be connecting all the new wiring and hopefully hooking it up to some electricity!  I really hope I don’t burn down my camper in the process.  I will be doing quite a bit of studying online before connecting anything to a power source, that’s for sure!

I’ll leave you with a cute picture of my cousin Anderson and Baxter.  He loves Baxter so much and tells everyone that Baxter is his dog that I just keep for him.  He’s such a sweet kid. smile  I’ve promised him that we will camp out together in Junebug as soon as she’s finished.  He’s excited and so am I!


IMG_2245


Working Vacation – Day Five

Posted on

This is the most exhausting vacation I’ve ever had.  But, I’m having fun, so that’s all that matters.  Well…at least most of the time anyway.

Today was a good day.  Except the part where I realized I made the frame the wrong size for my Fantastic Vent because I didn’t read the directions.  I swear, this project is turning me into a guy more and more each day. hahaha (just kidding guys)

I had two random people stop by while out for their evening walk to see what I was doing and tell me it was looking good.  That made me happy.  Both of my neighbors also stopped by multiple times today and the mailman is even friendlier.  I think one of the best things about this project is how much of a conversation starter it is.  I just love how it makes others around me curious, and then I end up talking to people I wouldn’t have otherwise.  Especially my neighbors, we are definitely a lot closer as a result of this project.  I think that’s pretty cool.  smile emoticon


I almost finished everything on my list today.   I still have to finish installing insulation on the street side and part of the rear.  The insulation took longer than I expected due to all of the trimming required.  I made quite a mess too, and it looked like it had snowed a beautiful layer of styrofoam all over my driveway.  haha

The first thing I did was finish the tail light wiring.  I had to do quite a few splices in the “hot” wire so that it connected with the side running lights and the license plate light.  The hot wire is supposed to be brown, according to the industry standard, but I didn’t have any more brown wire, so I had to make do with the leftover green wire.  It should still work.  I didn’t test it out yet, but I will do that tomorrow before installing all the skin.   Fingers crossed it works!  I have to turn the camper around in my driveway and temporarily install all the tail lights, then hook it up to my car to test.  I don’t have a little external tester, so this is the only way.  Kind of inconvenient but oh well.

IMG_4704

Before

IMG_4705

After many splices, it’s all connected!


Next, I started in on the wiring.  For a short period.  Until I realized that I had better fix the frame that I didn’t measure correctly.  In my last post, I mentioned that I thought the Fantastic Vent stuck up too high.  Well, once I actually read the directions, I realized that the interior piece is supposed to be trimmed to size, so it’s not supposed to stick up that high.  And it’s narrower, so I had to take apart my frame for the vent and start over.  Now, it should work!

After repairing my mistake, I got back to the wiring.  I started with the fridge plug, and worked my way backward.  Oh, and I decided to scrap the idea of using a 15 gallon fresh water tank.  I will sell the tank and just use a 7 gallon drum under my sink whenever shore water is not available.  That will be much easier and free up the space under the bed for my new “power chord” as someone on my favorite forum, Vintage Trailer Talk, called it.  The power chord will have the new breaker box as well as a couple of junction boxes that lead to my various electrical outlets and lights.  I’m installing an external plug on the front of the camper with its own dedicated circuit breaker for the AC to plug into.  This way I will only need one plug when camping.  I had initially thought I would plug in the AC to a separate outlet, but just in case that’s not an option, this will also work.  I’m also upgrading my electrical system to 30 amp and installing new outlets near all of the light fixtures so that I don’t have to use the outlet attached to the fixture.  I think this will work better.

Here’s what the kitchen fixture looked like when I took it apart today.  It’s kind of rusty and the wires don’t look too great.  I might try to replace the wires attached to the fixture if I can. I will also clean up all of the rust inside before I reinstall it.

IMG_4706

It was a pain in the butt drilling holes in all of the support beams in order to thread my electrical wires through all of them.  My arms got so tired and I was worried the whole time that I would accidentally drill a hole through my ceiling panel.  Luckily that did not happen.  Once I started drilling the holes, I realized that I might poke a twist nail into the hole and puncture one of my wires when I installed the trim inside the camper, so I decided I had better install all of the trim first, then finish with the wiring.

IMG_4710 IMG_4711

And here’s a pic of all of the wiring threaded through the holes and going to the locations where I’ll install new outlets or to existing fixtures!  I will finish wiring everything later, once the skin is on.  You’ll notice that the color of the wire is yellow.  This is because I upgraded all of the wires to 12 gauge.  The old wiring was only 14 gauge, which is fine for lights and outlets, but it needs to be 12 gauge since I’m upgrading to 30 amp.

IMG_4714

I didn’t like the idea of my wires running down the sides of the camper, so I kept them to the roof, front, and rear only. Both circuits are entering the camper on the bottom left, which leads to where I will be installing the power chord.

IMG_4713

The black and white wire is for the Fantastic Vent, which is 12 volt. Eventually, I plan to set up my system to have a 12 volt battery that charges either from my tow vehicle while driving or while I”m plugged into shore power. In the meantime, I’m running these wires to the nearest outlet and will attach a 12v plug to the other end. I am planning to buy a converter that will plug into a normal outlet as well as the 12v plug, then convert the 120v power to 12v. This will allow me to use my Fantastic Vent without damaging it.

IMG_4712

Pic of the front of the camper with the new wires installed. One is going to the fixture and then a second coming from the fixture to the outlet for the fridge. There is also another separate wire leading to the base of the camper where I will be installing an external plug for the AC.

This task took me most of the day.  The last thing I accomplished today was to install most of the insulation.  It wasn’t that difficult to do, but it was time consuming, and also a bit frustrating where there were wires because the rigid foam insulation wouldn’t lay down flat.  I also bought Reflectix bubble insulation for the really curvy parts of the roof.  Glad I did, they were much easier to install thanks to the flexibility of the material.  I just have the street side and part of the rear to complete tomorrow and then the skin can go on!  IMG_4715IMG_4716

IMG_4717

I have to get up early tomorrow because my helpers are coming over around 10:30am and I still have to finish up the insulation as well as run by Aztec Rentals to pick up my pneumatic stapler and then to Lowe’s to pick up some additional staples and tape for the insulation.

The new skin is unrolled in my living room at the moment…well the sides anyway.  I thought it would be a good idea to unroll them so they would flatten out a bit.  This is just the backside.  I took a peek under the protective film on the front side, and it was so shiny!  I’m excited about how nice it’s going to look!  Hopefully I can write again tomorrow with some beautiful pictures of the new skin!  biggrin

new skin

Working Vacation – Day Four

Posted on

Fortunately, today went pretty well and I got a lot accomplished.  smile

Here’s an updated list based on the one I posted yesterday:

  • Done – Install one more piece of wood along the bottom rear of Junebug for skin to attach to, will need to modify slightly from original design due to the steel beams sticking out of the back for the bumper.
  • Done – Paint undercarriage with black fence post paint after spraying some sealant on the seam of the metal flashing along the rear undercarriage (just to be extra sure it’ll stay dry).
  • Almost Done – Finish building a new frame and support beam for the roof vent and install.
  • Tomorrow – Run new 12 gauge wires along roof to receptacles and relocate breaker box to spot under the bed and exterior power inlet to a lower spot on the street side of Junebug.  (Need to order the new plug and power box, but I can buy the wires for now and get those in before the skin)
  • Tomorrow – Finish running the wiring for the running lights and license plate light and hook up to car to test.
  • Tomorrow – Purchase rigid foam insulation and install.

I started today by going to Lowes and Home Depot to buy electrical wiring and other supplies.  I went ahead and bought some Reflectix radiant barrier insulation while I was there to cover the really curvy parts of the ceiling.  I’ll go back tomorrow to get the rigid foam insulation.  I’m going to have to cut it because it won’t fit in my Tiguan otherwise.  While I was at the store, the freight company called to say they’d be at my house at 12pm.  Huh?  They were supposed to show up between 3-6pm!  I told the guy that I could only get a helper between 3-6pm, but he assured me that he would help me unload the two boxes.

He showed up about 12:30pm, and he was true to his word, he helped me unload the boxes and even opened them so I could inspect everything.   Everything looked good for the most part.  There was one spot that was damaged. but I decided it was a tolerable dent and I certainly didn’t want to send it back so I went ahead and signed for it.  I was able to drag the boxes into my kitchen for now since my garage is full.  smile

IMG_4690

New siding! This is the back of it, so it doesn’t look as shiny on this side.

IMG_4692

Here’s the dent that is in the side pieces. Not sure if it is affecting the other pieces underneath or just this one. I’ll find out when I unroll them. It is right next to the part that goes up inside the s-lock seam and toward the end of the roll, so I’m hoping maybe I can hide it somehow.

After my siding arrived, I resumed working on adding some additional pieces of wood to the rear so that I could attach the siding to it.  I don’t think I did this perfectly thanks to the steel beams in the way, but it should work anyway.  As you can see from the picture below, I will have to cut some slots into the siding to get it to curve around the steel beams.  I have to do the same thing in the front, so hopefully it will still look good when I’m done and seal properly.

IMG_4693


Next, I got out the fence post paint.  This stuff really does look and smell like asphalt, gross! IMG_4696

IMG_4695

Here’s the undercarriage before. There are a LOT of spiders under here. It’s a wonder I didn’t get bitten…that I know of.

IMG_4700

Undercarriage after. As you can see, I missed a few spots. I was using a roller and it was hard to get all the corner areas. I will go back in later and finish it up.

I also applied some fence post paint to the wood along the bottom all around the camper for added protection against water damage.
IMG_4698 IMG_4697

After I finished this task, I was covered in fencepost paint spots.  Later, I had to scrub off the top layer of skin to get it off!  That stuff is messy.

My last project of the day was the make a frame to go around the Fantastic Vent.  I made a frame, but I didn’t realize that the vent sticks up quite a bit higher than the old vent, so I will need to add another layer of wood.  I’m kind of worried that it sticks up too high and will make my skin look lopsided.  With the top part of the vent on, it sticks up a full 7/8″ higher than the cross beams.  I’m sure this is to ensure the water runs off and doesn’t collect causing a leak, but that seems excessive.  I guess I’ll see how it looks when the skin is on, hopefully it won’t be as bad as I think.


IMG_4701

Roof pic before putting the actual vent in. This is just the piece that goes inside the camper and connects with the vent on top.

IMG_4702

The view of the insert piece from the interior.

IMG_4703

I haven’t installed it yet, but this is what it will look like on the interior.

I’m happy with how the Fantastic Vent looks inside.  I am glad I got the translucent lid instead of opaque.  It’s nice to have a little sky light!

I was so exhausted after getting the things above done that I called it a day.  Tomorrow, I will run the new wires for the lights/outlets, finish connecting the tail light wiring for the side running lights, and install the insulation.  I also have to add a few more pieces to the frame around the vent and one more piece to the front of the camper frame.  Hopefully it all goes well and I will be ready to install the skin on Saturday!  I’m a little nervous about the skin because based on my past experience, everything is always harder than I thought it would be so this will probably be no different.  Oh well, I will give it my all and hope for the best!  That’s all anyone can do in life anyway.

Stayed tuned to see if I got everything on my list accomplished tomorrow!  cool