
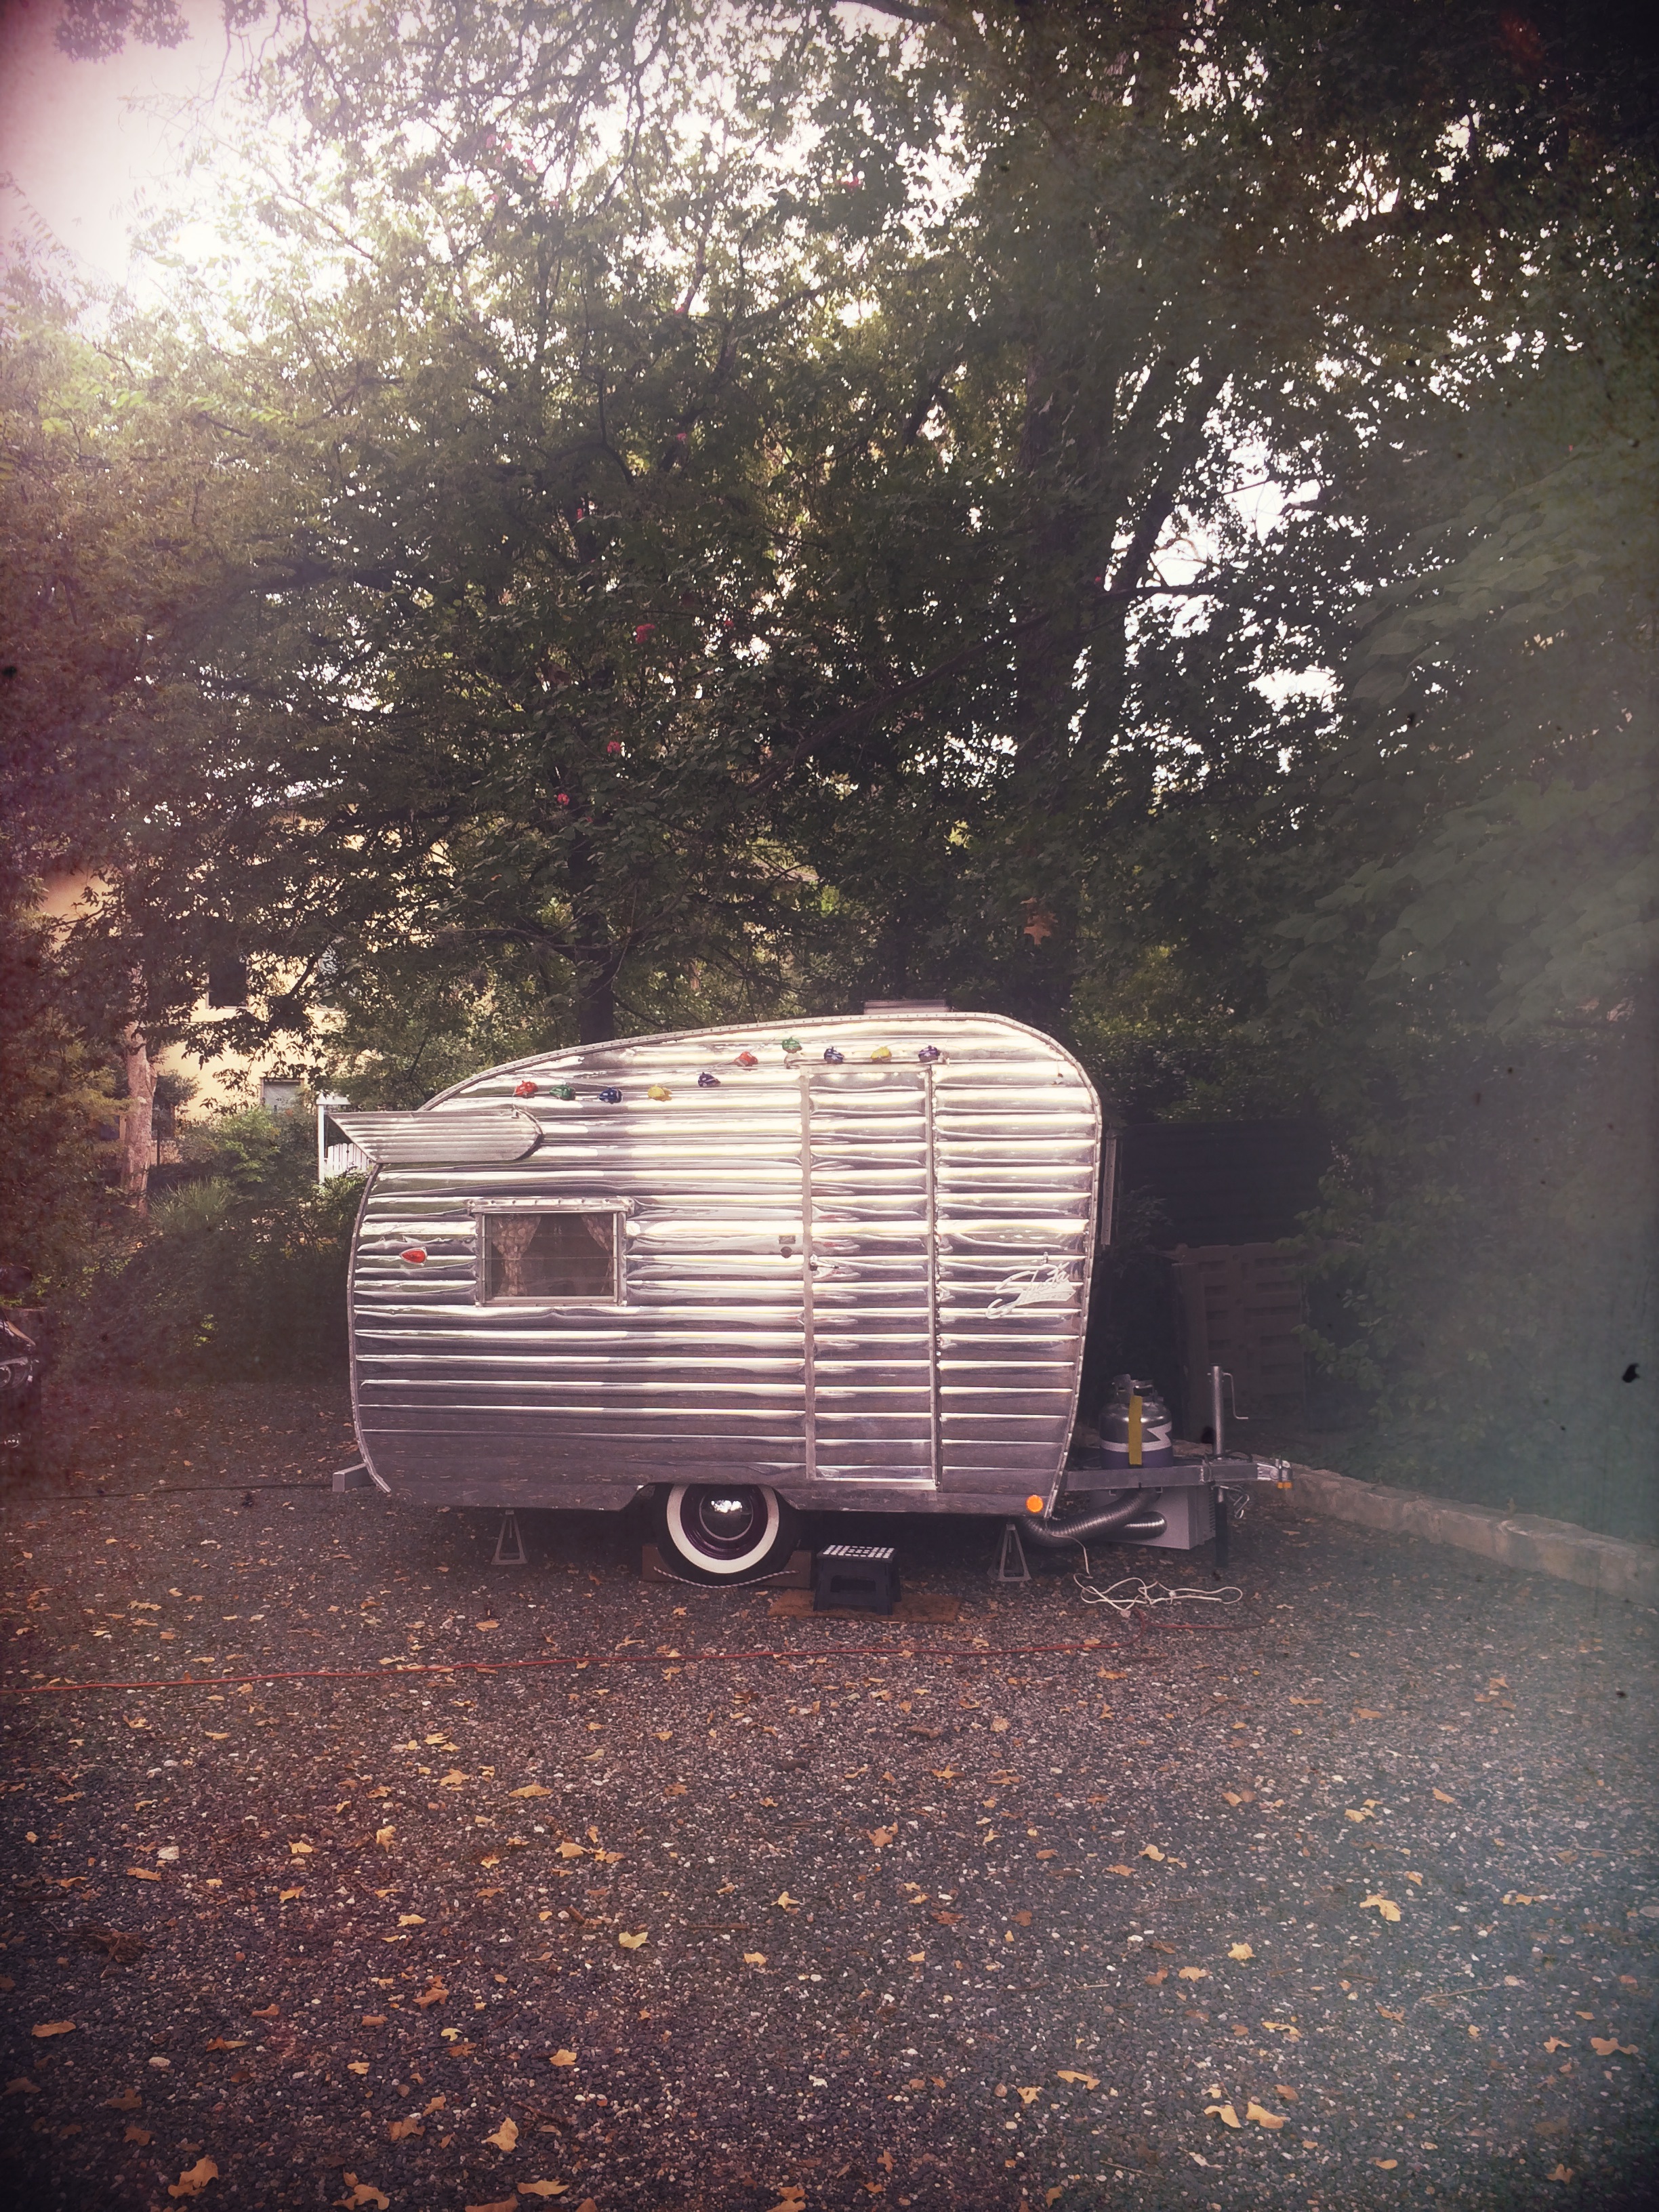
Last weekend, I took Junebug on her maiden voyage to Austin. I was going for a friend’s baby shower, and my friend, James, who lives in Austin offered to let me park the camper in his driveway for the weekend. I figured this would be a safe test run environment, just in case I got there and my electricity didn’t work or some other disaster happened. My friend, Jennifer, rode with me to Austin. I was super nervous as we set out on the highway. After all this time and money that I’ve now invested in Junebug, I didn’t want anything bad to happen! I realized shortly after we left Houston that I hadn’t increased the insurance coverage on the camper since I bought it. I called my insurance company while driving and added $10K more coverage, just in case! Luckily, I didn’t need it this time, but it’s always better to be safe than sorry!
 I noticed Junebug was swaying from side to side a bit when a big truck passed or a gust of wind hit us. I was pretty sure the new bumper and off center spare tire attached to it were partly to blame because she didn’t do that when I first drove her home from New Mexico. Even still, we made it to Austin in one piece and I parked her (with some difficulty) in James’ driveway. Unfortunately, James has a gravel driveway with a slight incline and then a steep drop off behind it that leads to his beautiful backyard with a little stream and waterfall. The last thing I wanted was for Junebug to become some yard art suspended over his waterfall.
 ![]() I usually have no trouble rolling Junebug into my own paved driveway using the castor wheel attached to the jack. Unfortunately, due to the slight incline and gravel in James’ driveway, it took Jennifer pushing and me pulling just to get her turned around. After turning her around so that the front door faced the house, I gave up and decided she was good where she was. She was tilting a bit to one side, so I felt like I was in the fun house when I stepped inside. haha
I usually have no trouble rolling Junebug into my own paved driveway using the castor wheel attached to the jack. Unfortunately, due to the slight incline and gravel in James’ driveway, it took Jennifer pushing and me pulling just to get her turned around. After turning her around so that the front door faced the house, I gave up and decided she was good where she was. She was tilting a bit to one side, so I felt like I was in the fun house when I stepped inside. haha
Filled with anxiety, I went to plug her in for the first time since getting off the highway. Much to my relief, everything worked! I touched all of the metal with the voltage meter before touching it with my hand, just in case something had come loose. Luckily, that was not the case. I even plugged in the fridge, and it works great too! ![]()
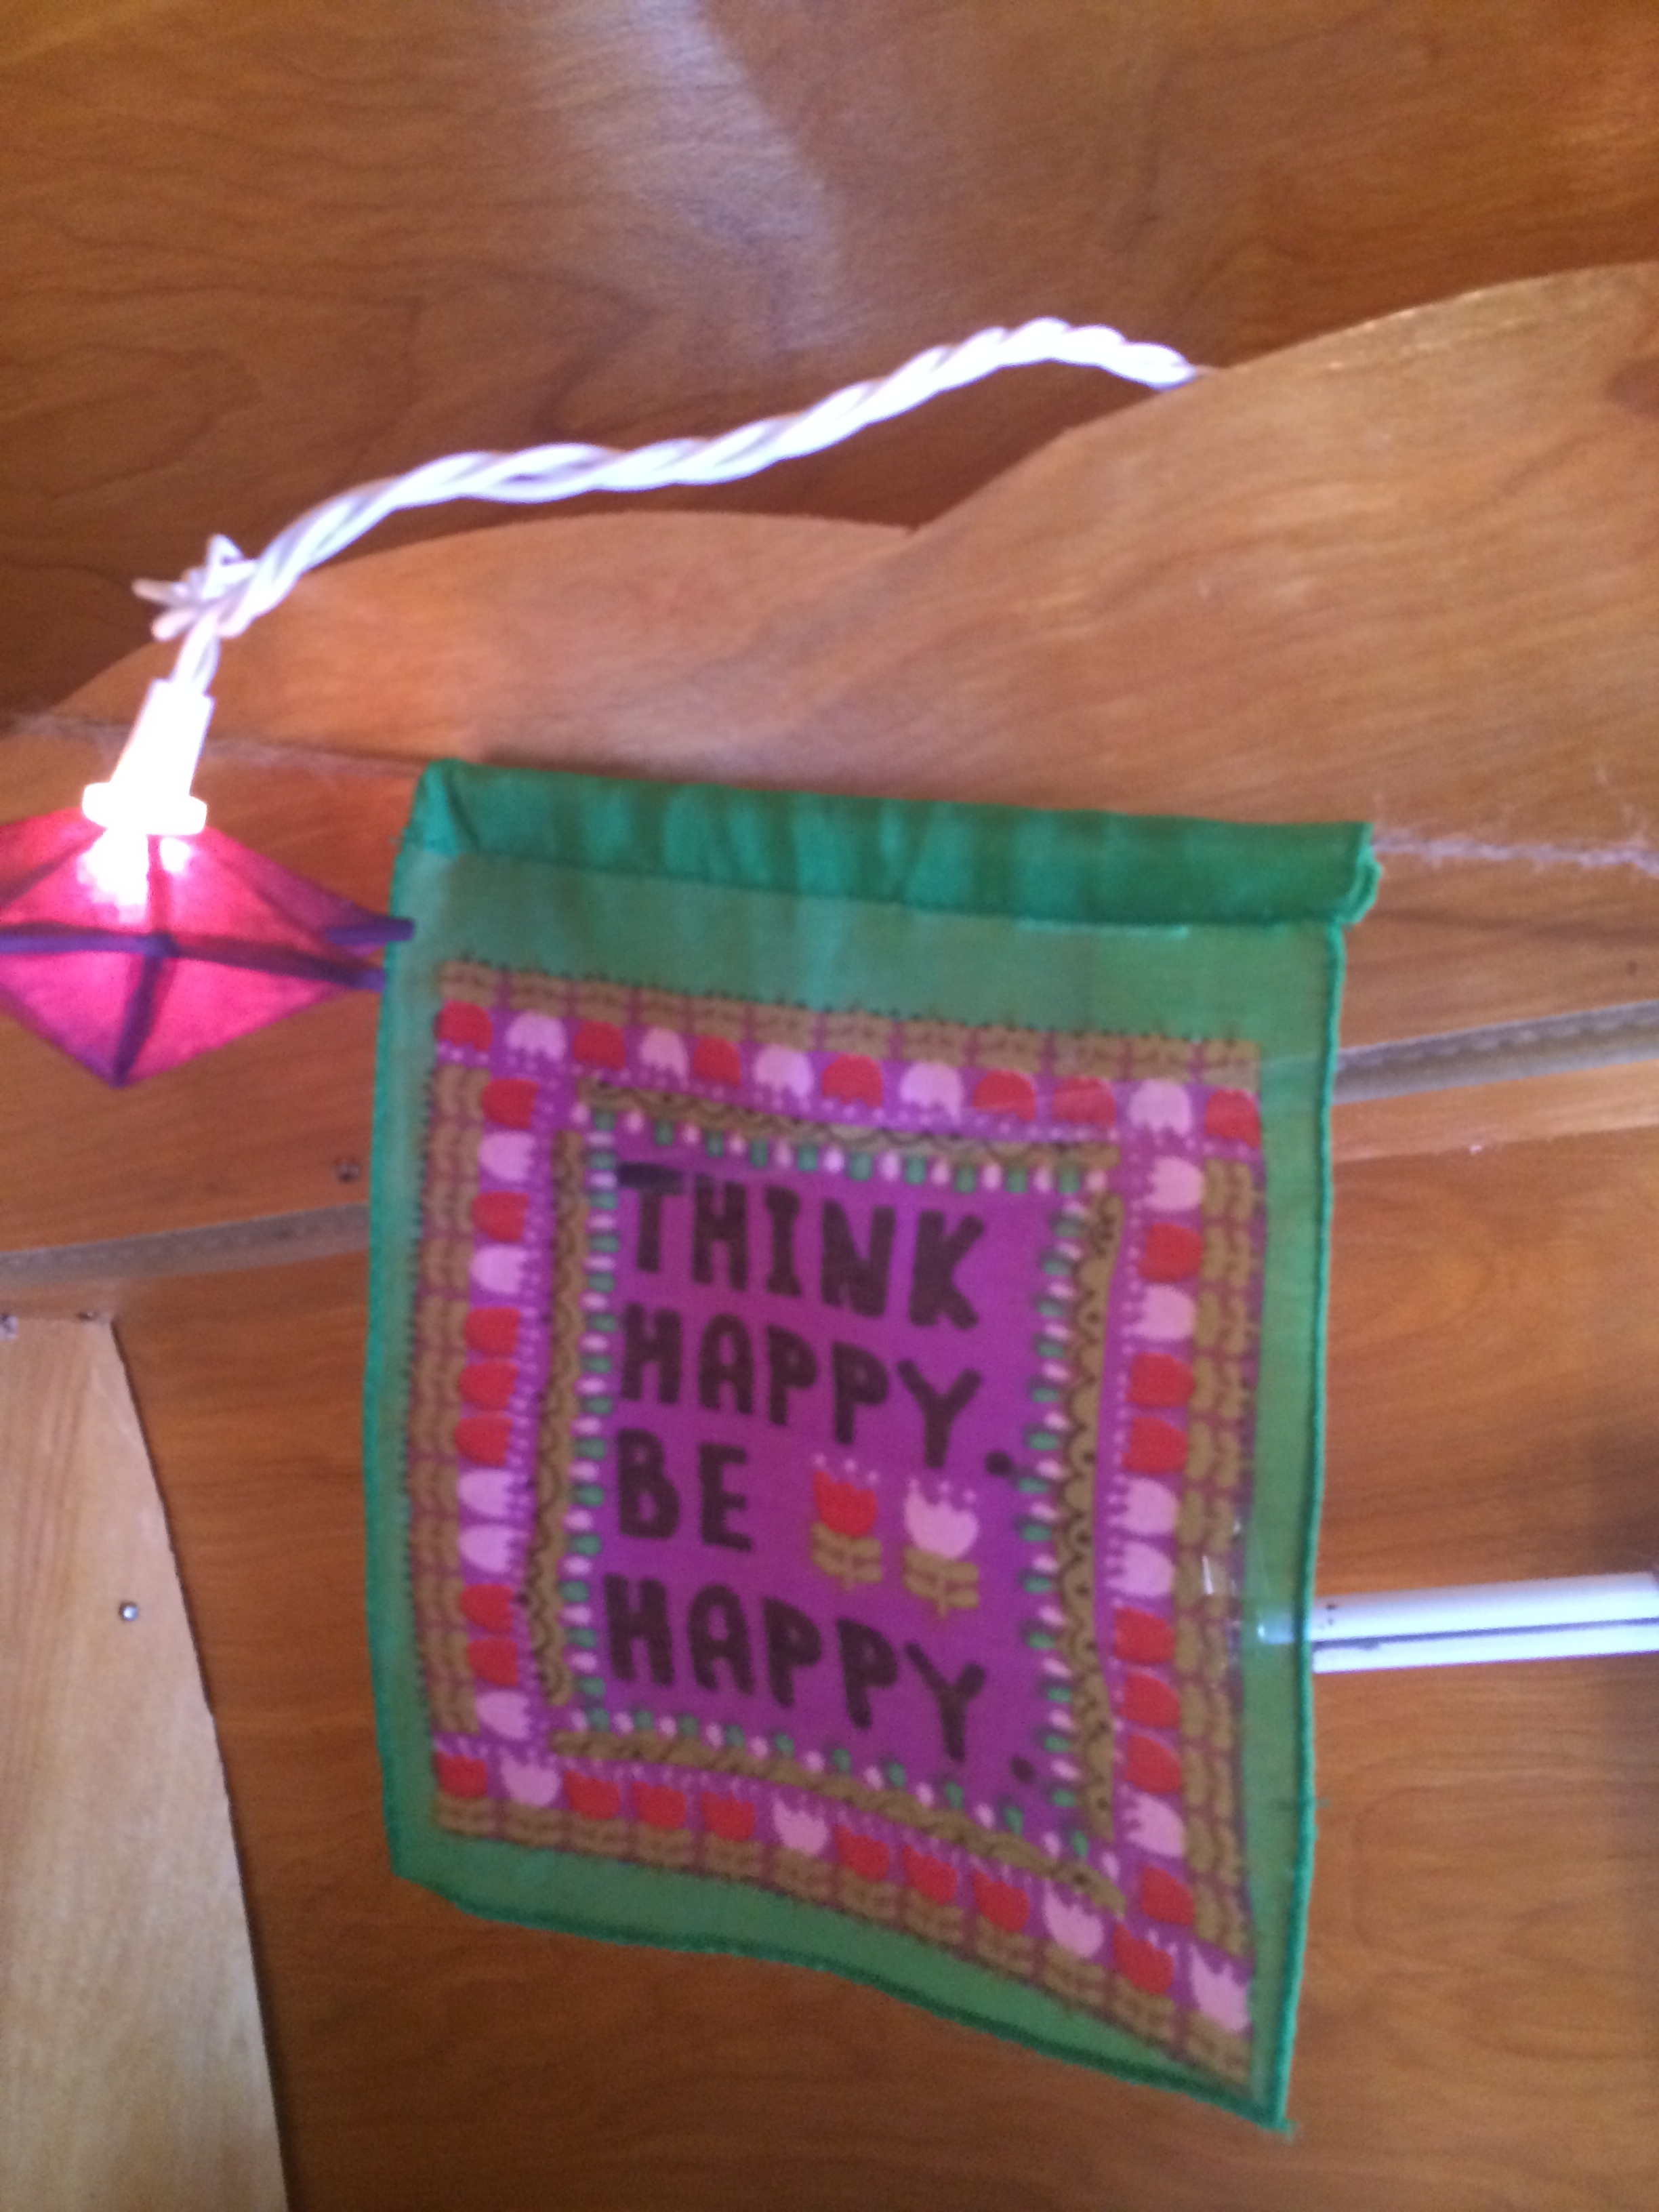
I hung the little camper lights that a friend from work gave me. They look so cute hanging on Junebug at night and during the day!


These are the cute little hand towels that my coworker Alyssa gave me for a “camper warming” gift. I love them!
Saturday morning, I plugged in the cappuccino machine to make my first cup of coffee in Junebug. Since I wasn’t plugged into a 30 amp outlet (I was using my adaptor and plugging into a normal household outlet), I decided it was best to unplug the fridge while running the coffee maker, just in case. The coffee came out great and no electrical issues!

Camping in style with a cappuccino. My mom gave me the cute little mug.
I finally got all the letters in the mail to spell Junebug, so they got to go with me on the maiden voyage. So cute! I got those as well as several other camper-themed items from www.naturallife.com. They have the cutest camper stuff!

After a fun-filled weekend, it was time to head home. On the way home, I got stuck behind a huge semi hauling some big piece of equipment. I tried to pass, but Junebug started swaying so much from the wind displacement that I freaked out and had to slow way down. We then decided to stop at Buc-ee’s for gas, and I removed the spare tire from the bumper and put it inside my car. I noticed this helped quite a bit the rest of the trip. I got a few honks and a few guys who stopped by while we were at the gas station, wanting a look inside. Junebug is quite the head-turner!


This weekend, I decided to go back to Master Hitch and get a sway bar installed on the hitch. I will probably still travel with the spare tire inside the camper instead of on the bumper, but I wanted the sway bar for added protection when trucks are passing. It really makes a difference, and only cost $100 with installation! Totally worth the money in my opinion.

This is a sway bar. It attaches to two different balls, one that is bolted to the side of the hitch, and another little ball that is welded onto the side of the main ball that the hitch is locked into. It creates tension between the car and the hitch, keeping it from swaying side to side as much.
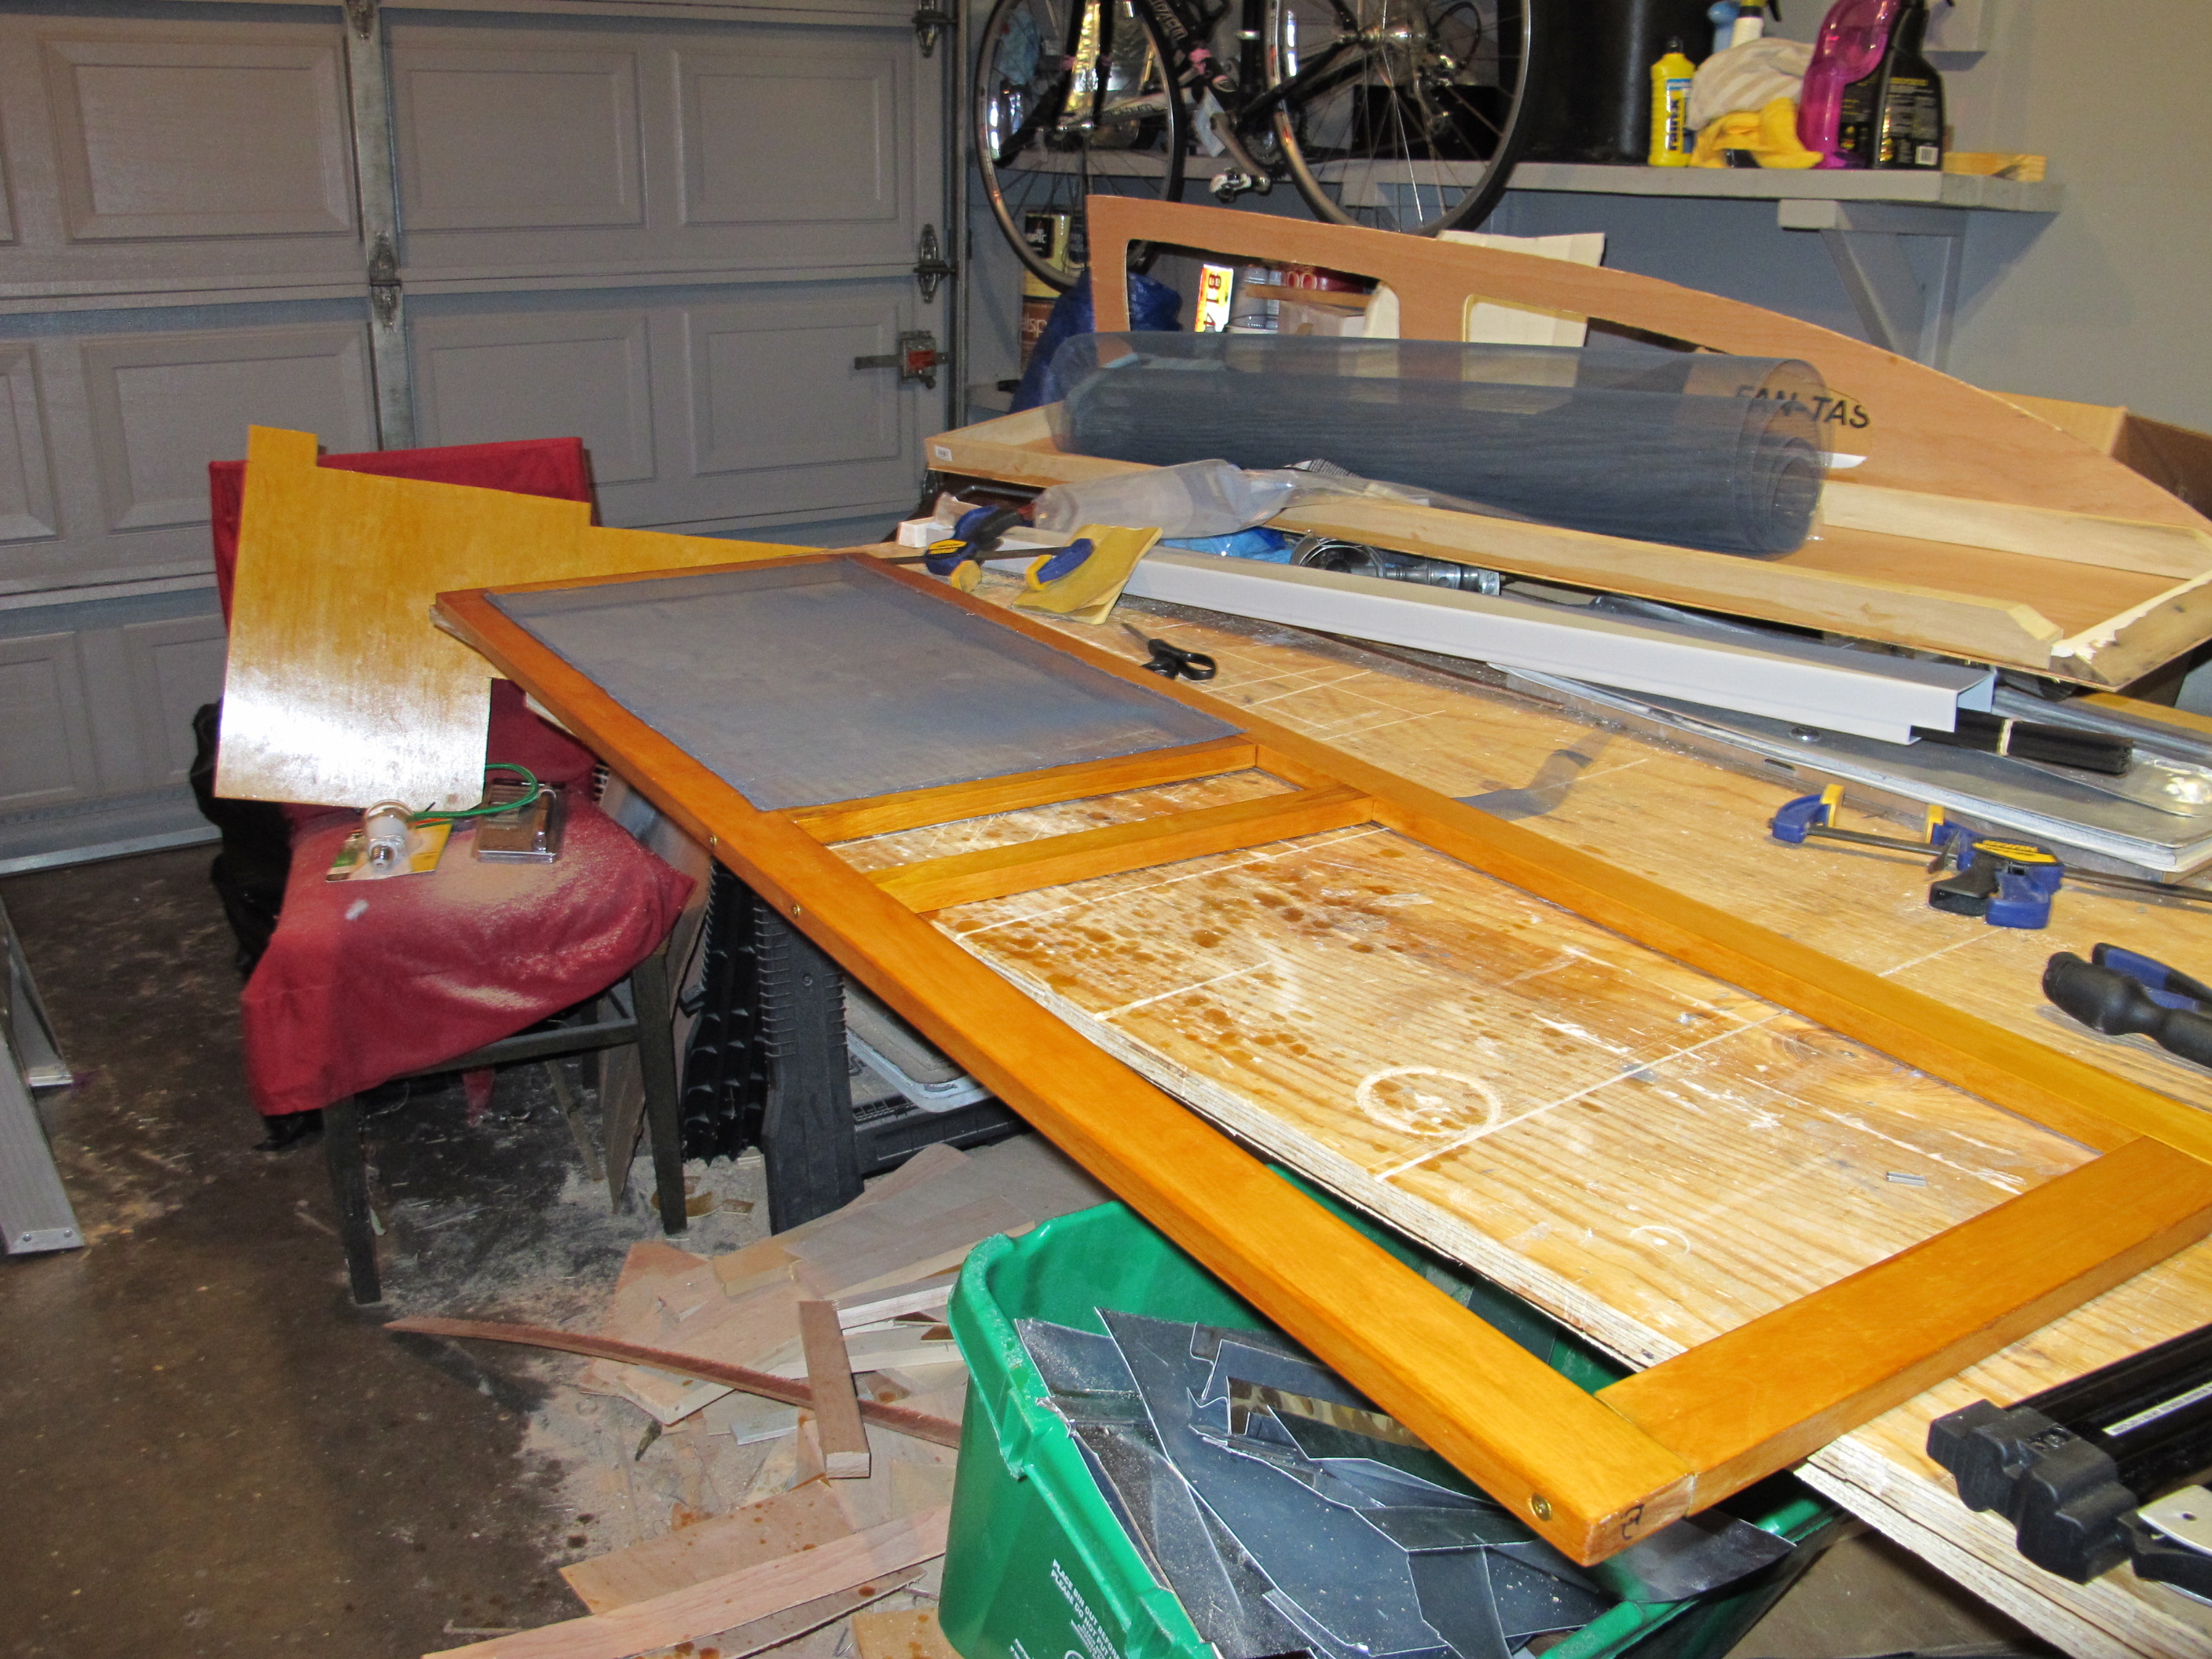
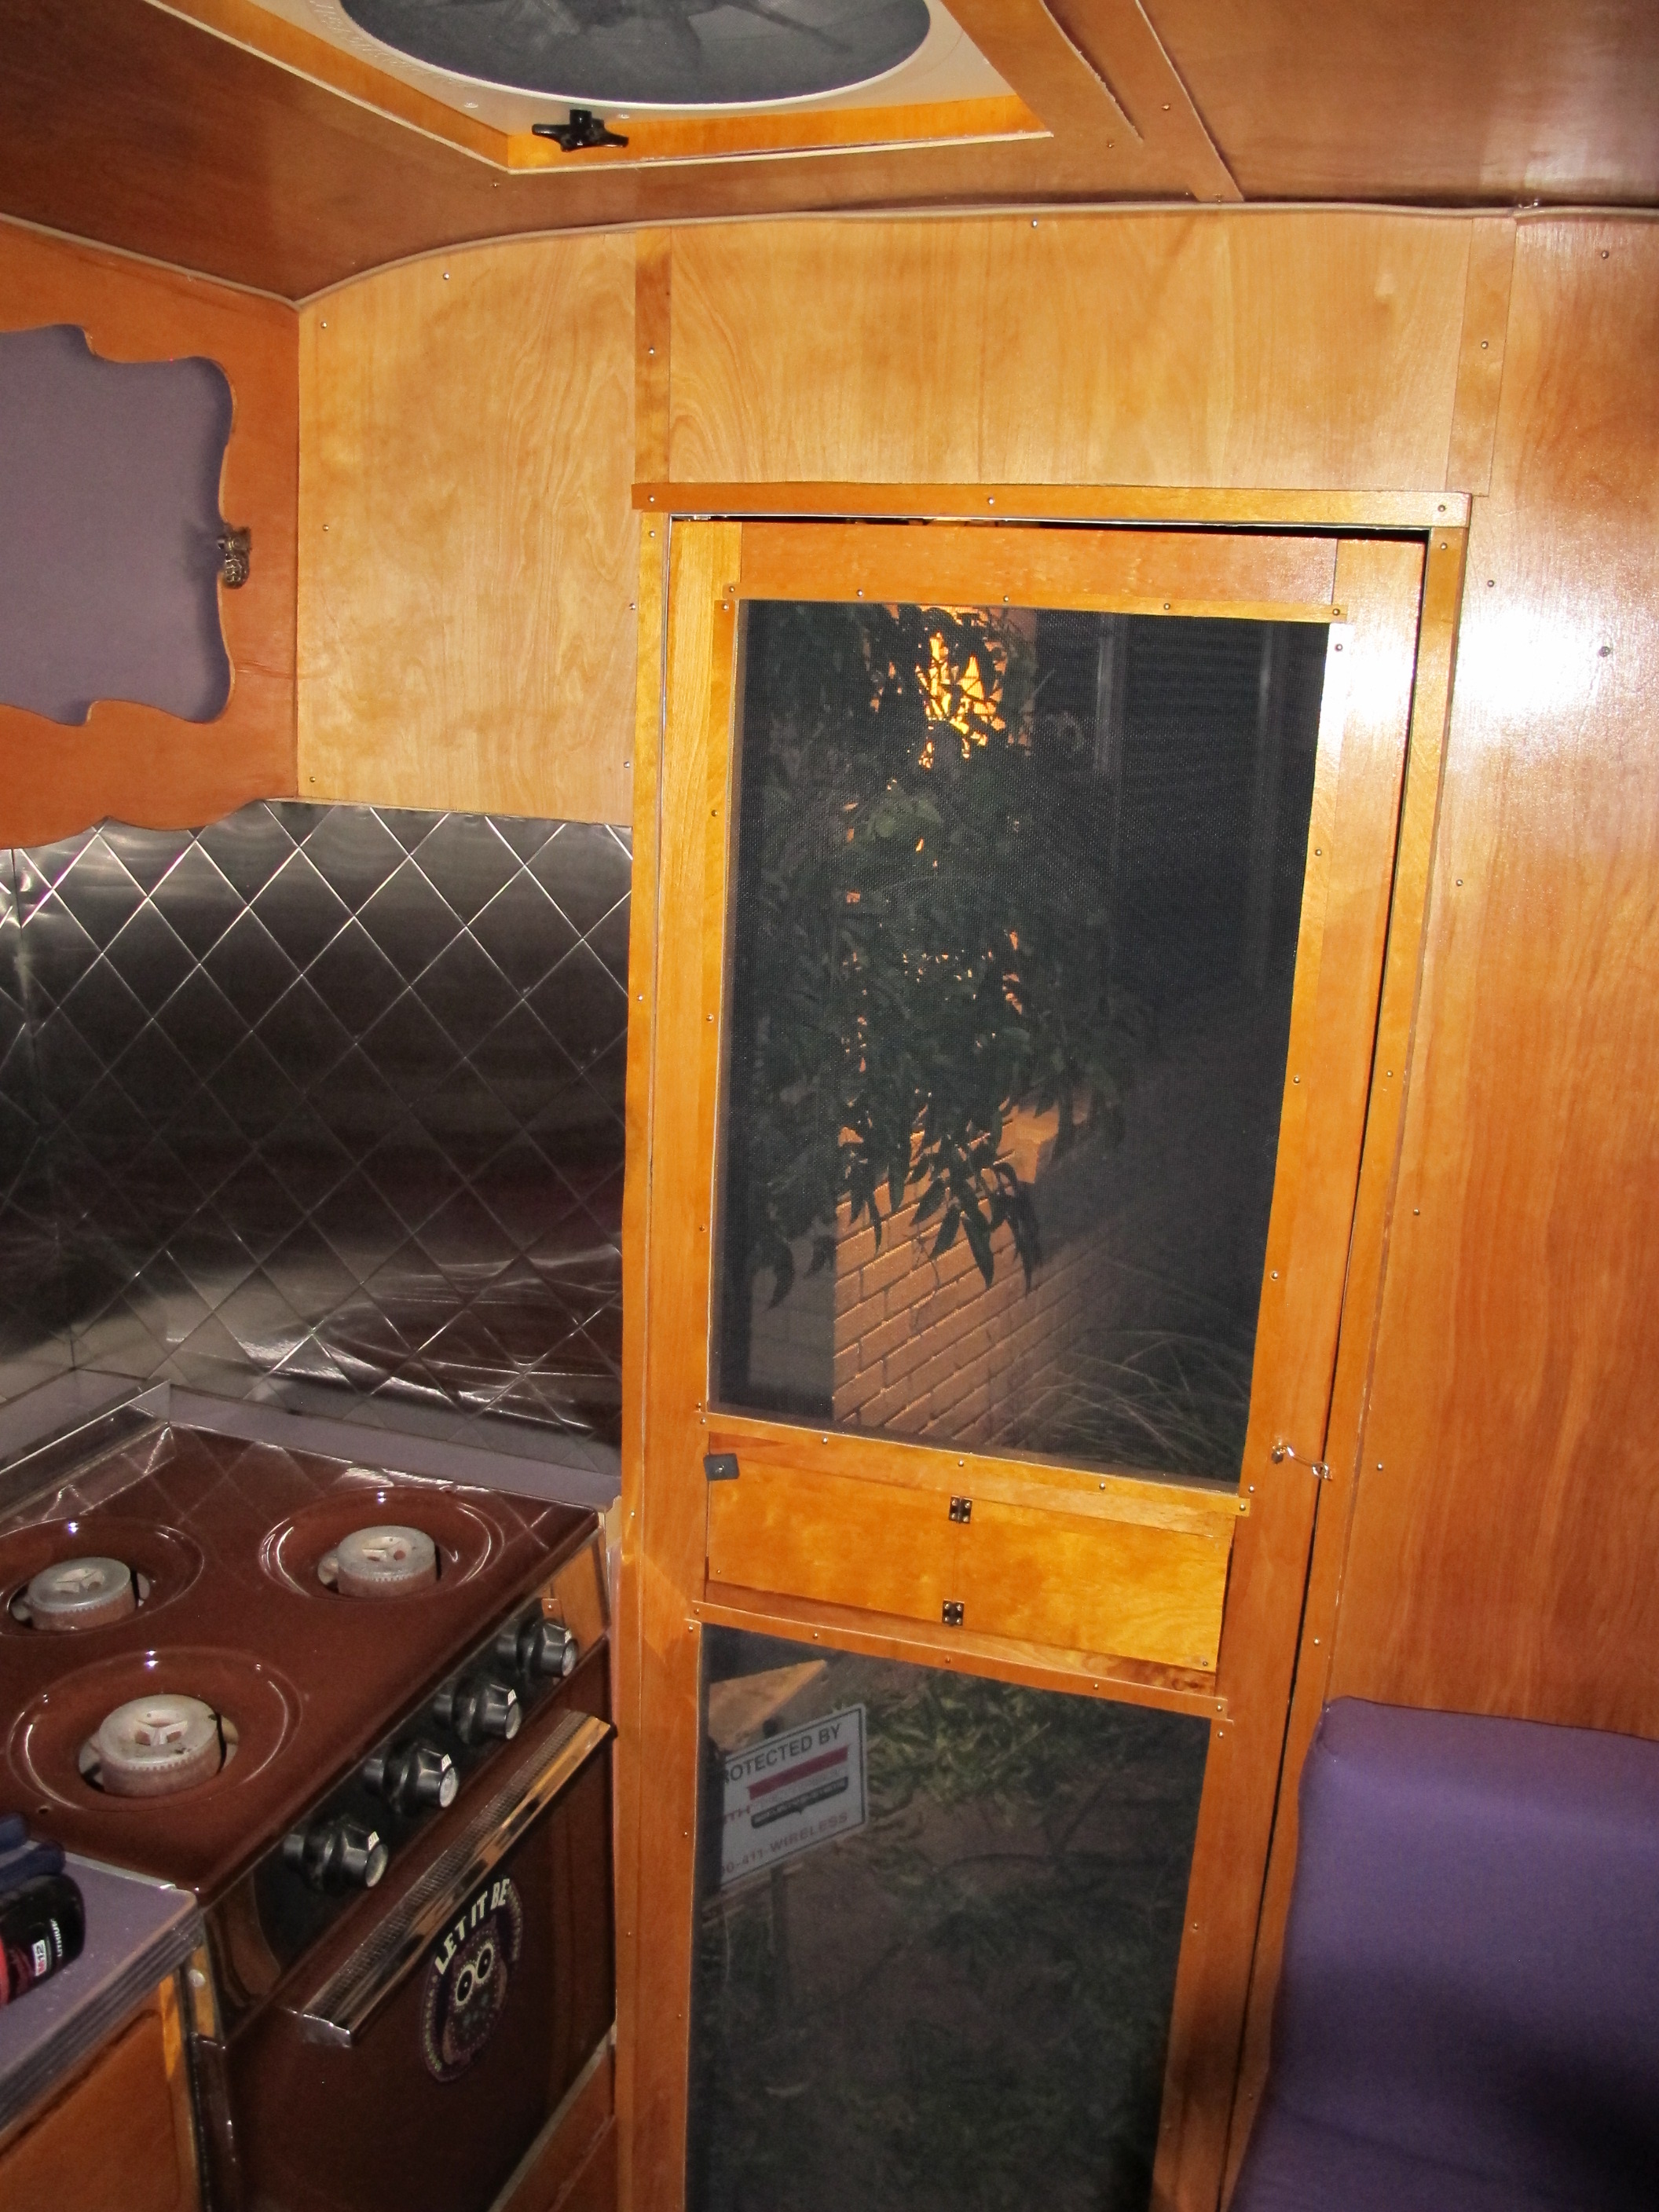
My first vintage camper rally is next weekend, so this weekend I wanted to build my new screen door so that I would have it for the rally. It took me a few days because I could only work on it a little at a time. I just finished and installed it this evening and I’m very pleased with the result!

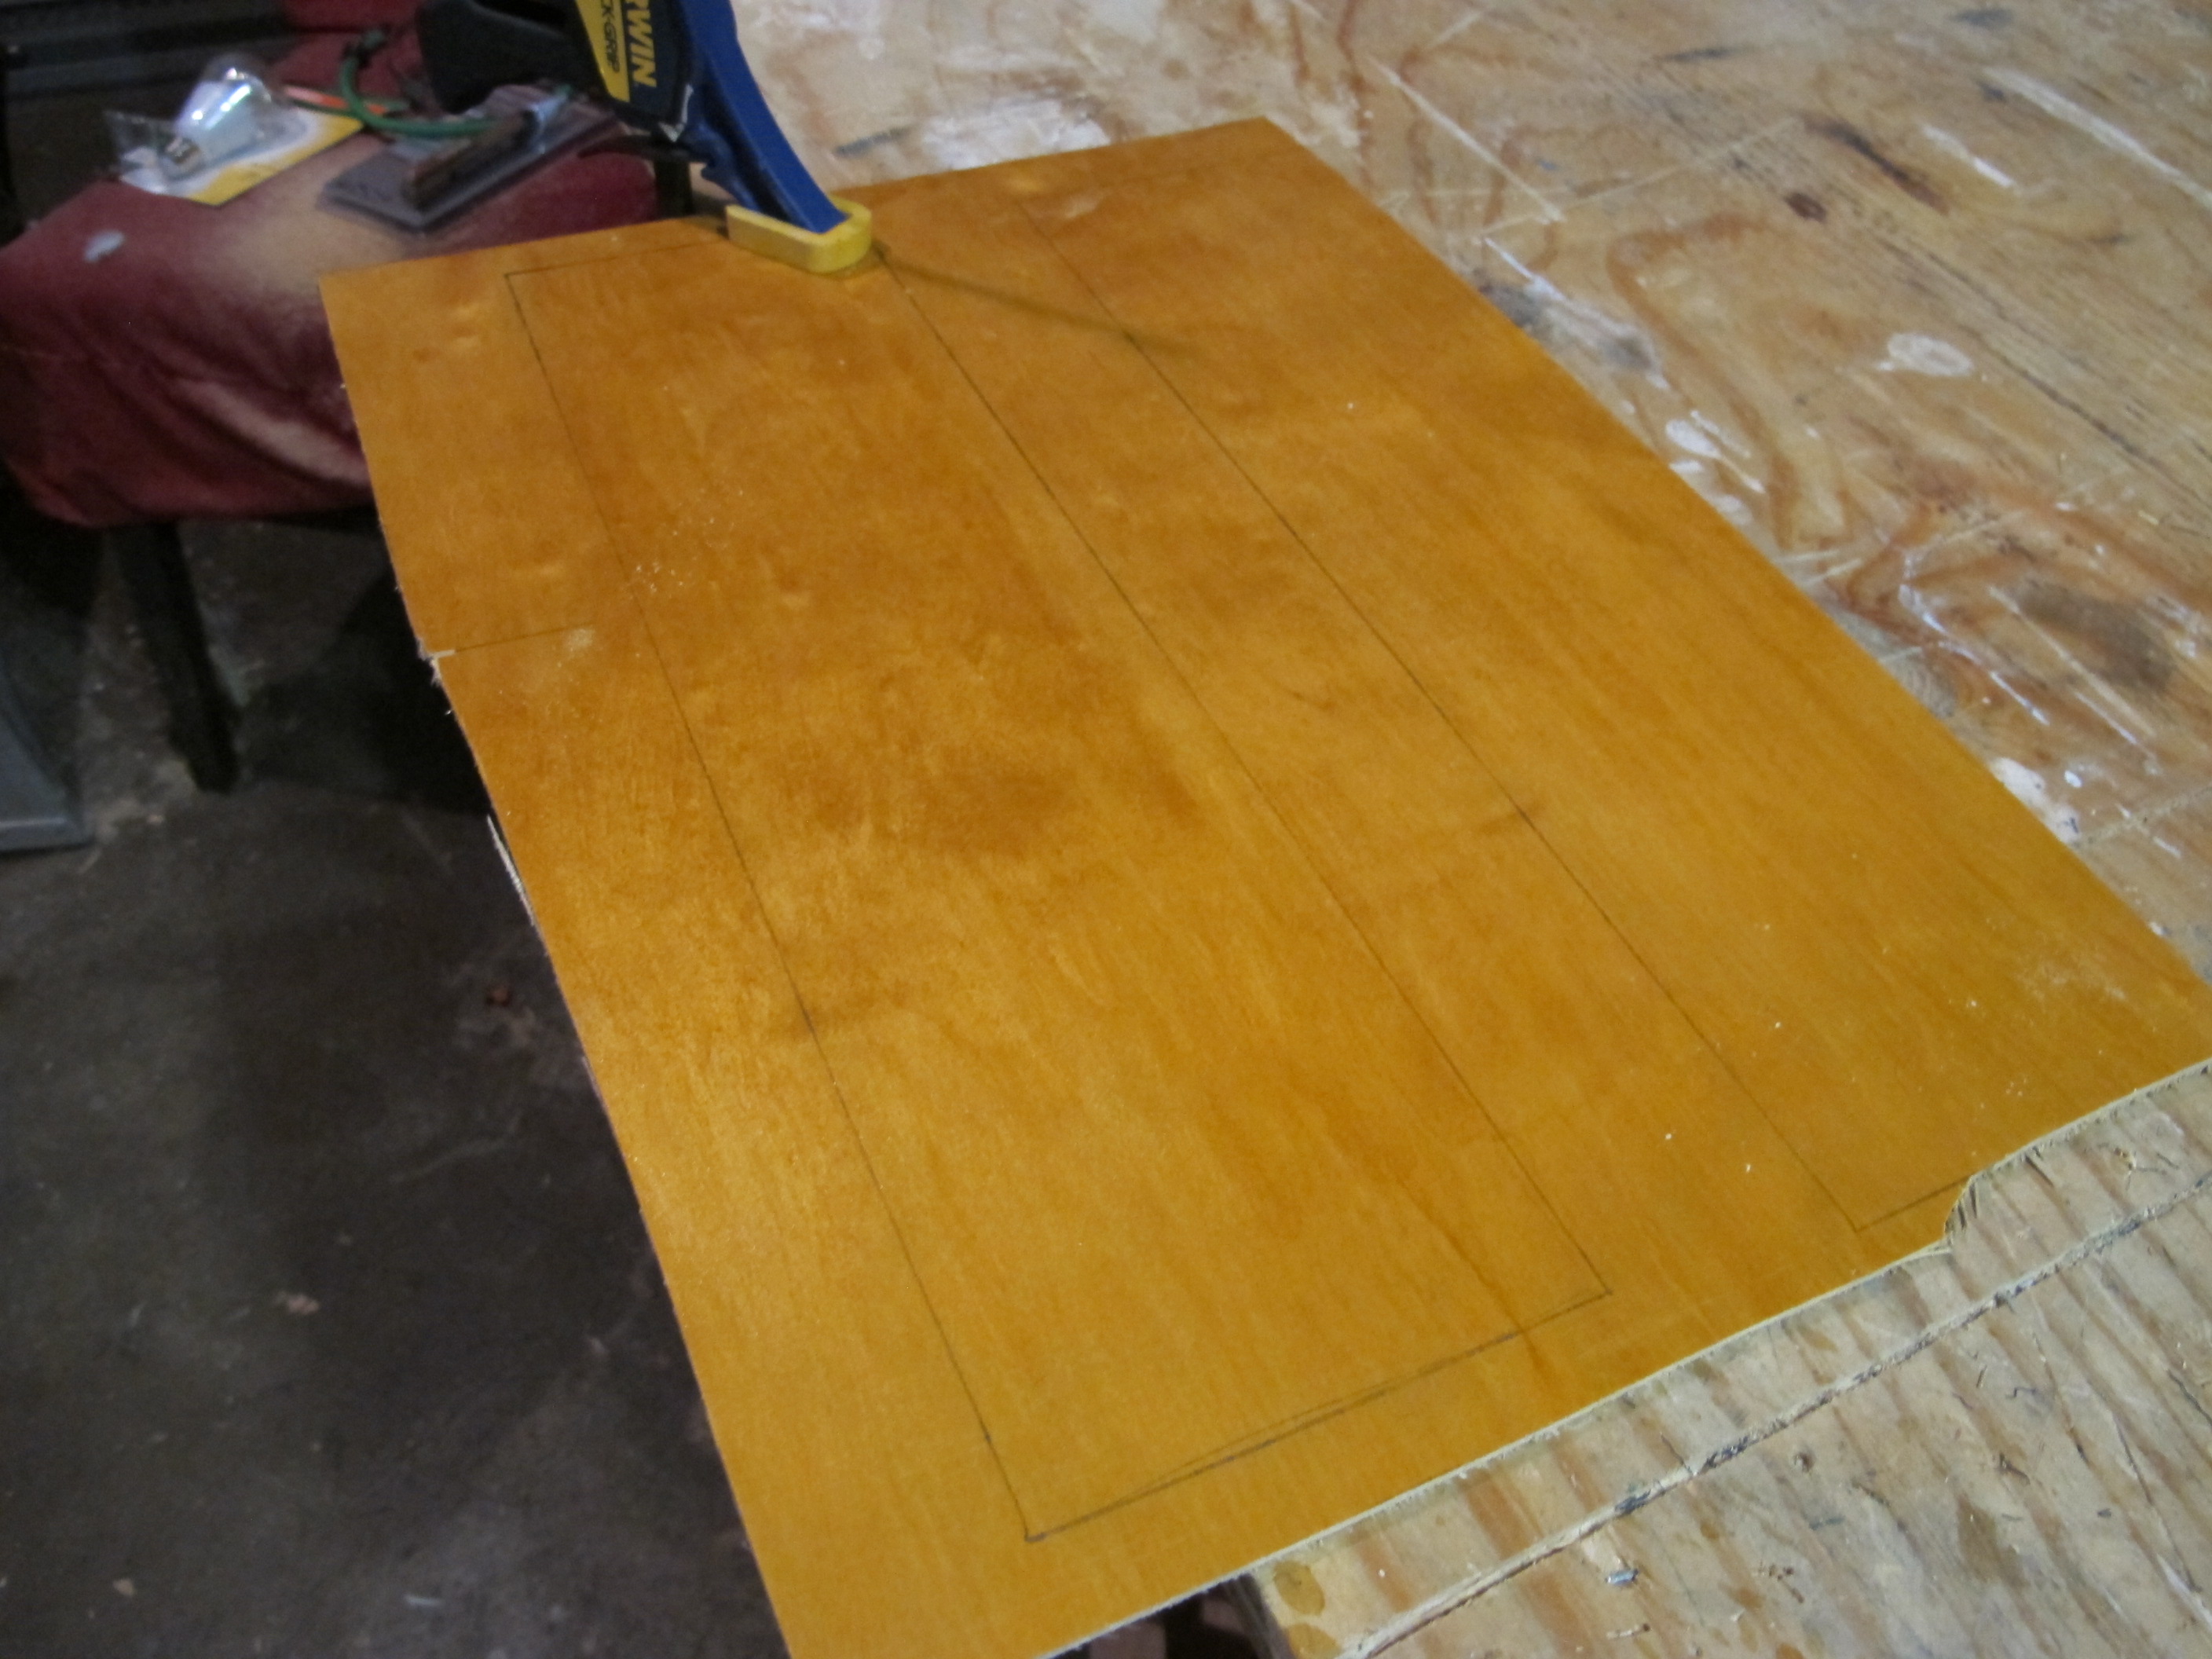
I picked up the birch a few weeks ago from Houston Hardwoods, but unfortunately it was too wide (I had gotten 1″x4″). I took it back this weekend and they cut it for me so that I had thinner pieces. It worked much better this size.
Frame is all ready to go. I used 3″ screws to hold it together.

I put several coats of amber shellac on it Friday and Saturday. Today, I started installing the screen. I used tinted aluminum screen material.
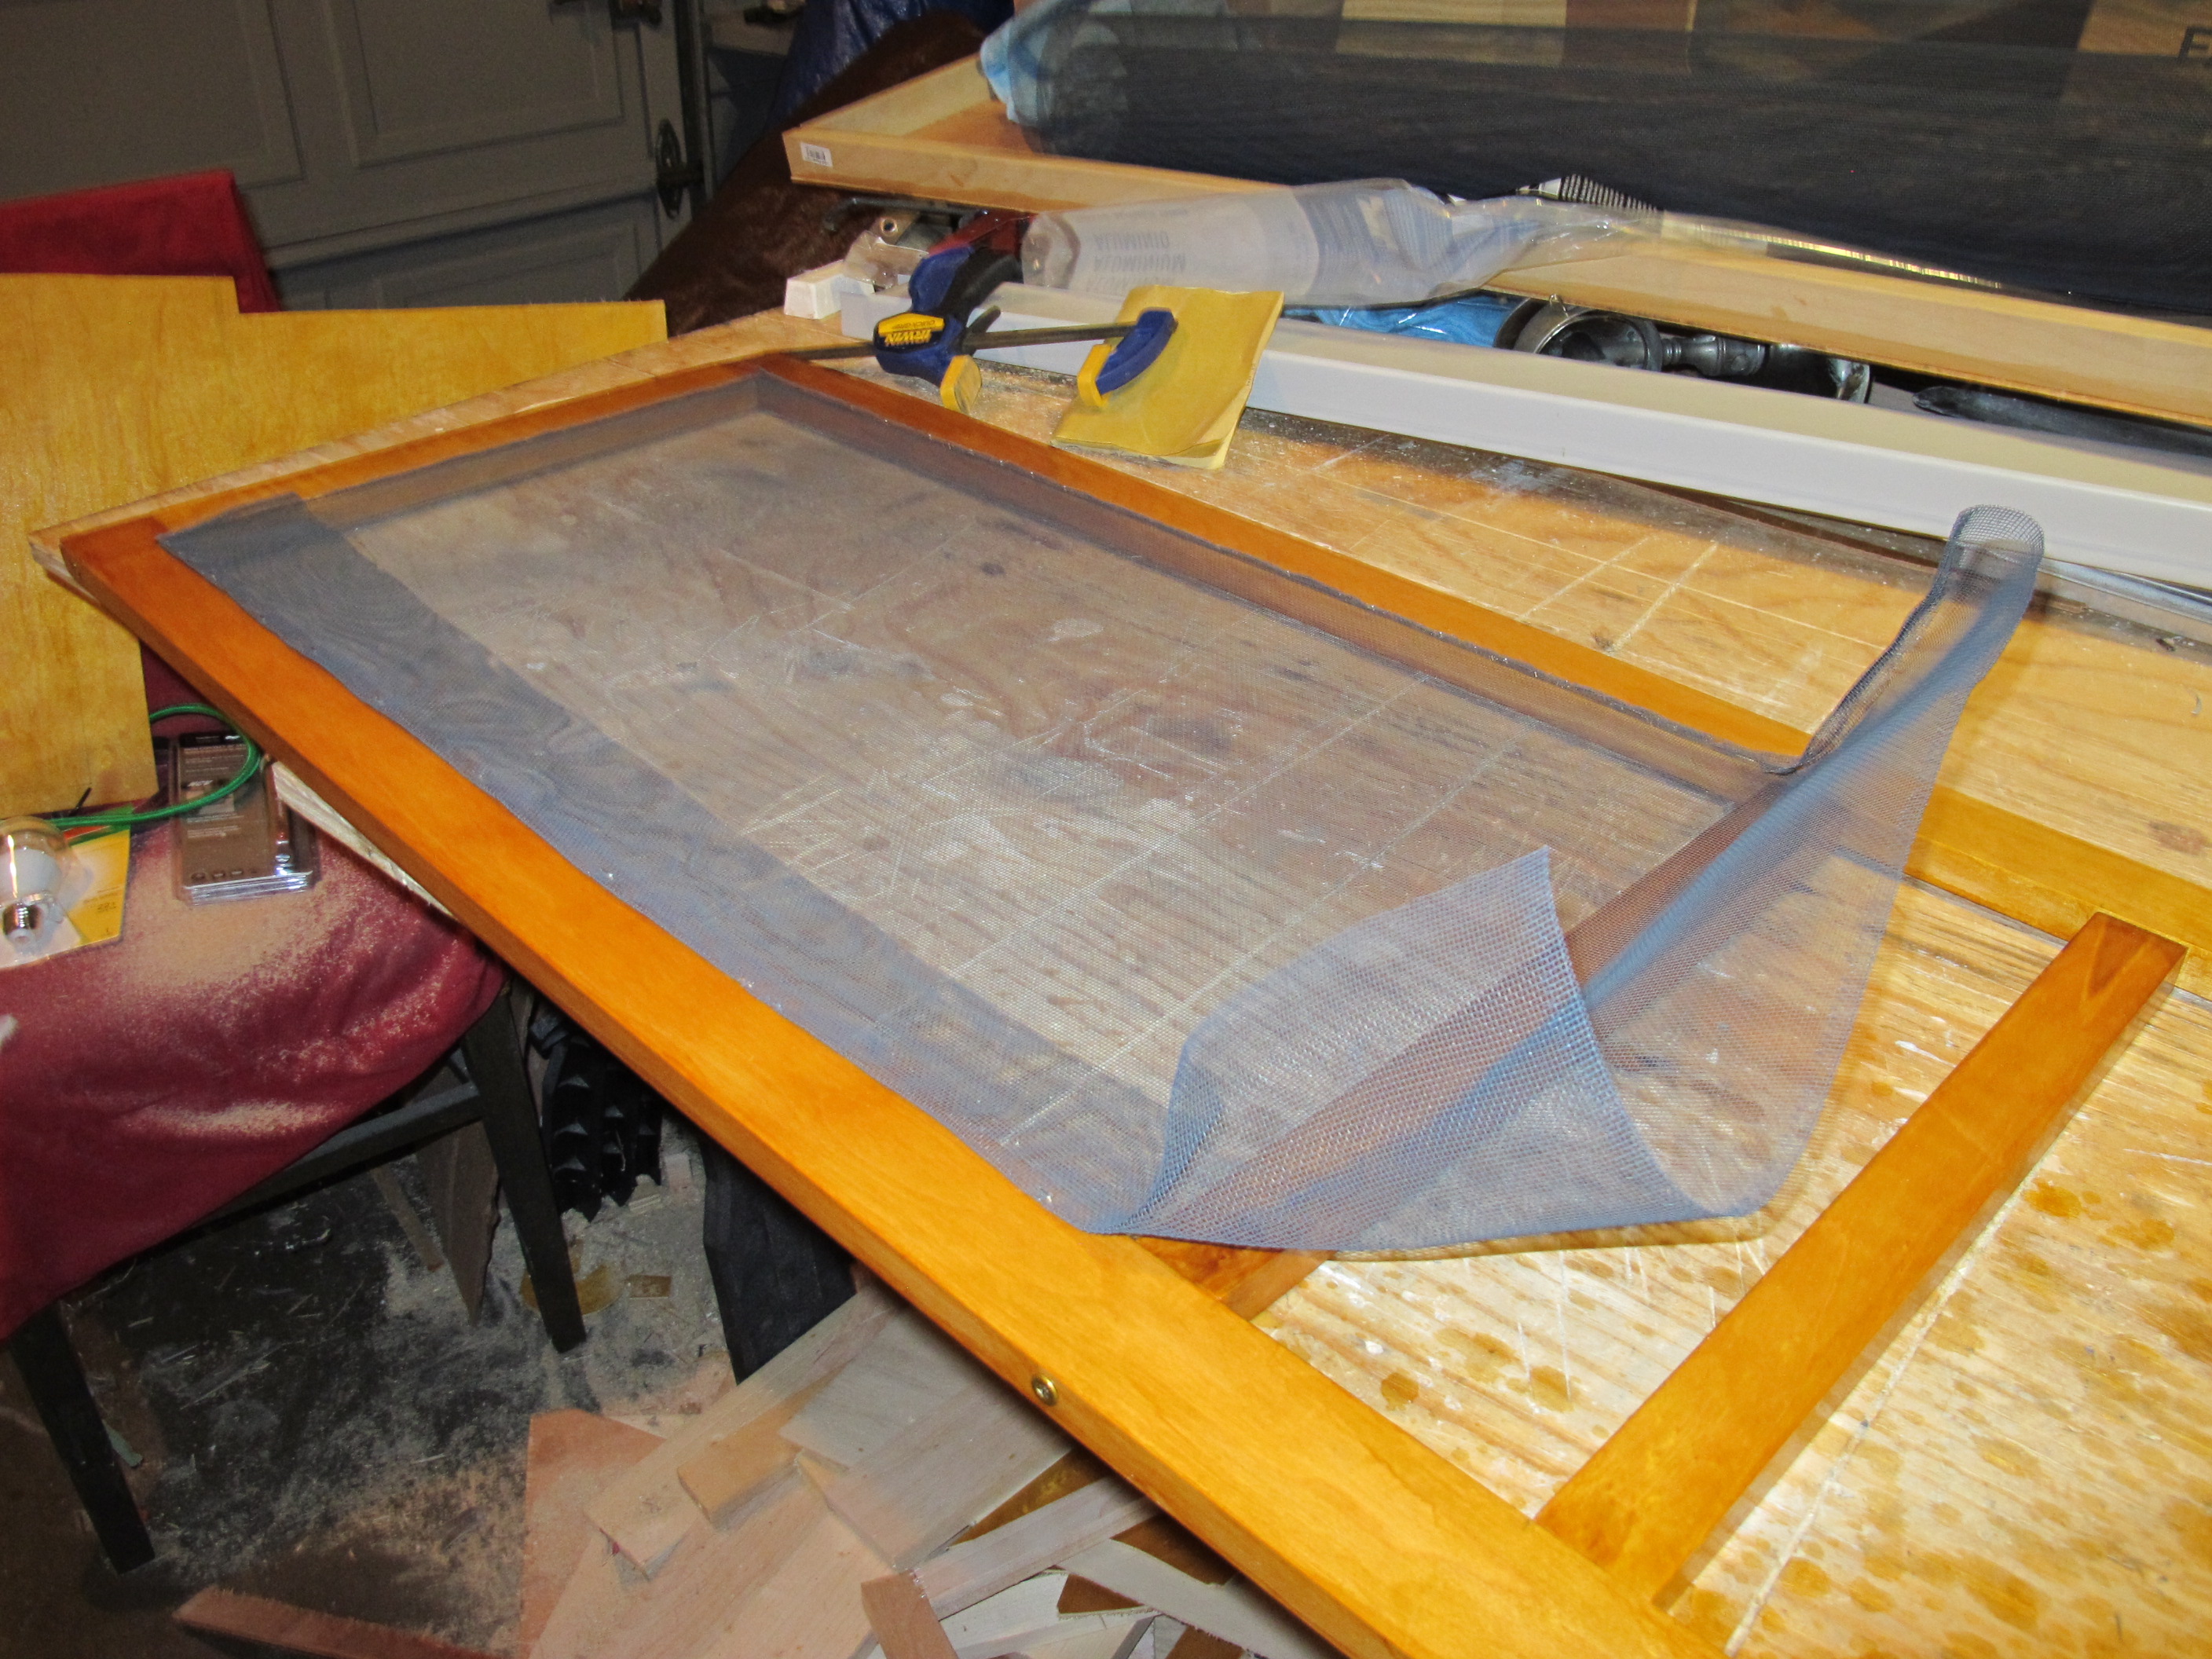
I folded the aluminum screen over once at the edges and then used my crown stapler to attach it to the frame. I tried to get it as tight as I could.
One half done!
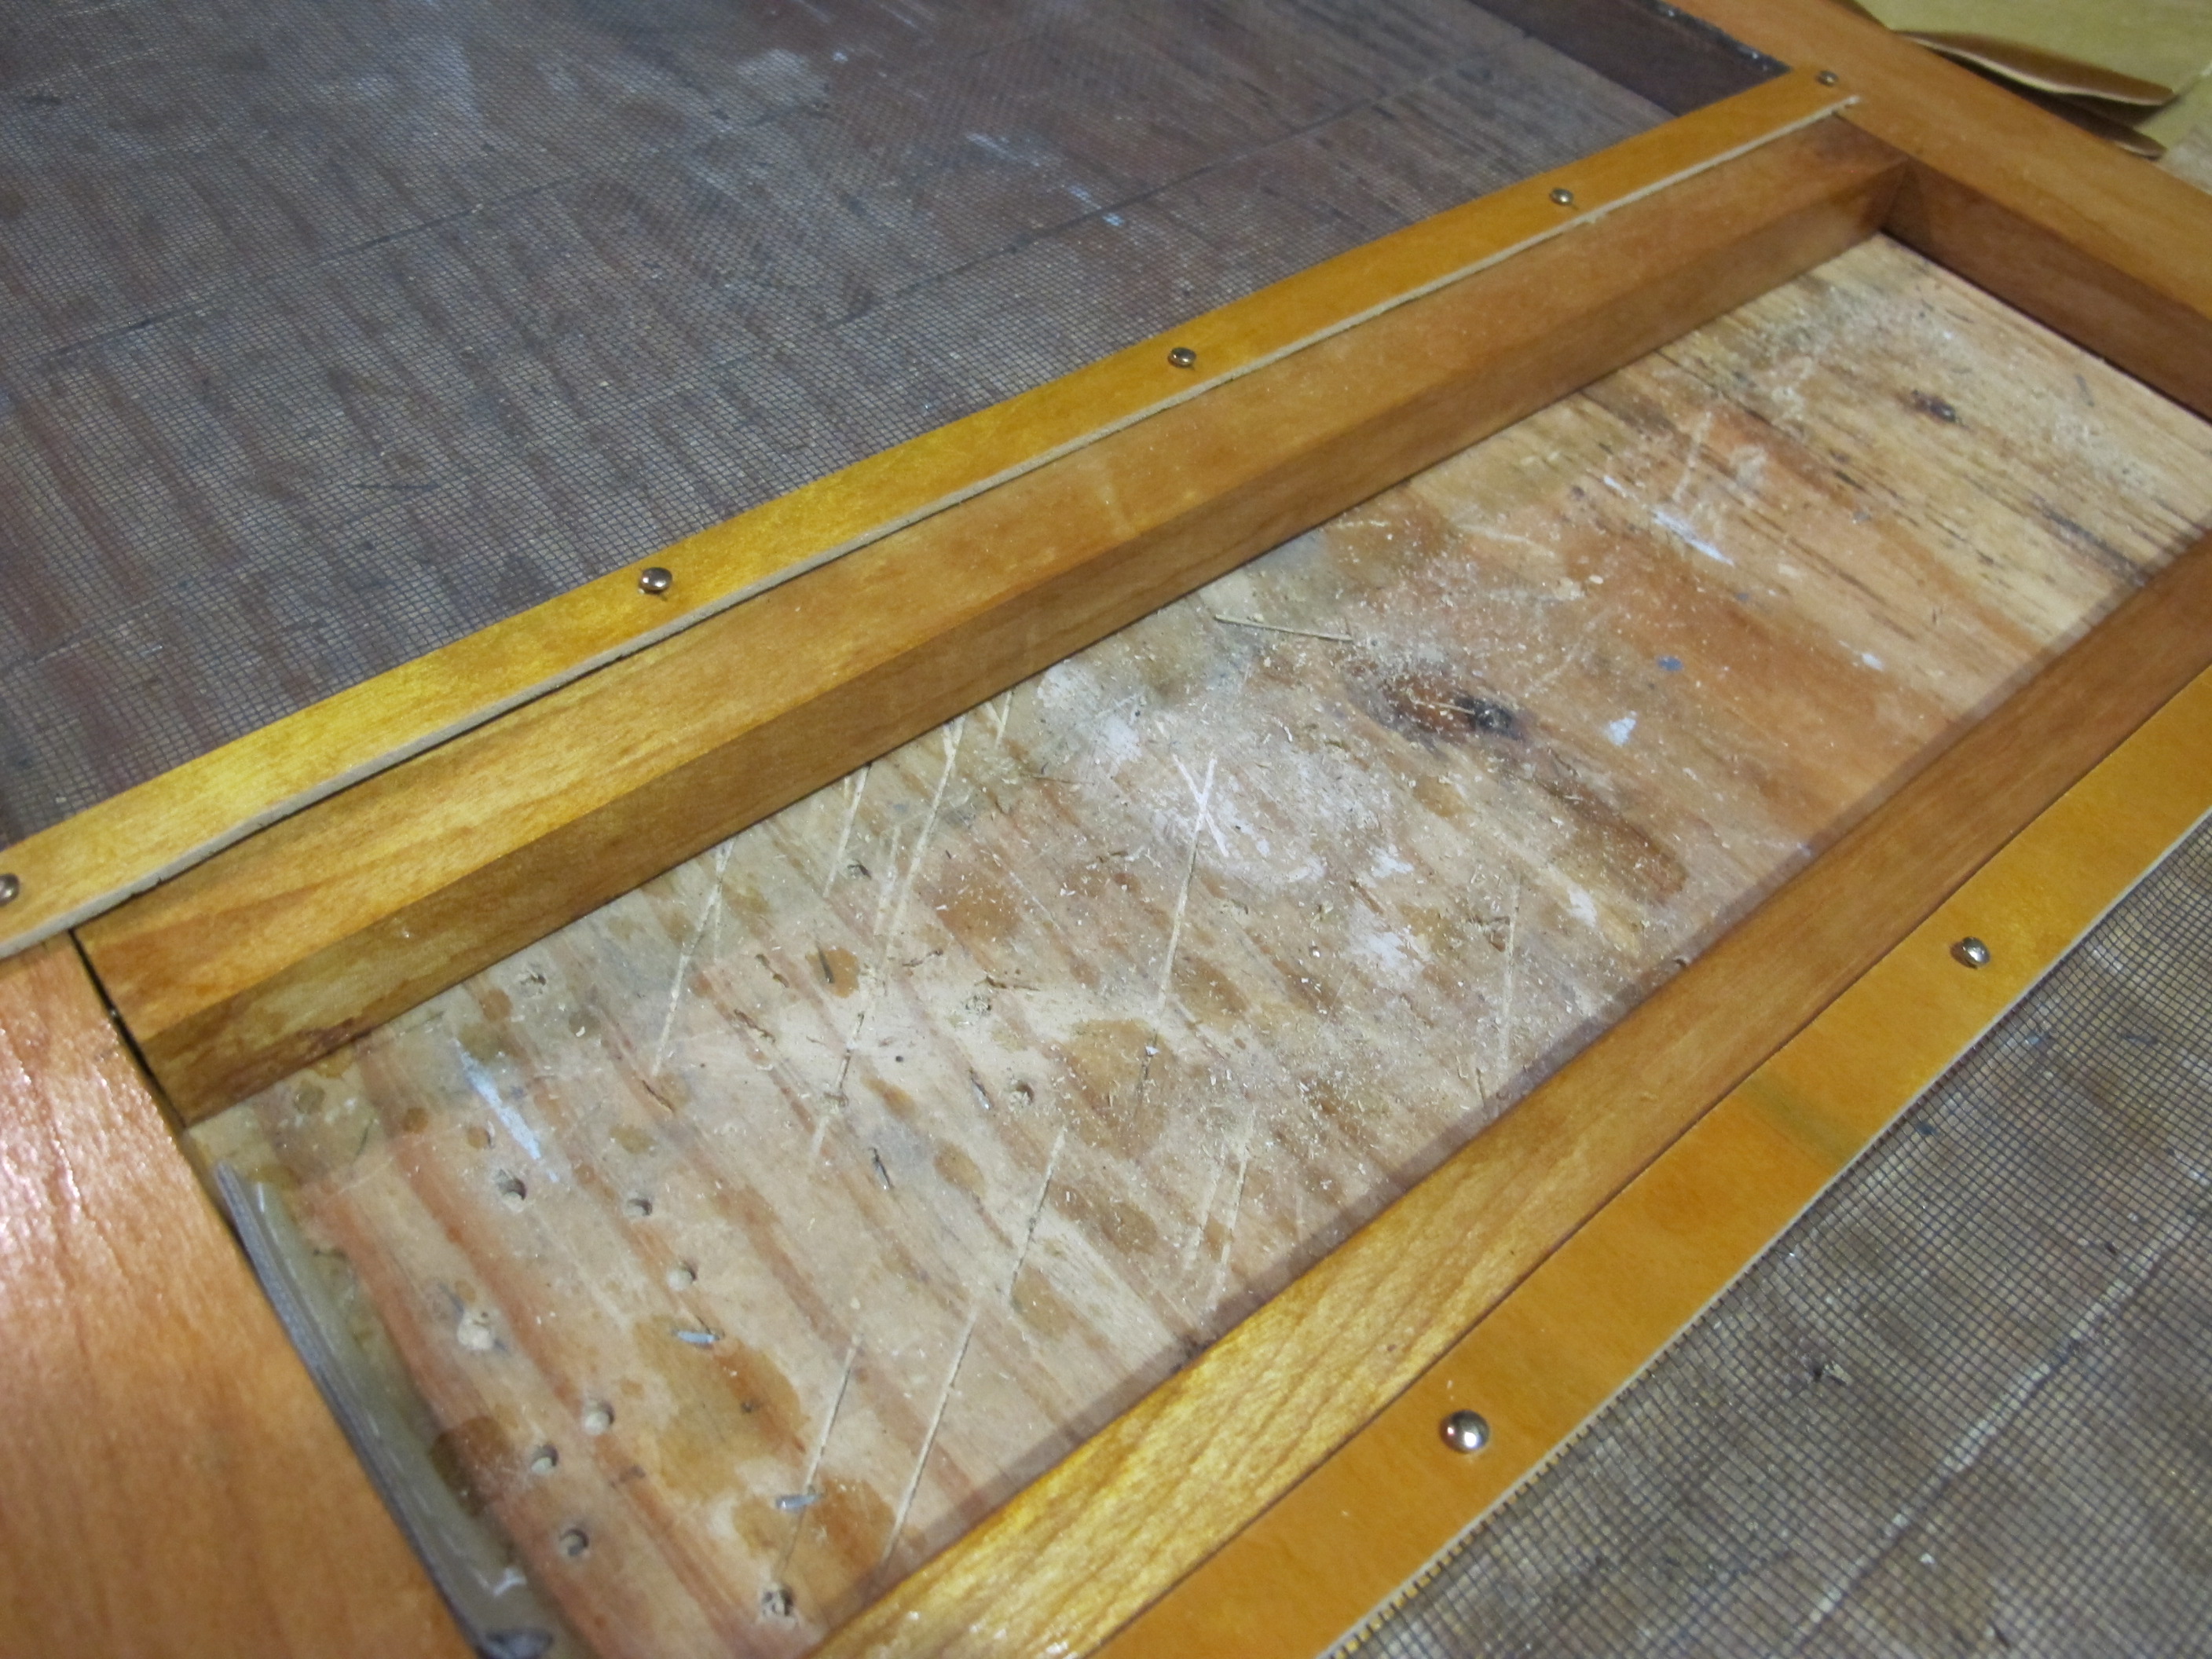
To cover the staples, I cut 1/2″ strips of birch paneling and nailed them down using twist nails.
Next, I cut two identical pieces of birch paneling to be sandwiched together to fill in the center of the door.

I used a couple of trim pieces to finish off the center of the door. It will be cut in half with hinges so that half of it opens to make room for the door handle when both doors are open or closed.
You can see the little hinges I installed on the interior so that the center of the door opens to the side.

Here’s the front! I used the same drawer pull that I used on the interior drawer for the handle. I think it turned out pretty nice!
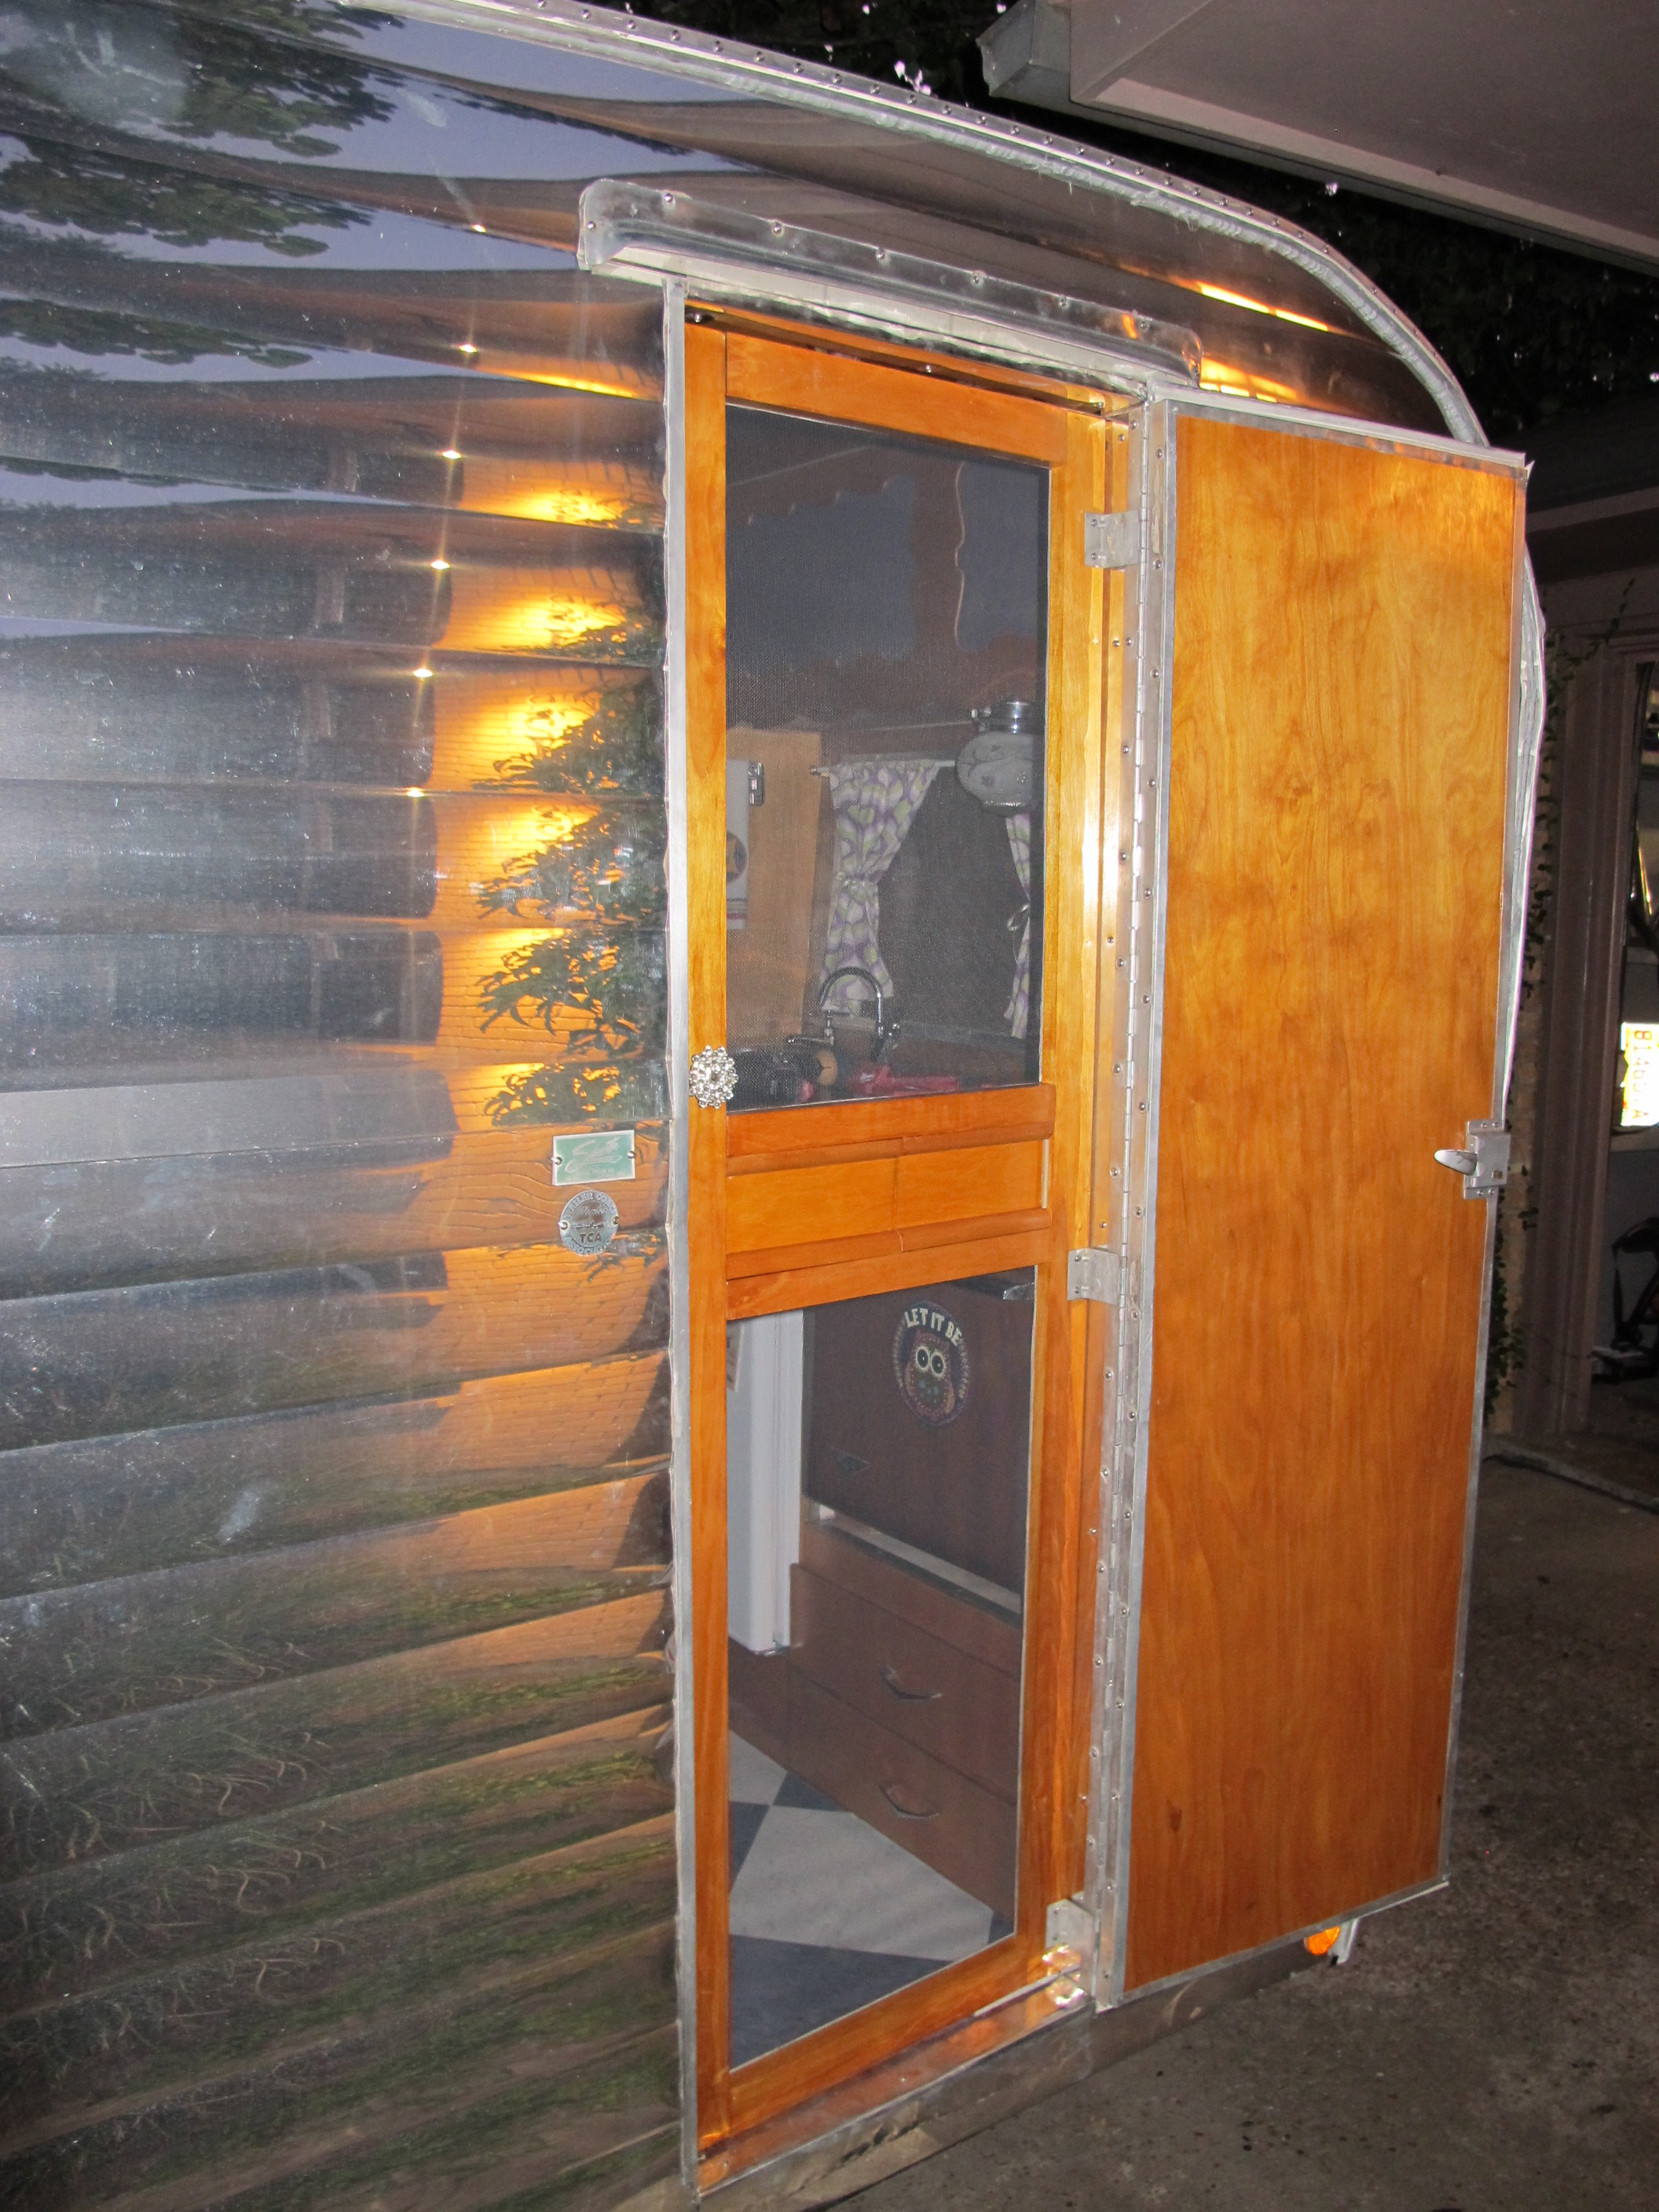
All ready for the rally!
I’m getting excited for the rally next weekend! I still have a lot of work to get done this week, but hopefully I’ll be able to get everything done and relax this weekend.
