RSS Feed

Tag Archives: tiny houses

Battered and Bruised

Posted on

Warning:  The first part of this post is a bit depressing.  If you’re not in the mood to handle a depressing post, you can skip the first paragraph and come back to it later when you’re mentally prepared.

I feel like I took a beating this week.  Monday started out ok, nothing special happened.  Tuesday, however, was the day from hell.  First, I spent part of the night feeling sick and had to go into work a little late.  Maybe my body knew somehow that the day was cursed and was trying to avoid it.   On my way into work, I spilled coffee all over my white shirt.  Then, when I got to work, I accidentally stuck my smart card (my badge that I have to insert into the computer to log on) into the cd drive because someone had the clever idea to put the card reader directly above the cd drive just to mess with people like me who are having a bad day and not paying attention.  ugh Of course, I couldn’t get it out and I couldn’t go anywhere without my badge, so I had to recruit a coworker to go with me to the IT floor to get someone to help me.  The guy took my computer apart, but I finally had my badge again after about an hour of wasted time!  After that, I thought things could only get better.  Unfortunately, I was wrong.  It was a nice day outside, so I decided to forego my usual spin class and head home to take Baxter for a run in the park by my house.  While we were out on our run, I saw a guy on a motorcycle hit a gravel patch, then the curb, then lose control and crash.  I wasn’t very far away, so I ran over immediately, thinking somehow I could help.  I don’t know what I was thinking since I didn’t have my cell phone, not to mention that I had a dog with me.  I guess it was just instinctual.  I was the first person to arrive on the scene, and as soon as I saw him, I wished I hadn’t.  He wasn’t wearing a helmet, and his head injuries were pretty severe.  I asked if he could hear me, and he didn’t respond even though his eyes were open.  He also wasn’t moving.  I noticed another car had stopped at this point, and the woman was calling 911.  I was relieved.  I thought the woman would get out of her car and come over, but she didn’t.  The furthest she got was to open her car door and step right outside of it.  She kept her distance and yelled over to me to answer the 911 operator’s questions.  A guy then runs up to me and frantically asks, “What do I do?  What do I do?”  I was trying to hold it together.  I guess everyone handles emergency situations differently.  A few seconds later, a nurse pulled up in her car and, with a somber expression on her face,  quickly walked over to the man, holding some type of first aid kit.  I stared at the man for another minute as people started showing up from all around.   I wondered if I needed to stay to talk to the police.  I didn’t know if anyone else had actually seen the accident.  Since it was only him and no other driver was involved, I thought maybe I didn’t need to stay.  At this point, I thought I might start bawling uncontrollably, so I decided I’d better go.  I knew he was getting help from the nurse until the ambulance arrived, and I was just in the way.  When I got home I cried really hard.  I don’t think I’ve cried that hard since my dad died.  I think I spent the rest of the week trying not to think about this man but failing miserably.  He was the first thing I thought of when I woke up and the last thing I thought of when I went to sleep.  I tried to look up information online about him, because I thought I could have some sense of closure if I knew what happened to him.  I’m pretty sure he didn’t survive, but I couldn’t find anything online about it.  Unfortunately, these types of motorcycle accidents are WAY too common.  If only he had been wearing his helmet, he would have been ok!   This whole incident got me thinking a lot about what is really important to me in life.  My family and my friendships are by far the most important things to me.  And Baxter too of course.  I want to tell my family and friends how much I love them every day, but that’s not always possible and would be a little over the top if I really did that I guess.  I hope that they know how important they are to me without me having to say it every day.   I kind of feel silly spending so much of my time alone, working on Junebug, when I don’t know how much longer I will have to spend with the people I care about.  Life can be over so quickly and unceremoniously.  I guess I keep working on Junebug because without a goal to work toward, I would feel lost.  And I felt lost this week and needed something to take my mind off of it.

So, now that I’ve gotten that off my chest, I will switch to the updates on my progress this weekend.  Junebug has a few bruises as well thanks to my mistakes.  It didn’t go perfectly (but when does it ever?), but I did finally finish getting the roof folded over and stapled down.  it was definitely the toughest job I’ve had to do yet, even harder than putting the side skins on last weekend.  Maybe because I was doing it alone, but I think it was just physically exhausting.

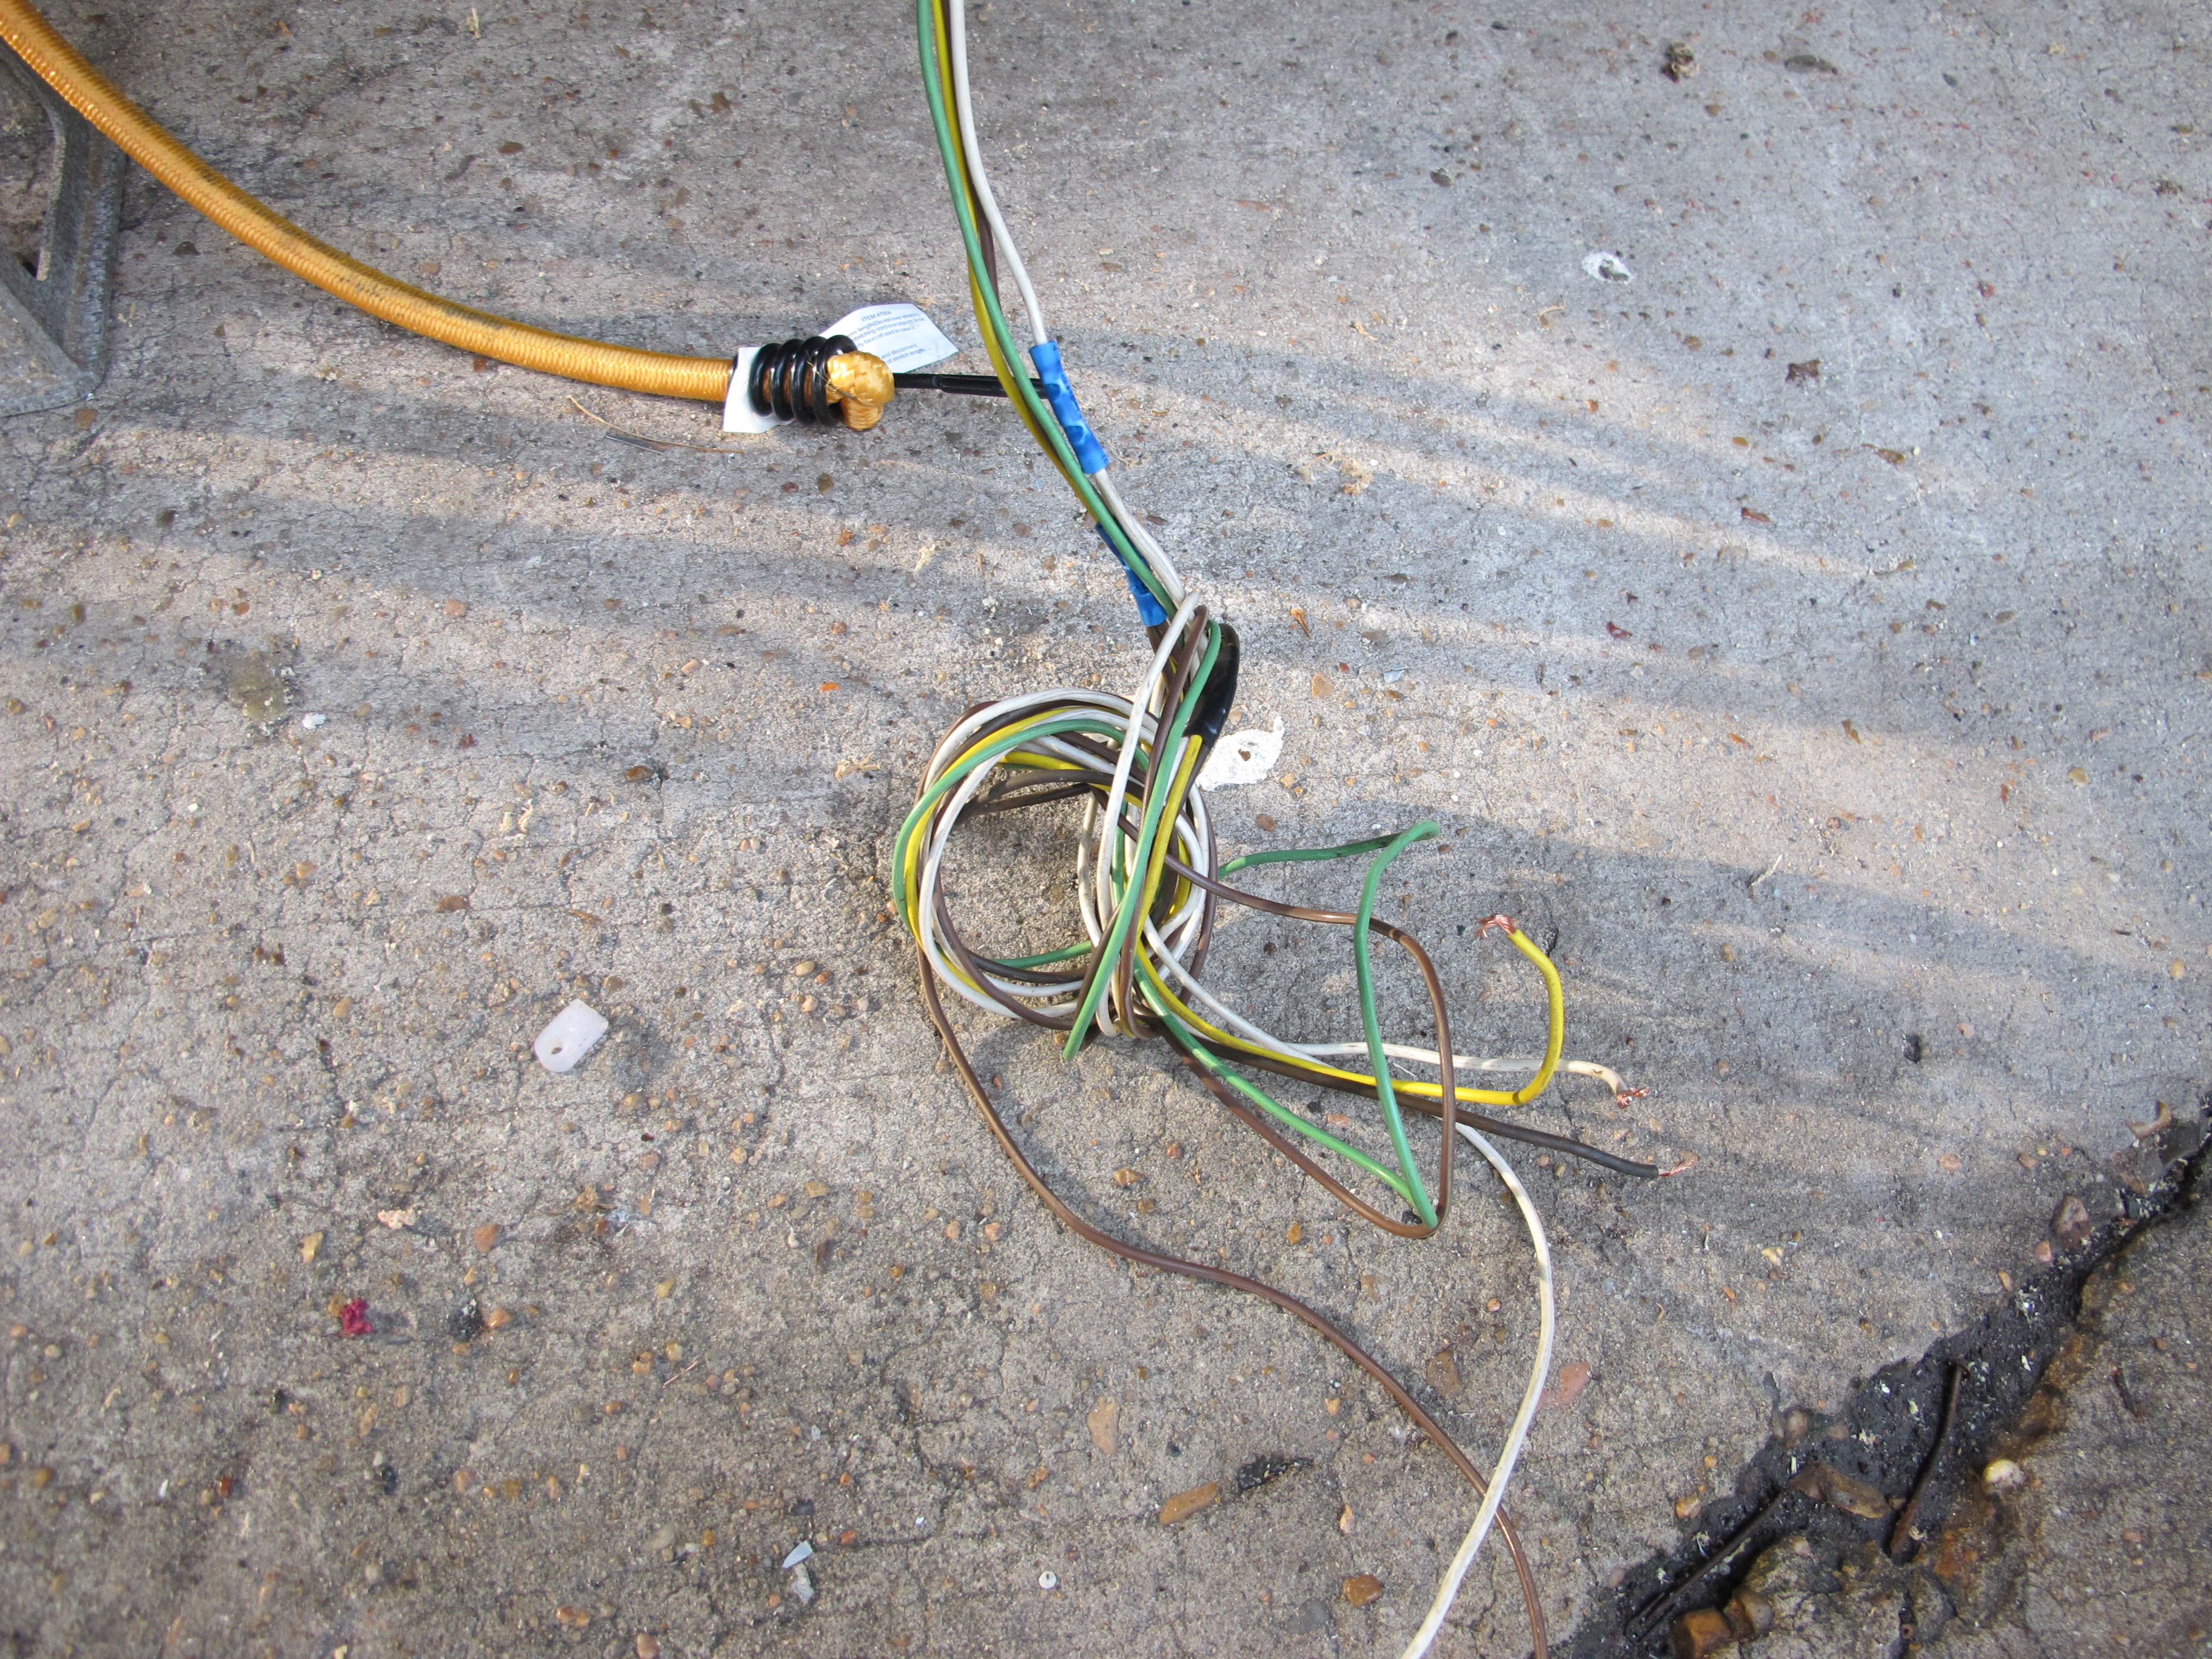
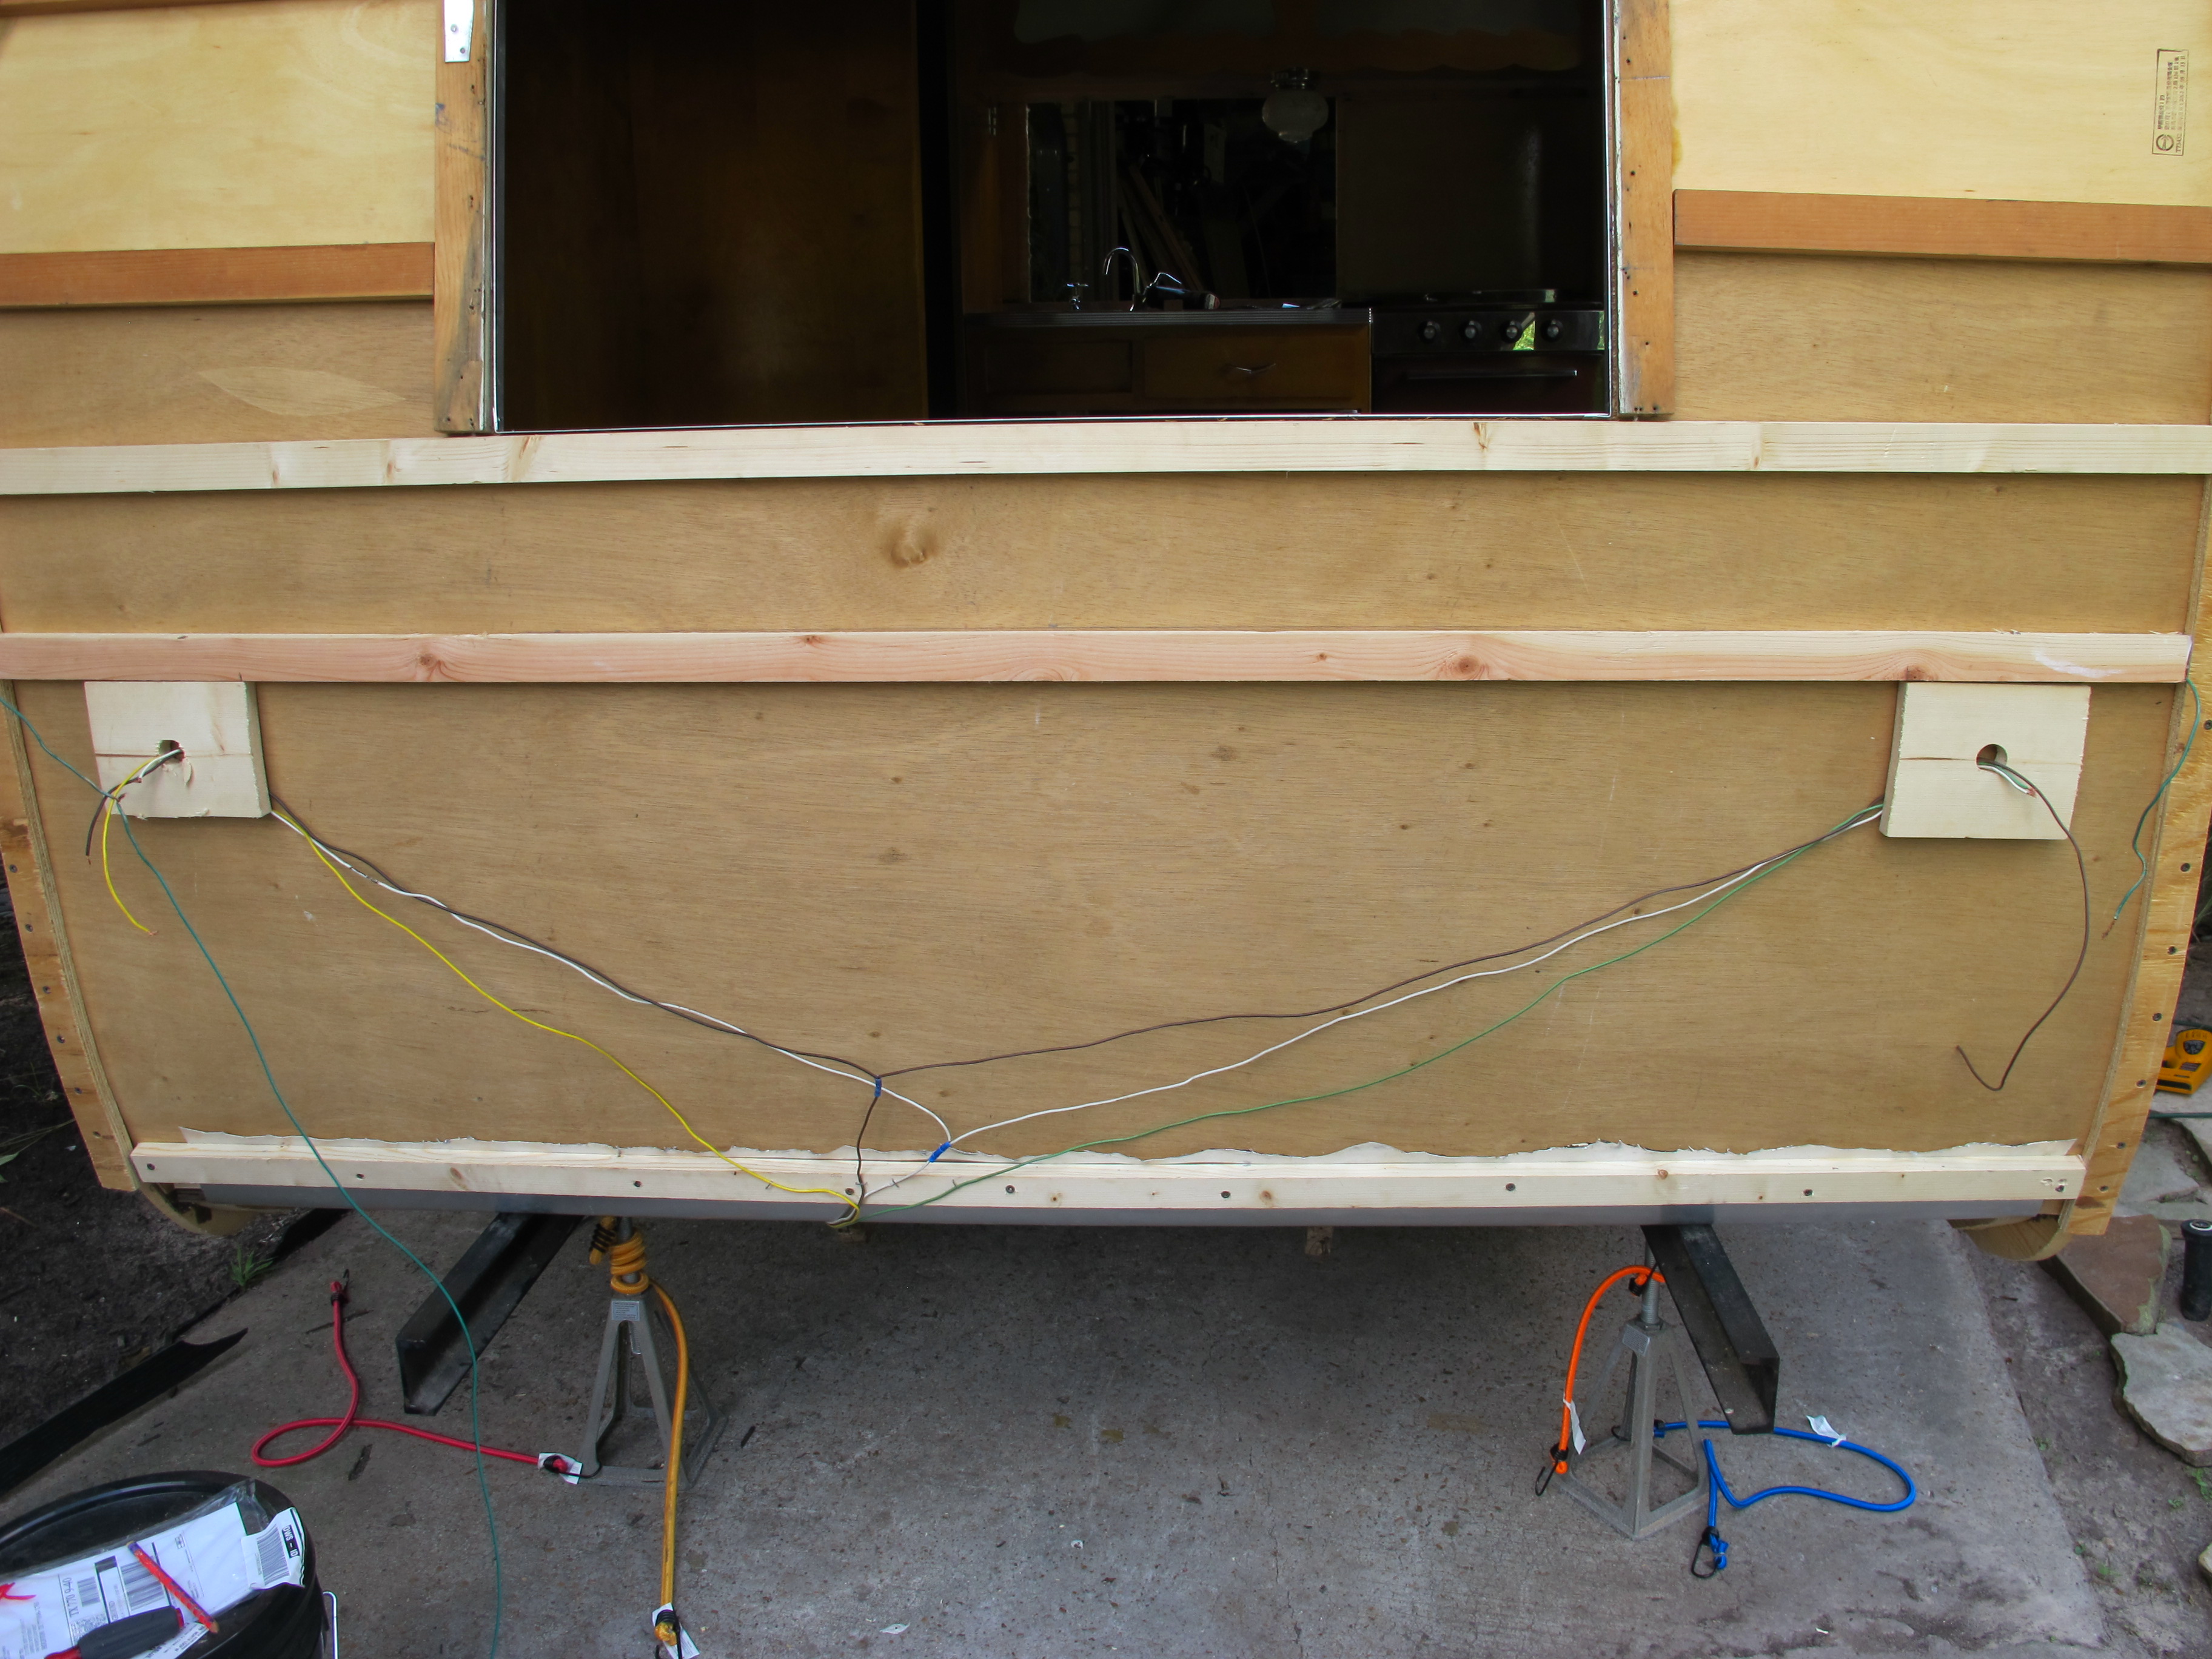
I started yesterday by finishing the insulation on the back panel.  I realized immediately that Oscar, my welder, had forgotten to leave some wire for the license plate light. ugh!  I had to call him because I wasn’t sure if I should wire it myself since that didn’t work too well the last time. haha  Luckily, Oscar is a really nice guy and was able to come by my house around 6pm yesterday to fix the problem.  He tested all of the wires and they worked, so let’s hope they stay that way once the lights are hooked up!

IMG_4737

Wires are all ready to go and insulation is in!


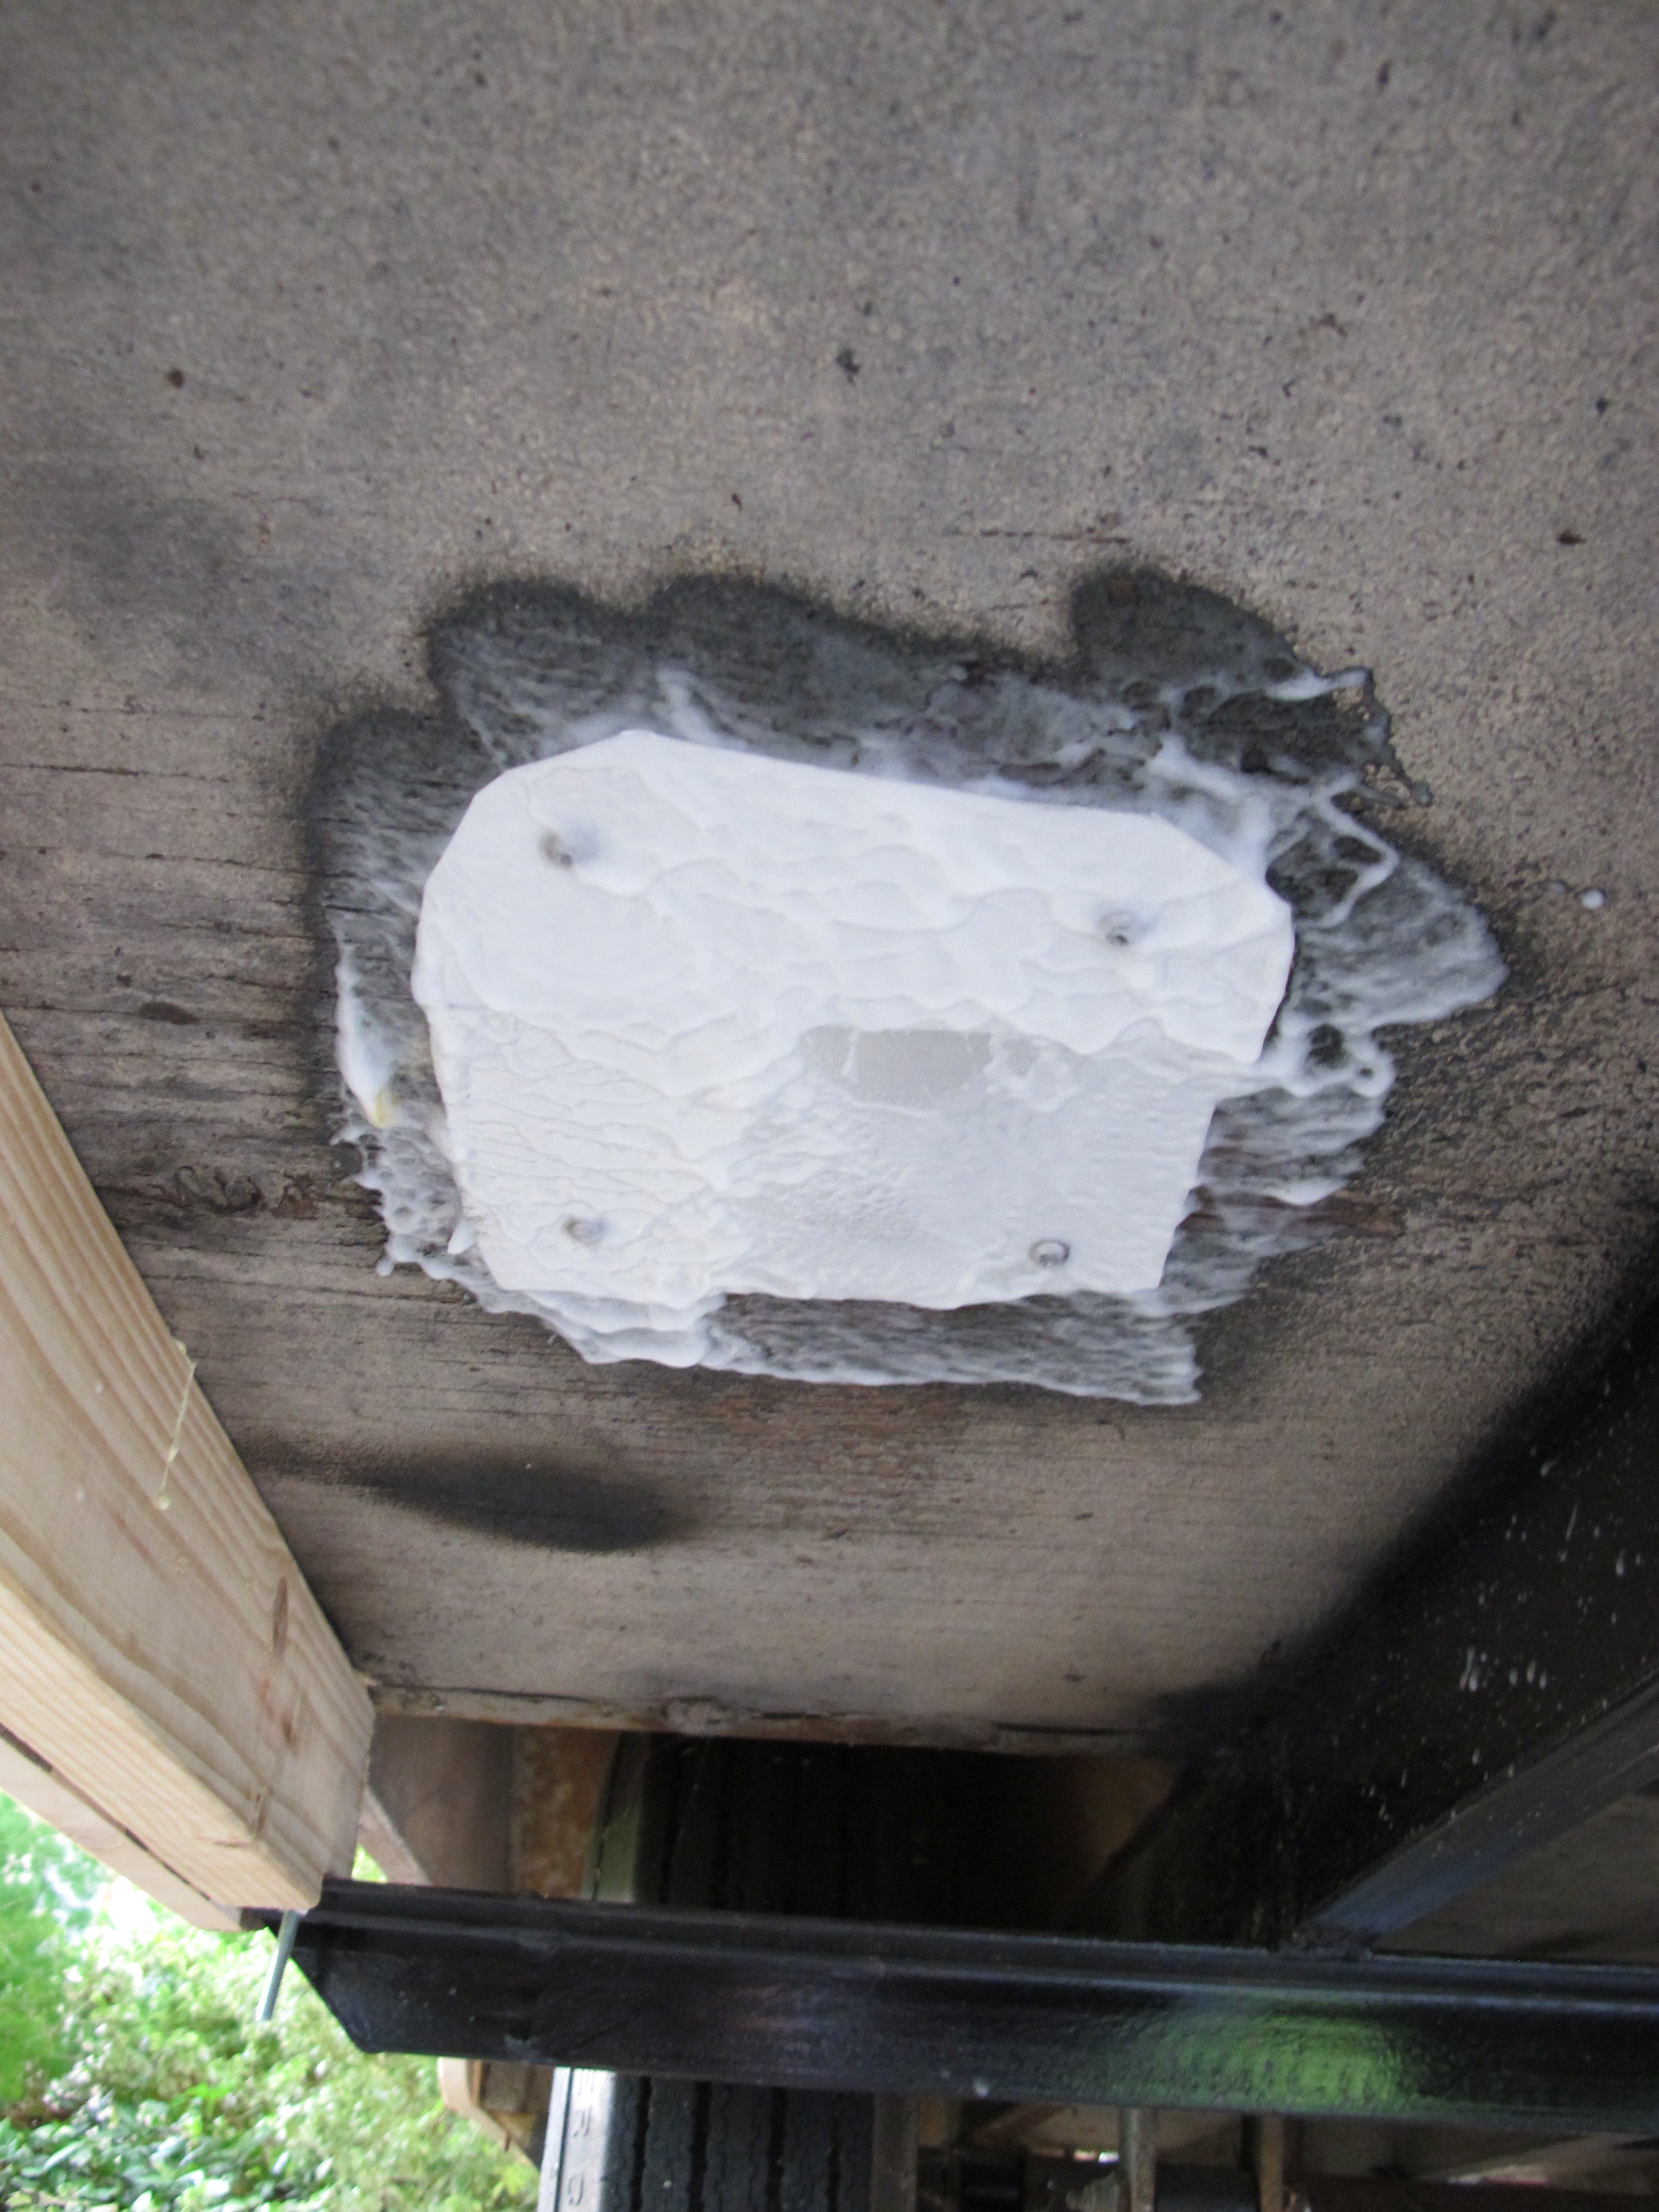
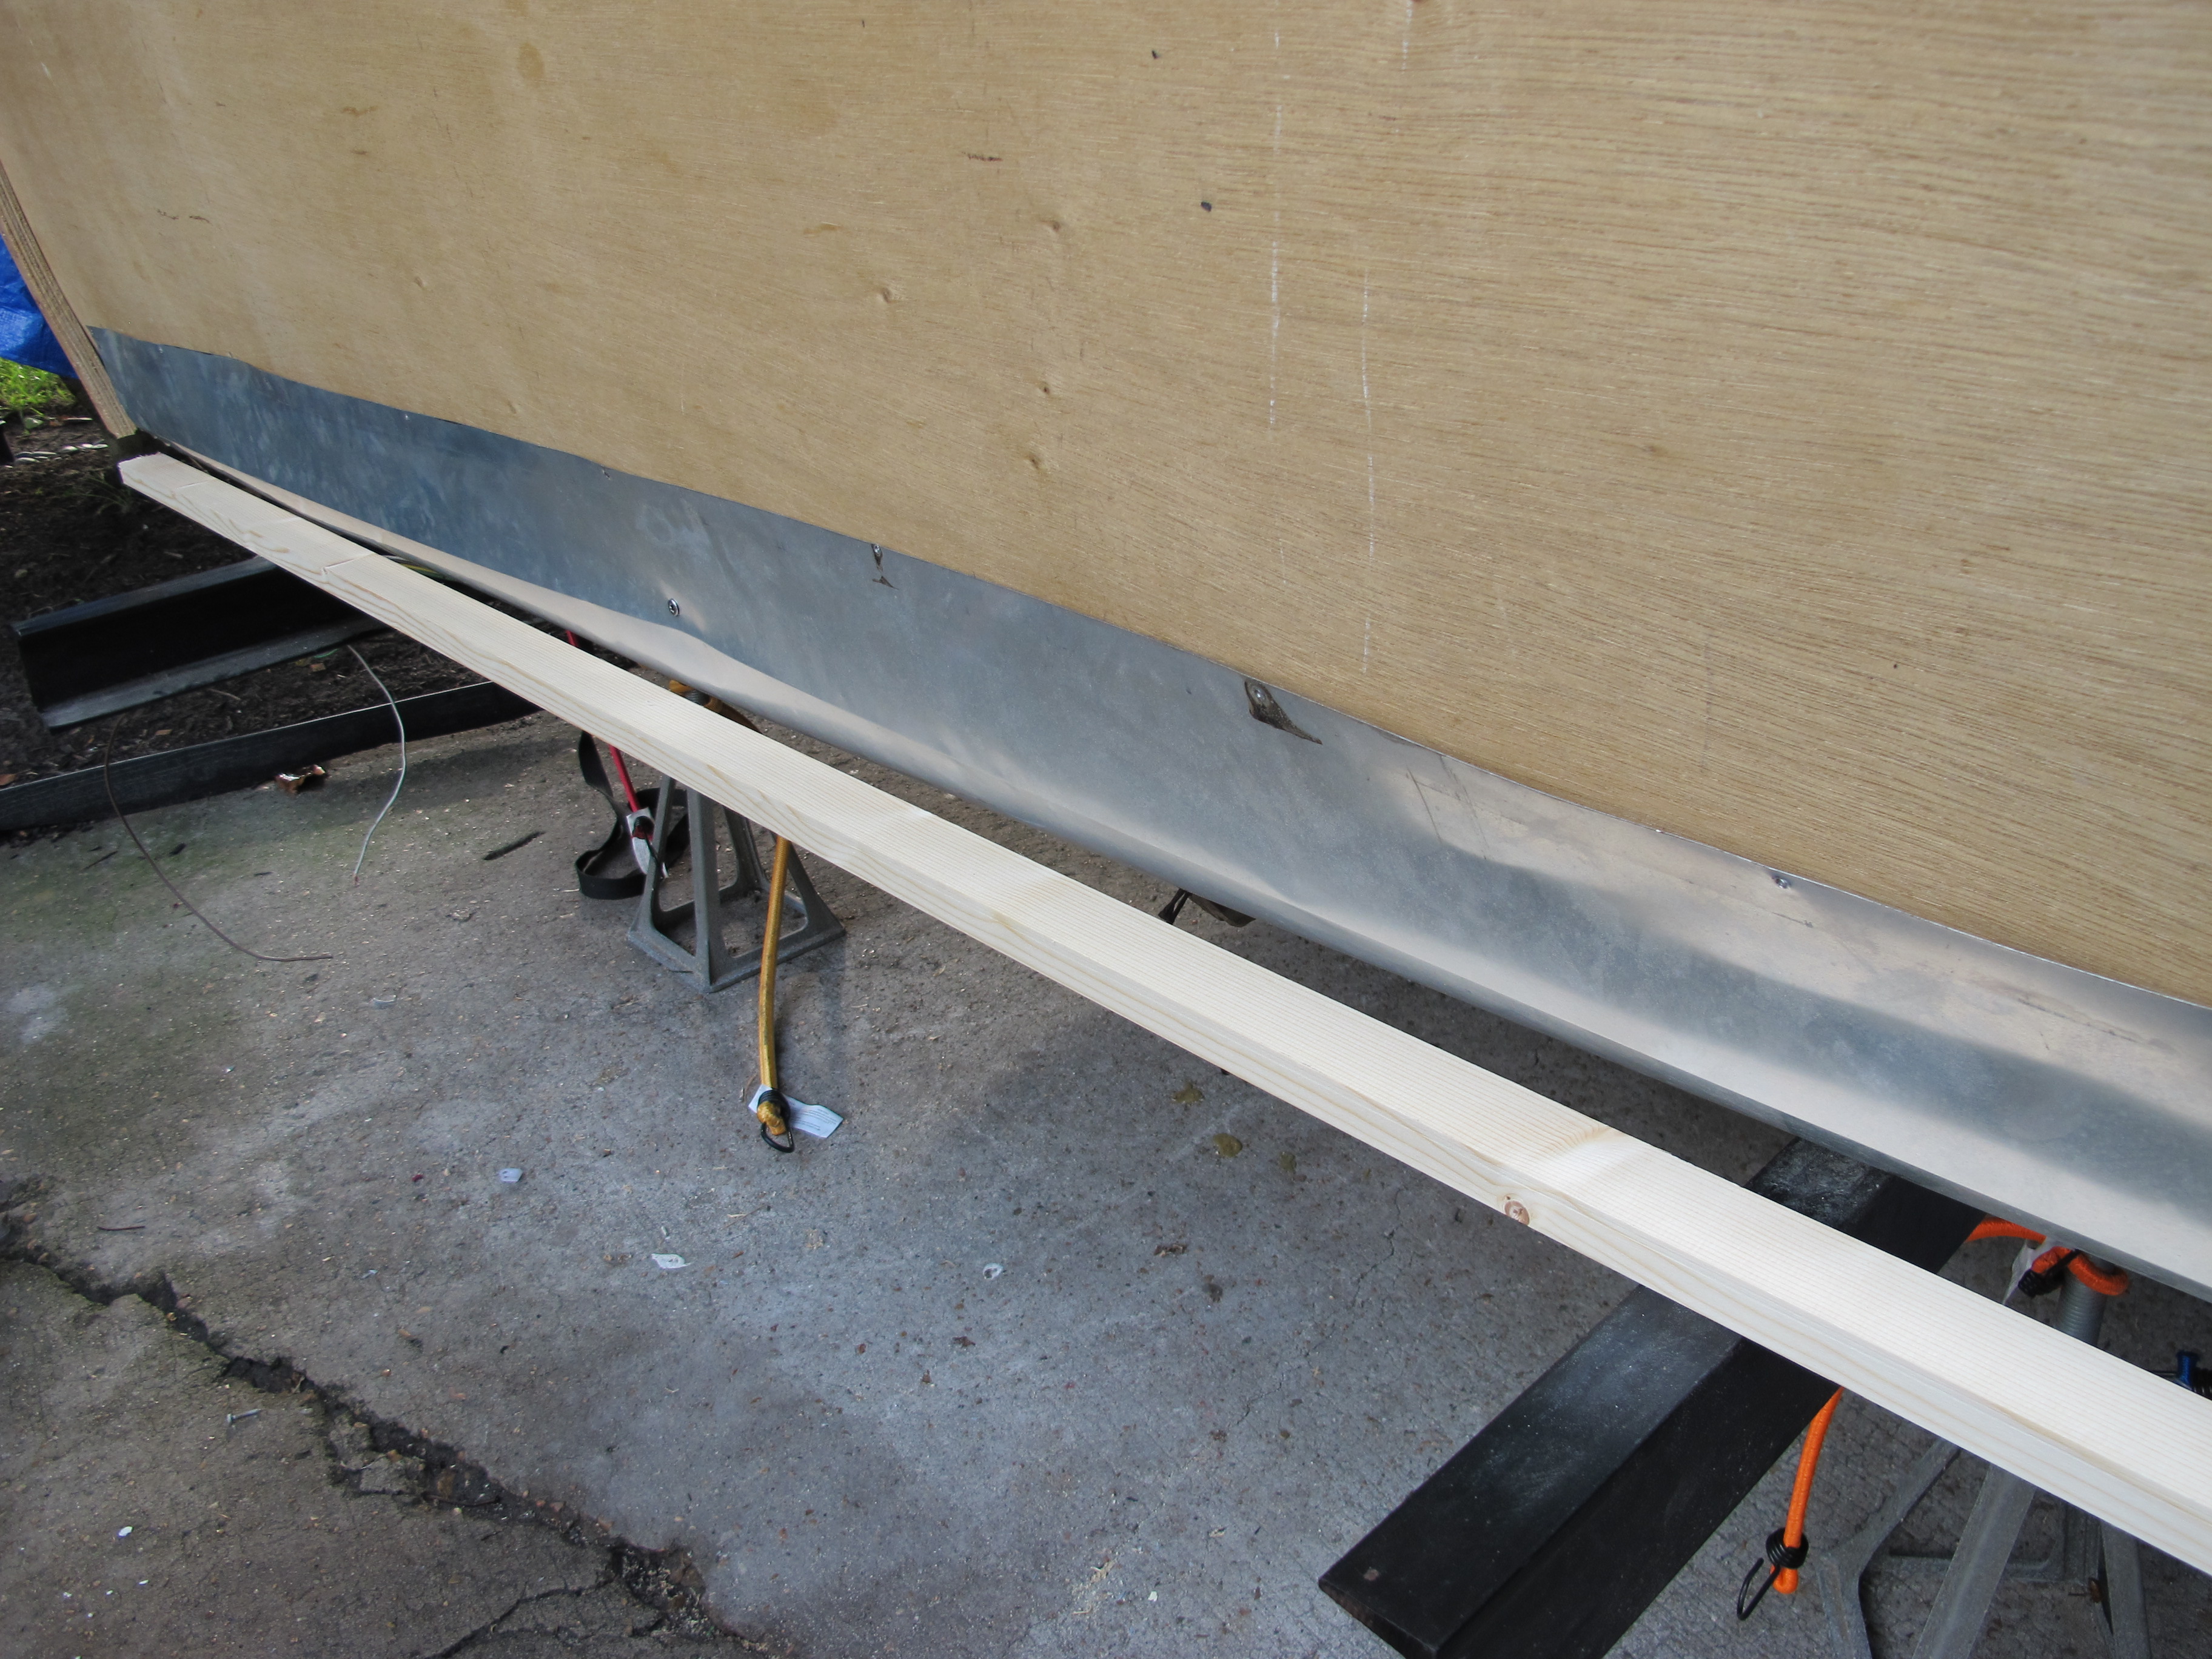
Next, I set out to patch up the mistake I made when cutting the side skin.  I cut a piece to fit over it and overlap slightly, then sealed the gap with gutter seal.  It doesn’t look perfect, but I’m hoping maybe it won’t be that noticeable once the drip rail is on since it’s up high.

IMG_4734

Mistake – before patching


IMG_4735

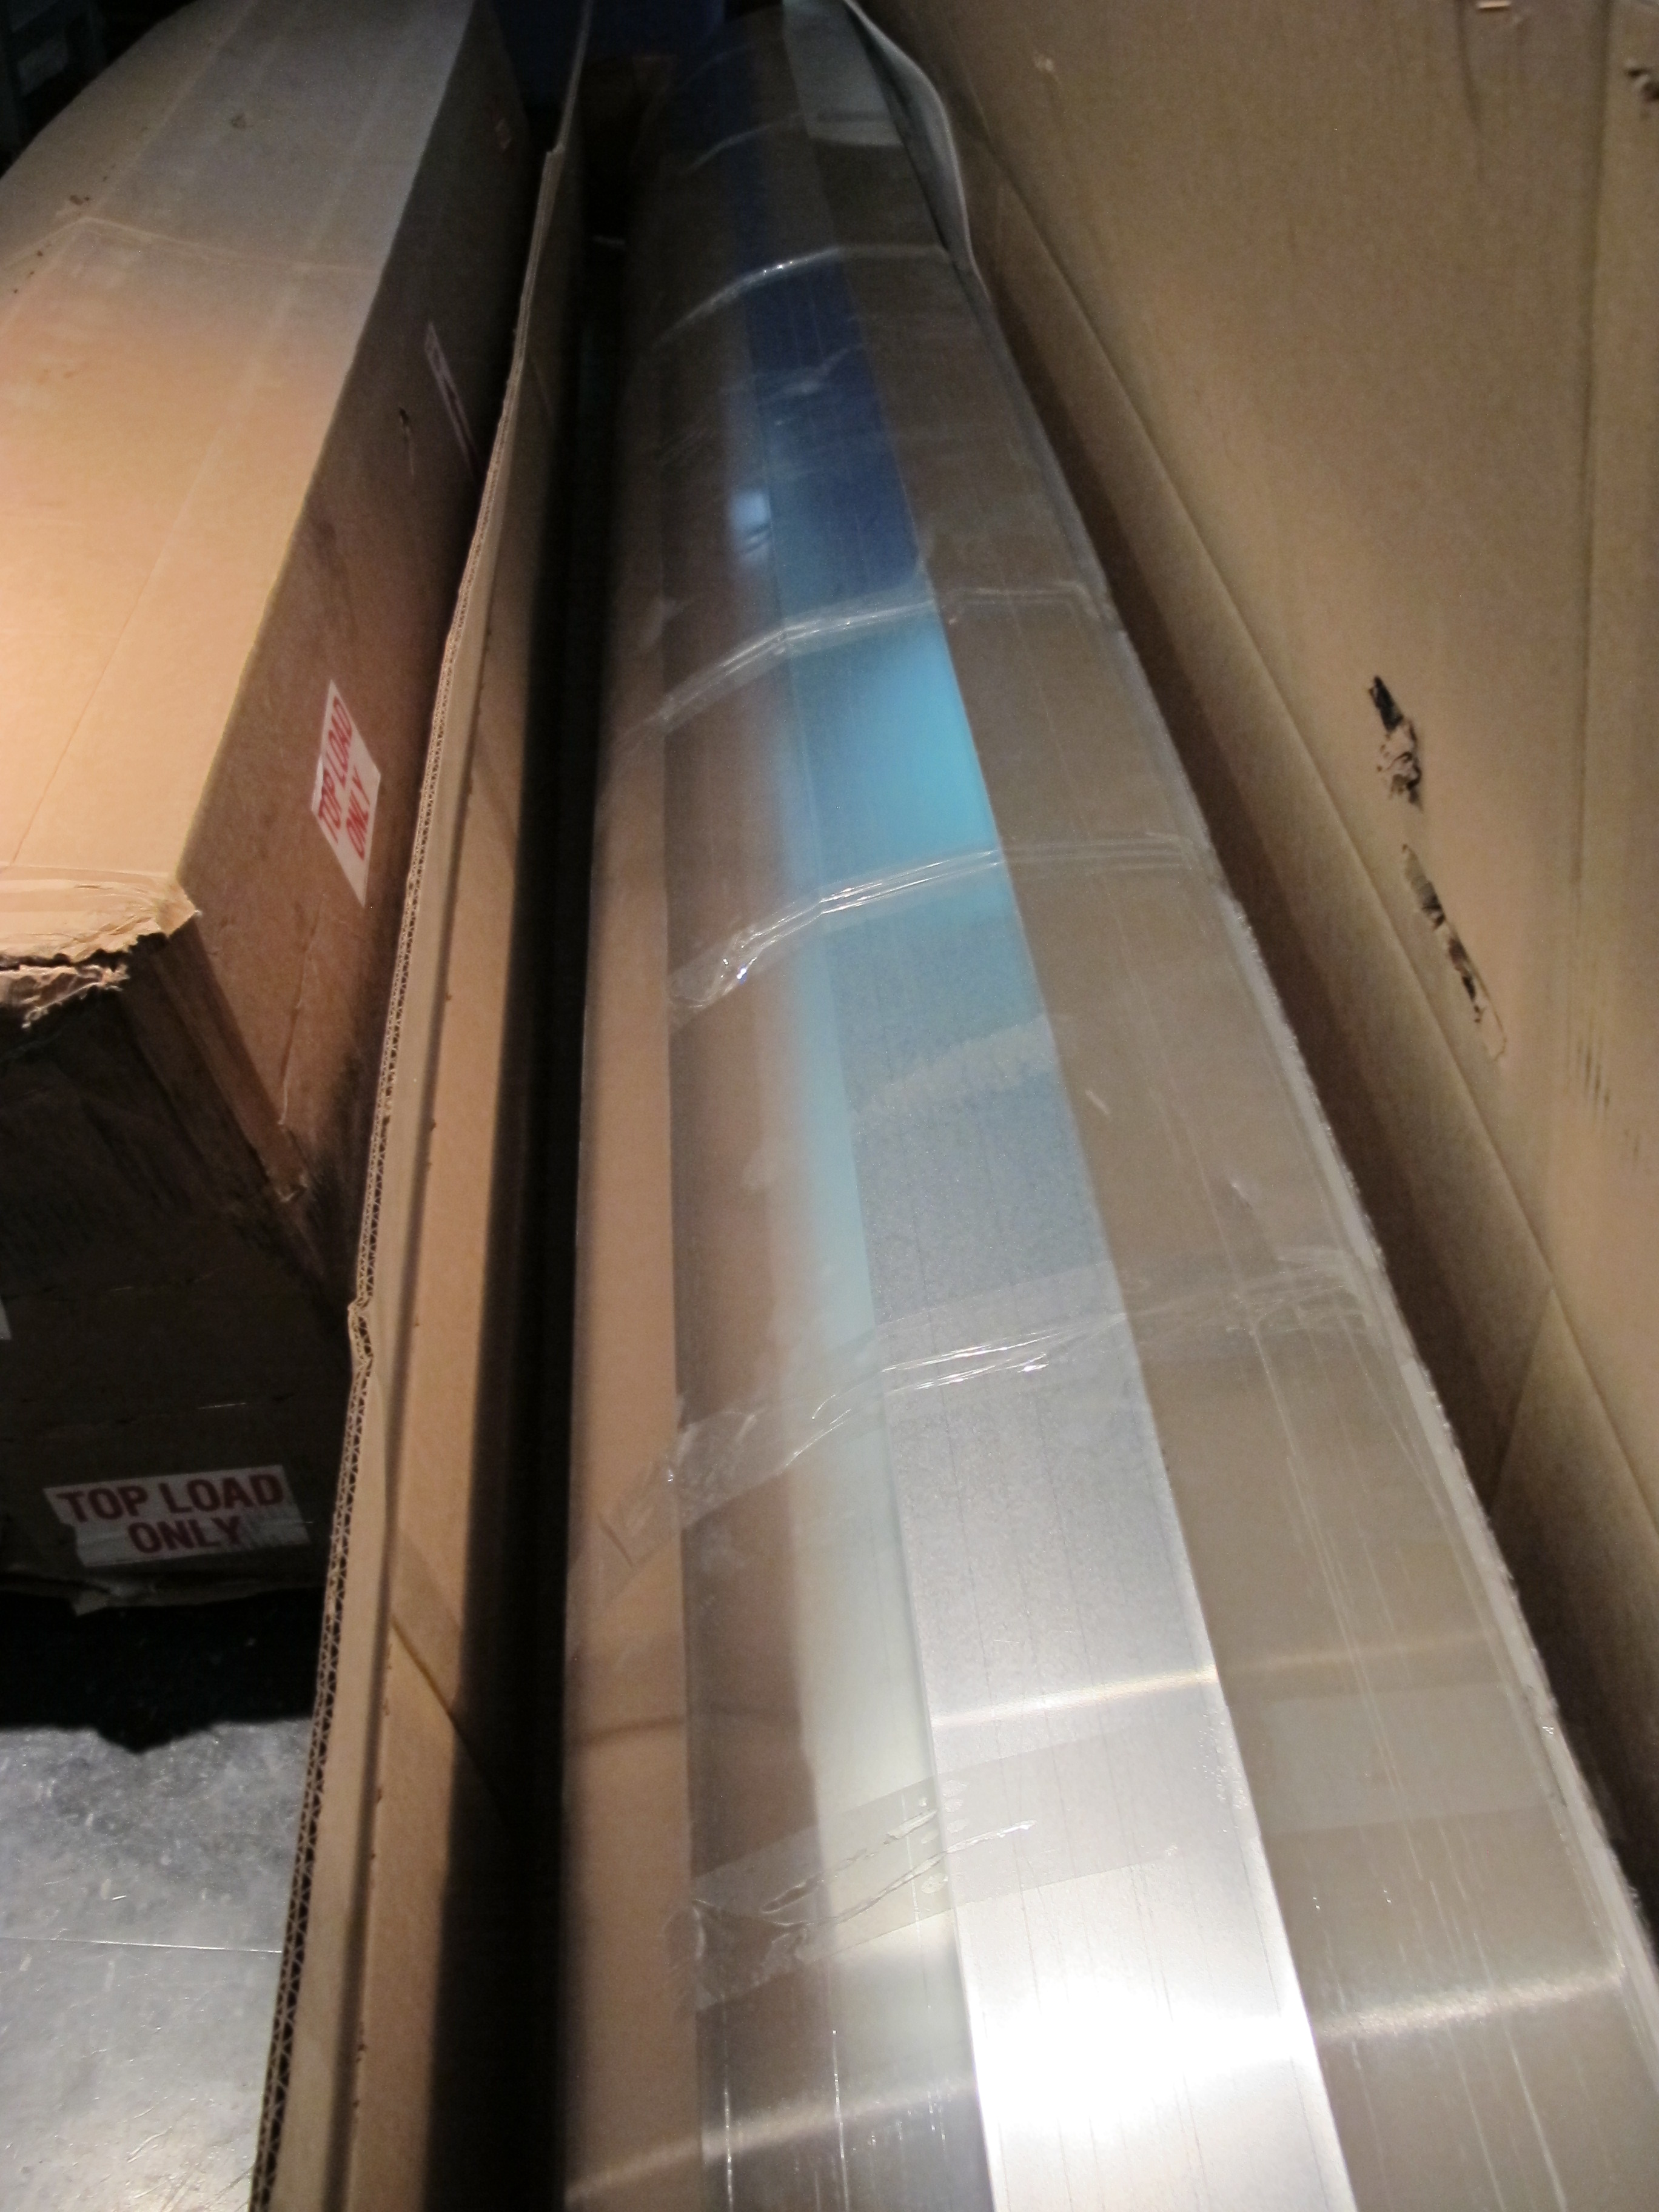
After patching – the protective film is still on the patch

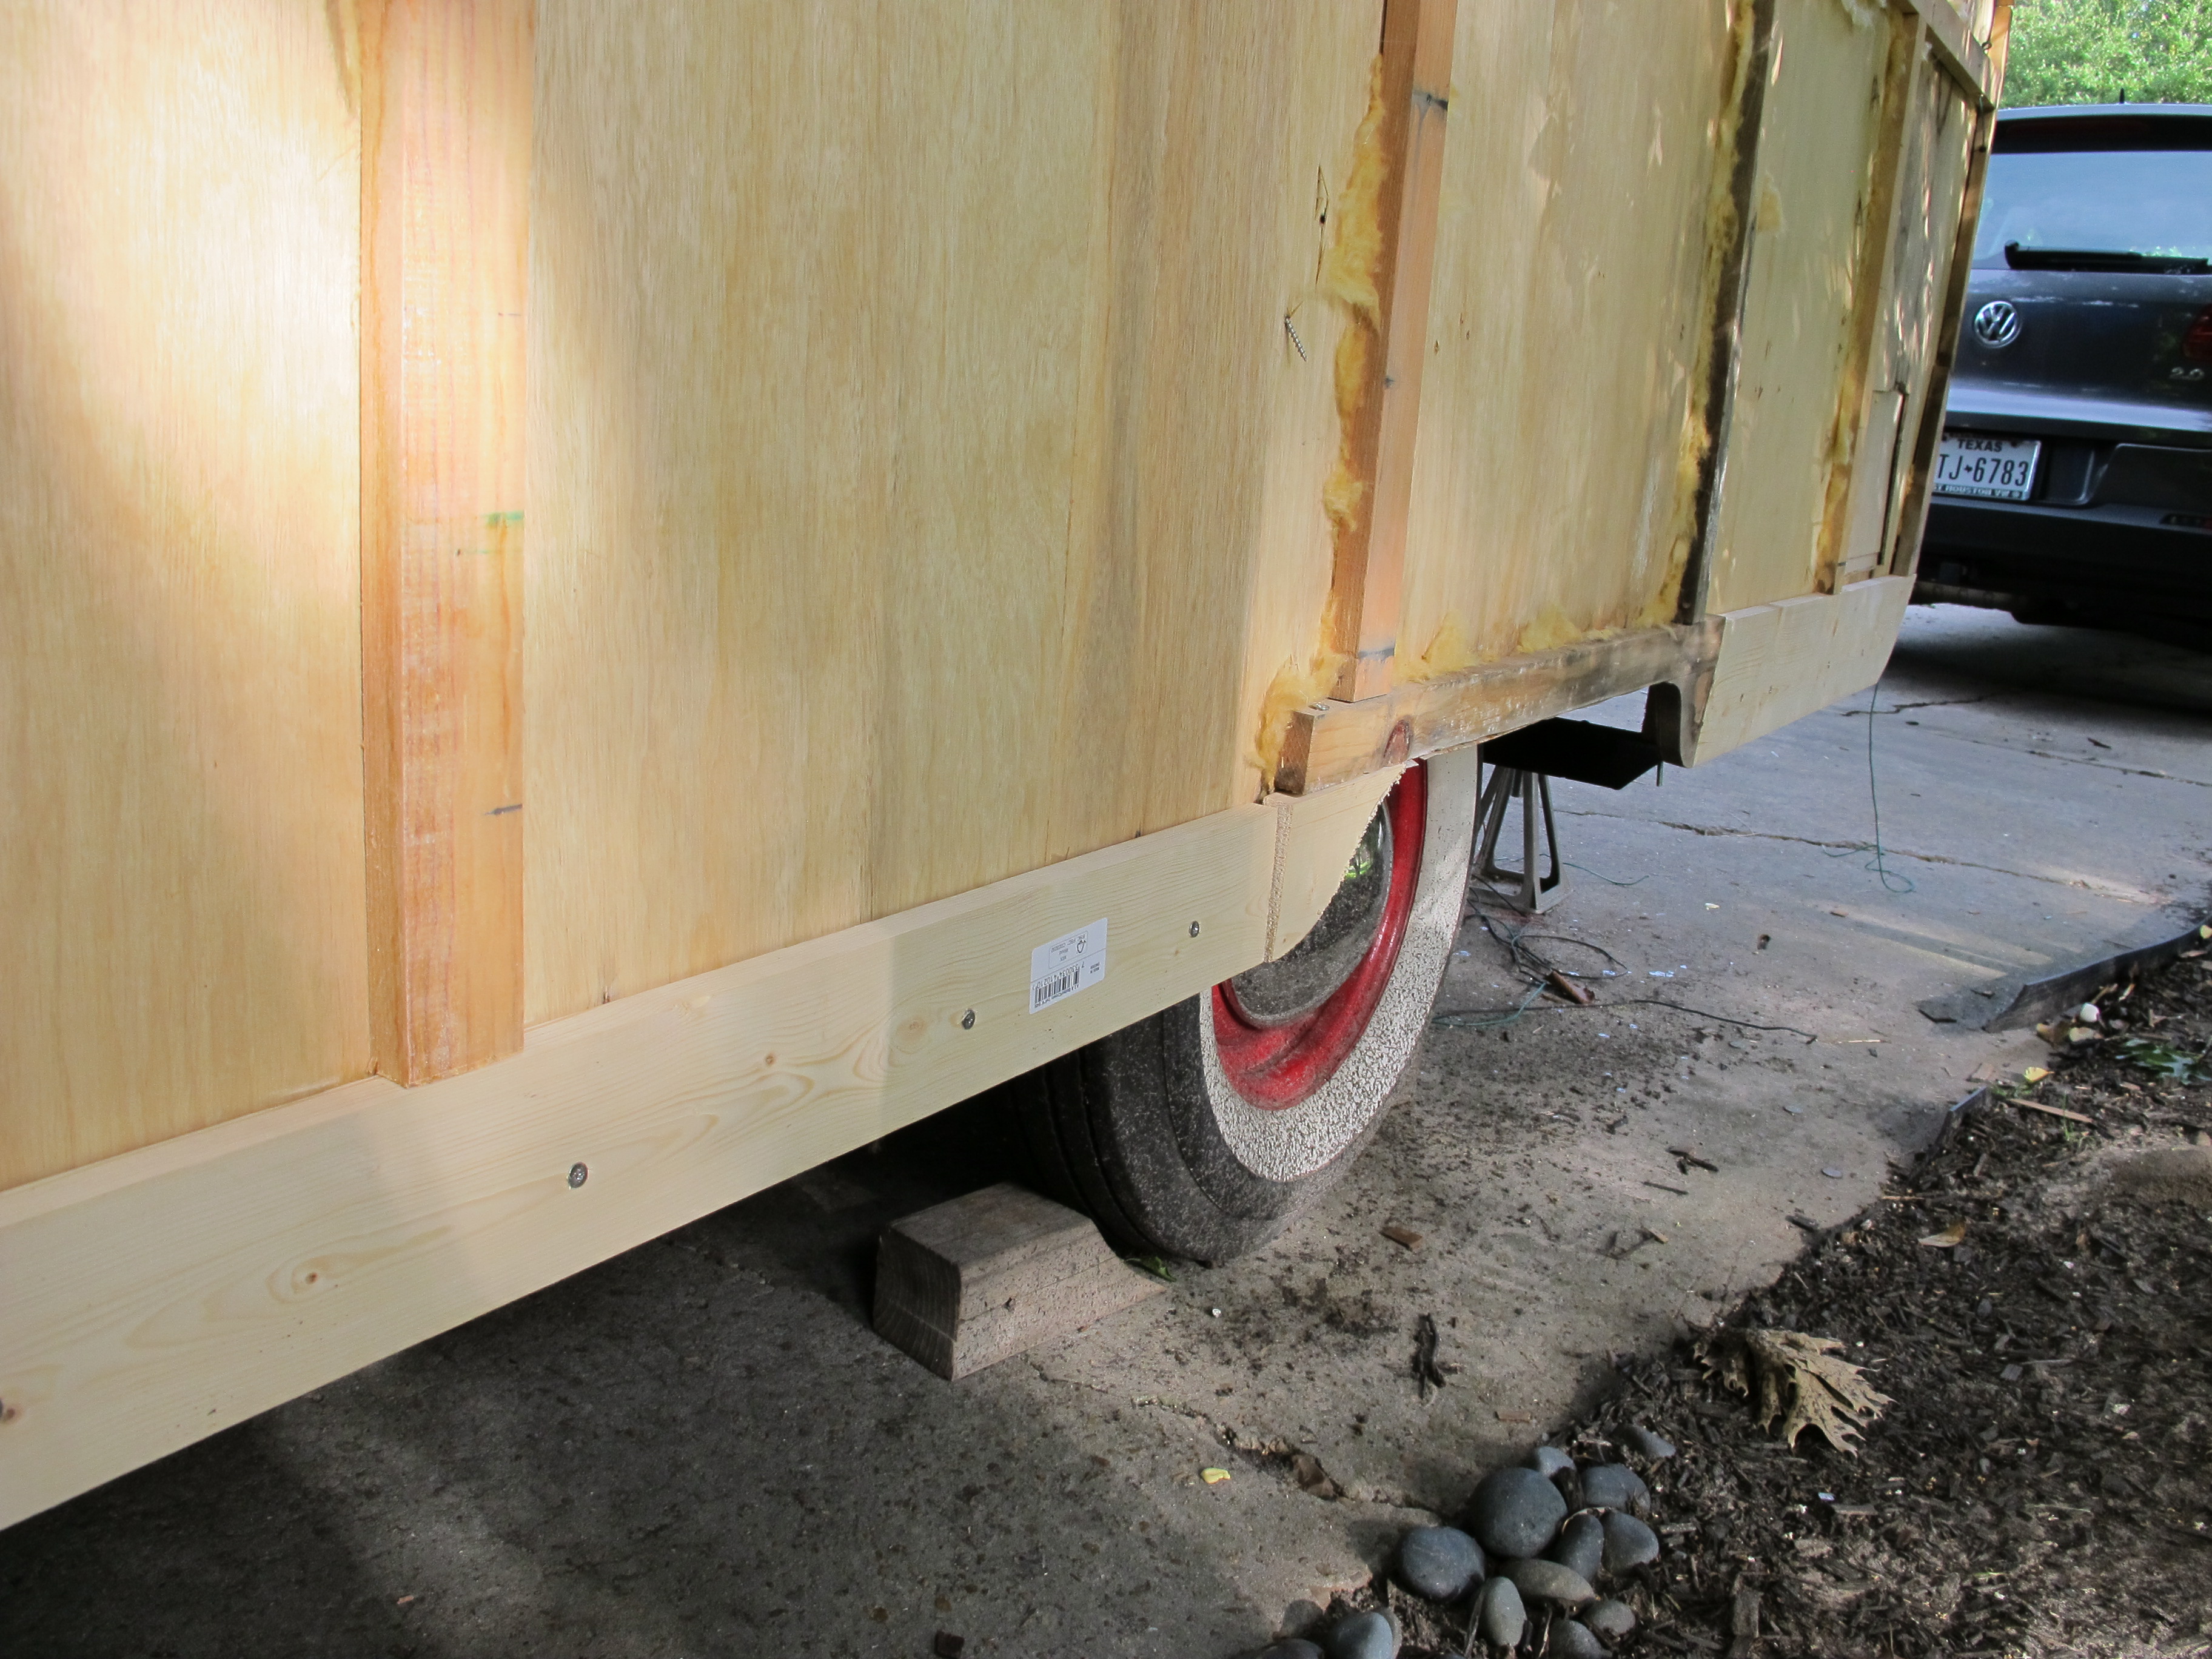
On Saturday, I also finished trimming the bottom edge of the curb side and then folding it under.   I put a few staples in, but not many because I will be screwing in some trim along the bottom and sealing it with gutter seal.

IMG_4736


IMG_4738

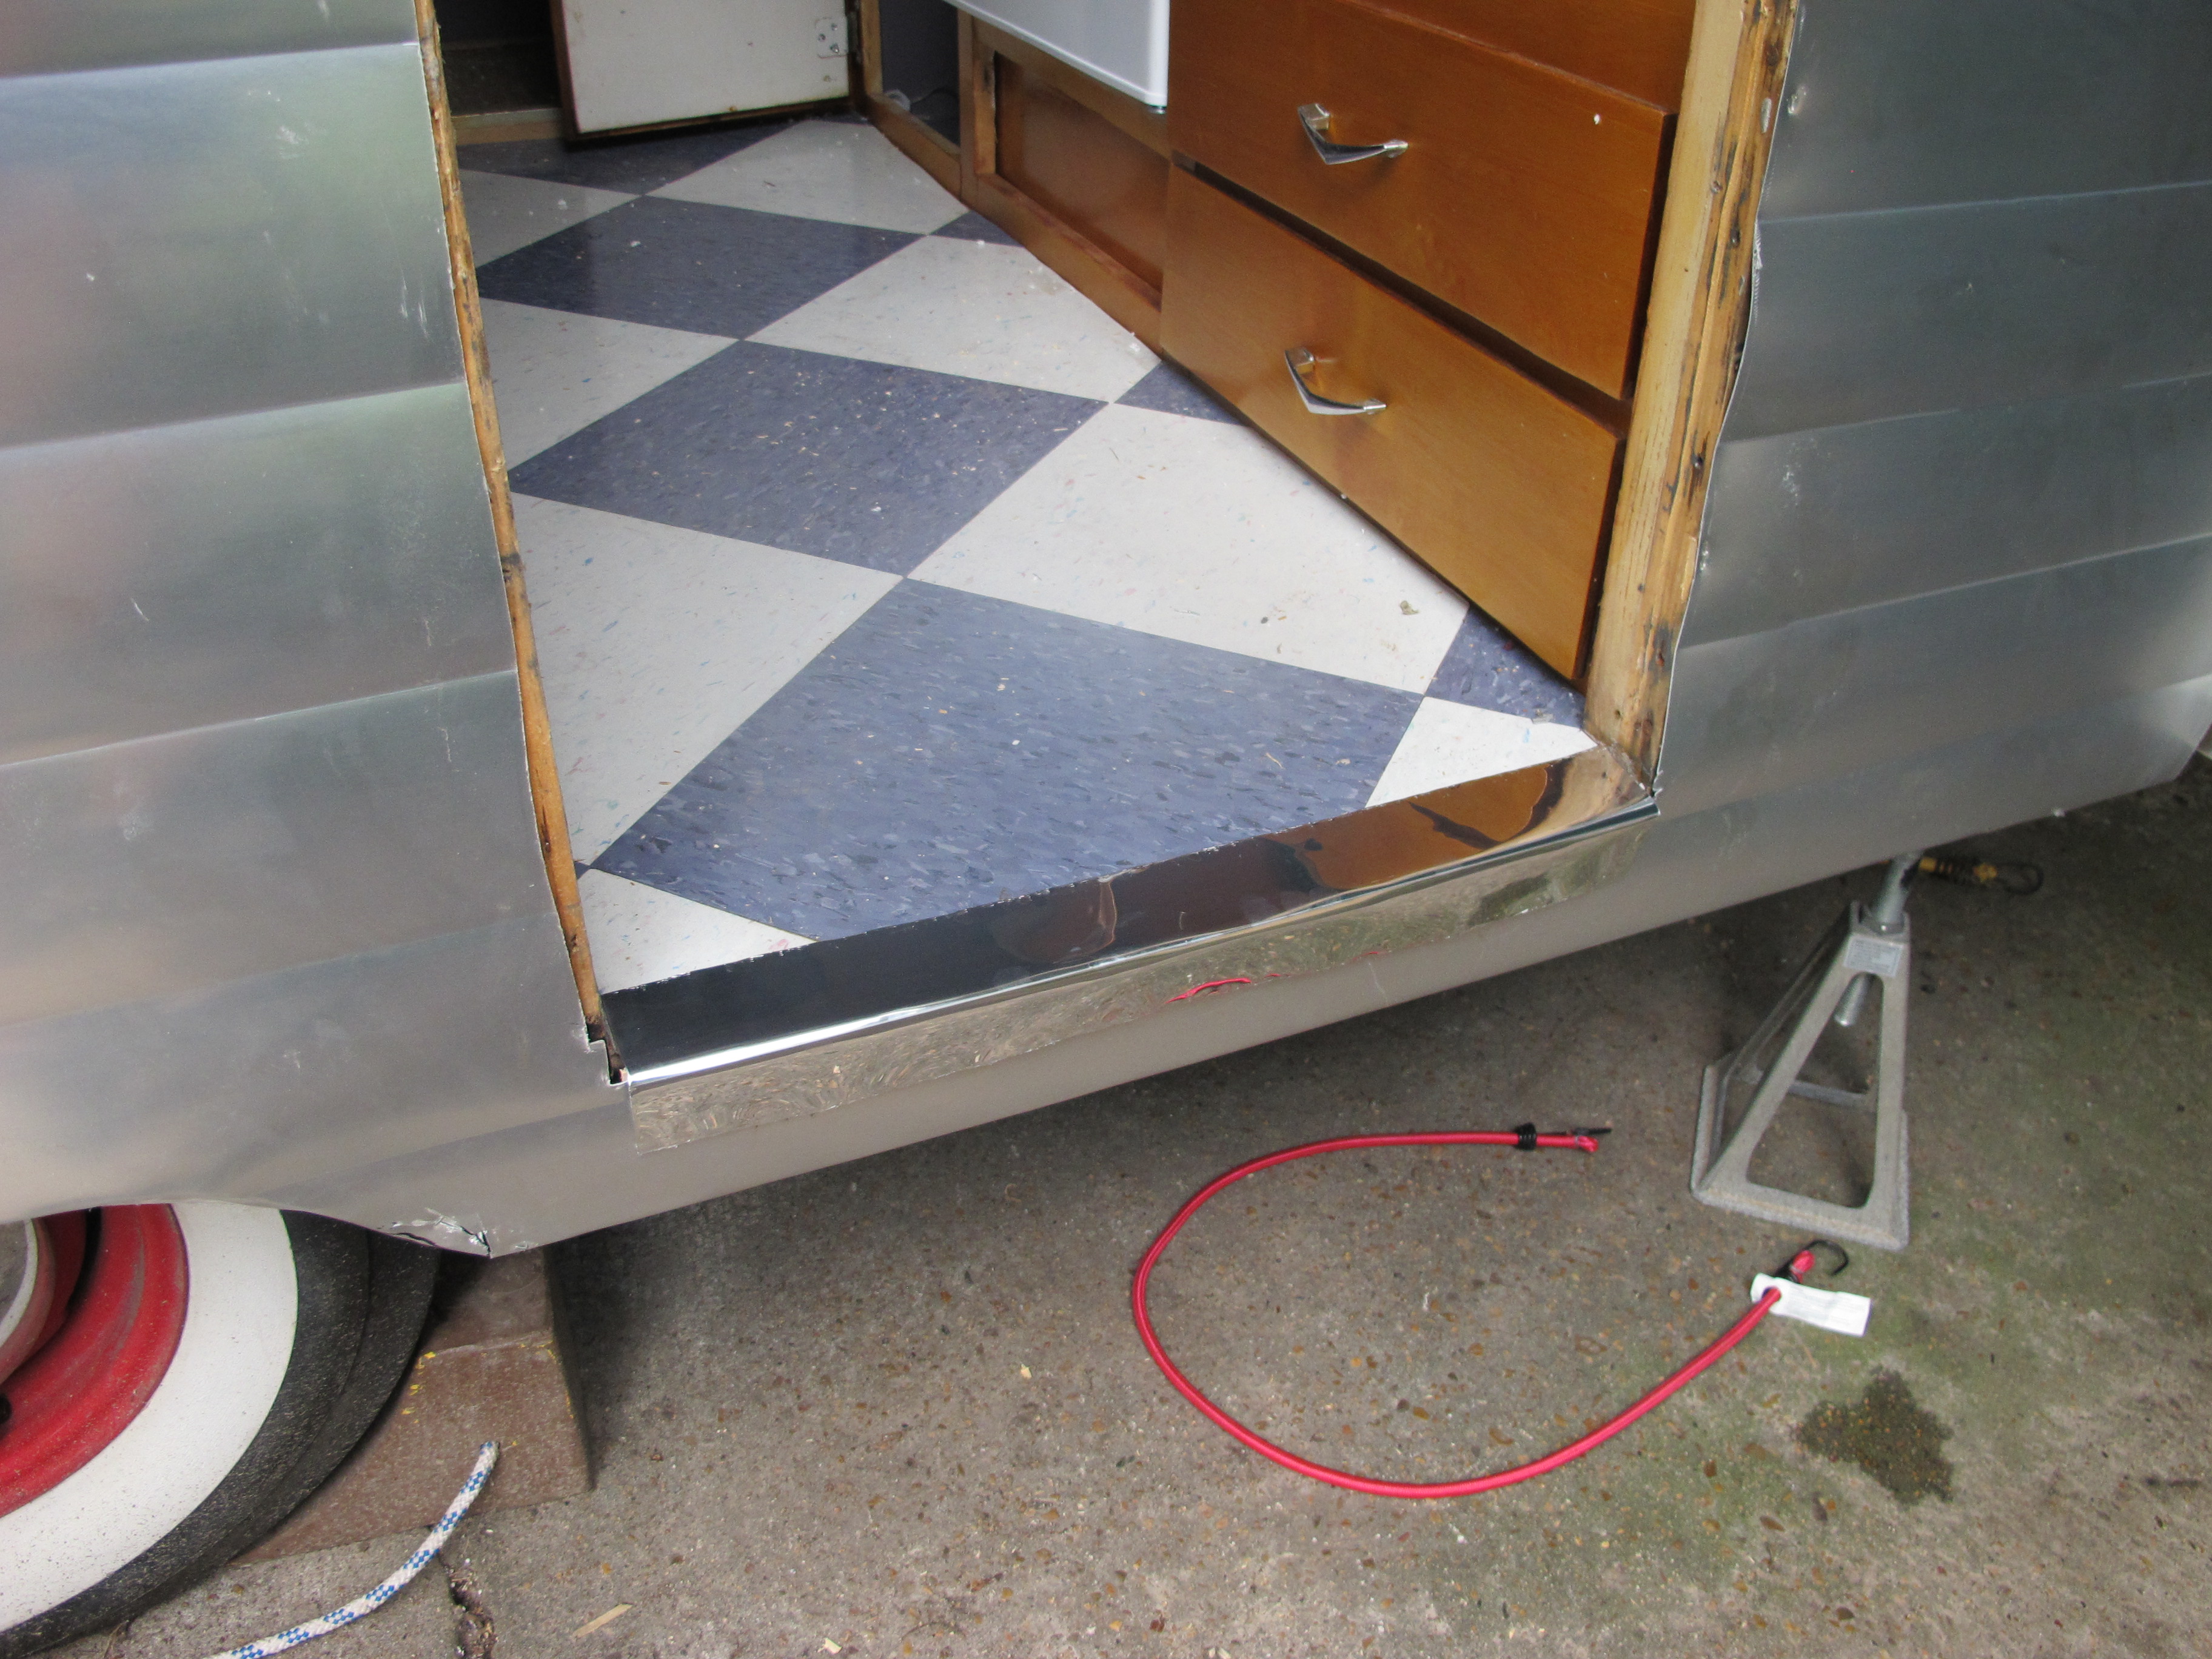
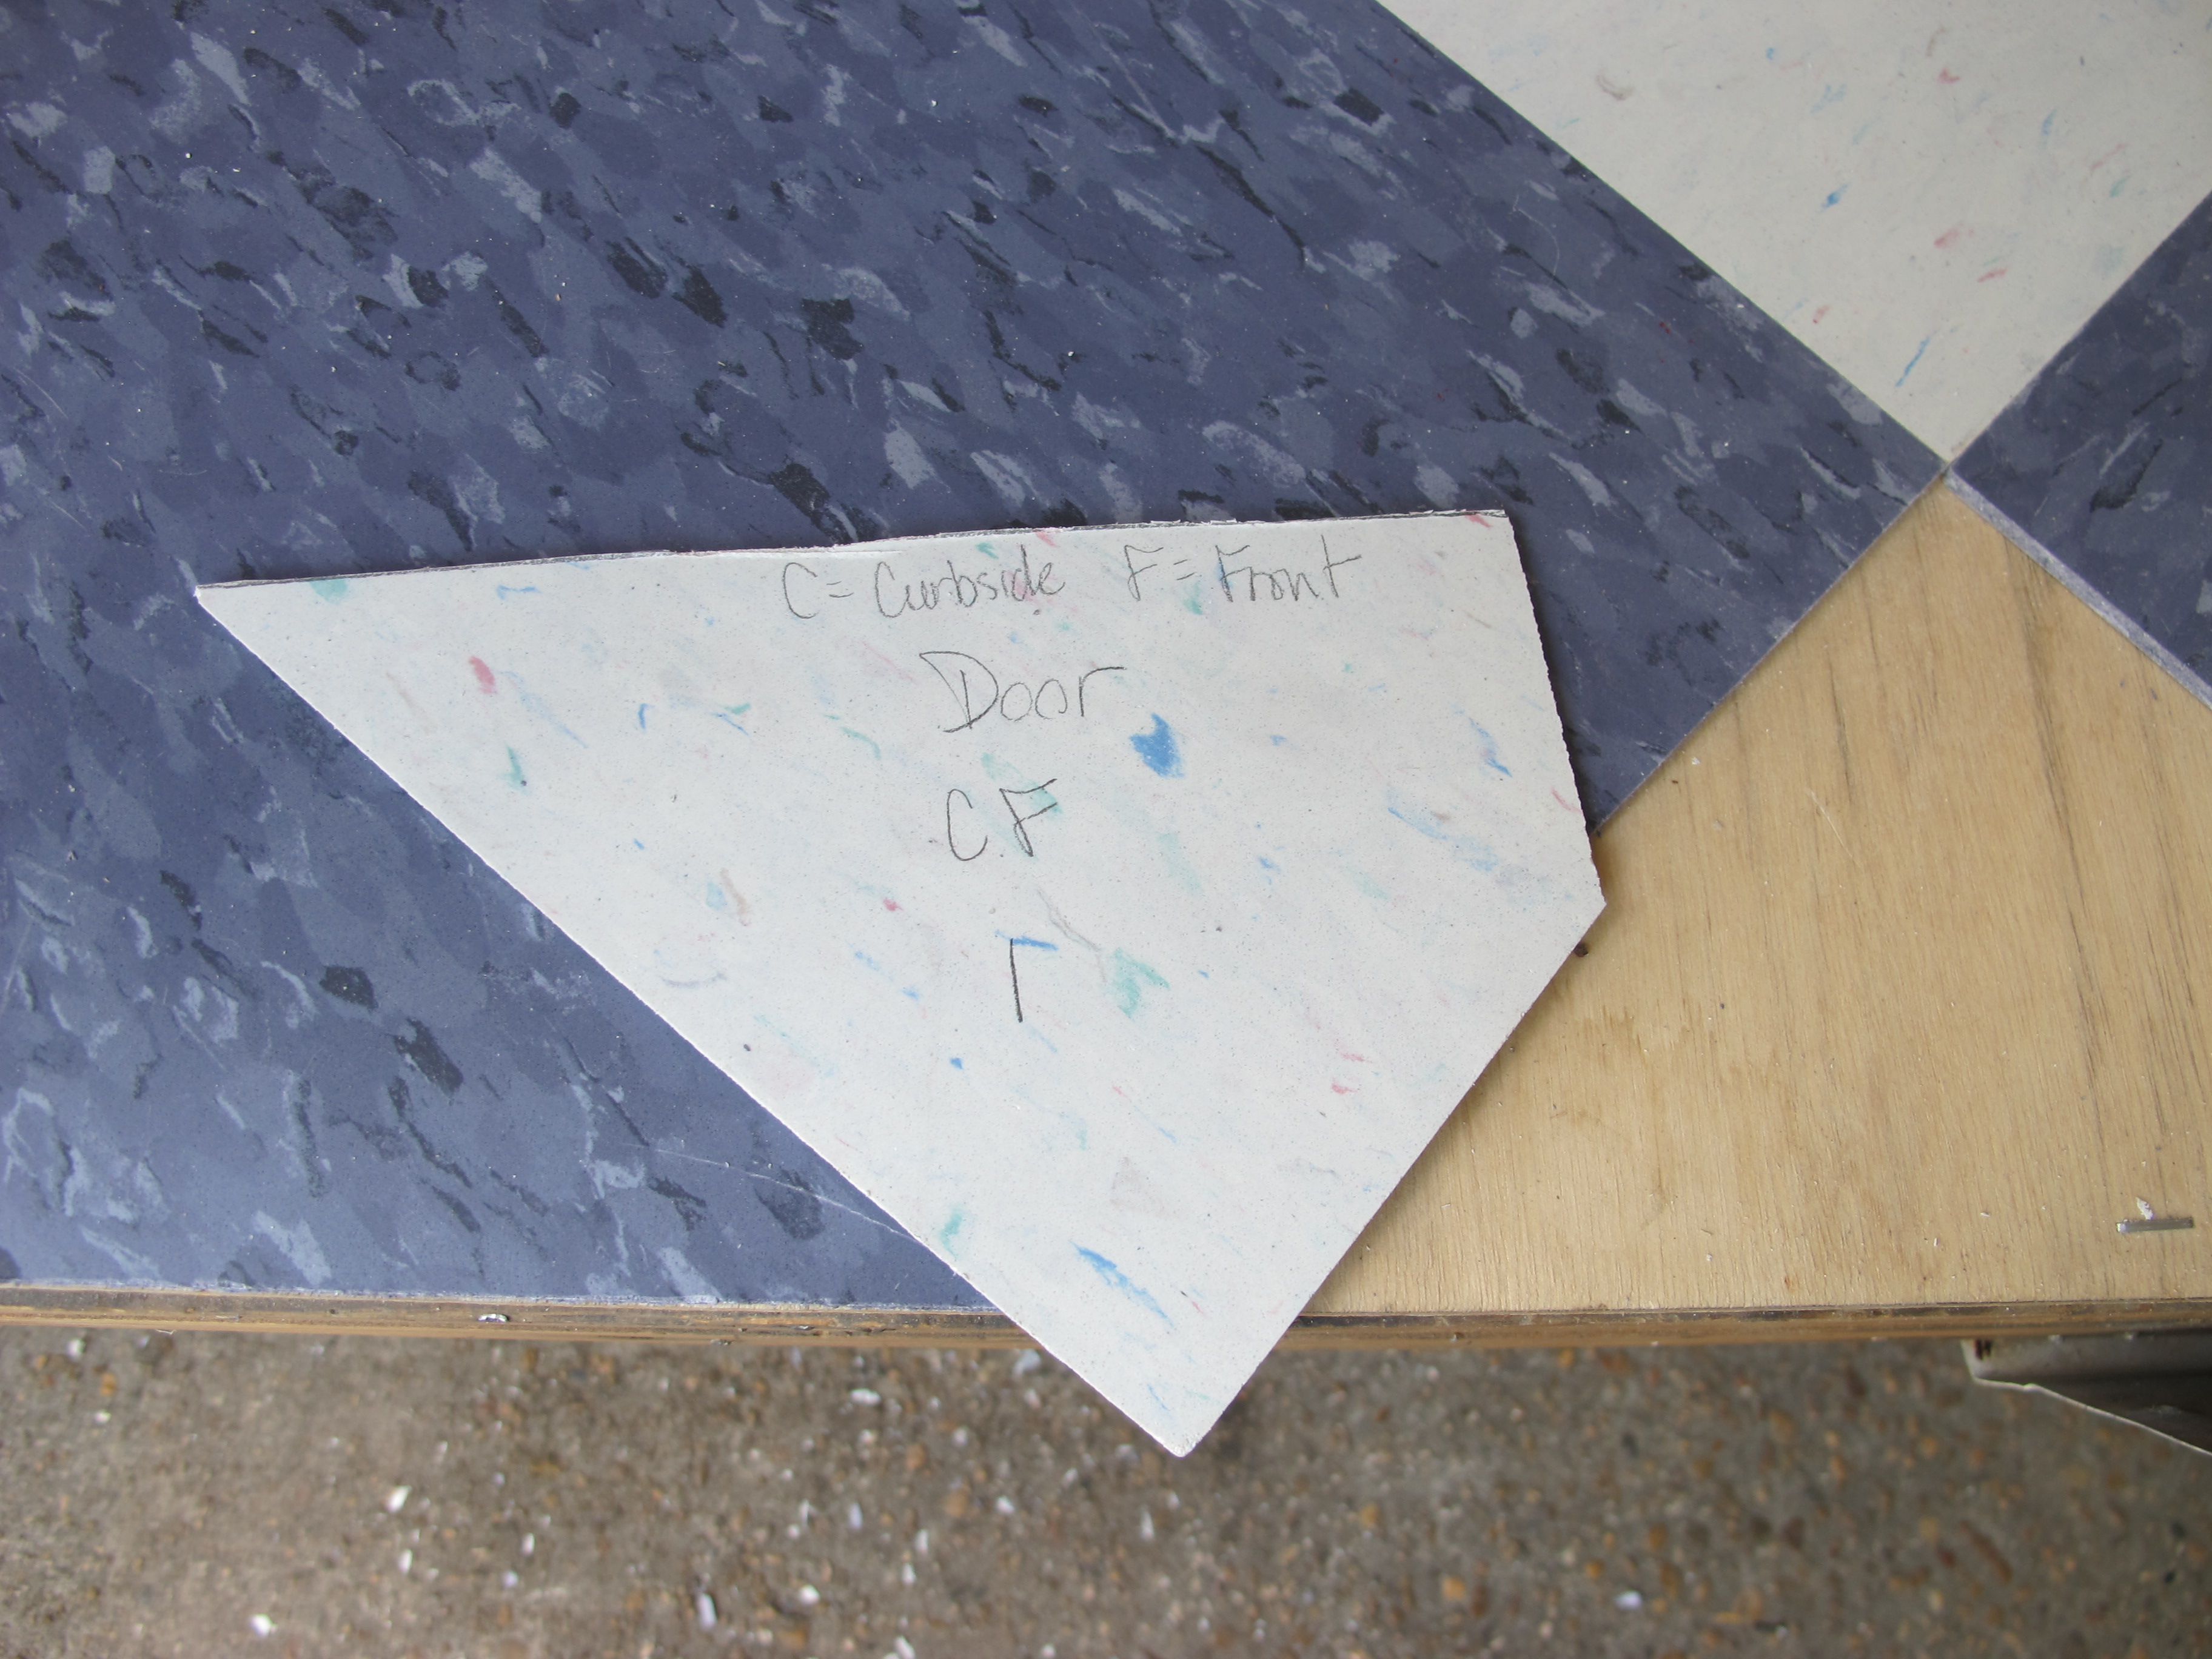
I made this little piece to go in the doorway from leftover skin. I will be doing the same for the top and sides of the door frame. I would also like to use some of the skin for the door itself, but the way it’s bent, I will likely need to take the skin to a metal shop where they have the right tools.

Today, I first removed a few of the stainless screws I had put into the curbing (the little strips of wood all along the outside of the frame that the roof staples into).  I decided that now that the curbing was in place and the curves were achieved, I didn’t need quite as many screws.  I was also worried about the screws being too close together and getting in the way of the screws that will hold the drip rail in place.


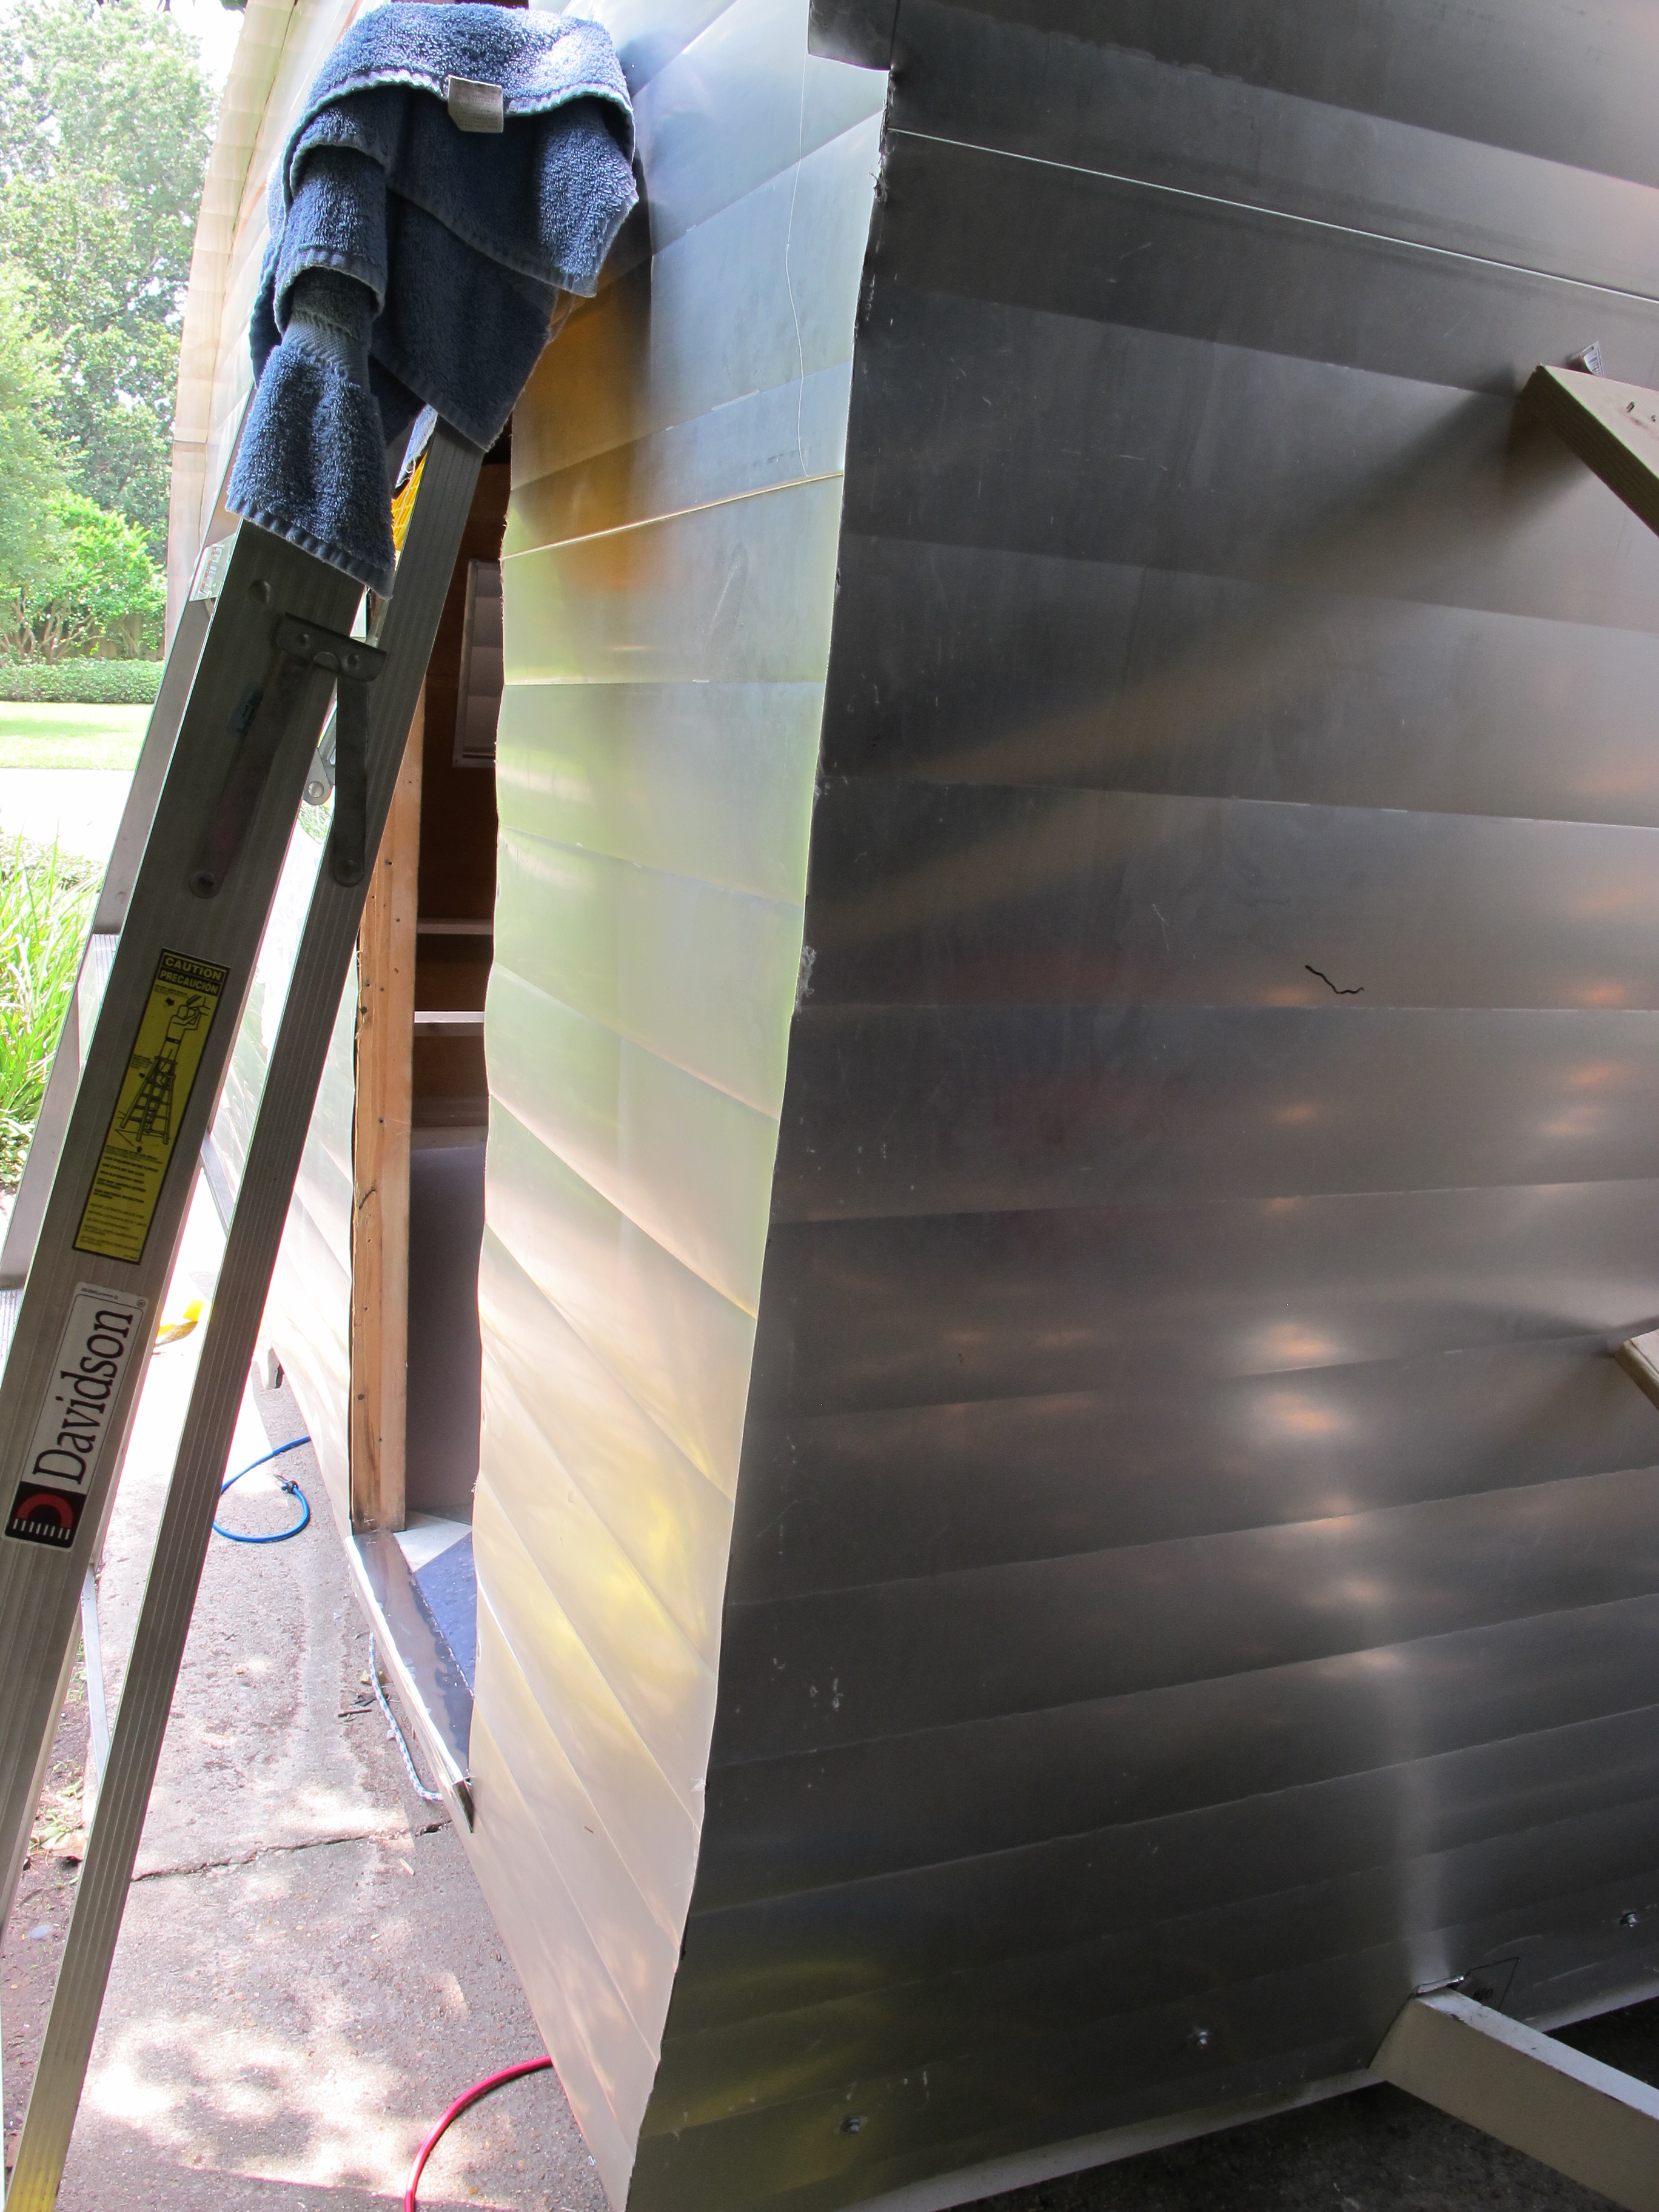
After that, I started securing the skin.  I started at the front, and worked my way toward the rear.  I did small sections on either side, going back and forth to hopefully avoid any buckling in the aluminum.


IMG_4739

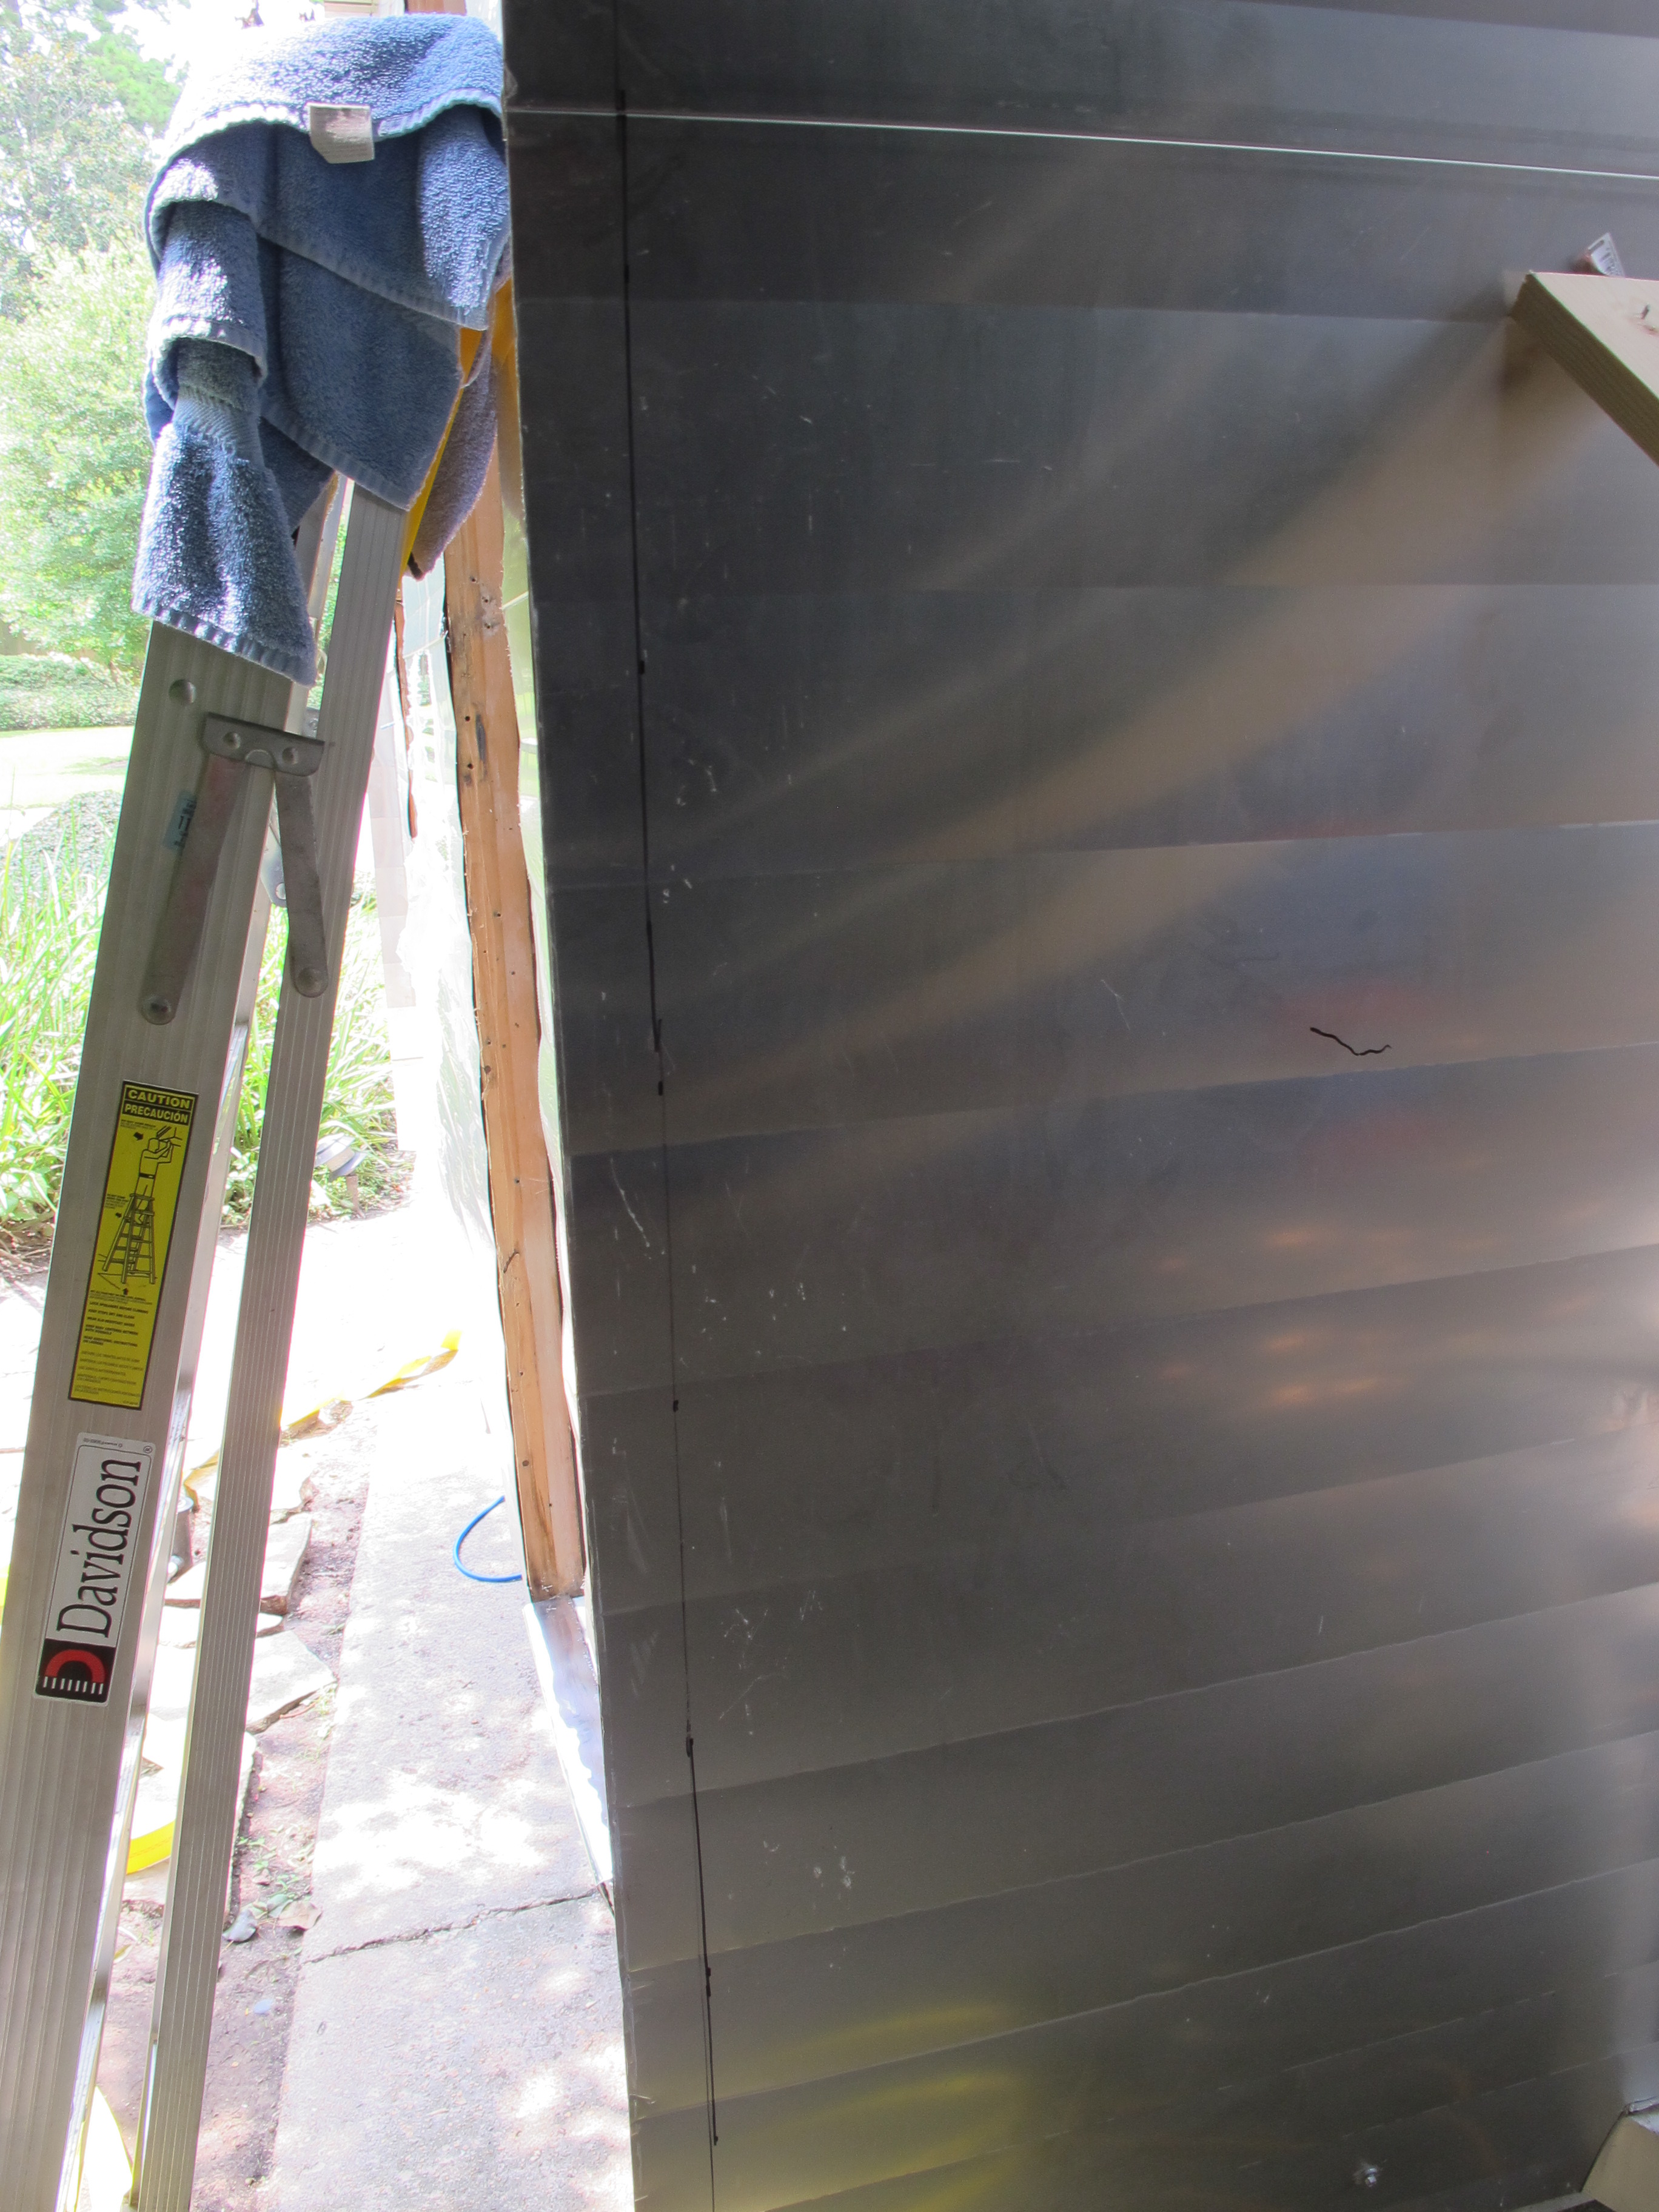
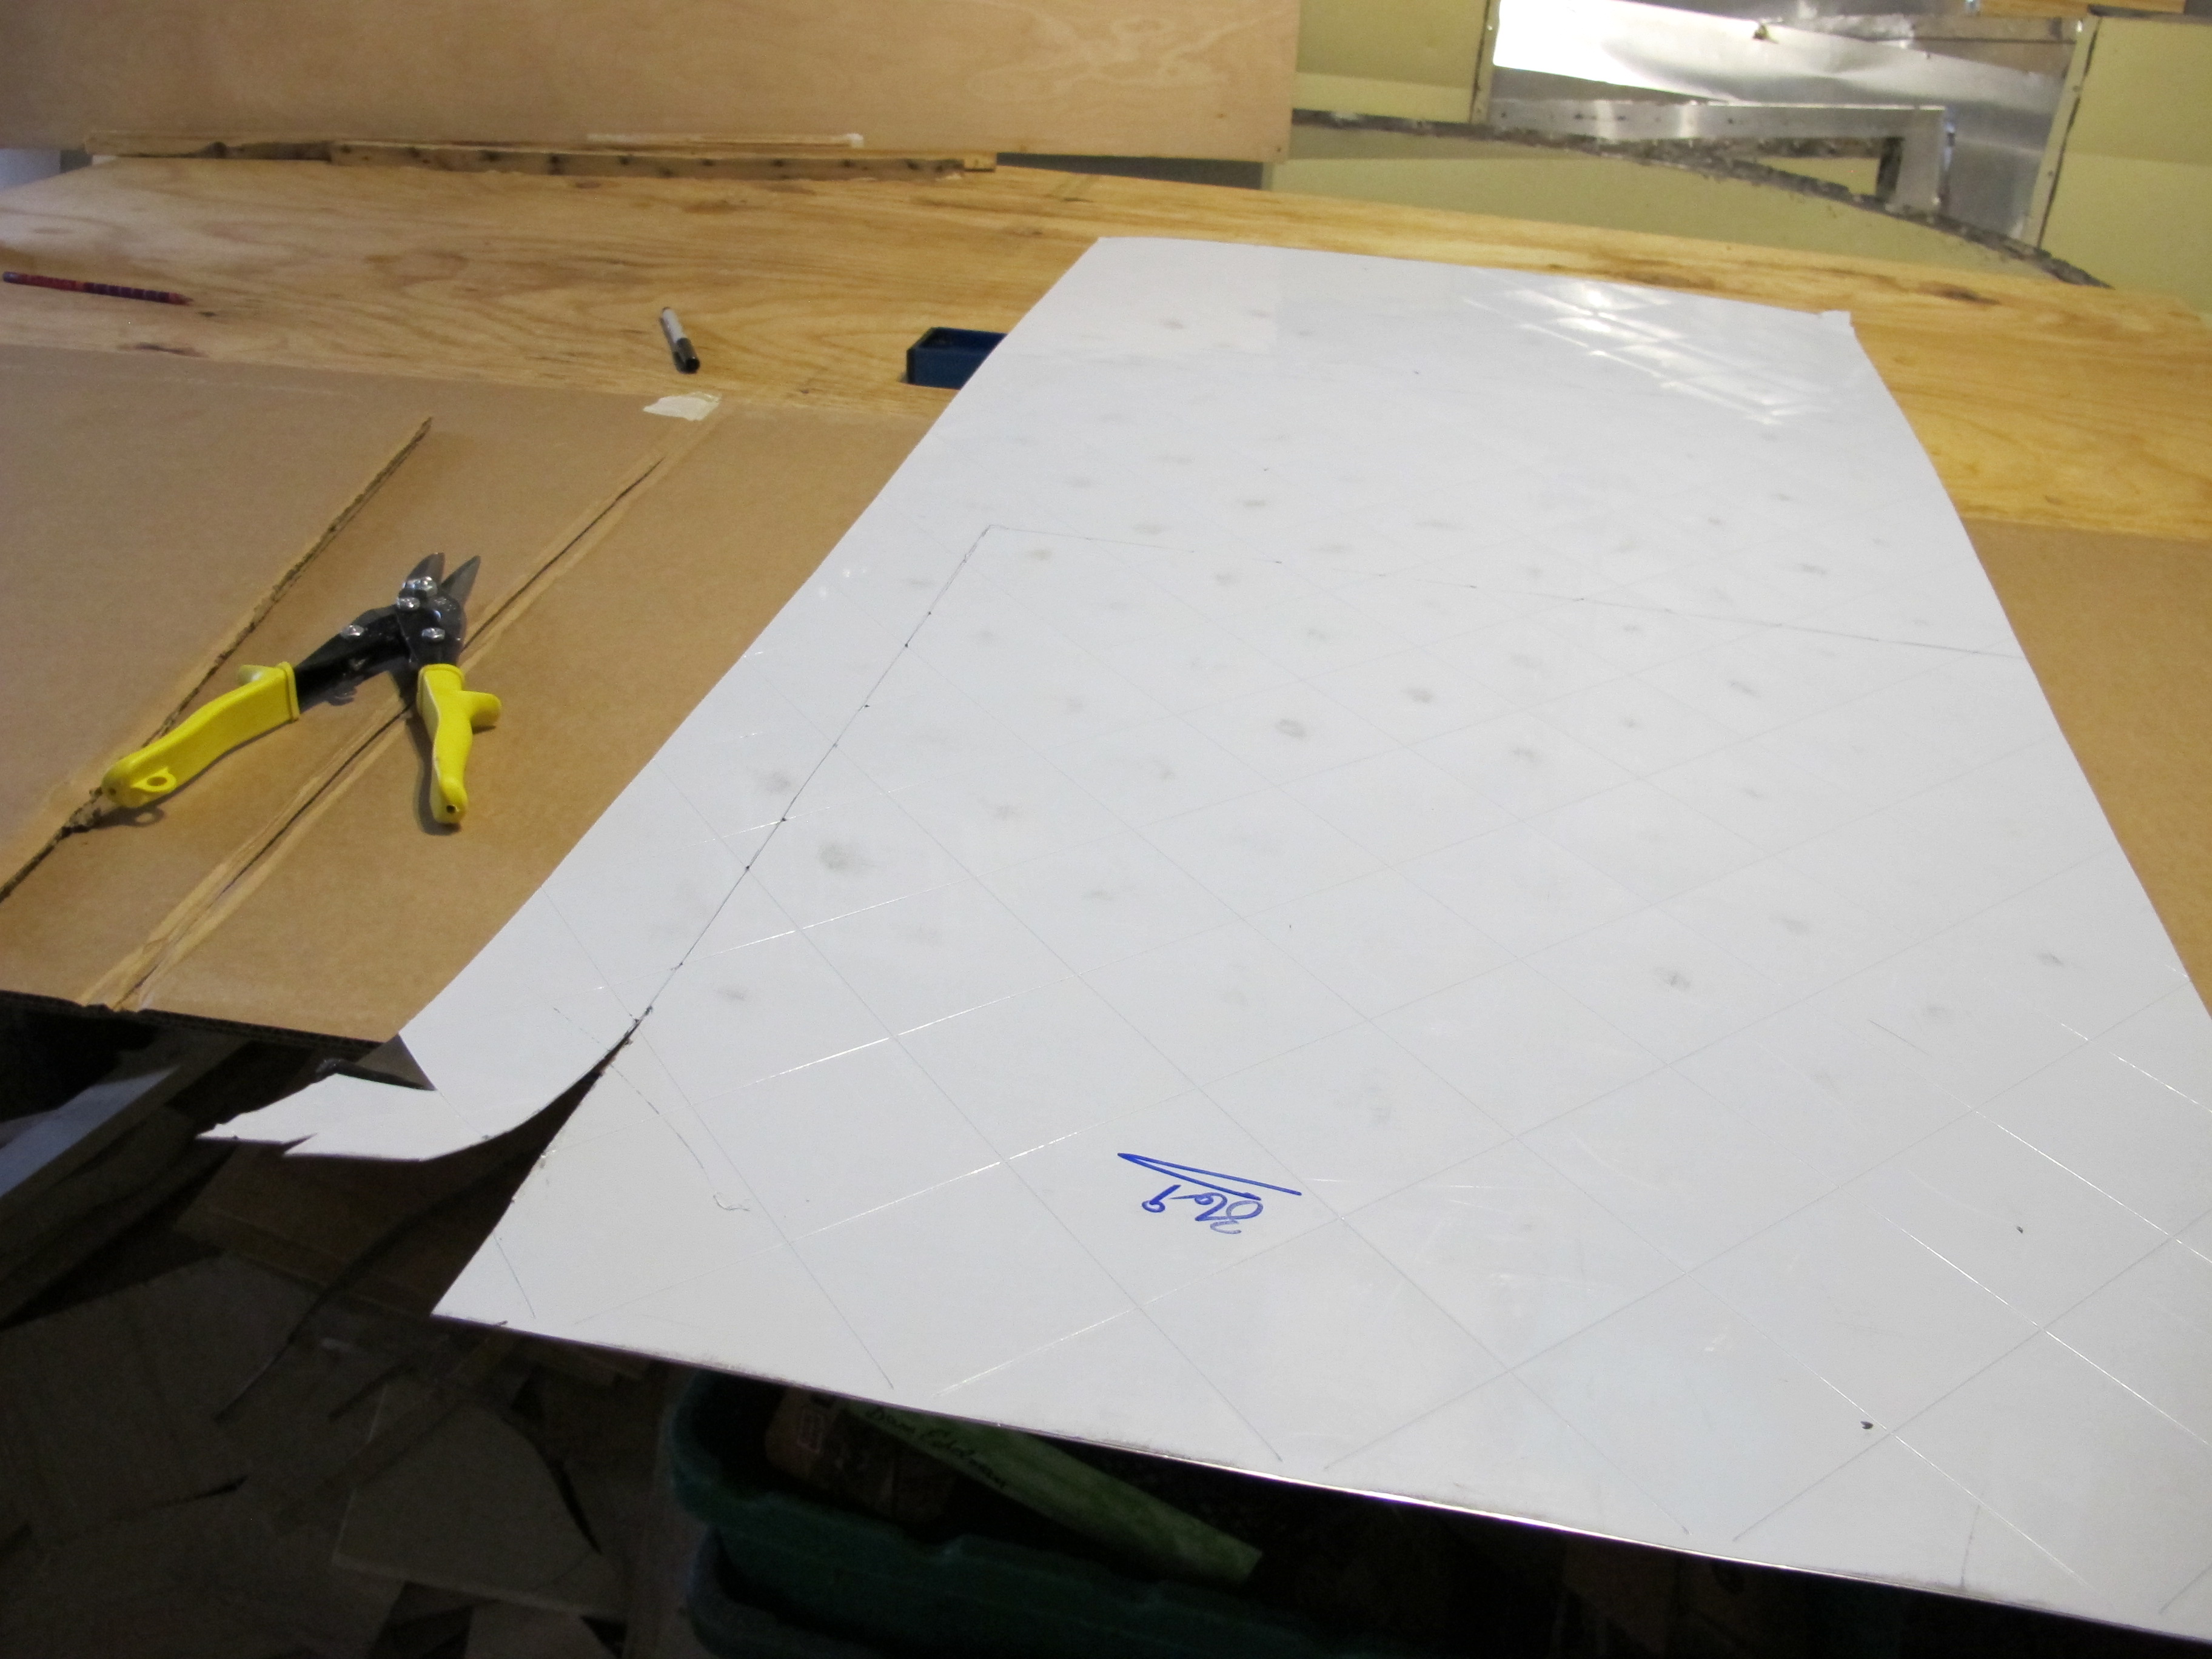
I used a sharpie to draw a line after measuring so that I could cut the excess skin and only leave 1/2″ to fold over.

IMG_4740

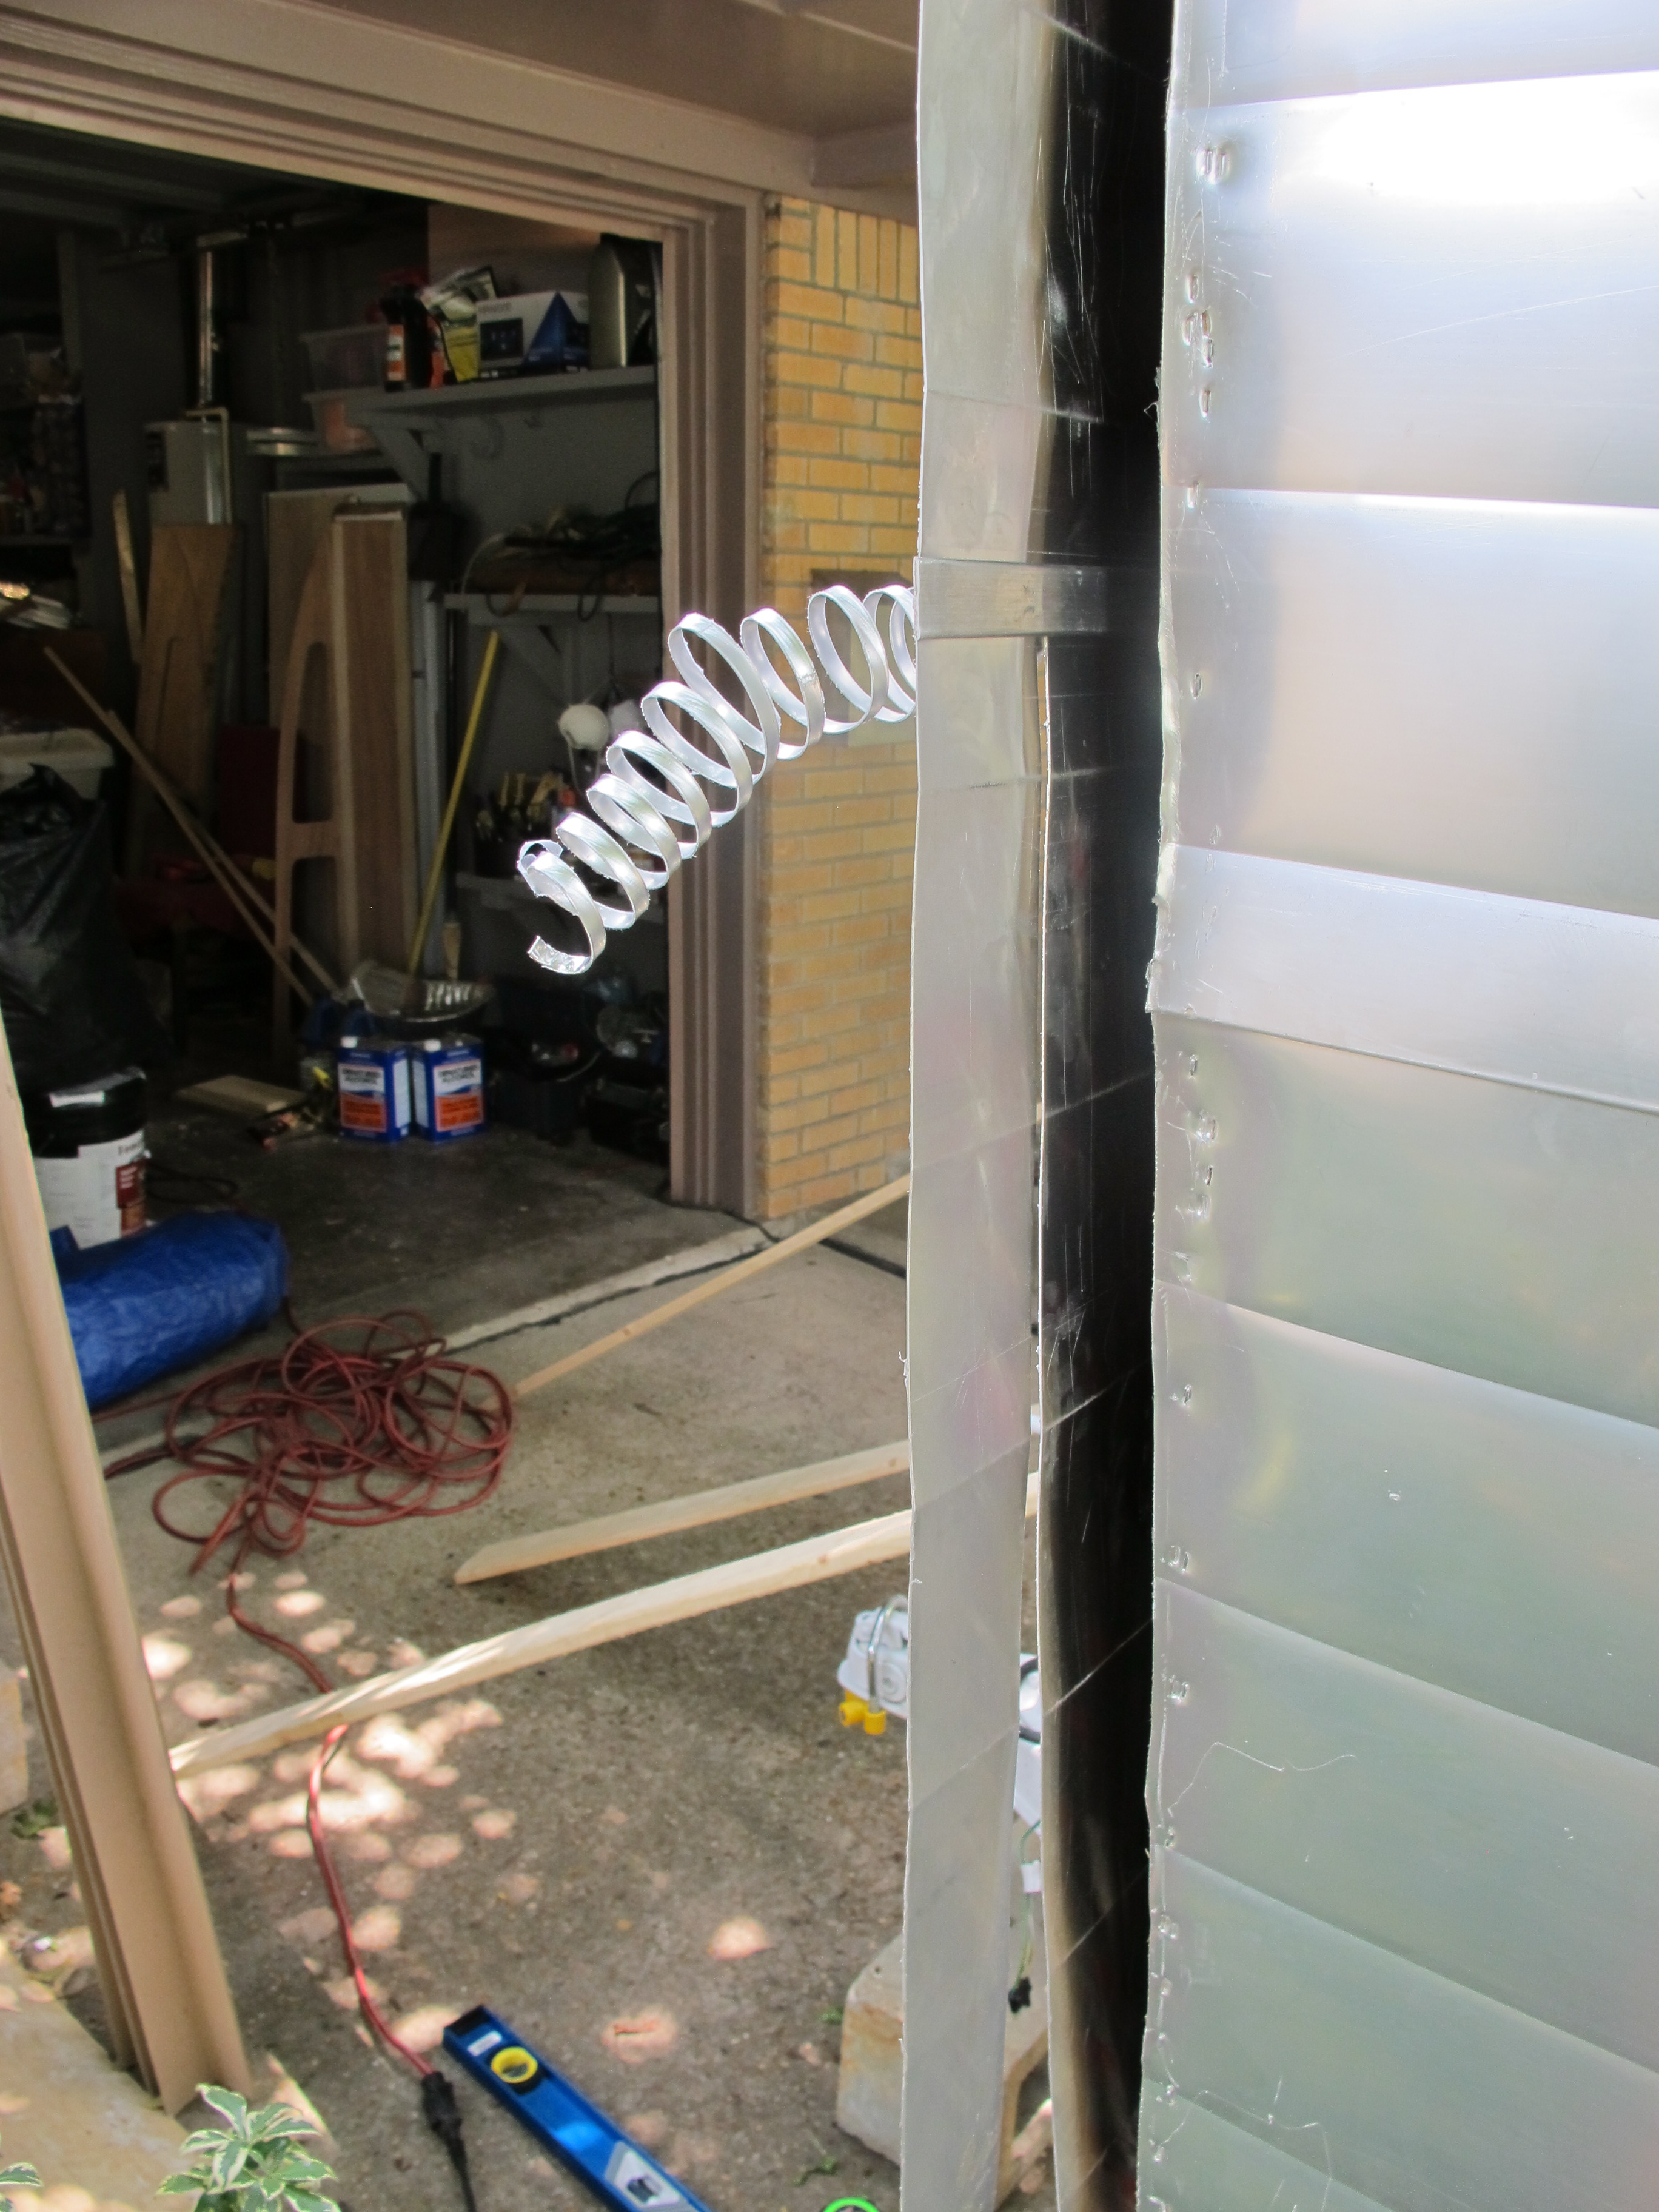
Here’s what it looks like after cutting with my metal shears. I cuts a little slice right out of the middle. This allows the larger piece of metal you’re cutting off to stay put and not have to curl up. It’s pretty neat how it works!

IMG_4742

All ready to start folding over. I only cut sections at a time and then folded over.


IMG_4743

Here’s what it looks like after holding down a wood block close to the edge, then hammering over the edge with a rubber mallet. This was definitely a good arm workout!

IMG_4744

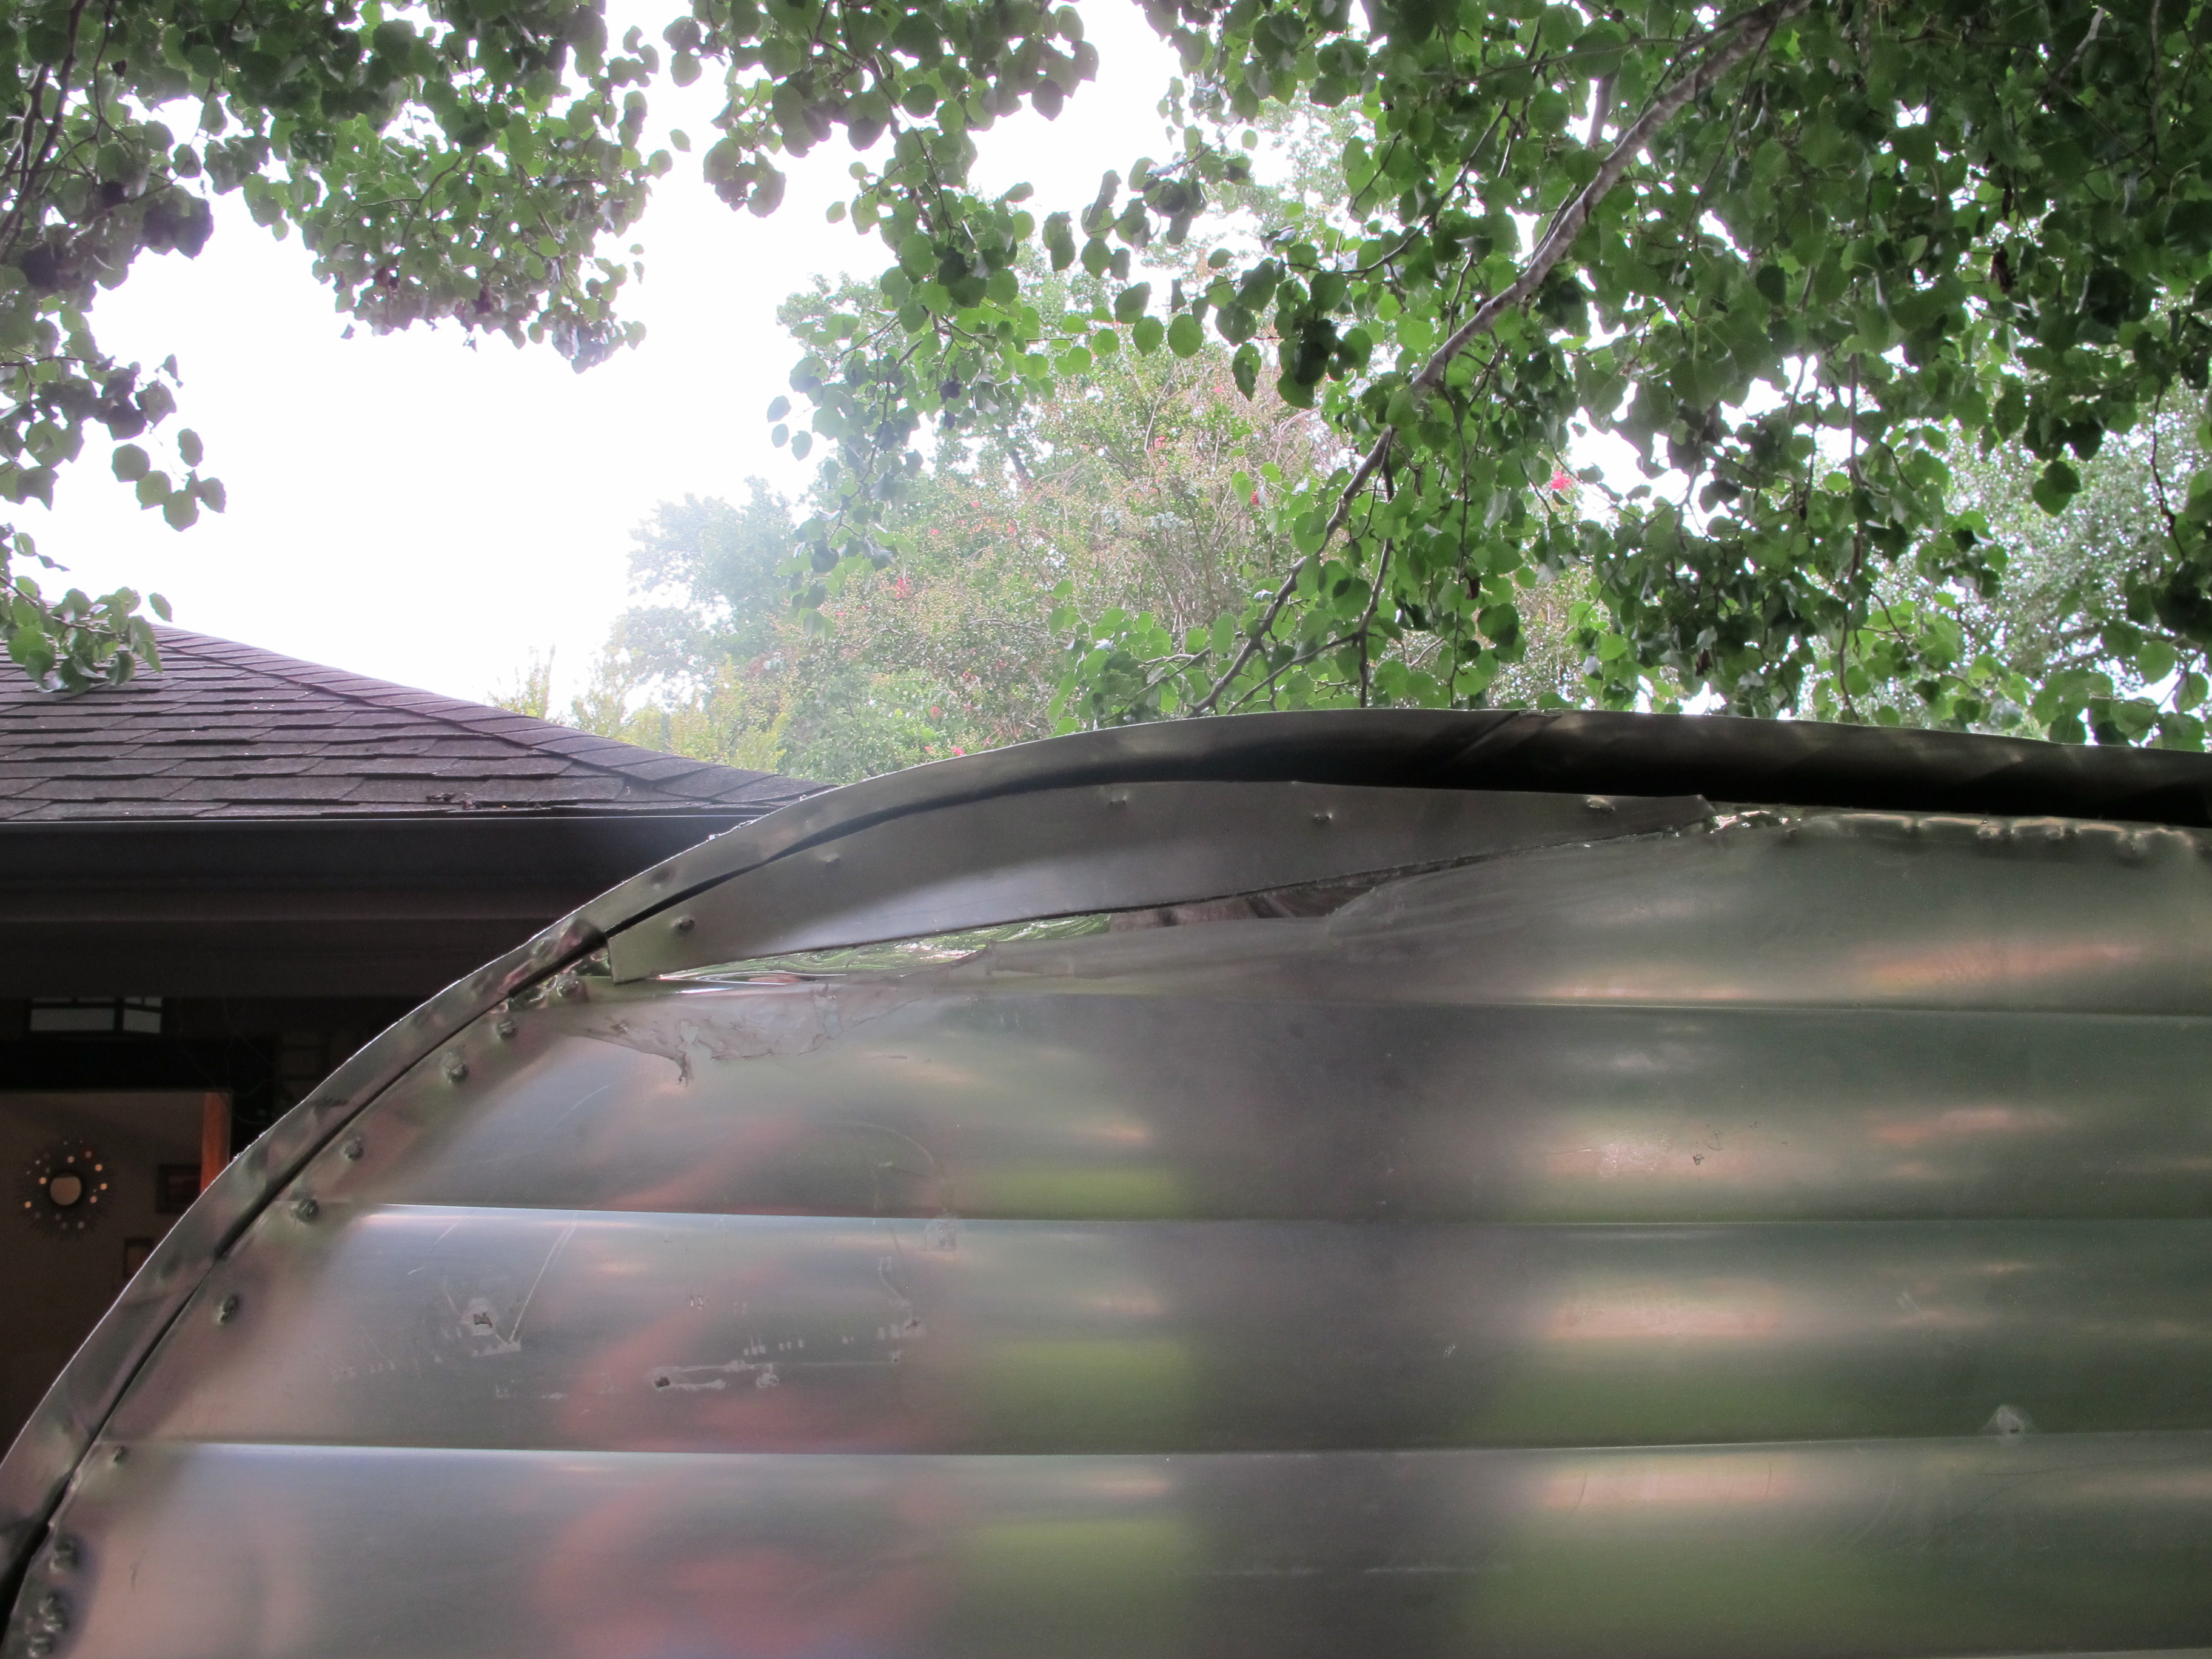
Front panel is getting close!

IMG_4746

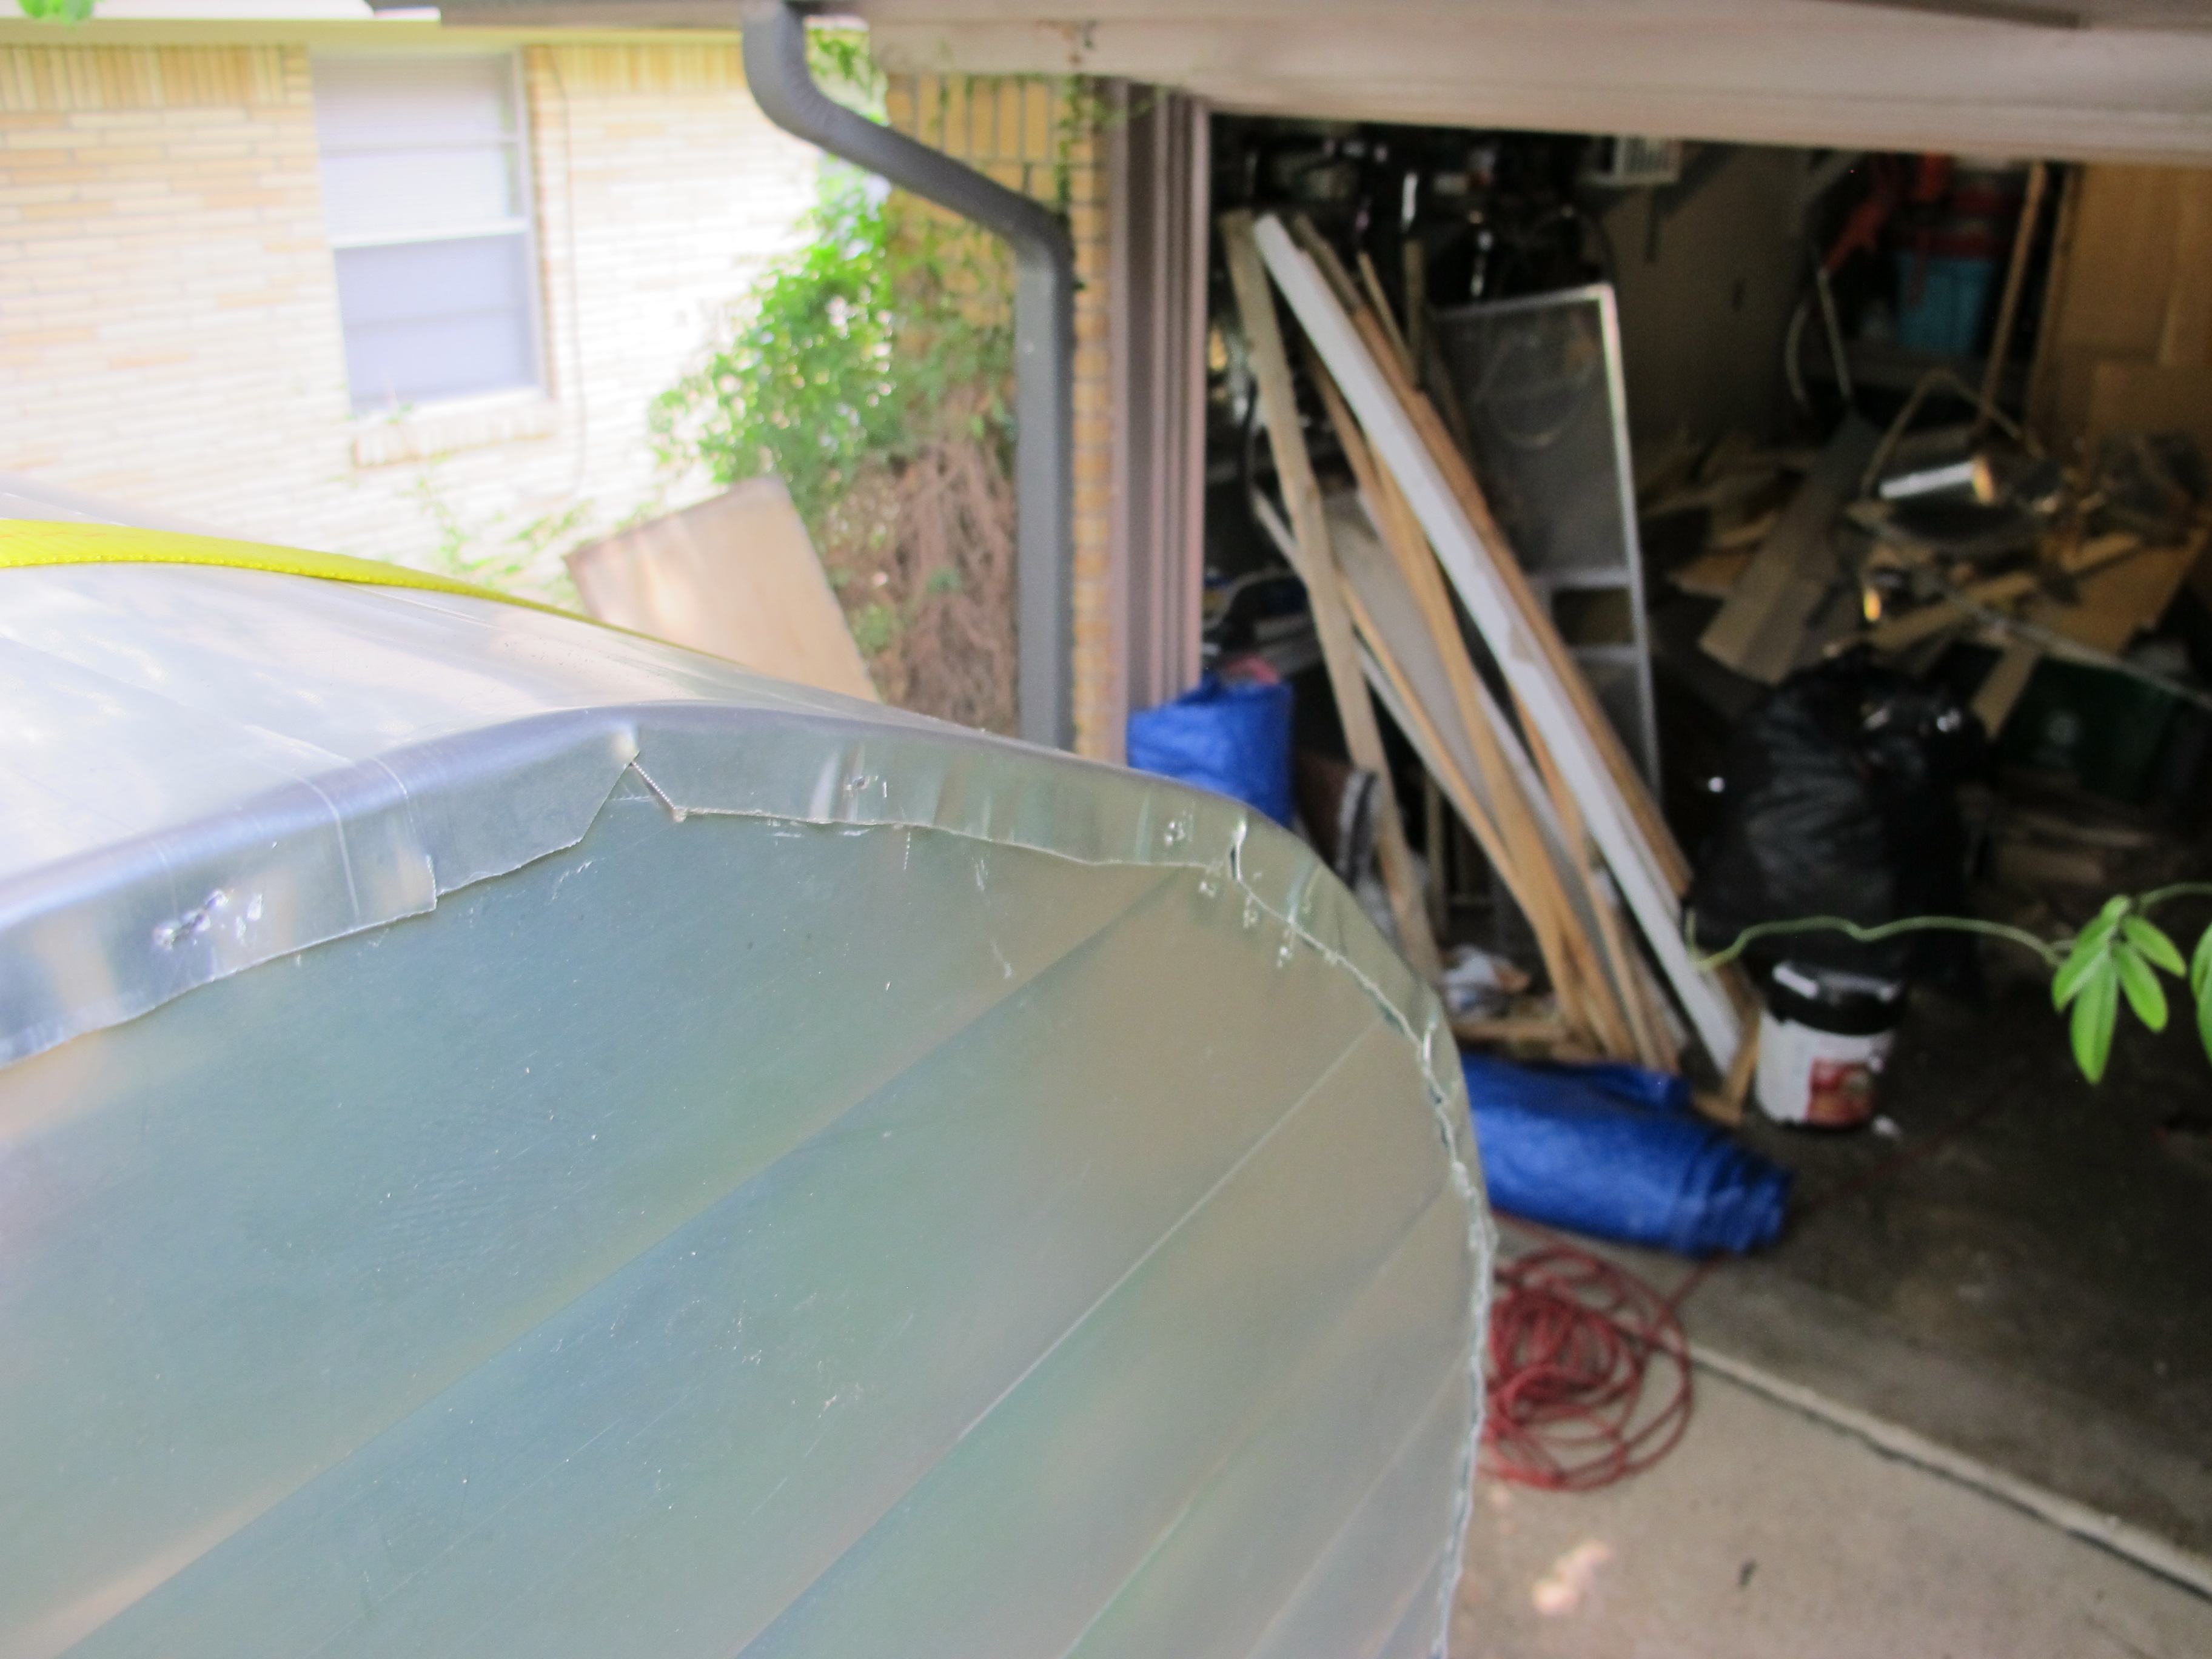
As you can see here, I cut little triangular notches in the aluminum on the really curvy parts so that they would lay flat after folding over. It worked really well!

IMG_4747

Ugh! Buckling! I’m not sure what caused this, but I think it might have been the insulation on the opposite side that was sticking up a little too much.


I eventually corrected the buckling, but unfortunately the whole roof moved slightly toward the street side as a result.  Luckily I had enough skin left on the curb side to make up for it.  It was slight enough of a change the it didn’t make the pattern in the skin look uneven (thank goodness!).

IMG_4753

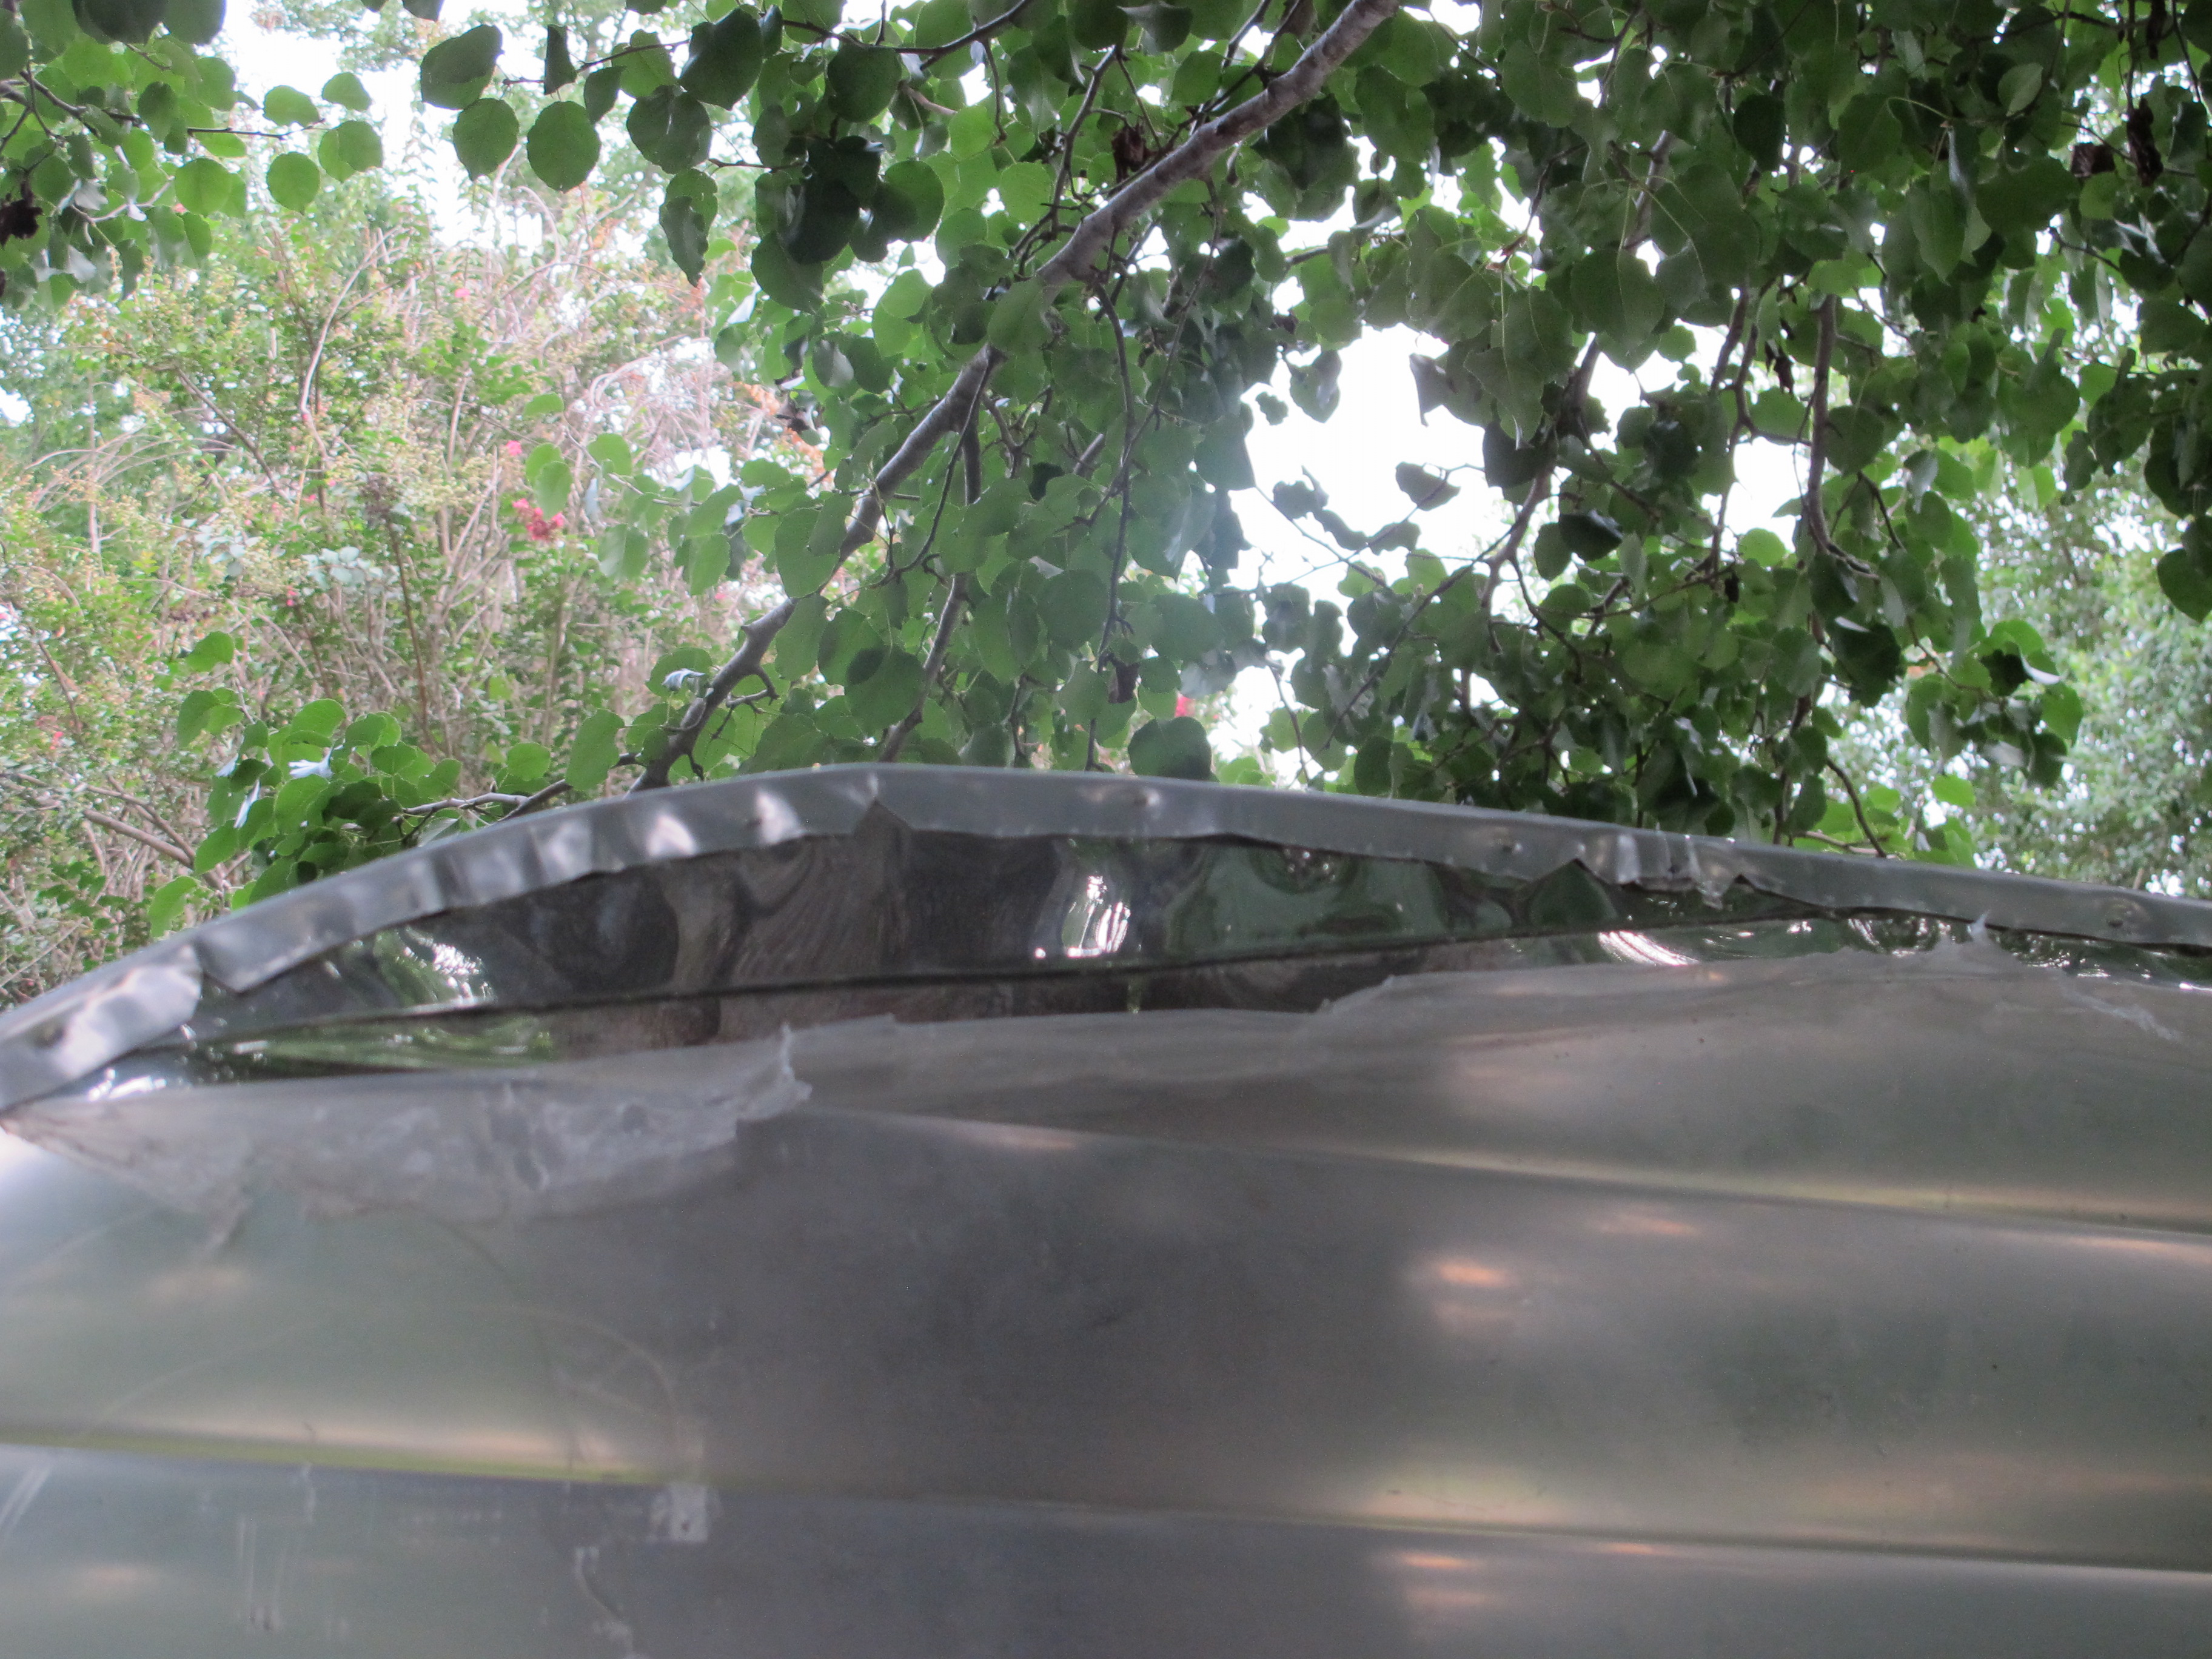
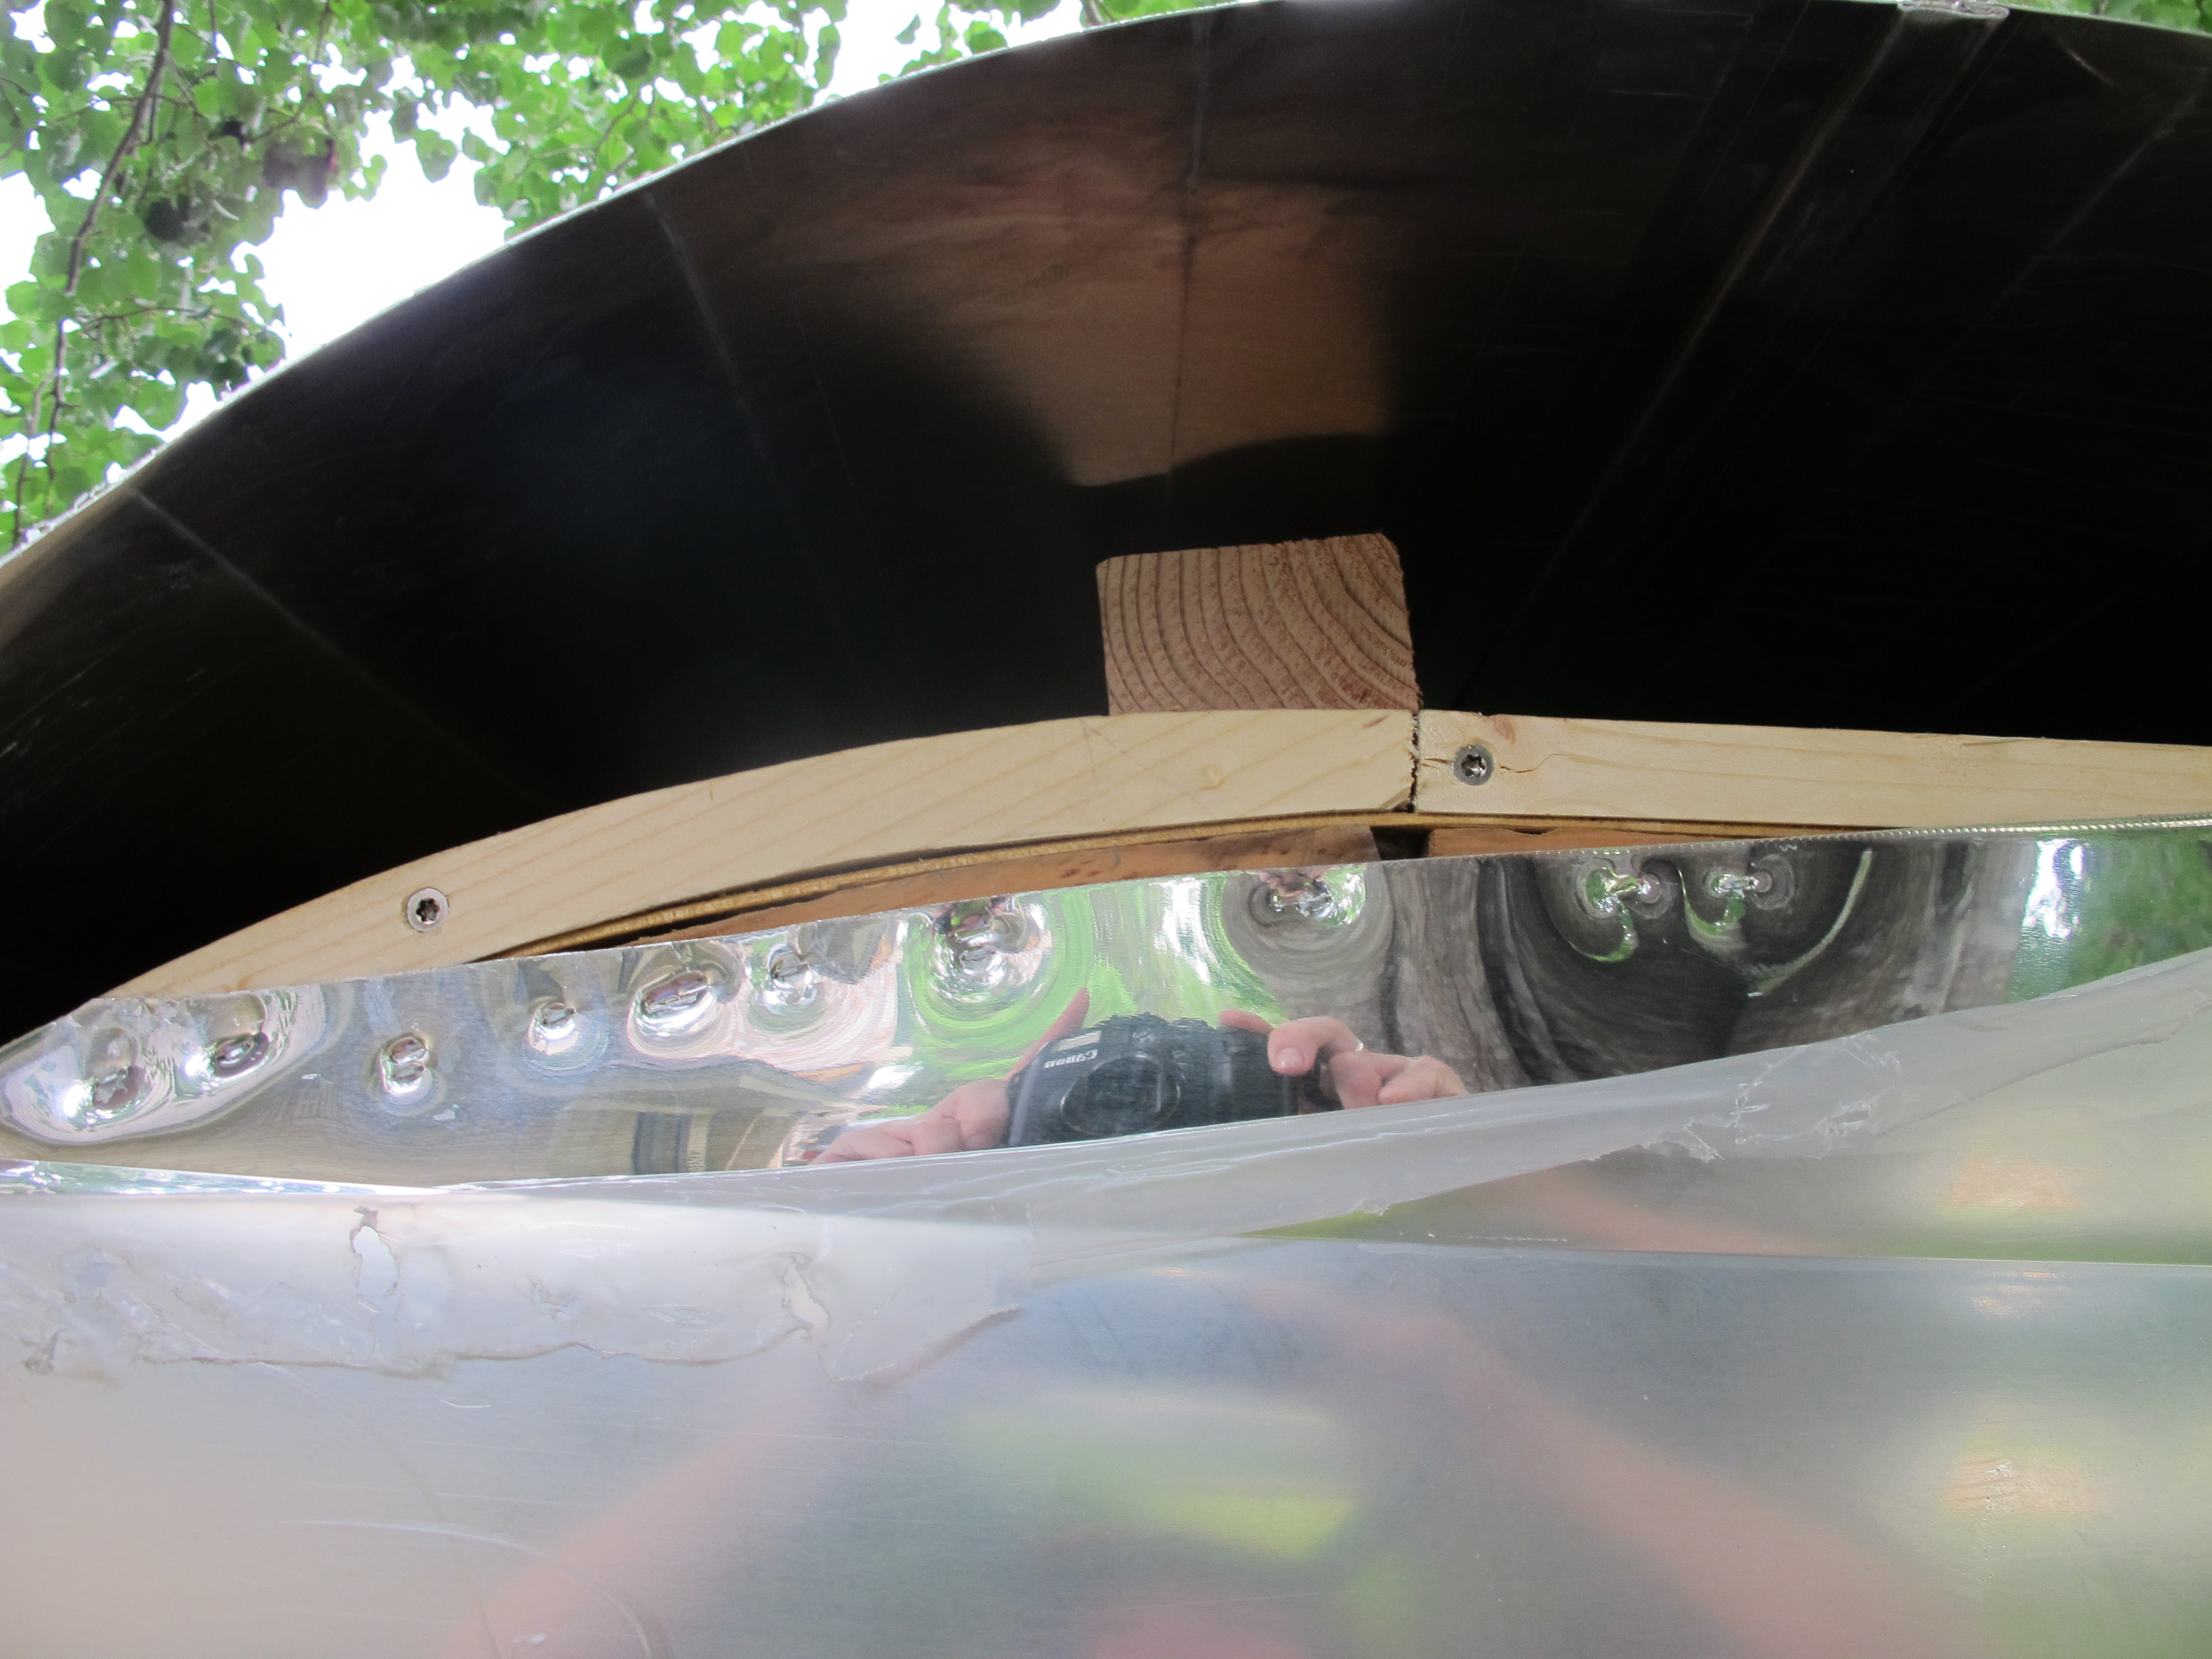
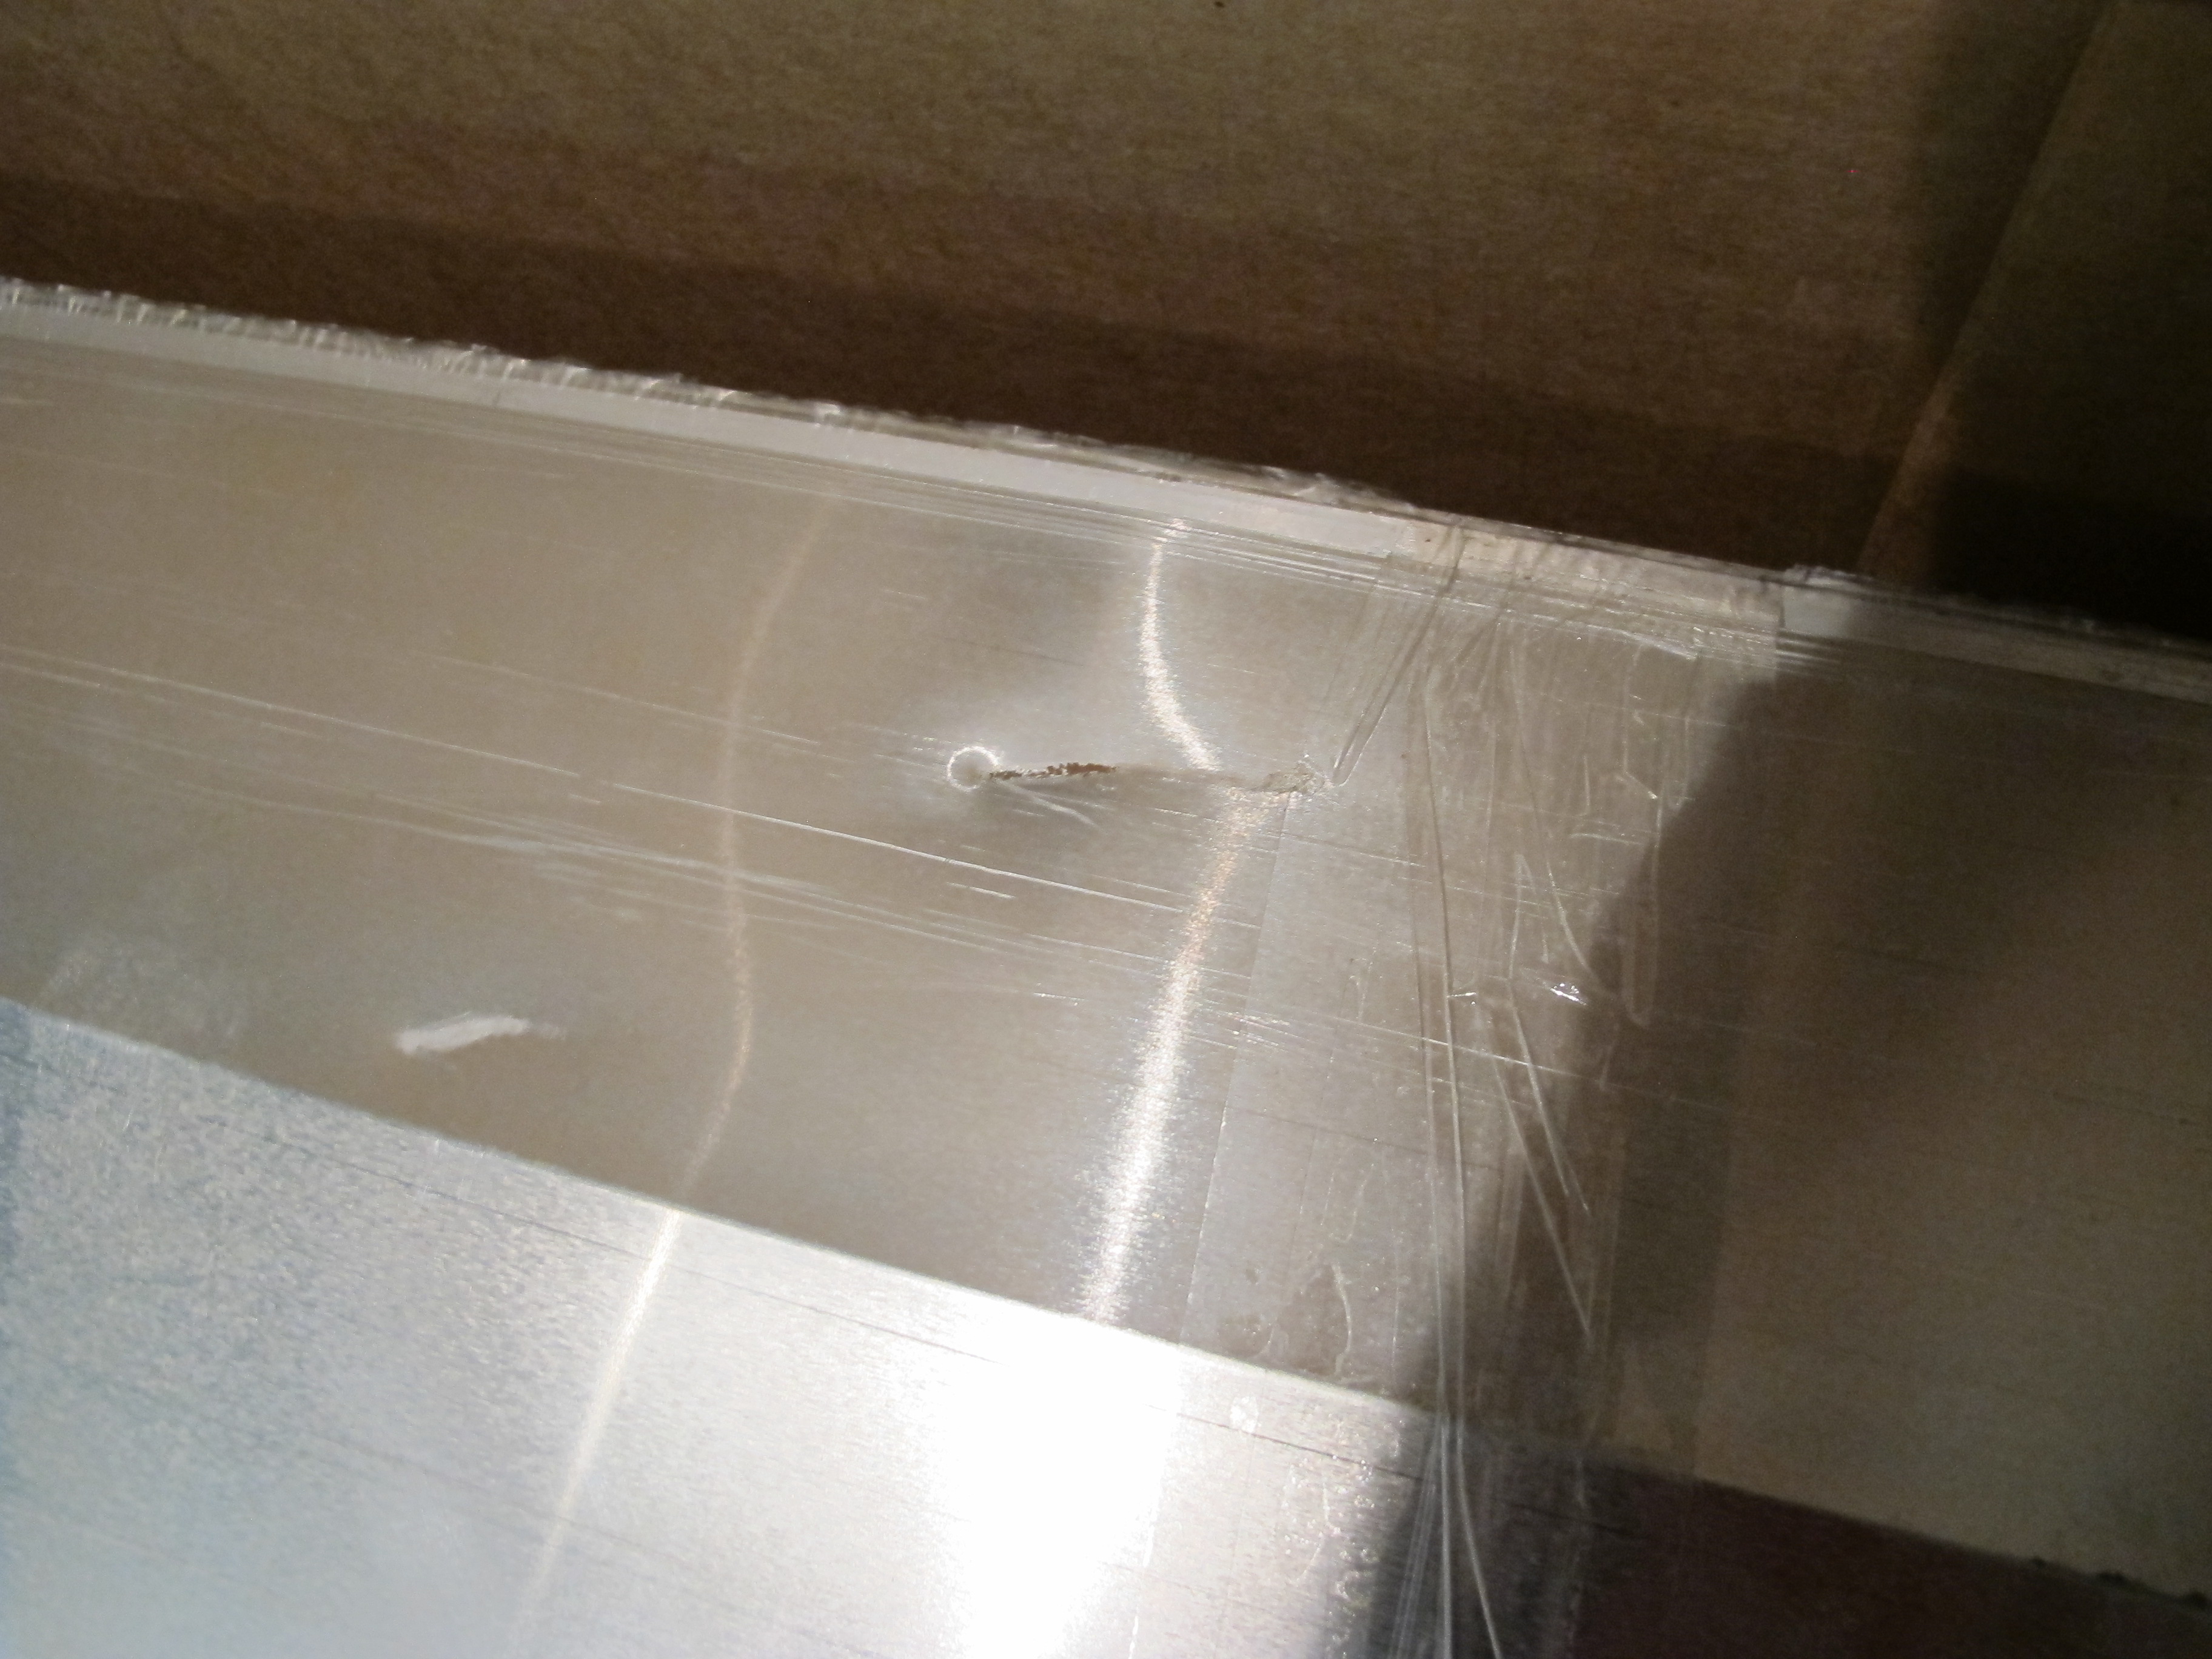
Here’s a close up of the patch I did now that the roof is stapled down. It’s not really that noticeable I don’t think. Hopefully it will be even less noticeable with the drip rail over it.


IMG_4751

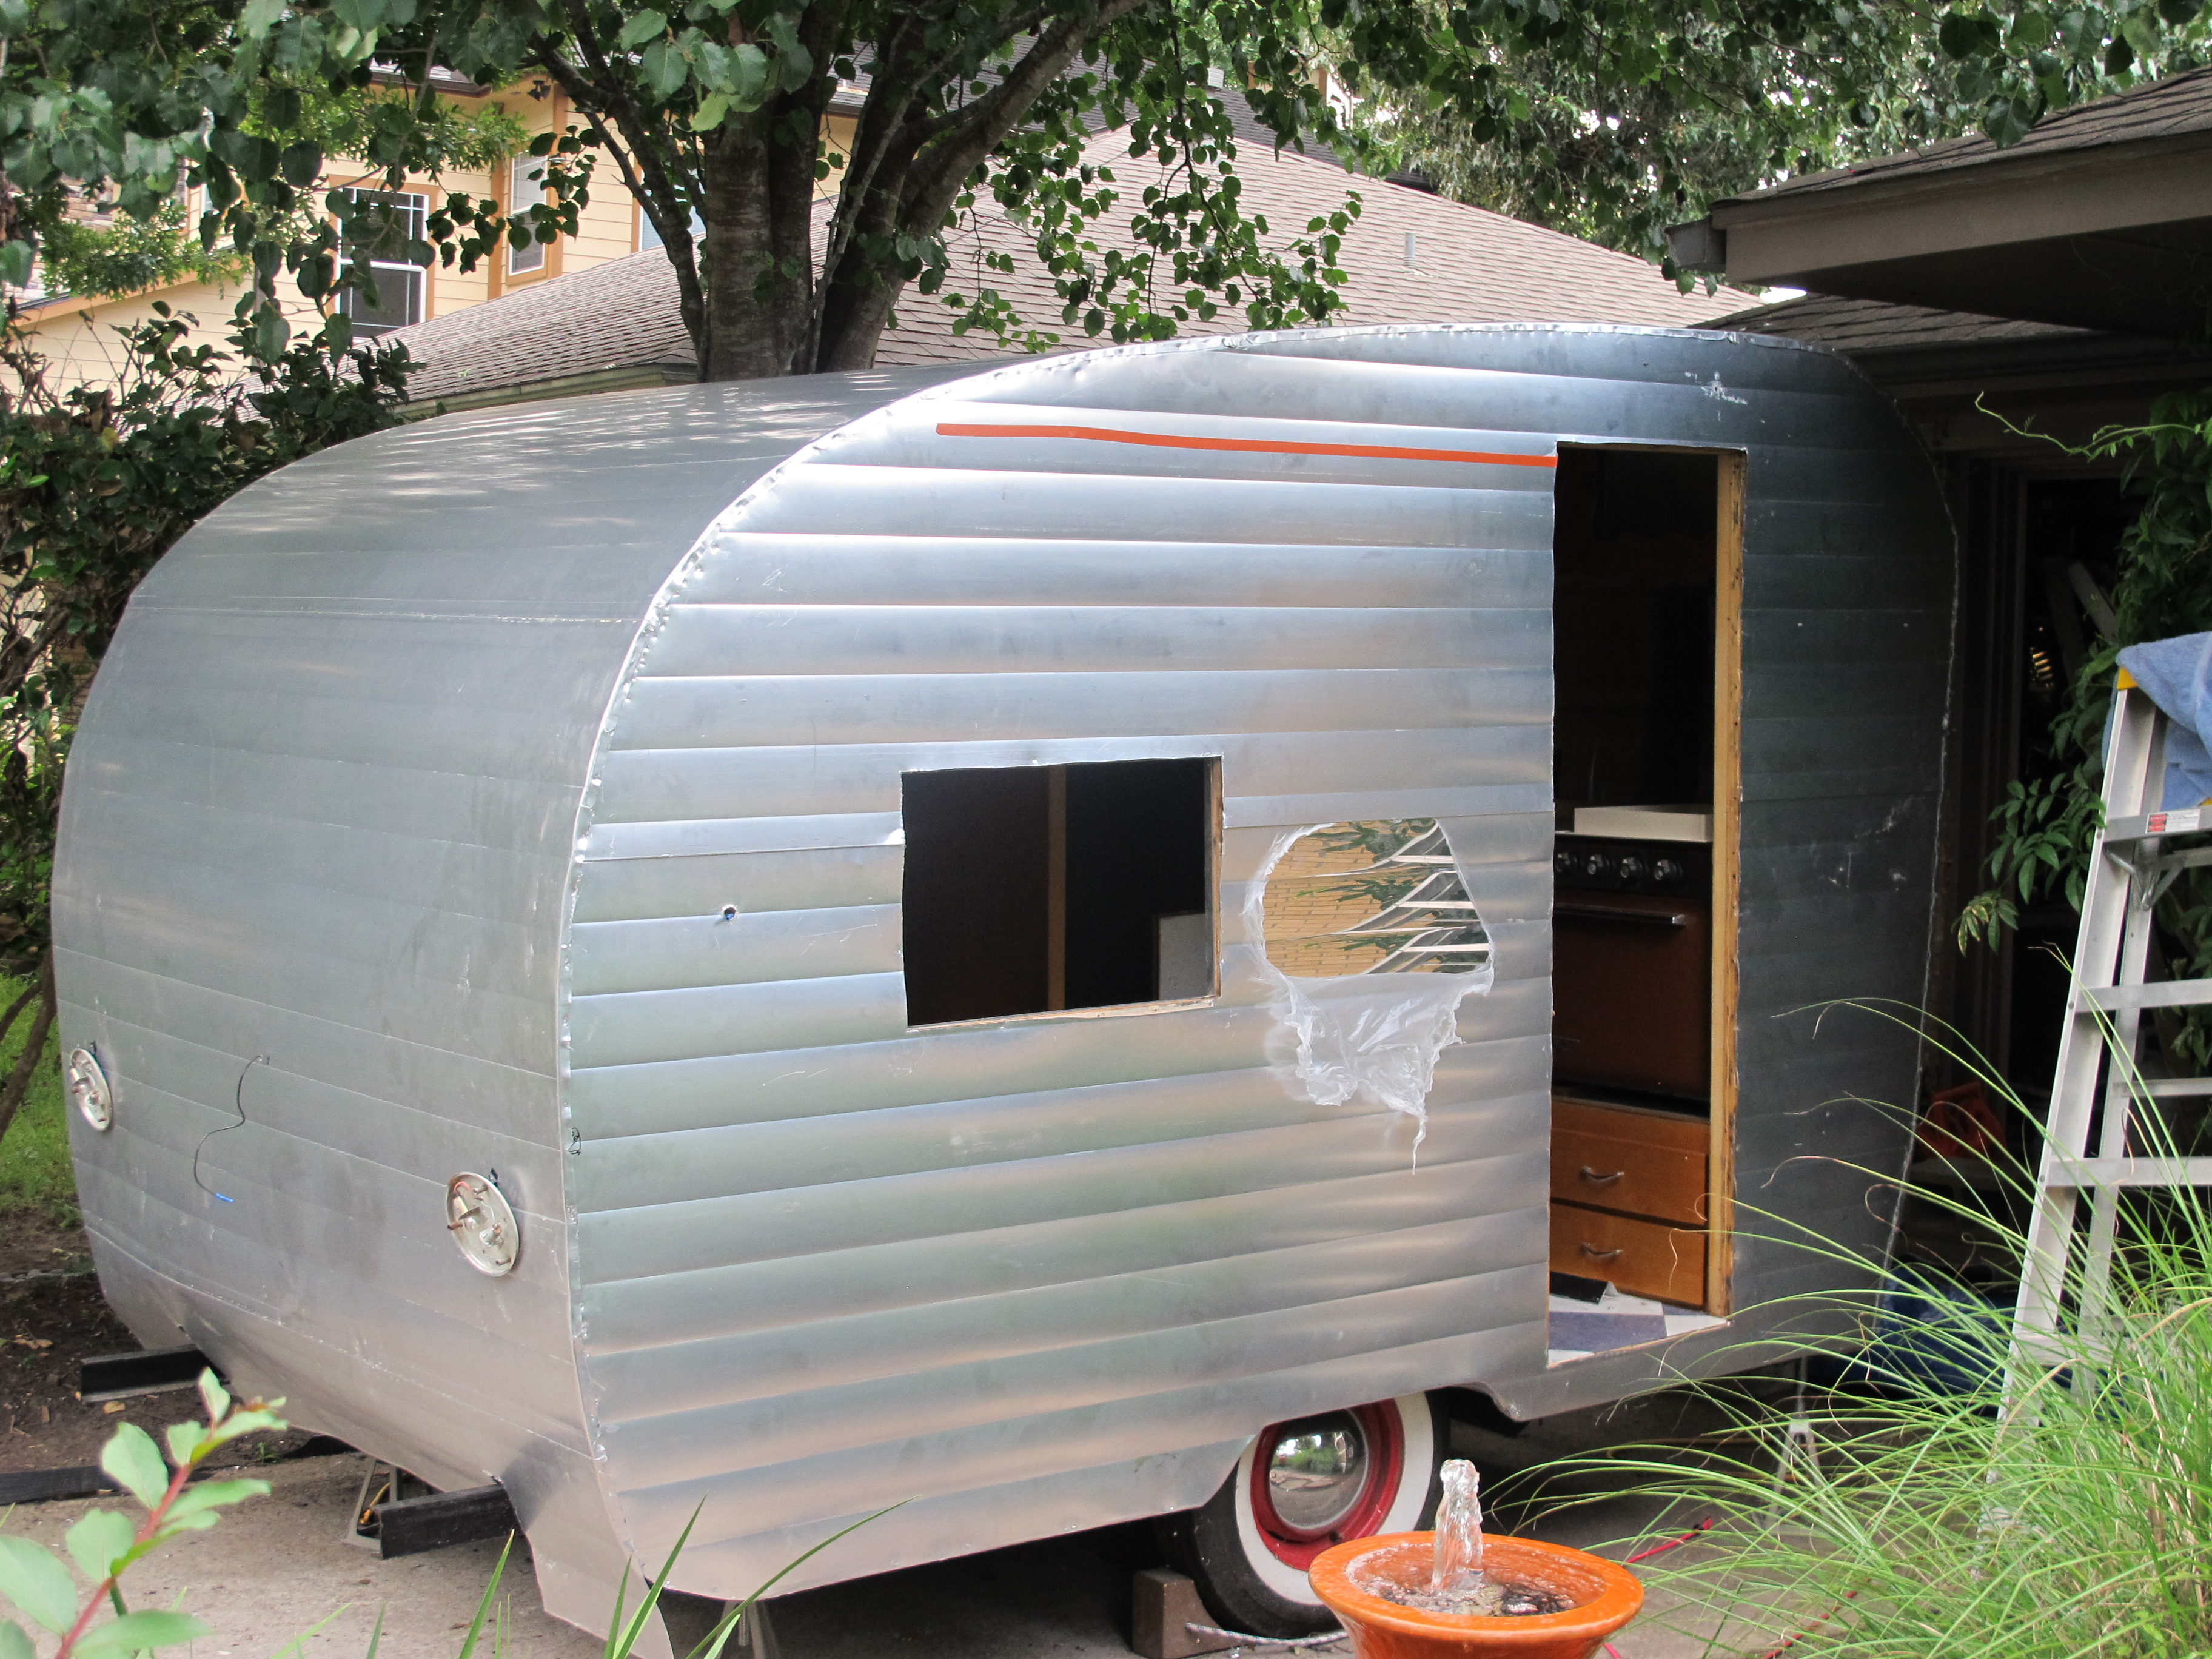
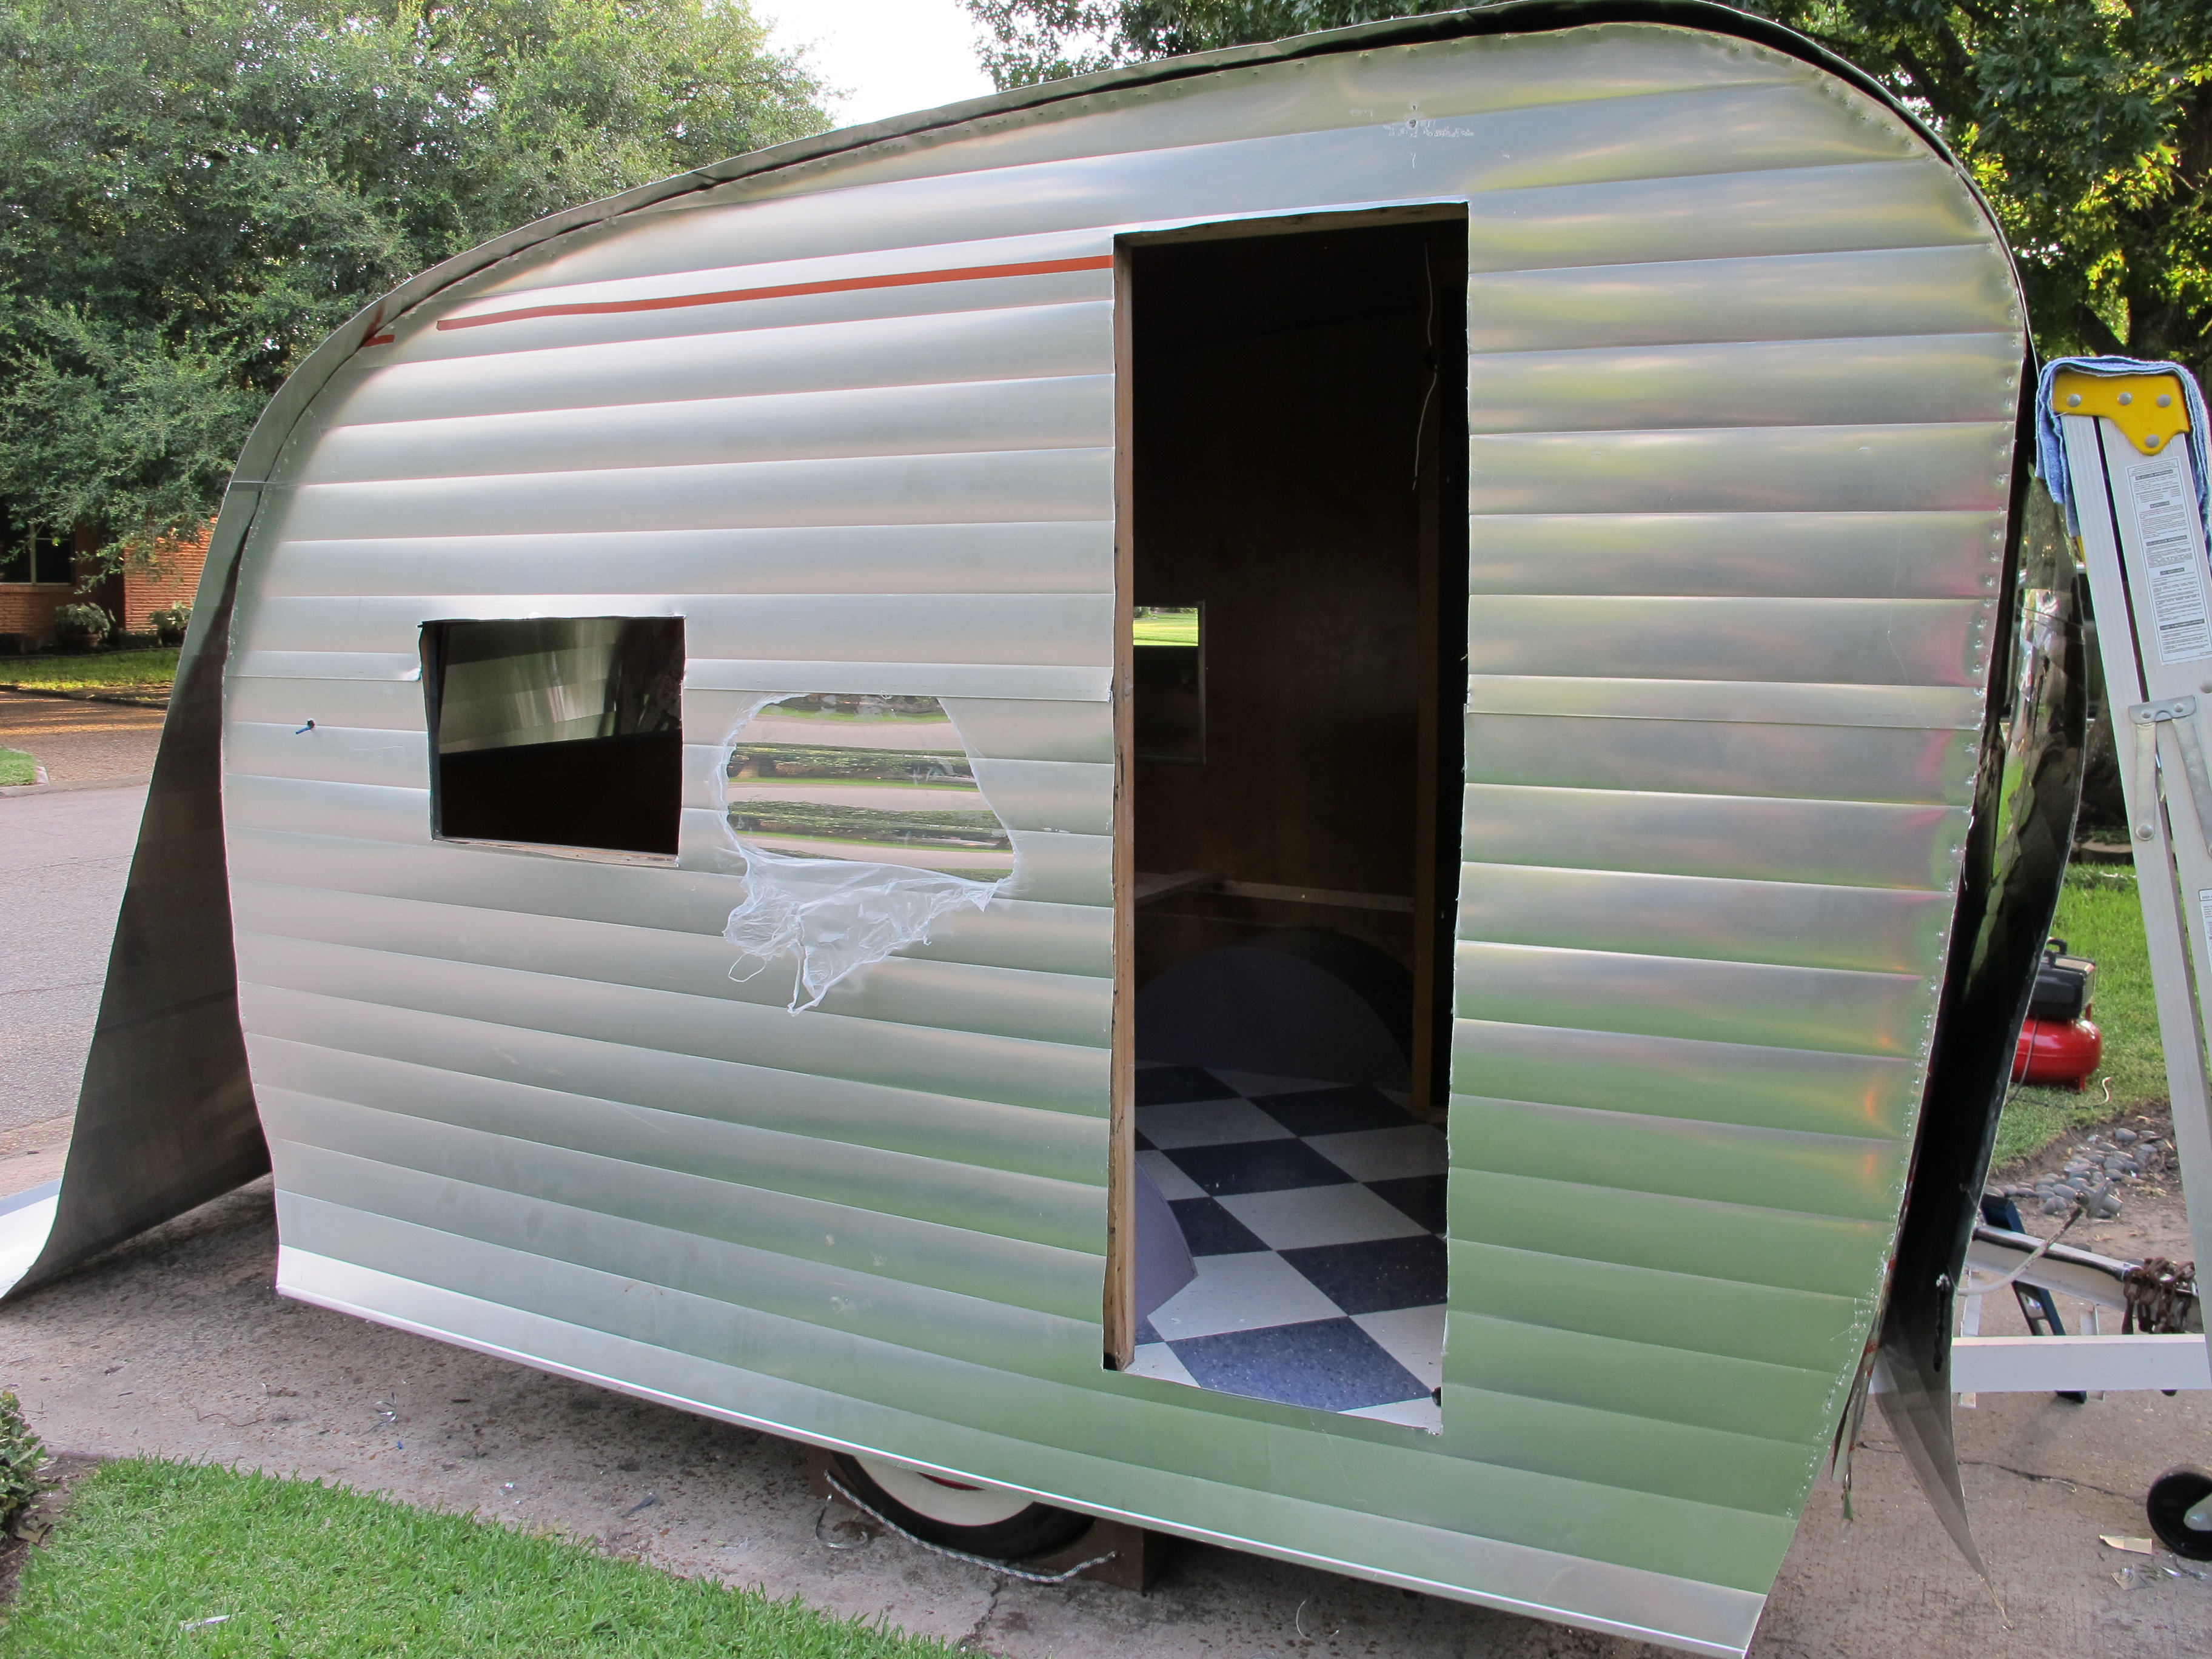
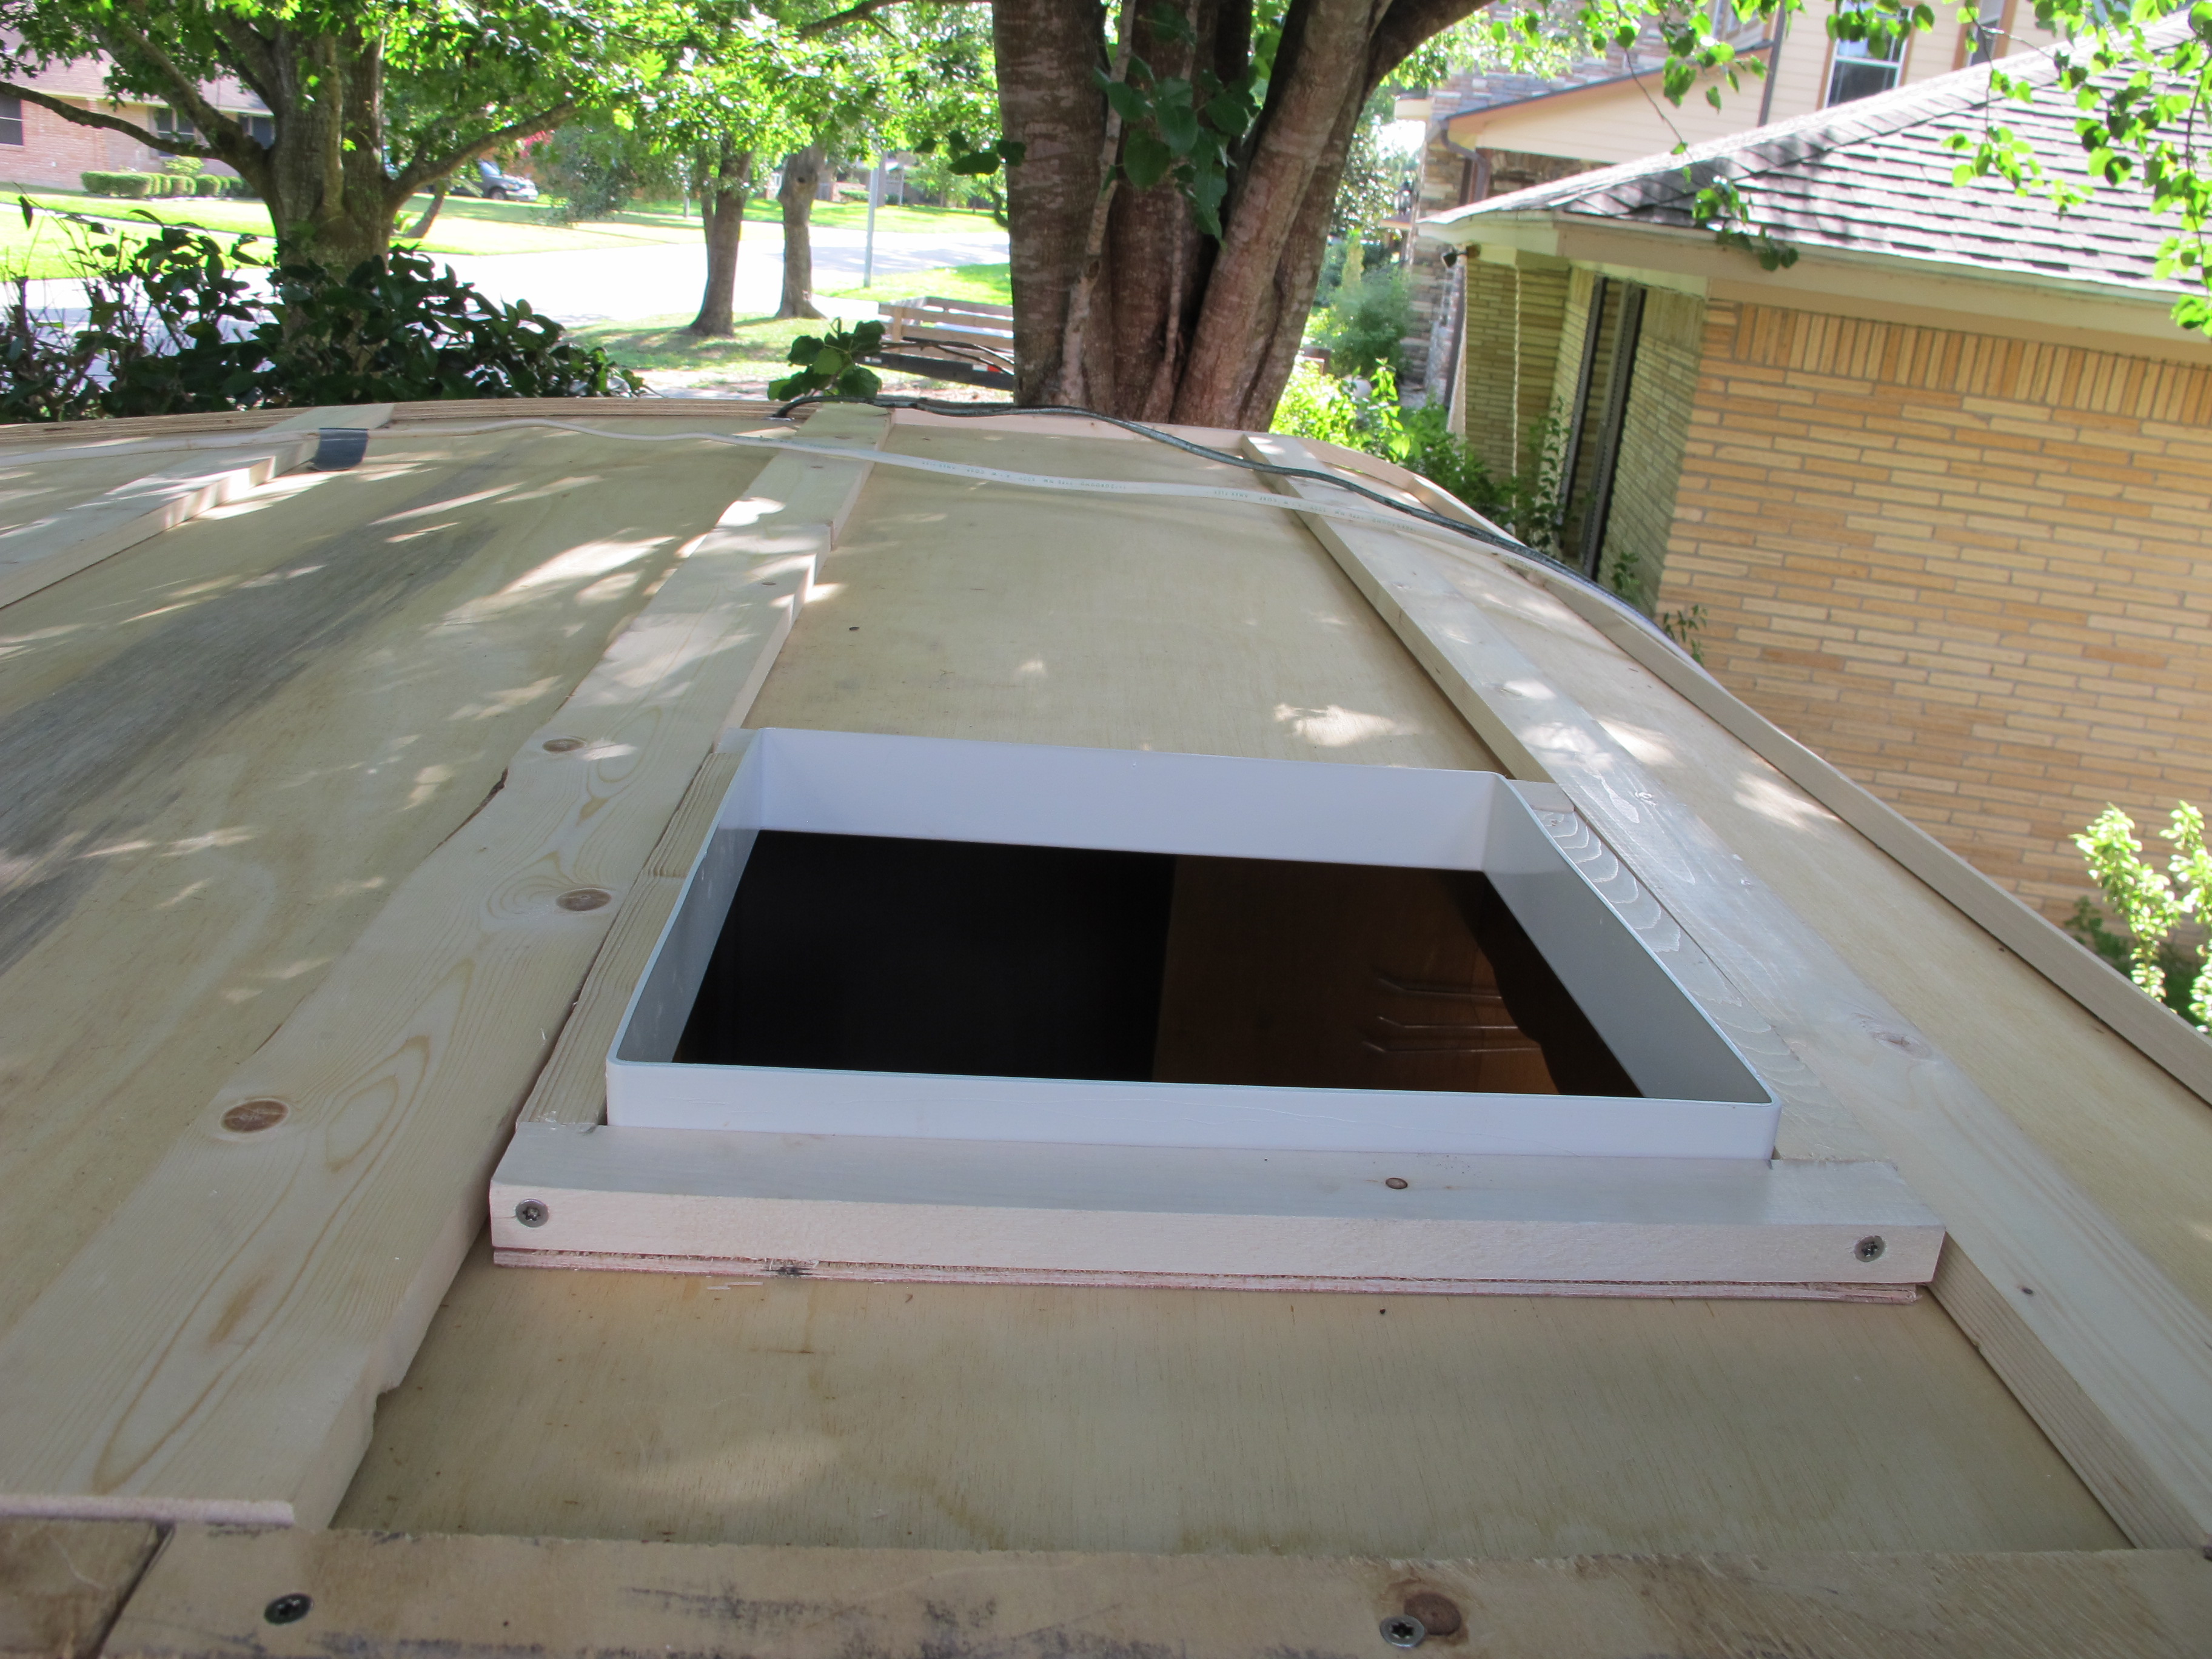
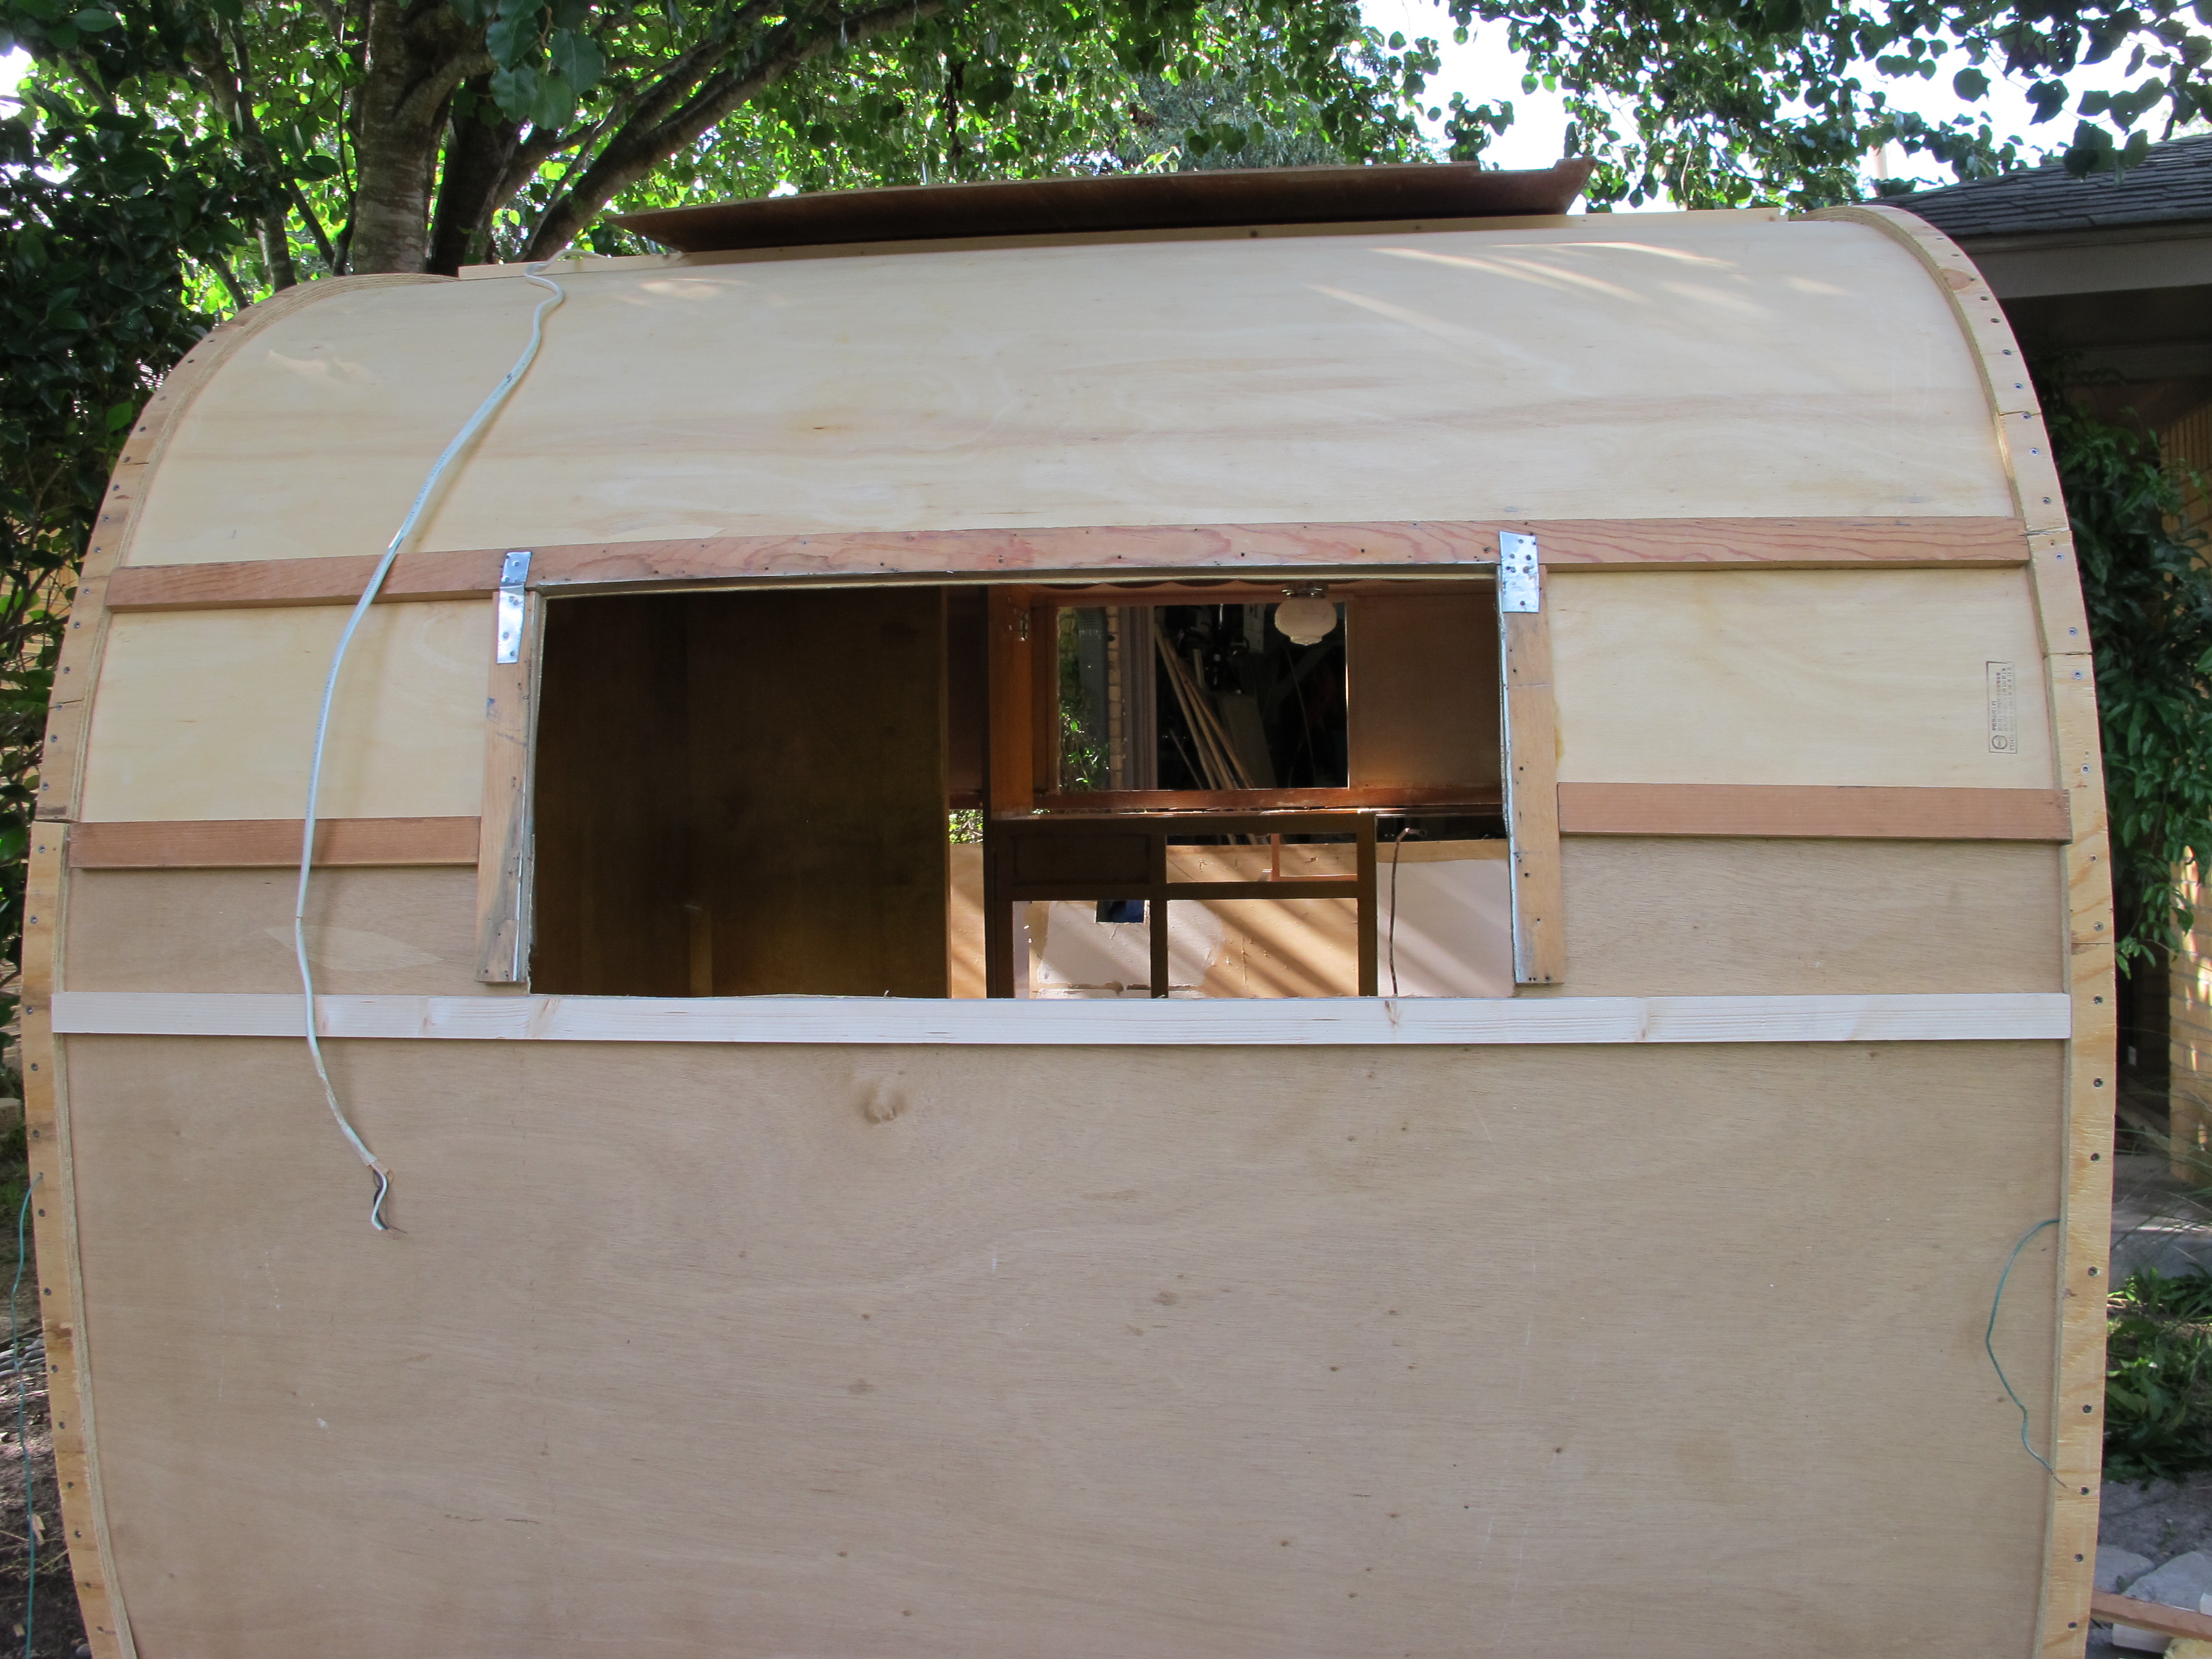
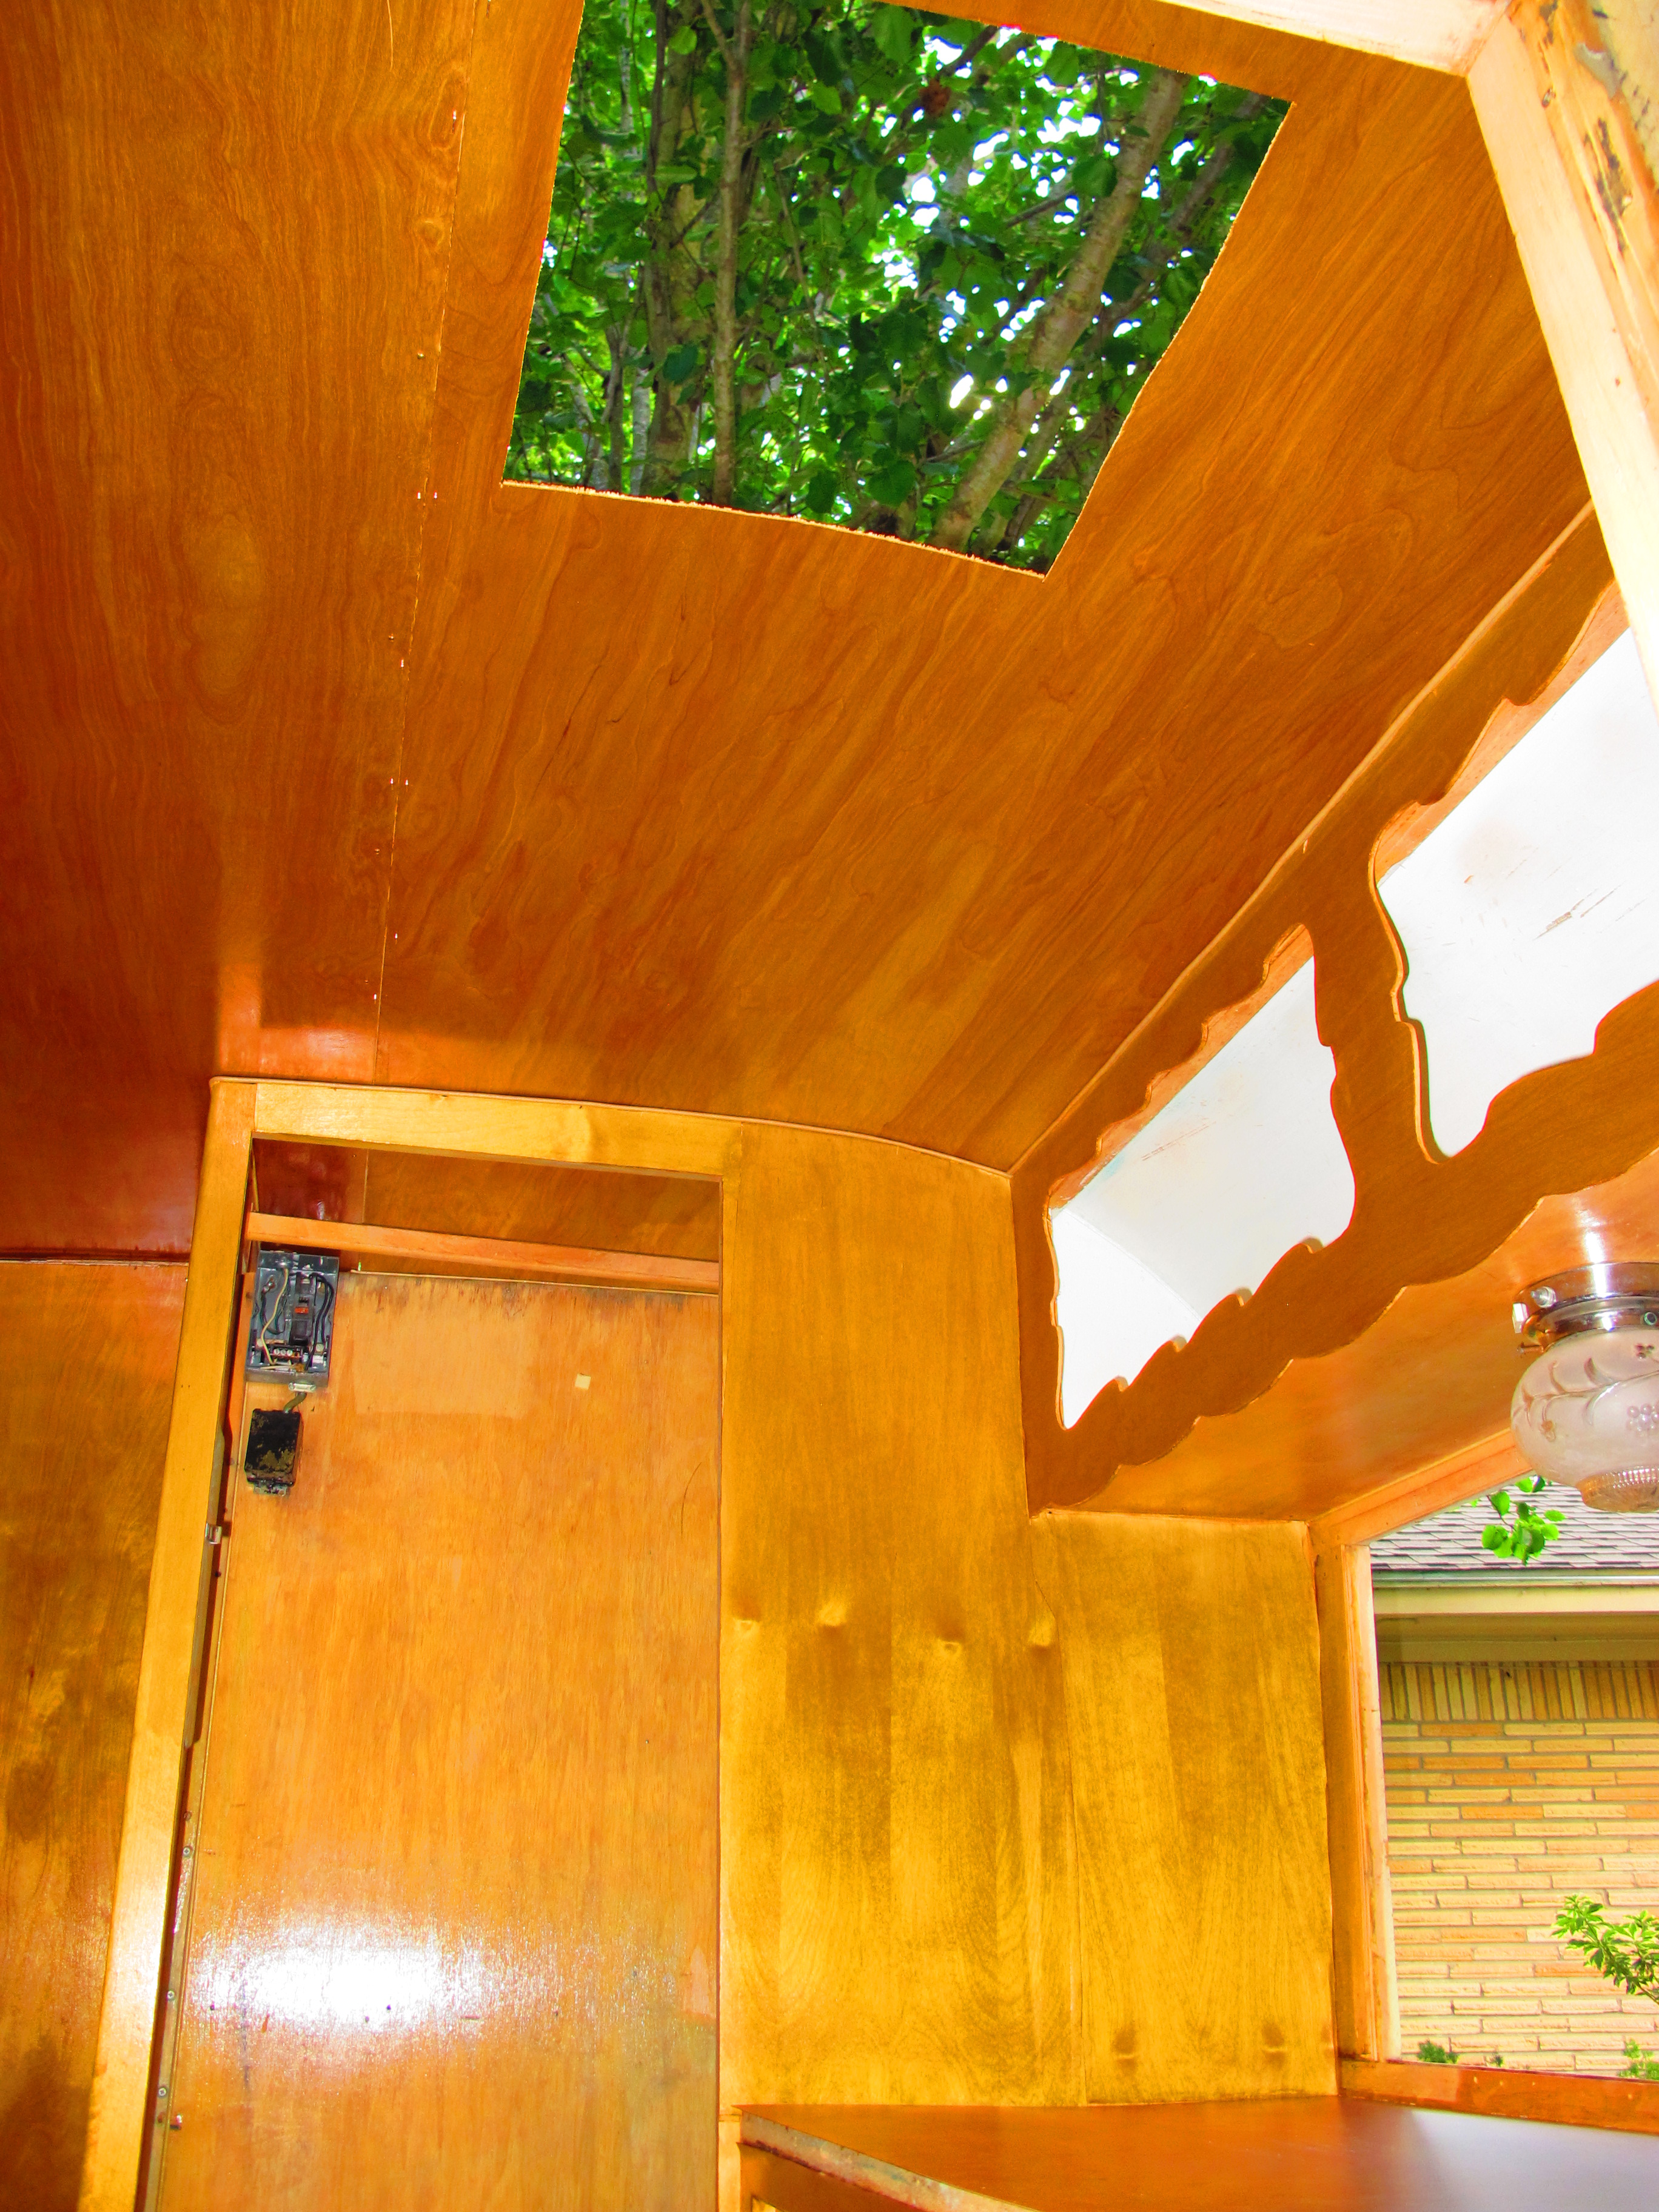
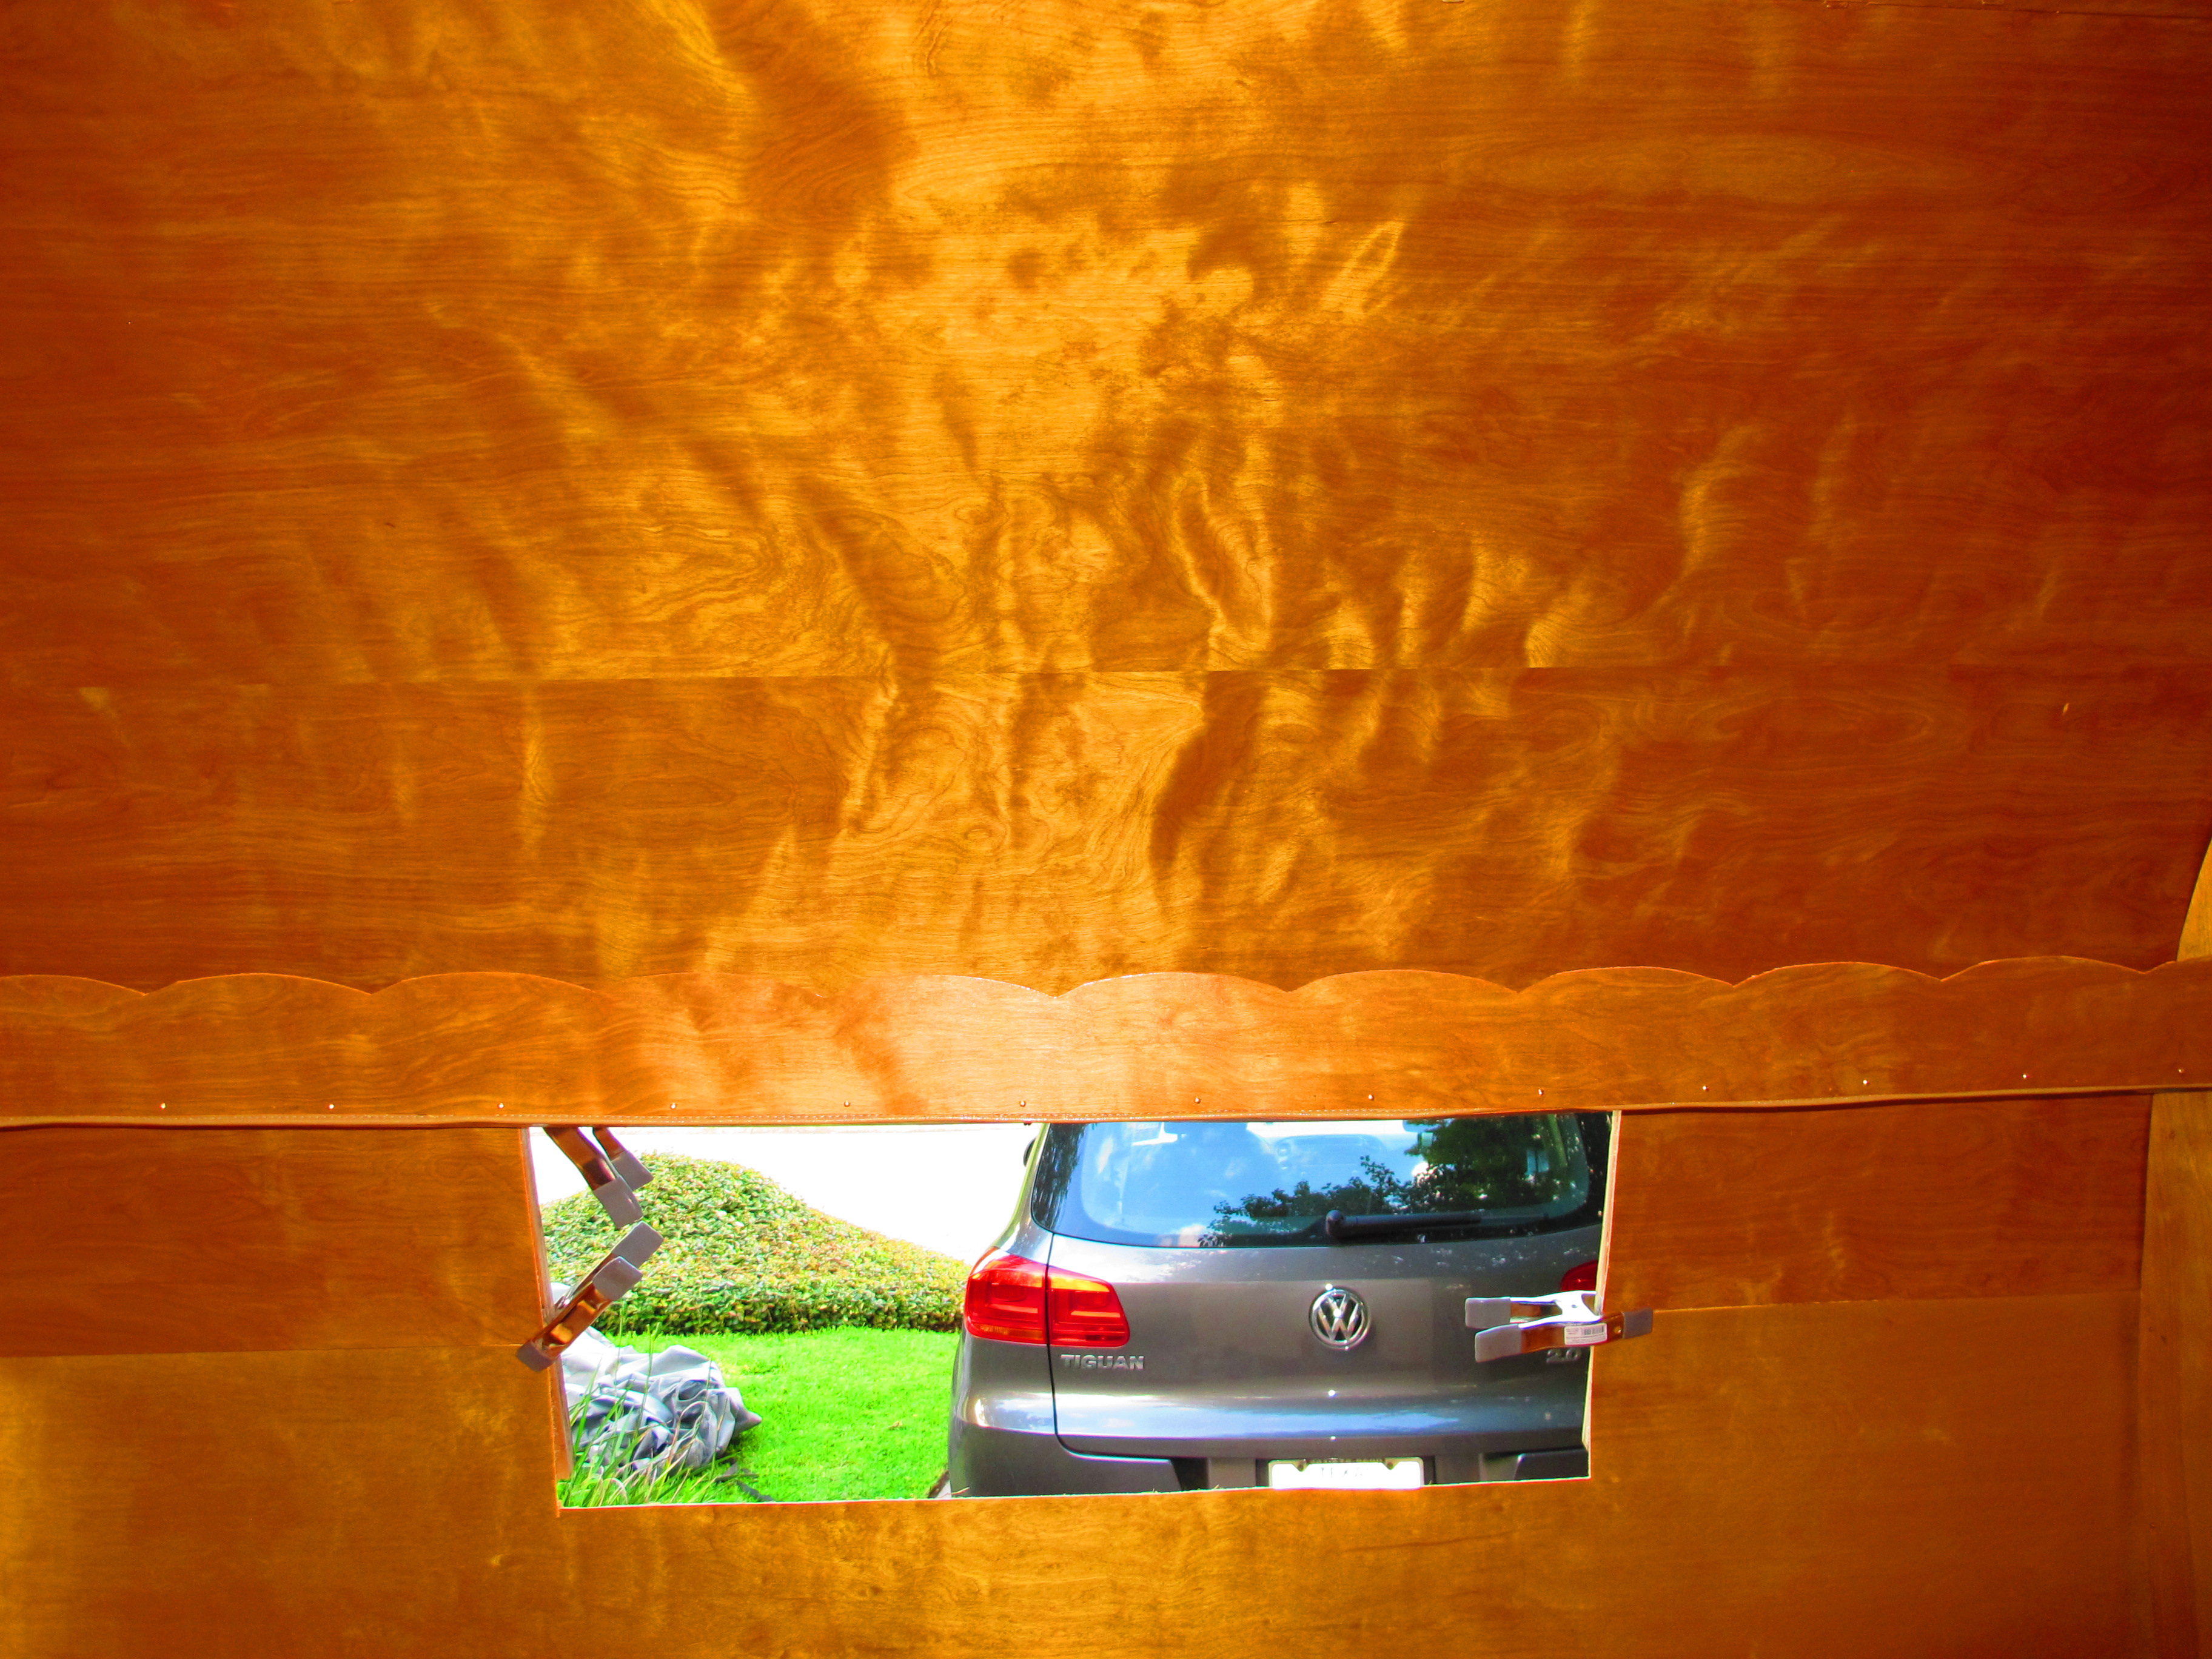
Front is all secure! Just need to cut out the window now of course.

When I got to the rear of Junebug, I realized that I needed to go ahead and attach the tail lights so that I could make sure the excess wire was safely under the skin where I wouldn’t accidentally put a screw through it.  I thought that would be an easy job, but it actually took forever!  I couldn’t get the Batt connectors to hold the wire like Oscar could.  I didn’t have a crimping tool, so I had to make do with my wire cutters.  When I crimped the batt connector, I accidentally cut through it a couple of times.  confused I finally got the wires to stay, but I’m a little nervous that the lights won’t work when I hook them up.  I didn’t have the heart to try them tonight in case they didn’t work.  I will try them next weekend when I’m not so exhausted.  If something went wrong, I’ll have to undo the back panel and then restaple it after fixing the lights.  It’s doable, but I REALLY don’t want to do that!

IMG_4754


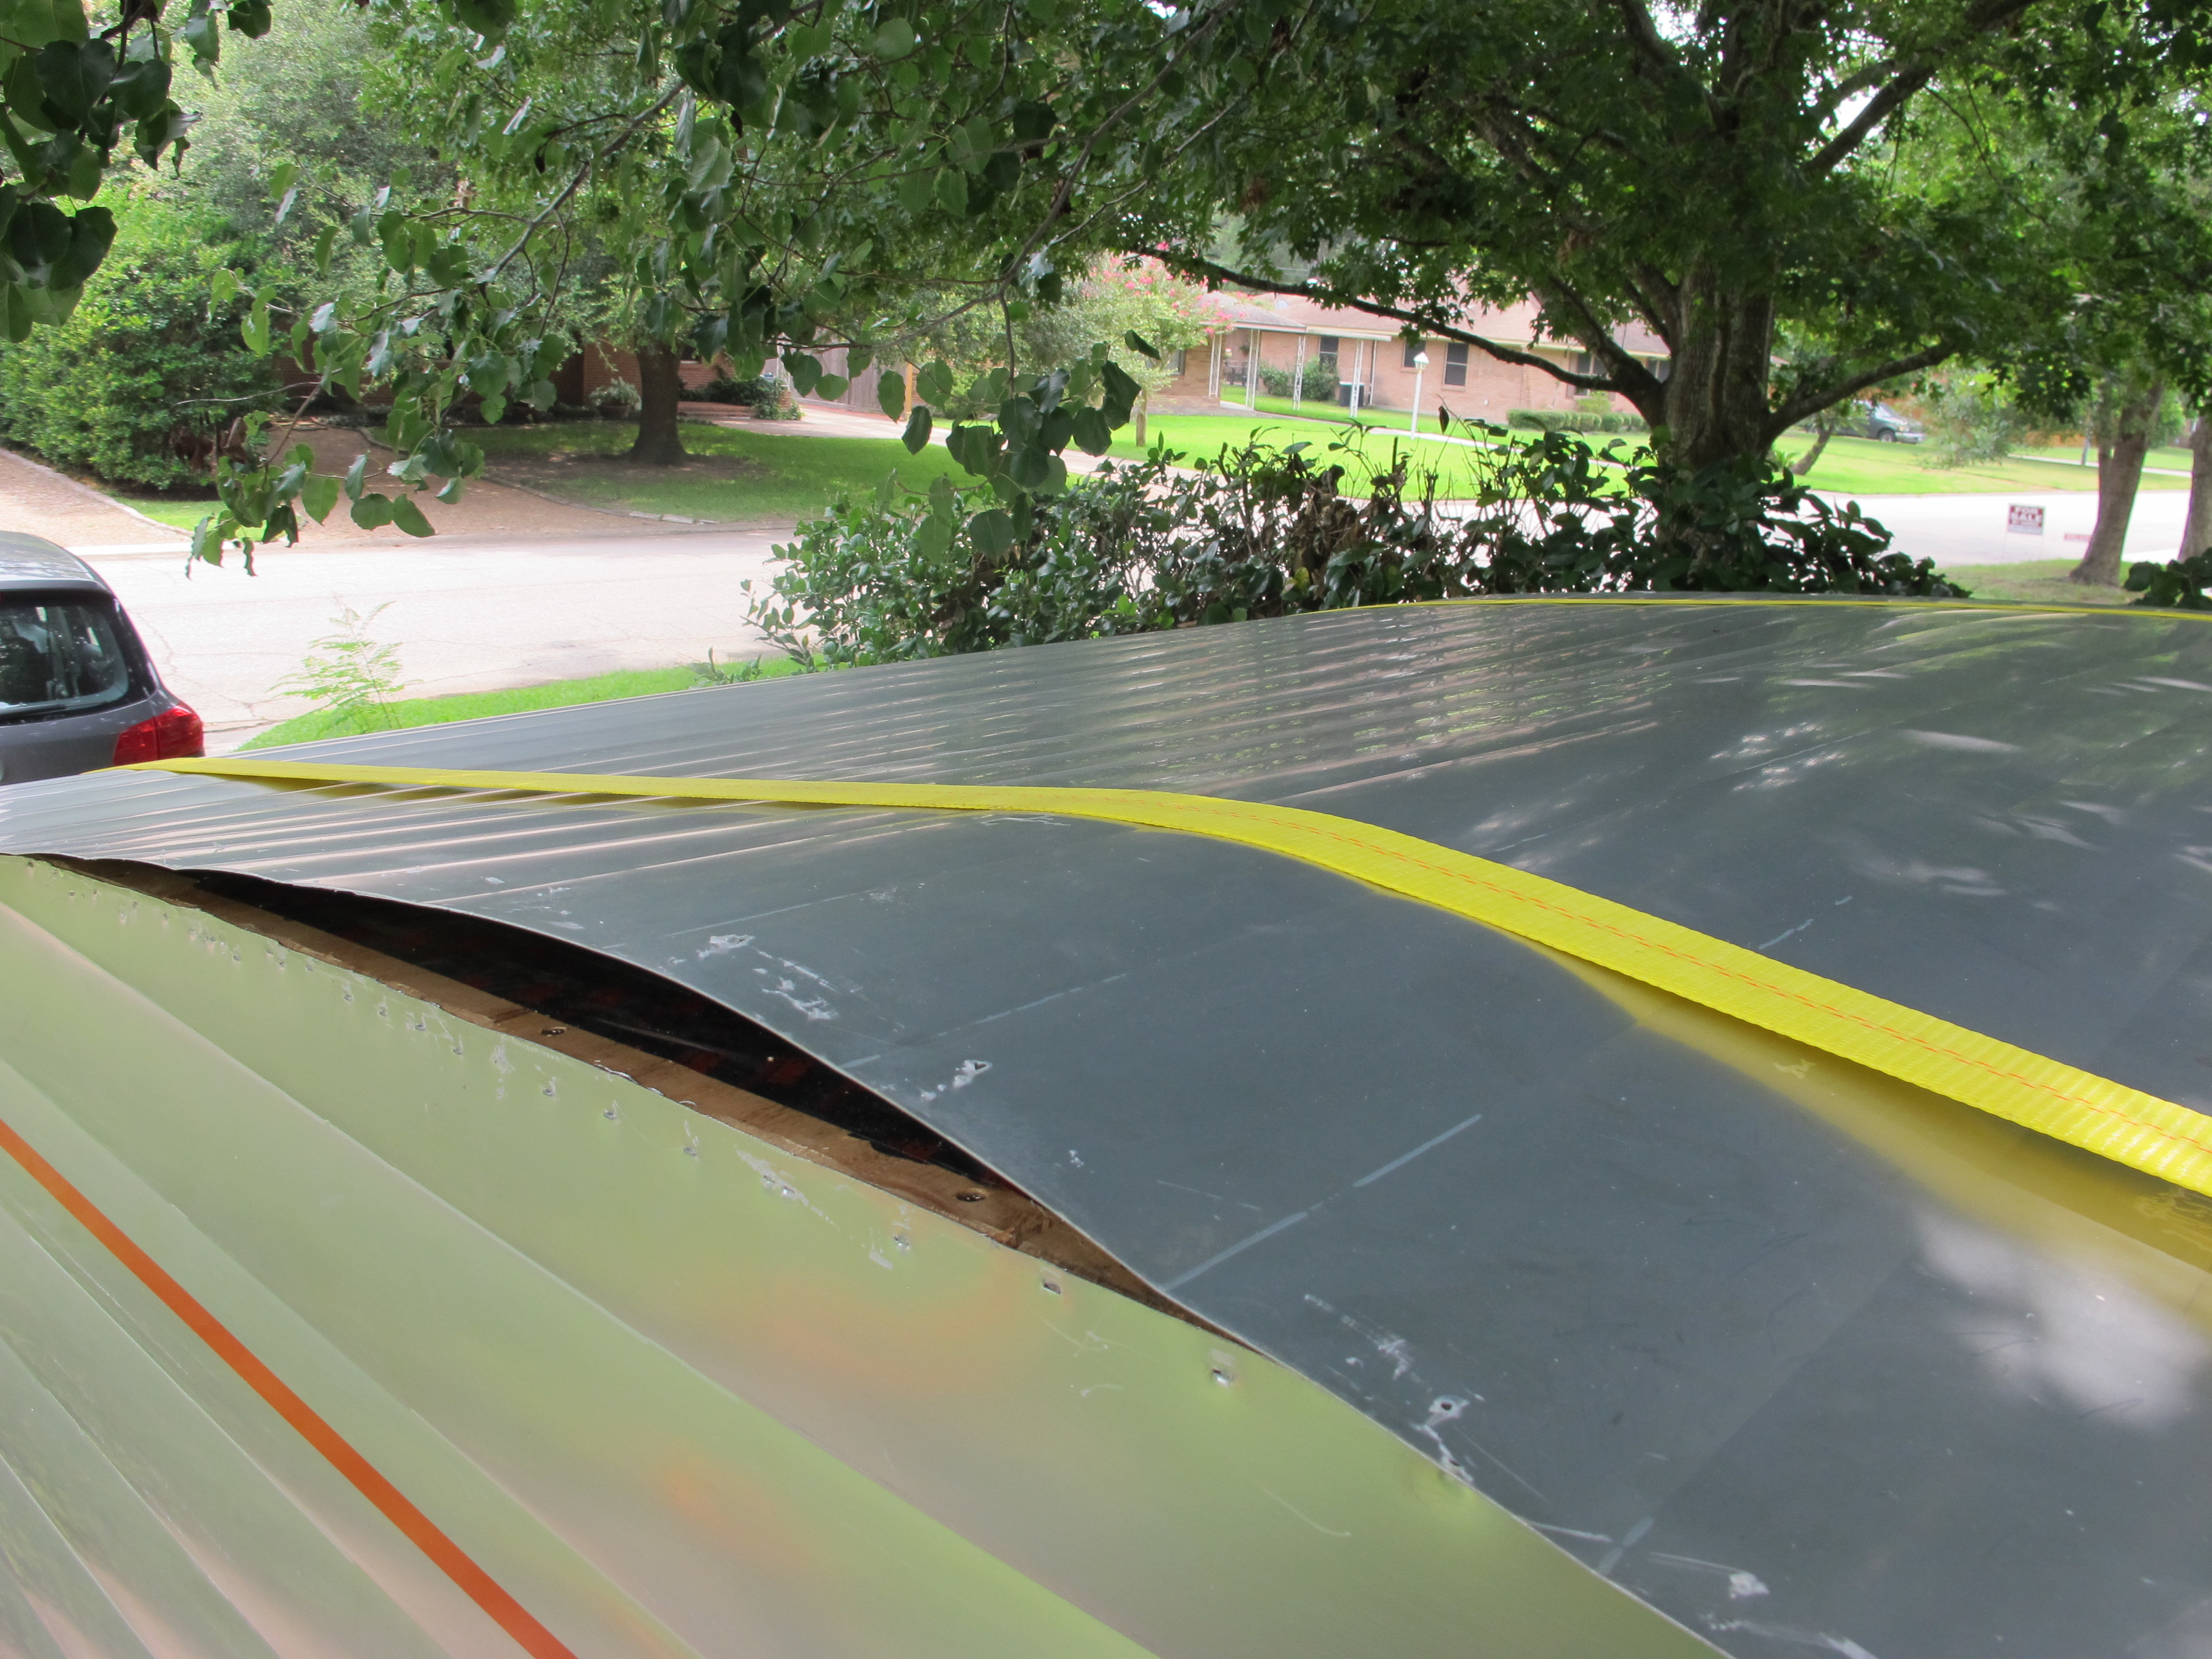
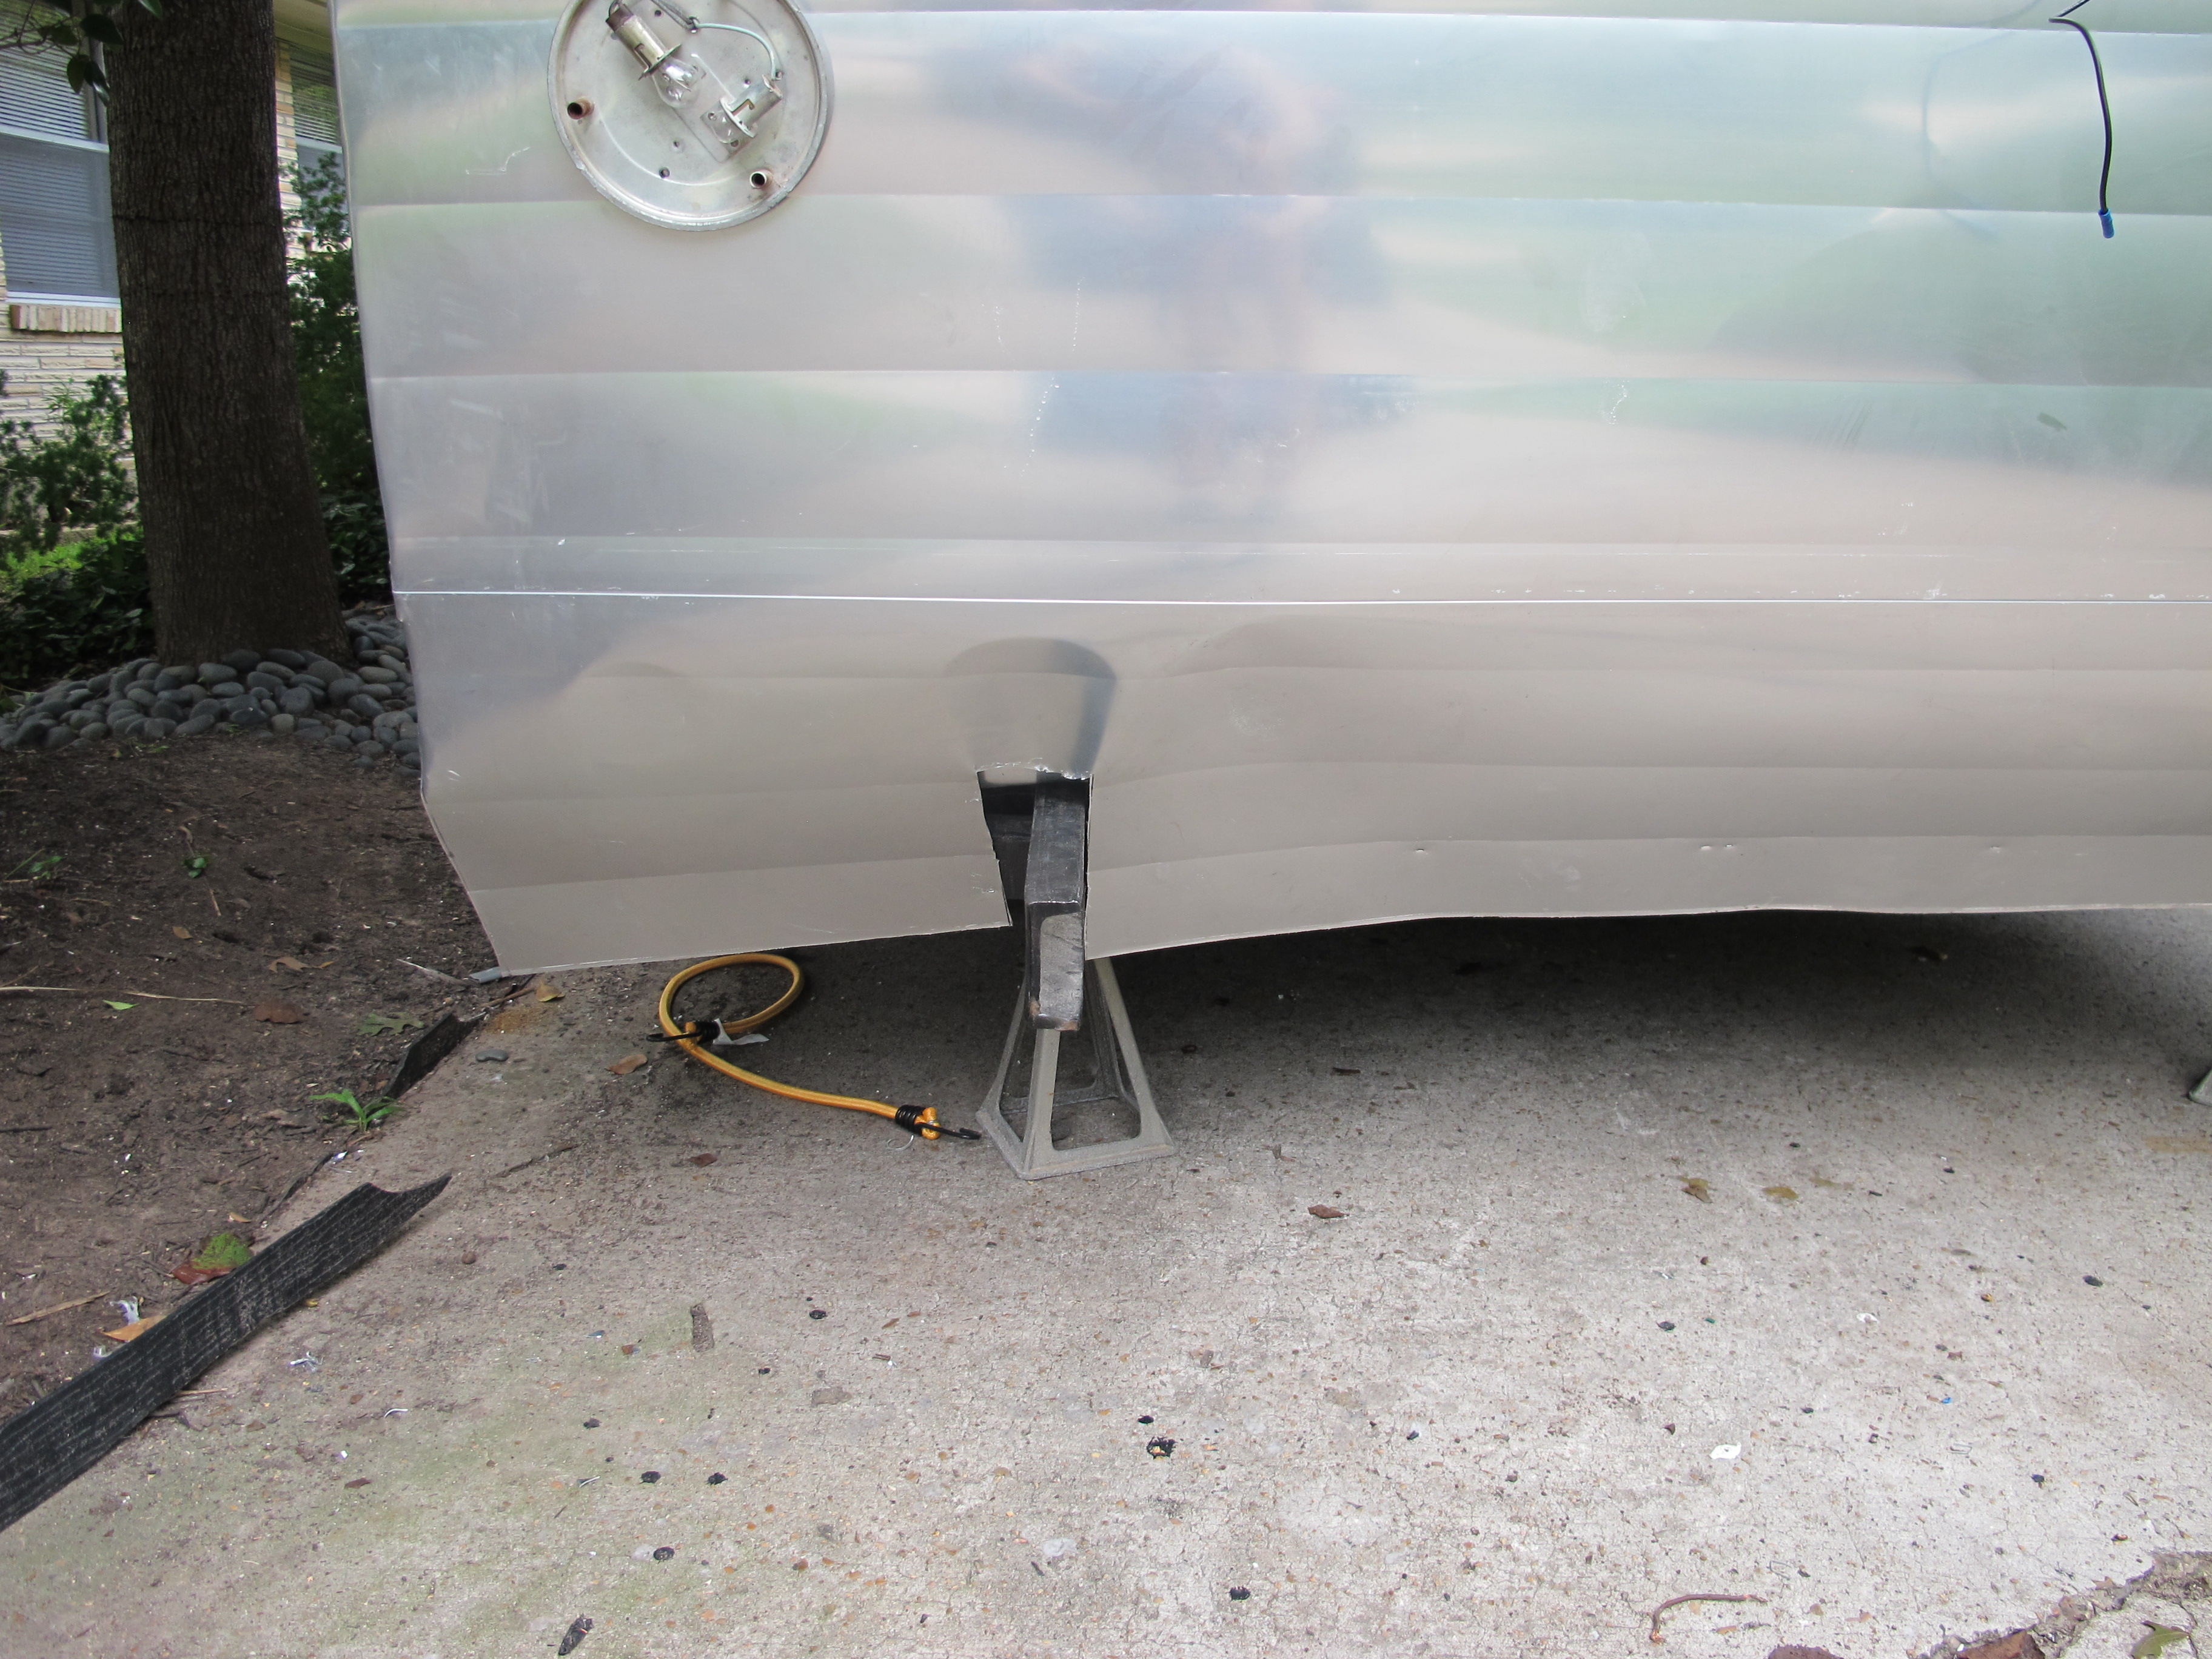
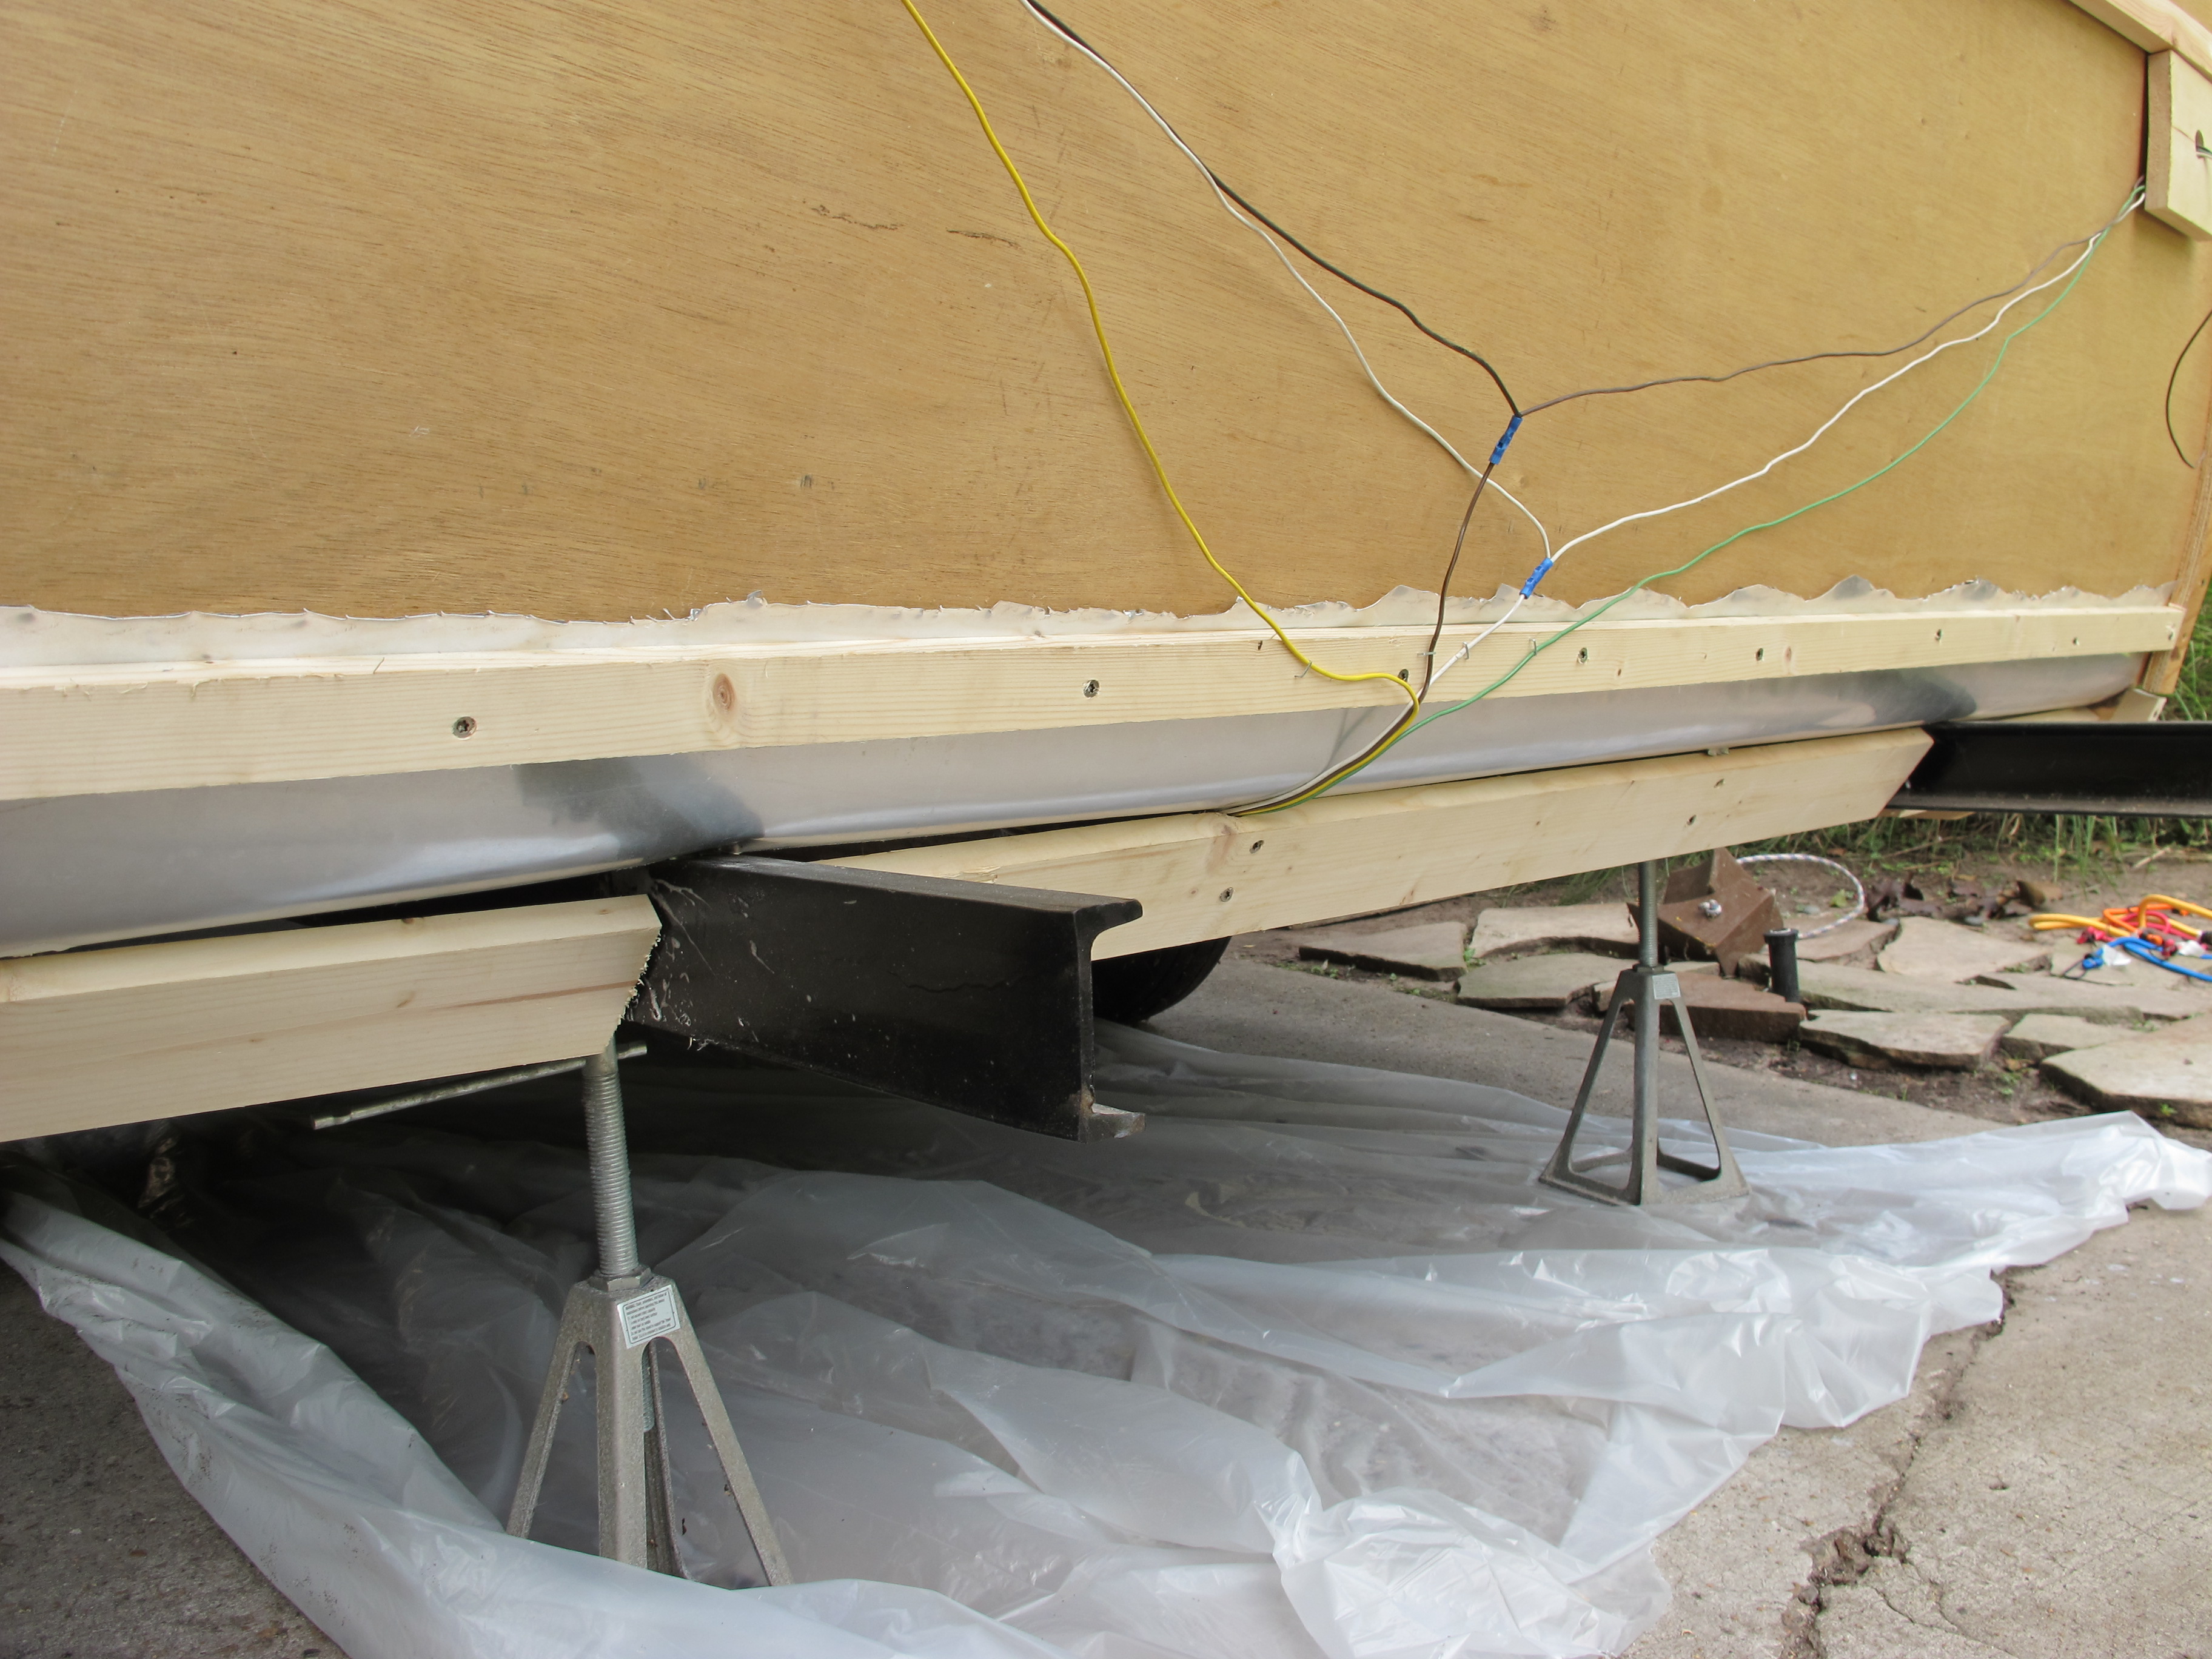
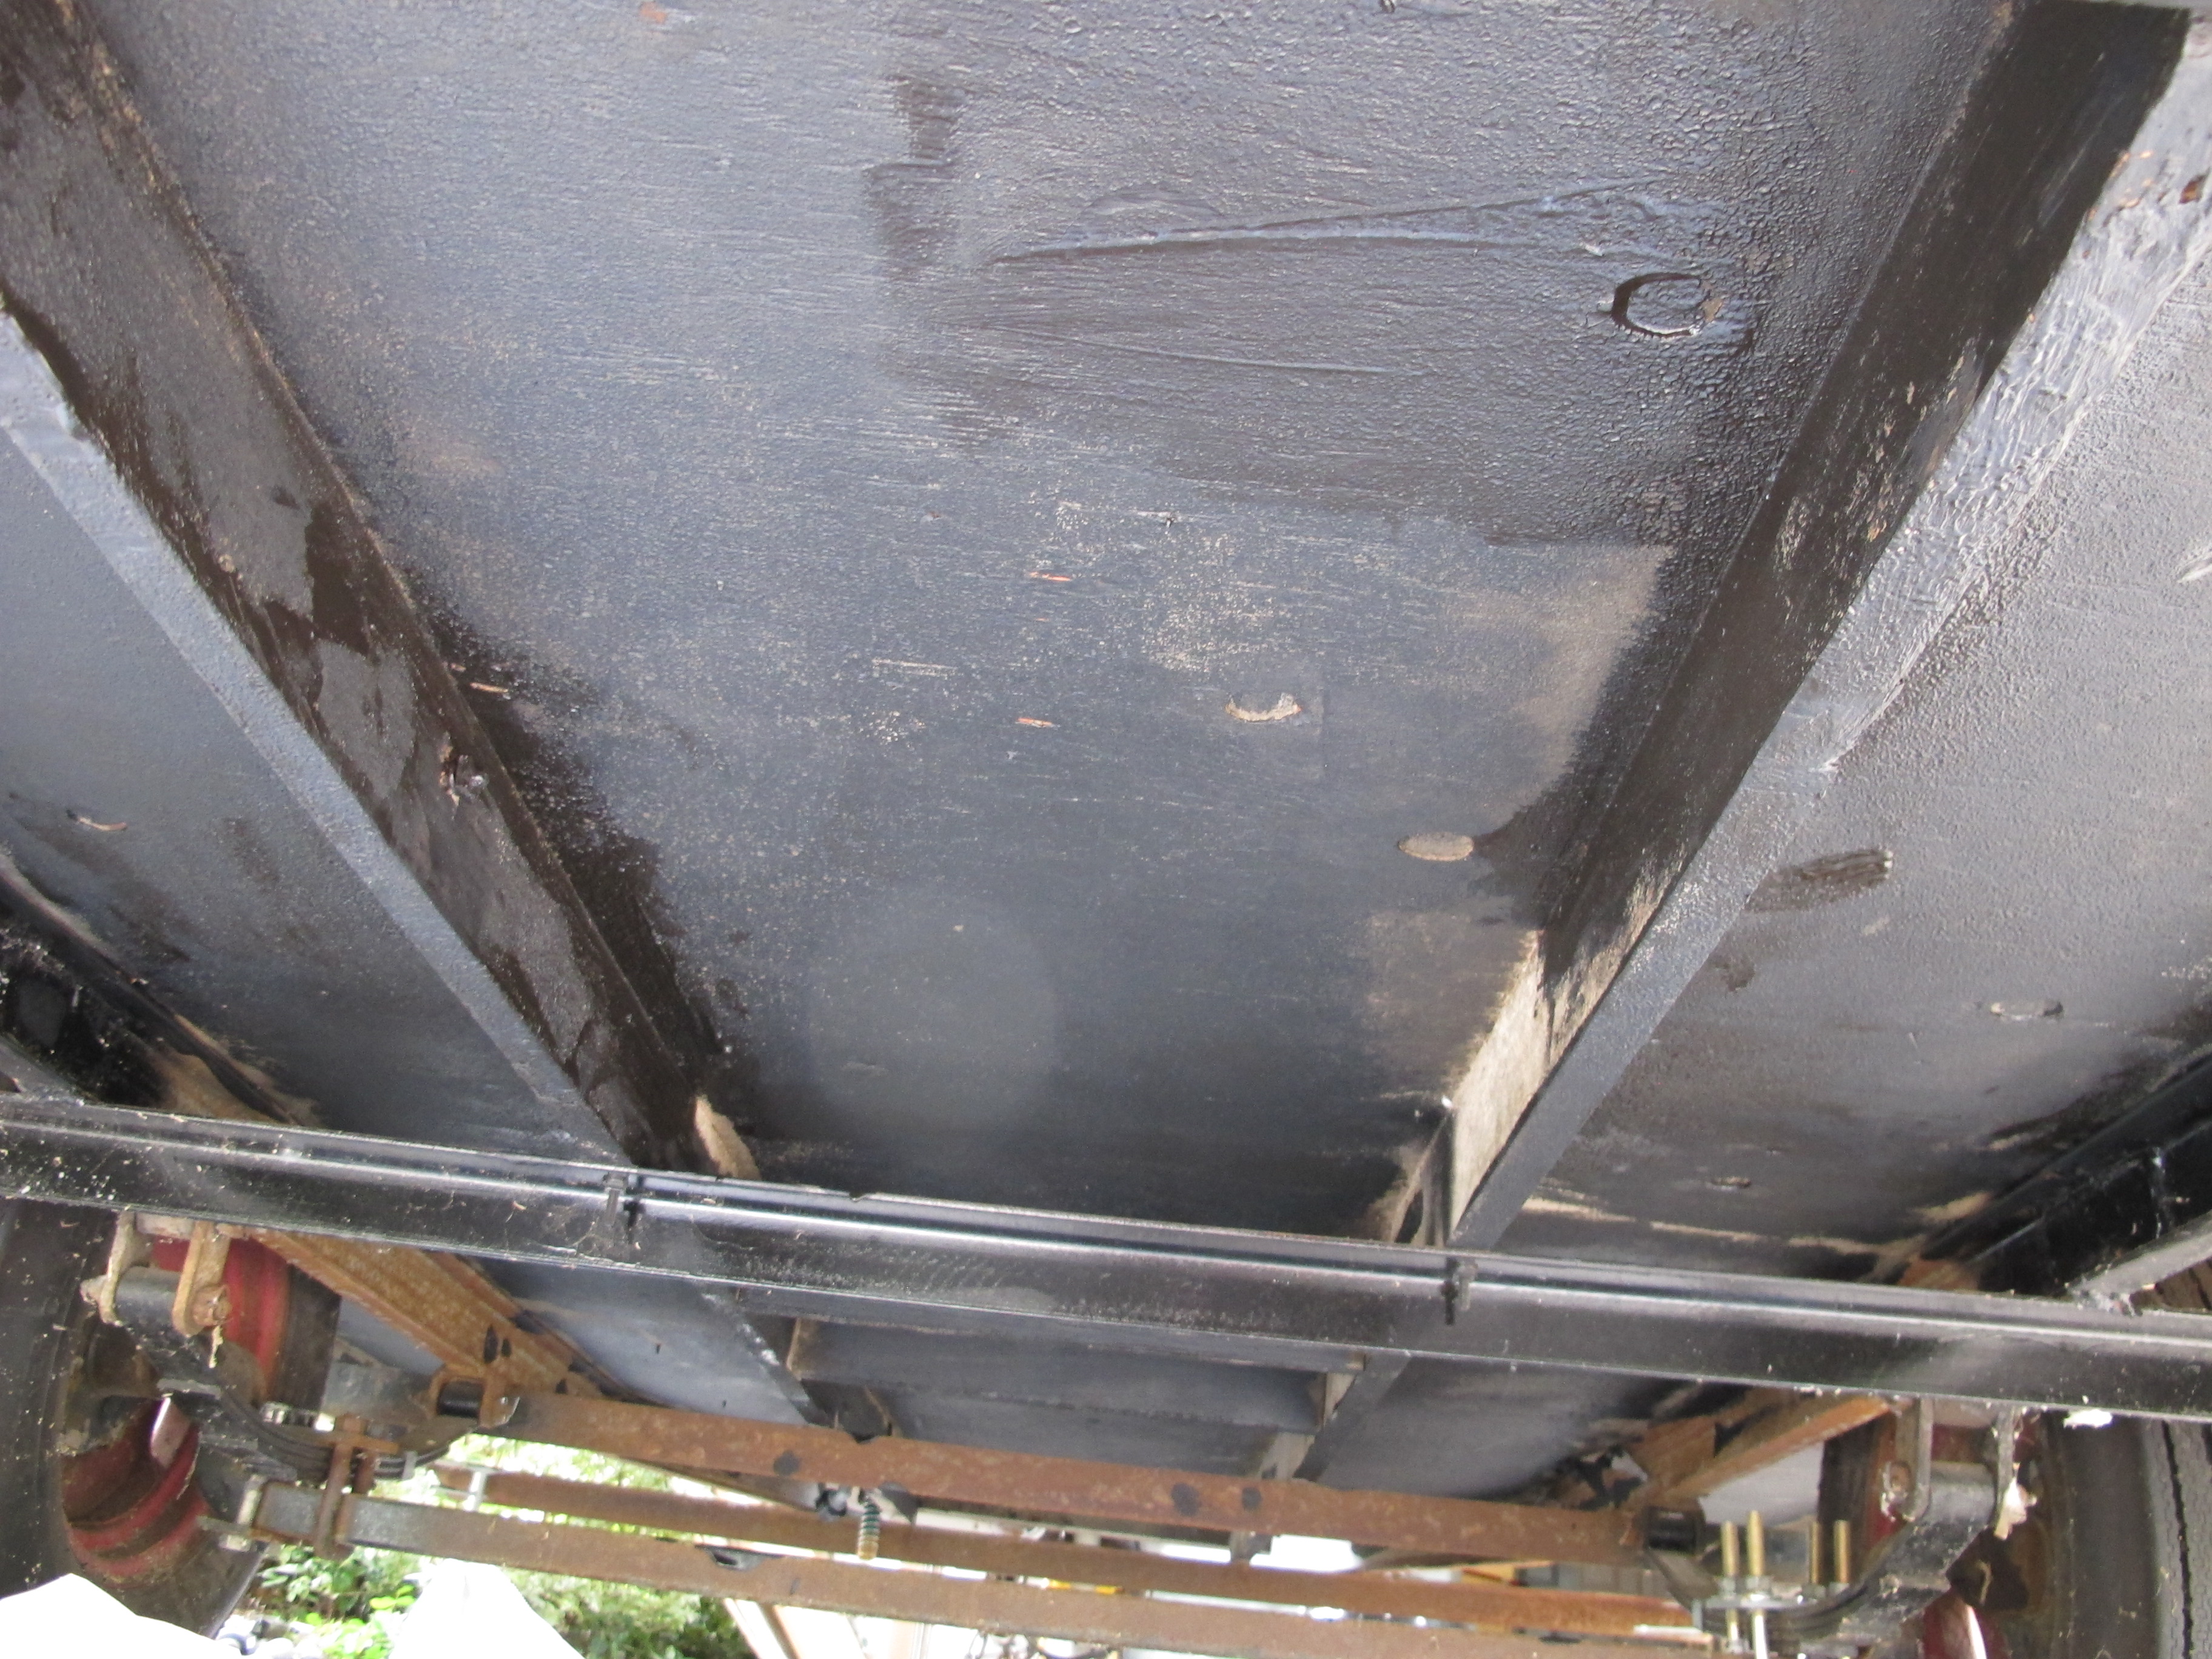
Unfortunately, I ran into another buckling problem, right at the end!  You can see where the buckling occurred, right next to the steel beam.  I also cut the holes in the skin in the wrong spot and had to make them much wider, thanks to my initial buckling problem.  So… Junebug is going to be far from perfect at the end of this.  But I’m not perfect either.  I mean, who wants to be perfect?  That’s so boring.  hahaha

I’m hoping that the bumper will help to hide these little blemishes.  I am also rethinking my plan to put the spare tire on the tongue, and may put it back here after all.

IMG_4755


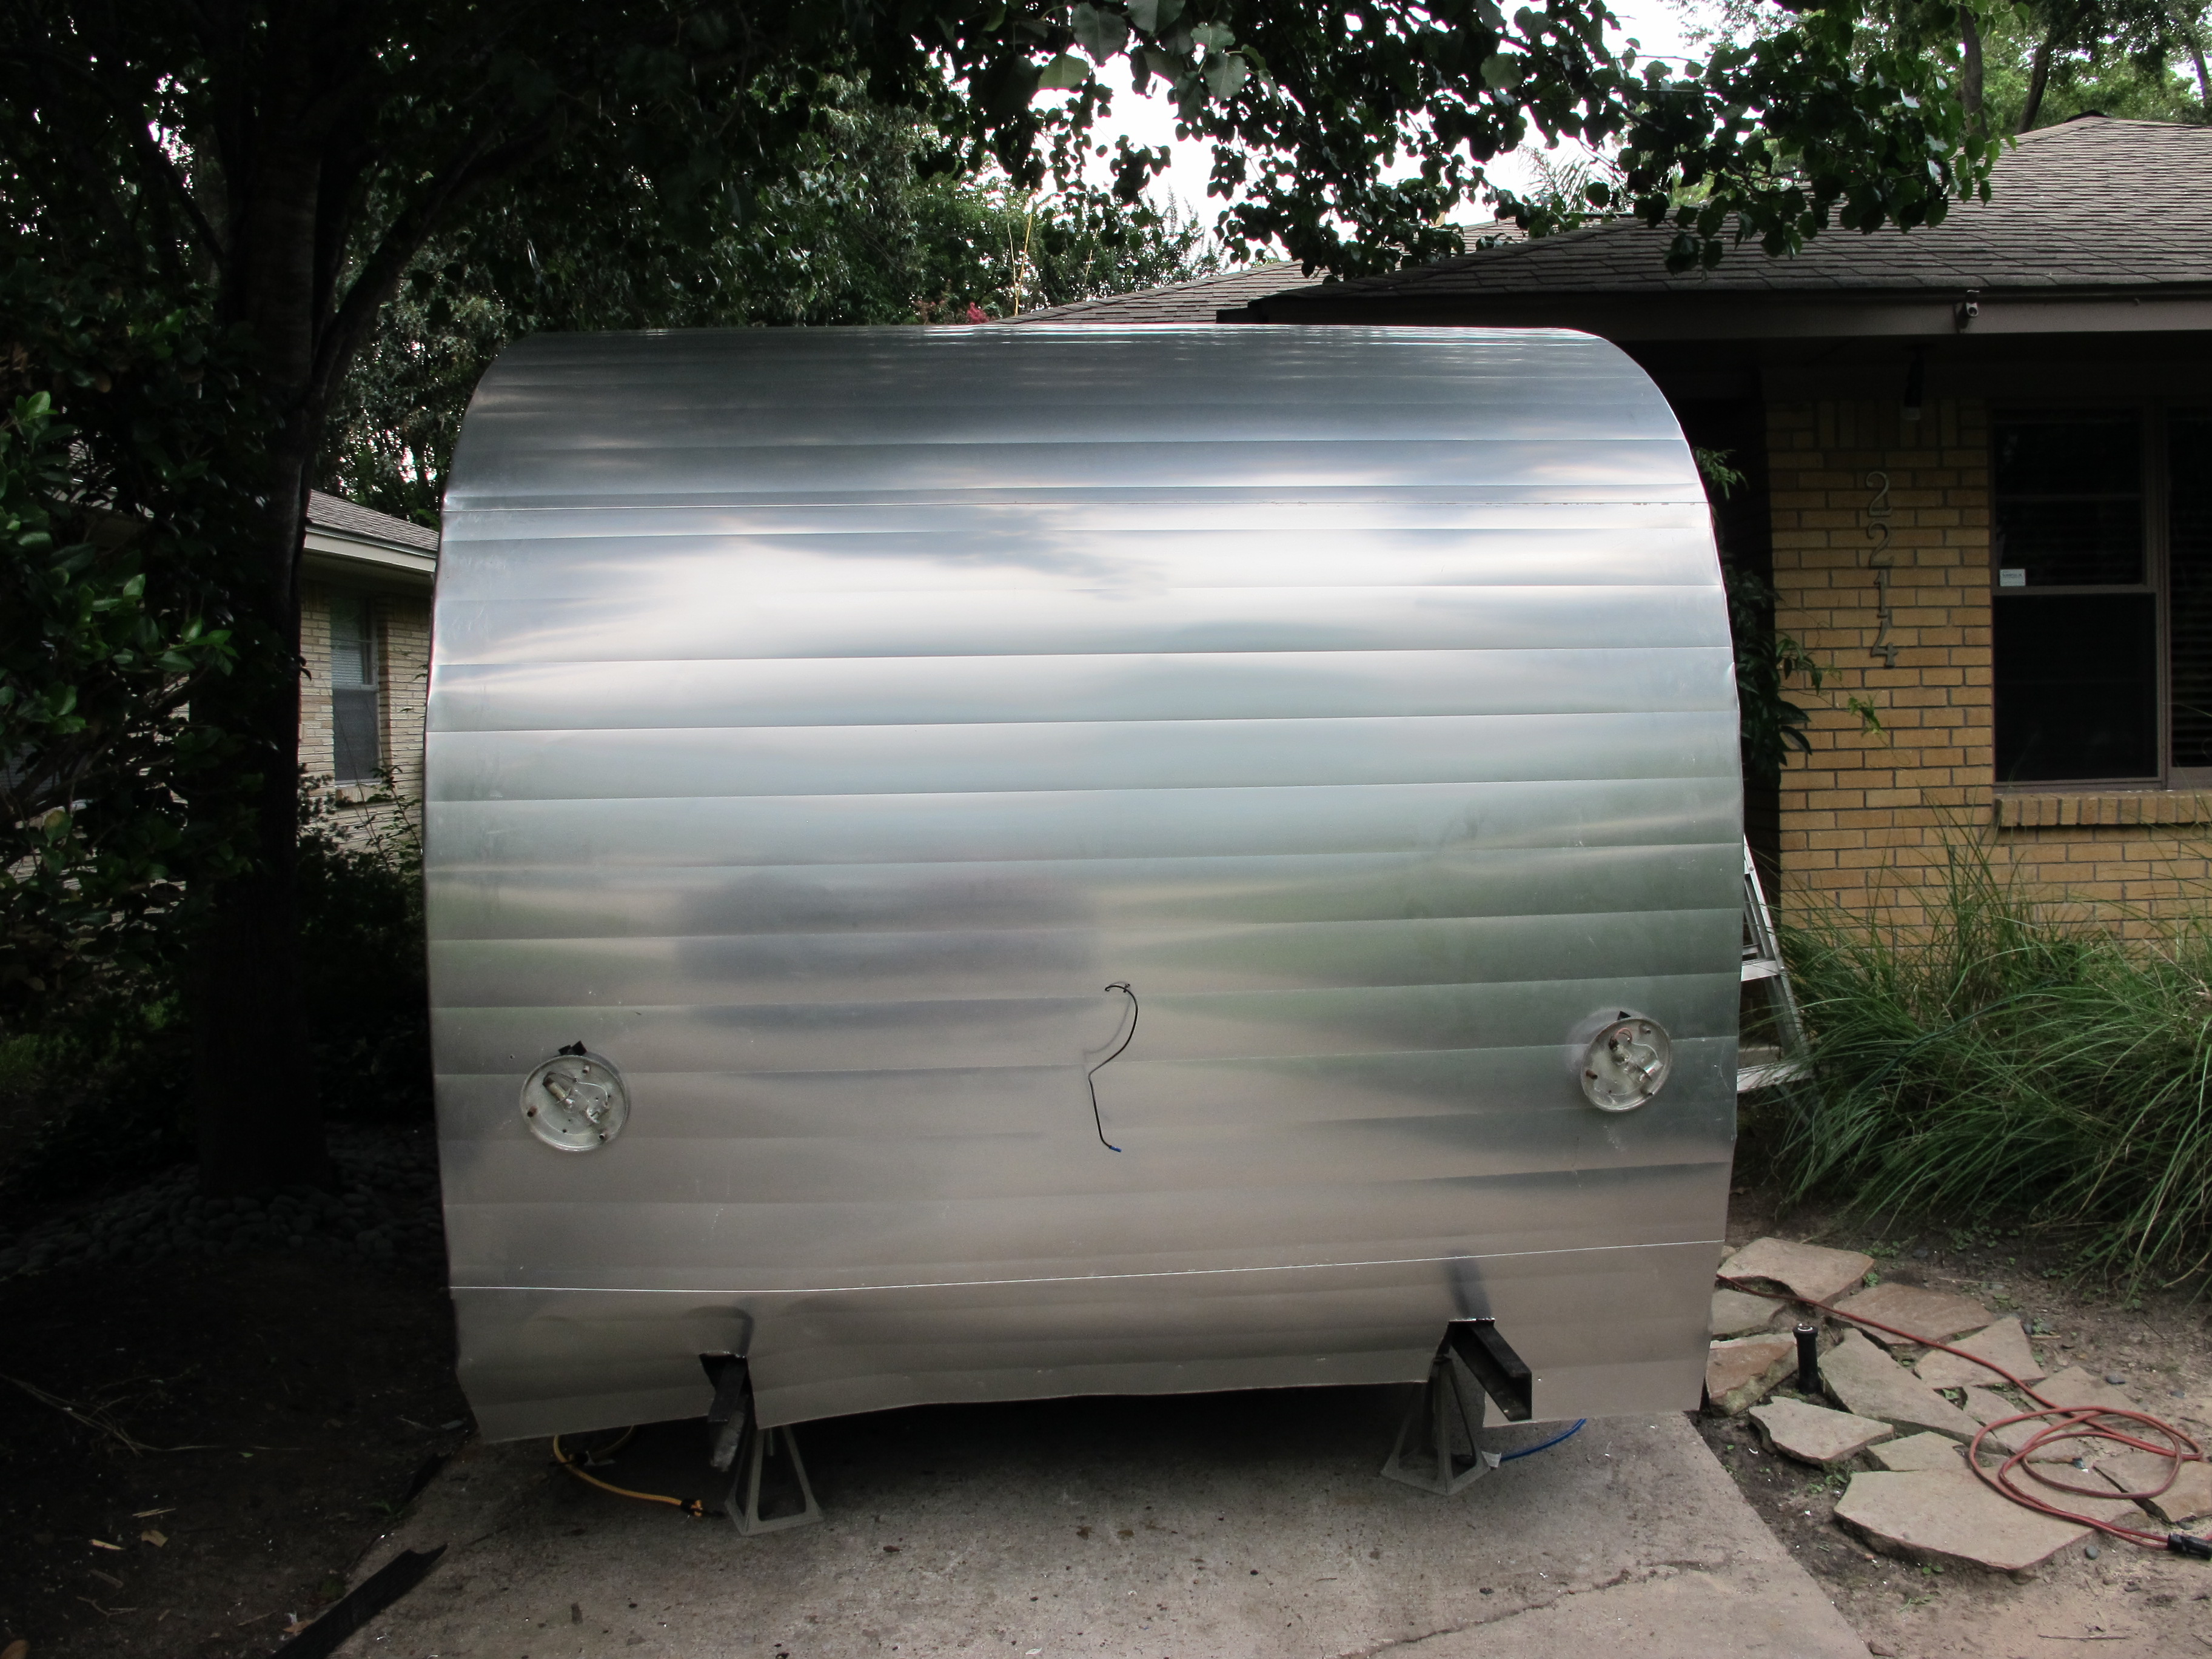
And here’s a shot of the whole thing after two hard days of labor.  I still need to finish the very bottom of the rear, but it’s almost there!  I also need to finish cutting out the window holes and add the drip rail and trim.

IMG_4756

I’m glad this week is over.  I am hoping that next week will be better!

Working Vacation – Day Six

Posted on

I’m too tired to write a post tonight.  It was a REALLY long day.  I didn’t finish putting the skin on in one day.  I think maybe I was a little delusional thinking I could finish in one day.  I did get pretty close though!  I just thought I’d write a quick note to say I’m still alive (although I did get a pretty good shock from the tail light wires today).  I will write the full update tomorrow once I’ve had some rest.


Here’s a sneak peek at today’s progress smile emoticon

IMG_4730

Working Vacation – Day Four

Posted on

Fortunately, today went pretty well and I got a lot accomplished.  smile

Here’s an updated list based on the one I posted yesterday:

  • Done – Install one more piece of wood along the bottom rear of Junebug for skin to attach to, will need to modify slightly from original design due to the steel beams sticking out of the back for the bumper.
  • Done – Paint undercarriage with black fence post paint after spraying some sealant on the seam of the metal flashing along the rear undercarriage (just to be extra sure it’ll stay dry).
  • Almost Done – Finish building a new frame and support beam for the roof vent and install.
  • Tomorrow – Run new 12 gauge wires along roof to receptacles and relocate breaker box to spot under the bed and exterior power inlet to a lower spot on the street side of Junebug.  (Need to order the new plug and power box, but I can buy the wires for now and get those in before the skin)
  • Tomorrow – Finish running the wiring for the running lights and license plate light and hook up to car to test.
  • Tomorrow – Purchase rigid foam insulation and install.

I started today by going to Lowes and Home Depot to buy electrical wiring and other supplies.  I went ahead and bought some Reflectix radiant barrier insulation while I was there to cover the really curvy parts of the ceiling.  I’ll go back tomorrow to get the rigid foam insulation.  I’m going to have to cut it because it won’t fit in my Tiguan otherwise.  While I was at the store, the freight company called to say they’d be at my house at 12pm.  Huh?  They were supposed to show up between 3-6pm!  I told the guy that I could only get a helper between 3-6pm, but he assured me that he would help me unload the two boxes.

He showed up about 12:30pm, and he was true to his word, he helped me unload the boxes and even opened them so I could inspect everything.   Everything looked good for the most part.  There was one spot that was damaged. but I decided it was a tolerable dent and I certainly didn’t want to send it back so I went ahead and signed for it.  I was able to drag the boxes into my kitchen for now since my garage is full.  smile

IMG_4690

New siding! This is the back of it, so it doesn’t look as shiny on this side.

IMG_4692

Here’s the dent that is in the side pieces. Not sure if it is affecting the other pieces underneath or just this one. I’ll find out when I unroll them. It is right next to the part that goes up inside the s-lock seam and toward the end of the roll, so I’m hoping maybe I can hide it somehow.

After my siding arrived, I resumed working on adding some additional pieces of wood to the rear so that I could attach the siding to it.  I don’t think I did this perfectly thanks to the steel beams in the way, but it should work anyway.  As you can see from the picture below, I will have to cut some slots into the siding to get it to curve around the steel beams.  I have to do the same thing in the front, so hopefully it will still look good when I’m done and seal properly.

IMG_4693


Next, I got out the fence post paint.  This stuff really does look and smell like asphalt, gross! IMG_4696

IMG_4695

Here’s the undercarriage before. There are a LOT of spiders under here. It’s a wonder I didn’t get bitten…that I know of.

IMG_4700

Undercarriage after. As you can see, I missed a few spots. I was using a roller and it was hard to get all the corner areas. I will go back in later and finish it up.

I also applied some fence post paint to the wood along the bottom all around the camper for added protection against water damage.
IMG_4698 IMG_4697

After I finished this task, I was covered in fencepost paint spots.  Later, I had to scrub off the top layer of skin to get it off!  That stuff is messy.

My last project of the day was the make a frame to go around the Fantastic Vent.  I made a frame, but I didn’t realize that the vent sticks up quite a bit higher than the old vent, so I will need to add another layer of wood.  I’m kind of worried that it sticks up too high and will make my skin look lopsided.  With the top part of the vent on, it sticks up a full 7/8″ higher than the cross beams.  I’m sure this is to ensure the water runs off and doesn’t collect causing a leak, but that seems excessive.  I guess I’ll see how it looks when the skin is on, hopefully it won’t be as bad as I think.


IMG_4701

Roof pic before putting the actual vent in. This is just the piece that goes inside the camper and connects with the vent on top.

IMG_4702

The view of the insert piece from the interior.

IMG_4703

I haven’t installed it yet, but this is what it will look like on the interior.

I’m happy with how the Fantastic Vent looks inside.  I am glad I got the translucent lid instead of opaque.  It’s nice to have a little sky light!

I was so exhausted after getting the things above done that I called it a day.  Tomorrow, I will run the new wires for the lights/outlets, finish connecting the tail light wiring for the side running lights, and install the insulation.  I also have to add a few more pieces to the frame around the vent and one more piece to the front of the camper frame.  Hopefully it all goes well and I will be ready to install the skin on Saturday!  I’m a little nervous about the skin because based on my past experience, everything is always harder than I thought it would be so this will probably be no different.  Oh well, I will give it my all and hope for the best!  That’s all anyone can do in life anyway.

Stayed tuned to see if I got everything on my list accomplished tomorrow!  cool

Working Vacation – Day Three

Posted on

Today was the one day this week that I had to go to my actual job that pays my bills, so I couldn’t work on Junebug.  Luckily that’s over now and I can get back to the fun stuff.  smile emoticon

I decided to make a list of everything I need to do before I put the new skin on Junebug.  I have other projects that I would probably rather work on, but I need to prioritize.  The skin is supposed to arrive tomorrow between 3 and 6pm, according to the freight shipping company.  When I posted my complaints about dealing with the shipping company on http://vintagetrailertalk.freeforums.net/ it was funny how many others had similar experiences.  Apparently, freight shipping companies really hate customers like me who order heavy items to be delivered to my residential address.  I called my friend Jennifer to come over tomorrow during that window to help me unload the boxes.  They will each be 11 feet long, not sure how wide, and weigh about 100 pounds each.  My AC unit that I got for Junebug weighs 50 lbs and I can lift it no problem, so I am pretty sure we can lift those boxes.  Fingers crossed!

To give you an idea of the exterior look that I’ll be going for on Junebug, here’s a picture of another camper with a similar design.  I would like to keep the top half silver as well and paint the bottom half a lavender color.  I still haven’t decided on the stripe, I thought about doing the white stripe like the pic below, but I also thought a light green stripe would be fun.  It would definitely give it a different look with the green stripe.

shasta_pink_silver

Here’s the list of things I need to accomplish before Saturday, when I have three friends coming over to help me put the skin on.

  • Run new 12 gauge wires along roof to receptacles and relocate breaker box to spot under the bed and exterior power inlet to a lower spot on the street side of Junebug.  (Need to order the new plug and power box, but I can buy the wires for now and get those in before the skin)
  • Install one more piece of wood along the bottom rear of Junebug for skin to attach to, will need to modify slightly from original design due to the steel beams sticking out of the back for the bumper.
  • Finish running the wiring for the running lights and license plate light and hook up to car to test.
  • Paint undercarriage with black fence post paint after spraying some sealant on the seam of the metal flashing along the rear undercarriage (just to be extra sure it’ll stay dry).
  • Finish building a new frame and support beam for the roof vent and install.
  • Purchase rigid foam insulation and install (I’ll do this last on this list).

And a list of things left to do that can be done after the skin is on:

  • Finish upgrading the electrical system to 30 amp once parts are in:  Install new power box, update circuit breakers, install new 30 amp plug for power inlet, etc
  • Add finishing trim along seams in the paneling as well as trim around kitchen countertop and backsplash.
  • Finish building new frame for bed and benches, apply shellac, and install.
  • Modify old cushions to fit new layout
  • Install air vents in the appropriate locations for the new AC.
  • Finish cleaning all windows and polish the aluminum.
  • Strip old paint off of door hardware, window eyebrows, and j-rail.
  • Re-install windows with new putty tape and stainless steel screws as well as j-rail and eyebrows.
  • Install Fantastic Vent in roof and seal.
  • Apply shellac to the interior of the new door and add new skin to exterior of door, then install.
  • Repeat same process for the baggage door.
  • Finish painting closet/bathroom purple.
  • Add finishing touches on interior like hanging curtains, pictures, add bedding, etc.
  • Hopefully finish by end of July so I can take Junebug to my grandma’s house to show my family.
  • Have unveiling party for Junebug and invite all of my friends and family who wonder where I’ve been all this time and are starting to worry about my obsession.
  • Go to first vintage camper rally in September!

So, I still have a lot left to do, but I think I can do multiple things on the list in one day, so hopefully I can make good progress over the next few weeks.  I had better get to work studying electrical circuits tonight since I am now going to be doing that project myself too.  Thank goodness for the internet!


Working Vacation – Day One

Posted on

So, I decided to take this week off work (well almost all of the week, I have a meeting on Wednesday that I couldn’t reschedule).  Most people would go to the beach or relax somewhere nice with their feet up, but not me, I must admit that my little addiction means I plan to spend my entire vacation working on Junebug. lol   I know, I’m hopeless.  I swear I will relax and go camping once I am done with this project!  I like a challenge, and my new goal is to finish Junebug (or get as close as possible) by the last week of July (i.e. two weeks from now eek).  My family is coming down to my grandma’s in Austin to visit, and I would love to take Junebug to her house again to show how changed she is!

Early last week, I called Steve at Hemet Valley RV and ordered my new pre-polished aluminum siding for Junebug.  I sent him the “lovely” drawing below to help explain my order.  I think it’s pretty clear that my sketching abilities are rudimentary at best. haha

new skin 1


In order the measure the size of the roof/rear/front of Junebug, I actually tied a piece of twine to the tongue and then threw the rest over the top of the camper until it fell on the other side.  After that, I removed the twine and measured how long it was.  I don’t know if this was the best method, but it was sure a lot easier than trying to use the measuring tape!  IMG_4640


After discussing the sizes I needed with Steve for a few minutes, we settled on one long piece with factory seams to cover the roof, rear, and front of the camper that would be 84″ wide by 24′ long.  He wanted it to be 24′ feet long vs 20′ feet long since that would probably be cutting it too close and it comes in 4′ pieces.  I will also be getting four side pieces, two for each side.  Each will be 10′ long and 4′ tall, with the bottom piece already bent at the bottom so I can easily fit it to the bottom of the sides.  The top piece will have an S lock seam in it so that it will easily slide into the bottom piece, creating a water-tight seal.  I figured it would take a few weeks for me to get my siding, but Steve told me that it should arrive by this Thursday, July 10th!  I was so pleasantly surprised that it would be ready and shipped so quickly!  I have already enlisted the help of three friends next weekend to help me put it on Junebug in exchange for beer, food, and swimming in the pool after.  smile  I can’t wait!

In preparation for the new skin, I decided I had better look into what type of aluminum shears I should get.  I already have a multi-purpose hand-held set, but they don’t really work that well, so I wanted something better.  Today, I decided to buy a pair of electric metal shears from Northern Tool.  I tried them on my stainless steel backsplash, which is harder to cut than aluminum, and they worked great!  I am hoping they will make cutting the aluminum siding a cinch.

IMG_4667


My pool party for the 4th of July went well.  I was slightly hungover on Saturday, but that didn’t stop me from getting a few things done on Junebug after cleaning up the mess in my house.

I decided that I wanted to put a bit of metal flashing around the rear to add some protection from water that might get under the skin while driving on wet roads.  I thought the old siding would be put to good use for this purpose!

IMG_4641

piece of old siding before cutting a section off

IMG_4652

After attaching the aluminum and adding a piece of wood for extra support. Still not finished though..


I still need to add another piece of wood across the rear for the siding to attach to.  I’m trying to figure out the best way to do this since the new steel beams are in the way of attaching a piece of wood all the way across.  I may have to attach some pieces in sections.  I’m also planning to put some sealant around the flashing where it meets the wood.  I will be painting the undercarriage with Black Beauty Fence Post Paint as well.  I just picked up a huge 5 gallon drum of it from Home Depot.  I wanted less, but apparently they don’t sell it in smaller quantities.  If anyone wants some fence post paint, you know who to call!

I had the same welder I hired a while ago come back to help me fix the taillight wiring.  Initially, he was just going to help me prepare to connect the taillights again once the skin is on, but upon closer inspection, he thought it would be best to replace the wiring.  I thought that was probably a good idea seeing as how it was pretty old.  He added all new wiring and took some measurements and is planning to come back again soon to attach the bumper, repair my propane tank holder, and add a spare tire mount to the propane tank holder.  All of that is going to cost me $300 which is more than I wanted to spend, but I figured I might as well just get it done now and not have to worry about it later.

IMG_4651

New wiring – all different colors than the old wiring. Not sure if the colors have changed over time, or if the Shasta factory didn’t care. I’m guessing the latter based on experience…


It started raining later on Saturday, so I changed course and started building a drawer to go under the bed.  I used some pieces of pine for the frame then attached leftover pieces of birch as the bottom, sides, and front.  It’s a good sized drawer, it measures 35″ wide x 24″ deep, x 10″ tall.  I thought it would be easier to access than lifting up the bed to get things. IMG_4644
IMG_4646

IMG_4647

IMG_4648 
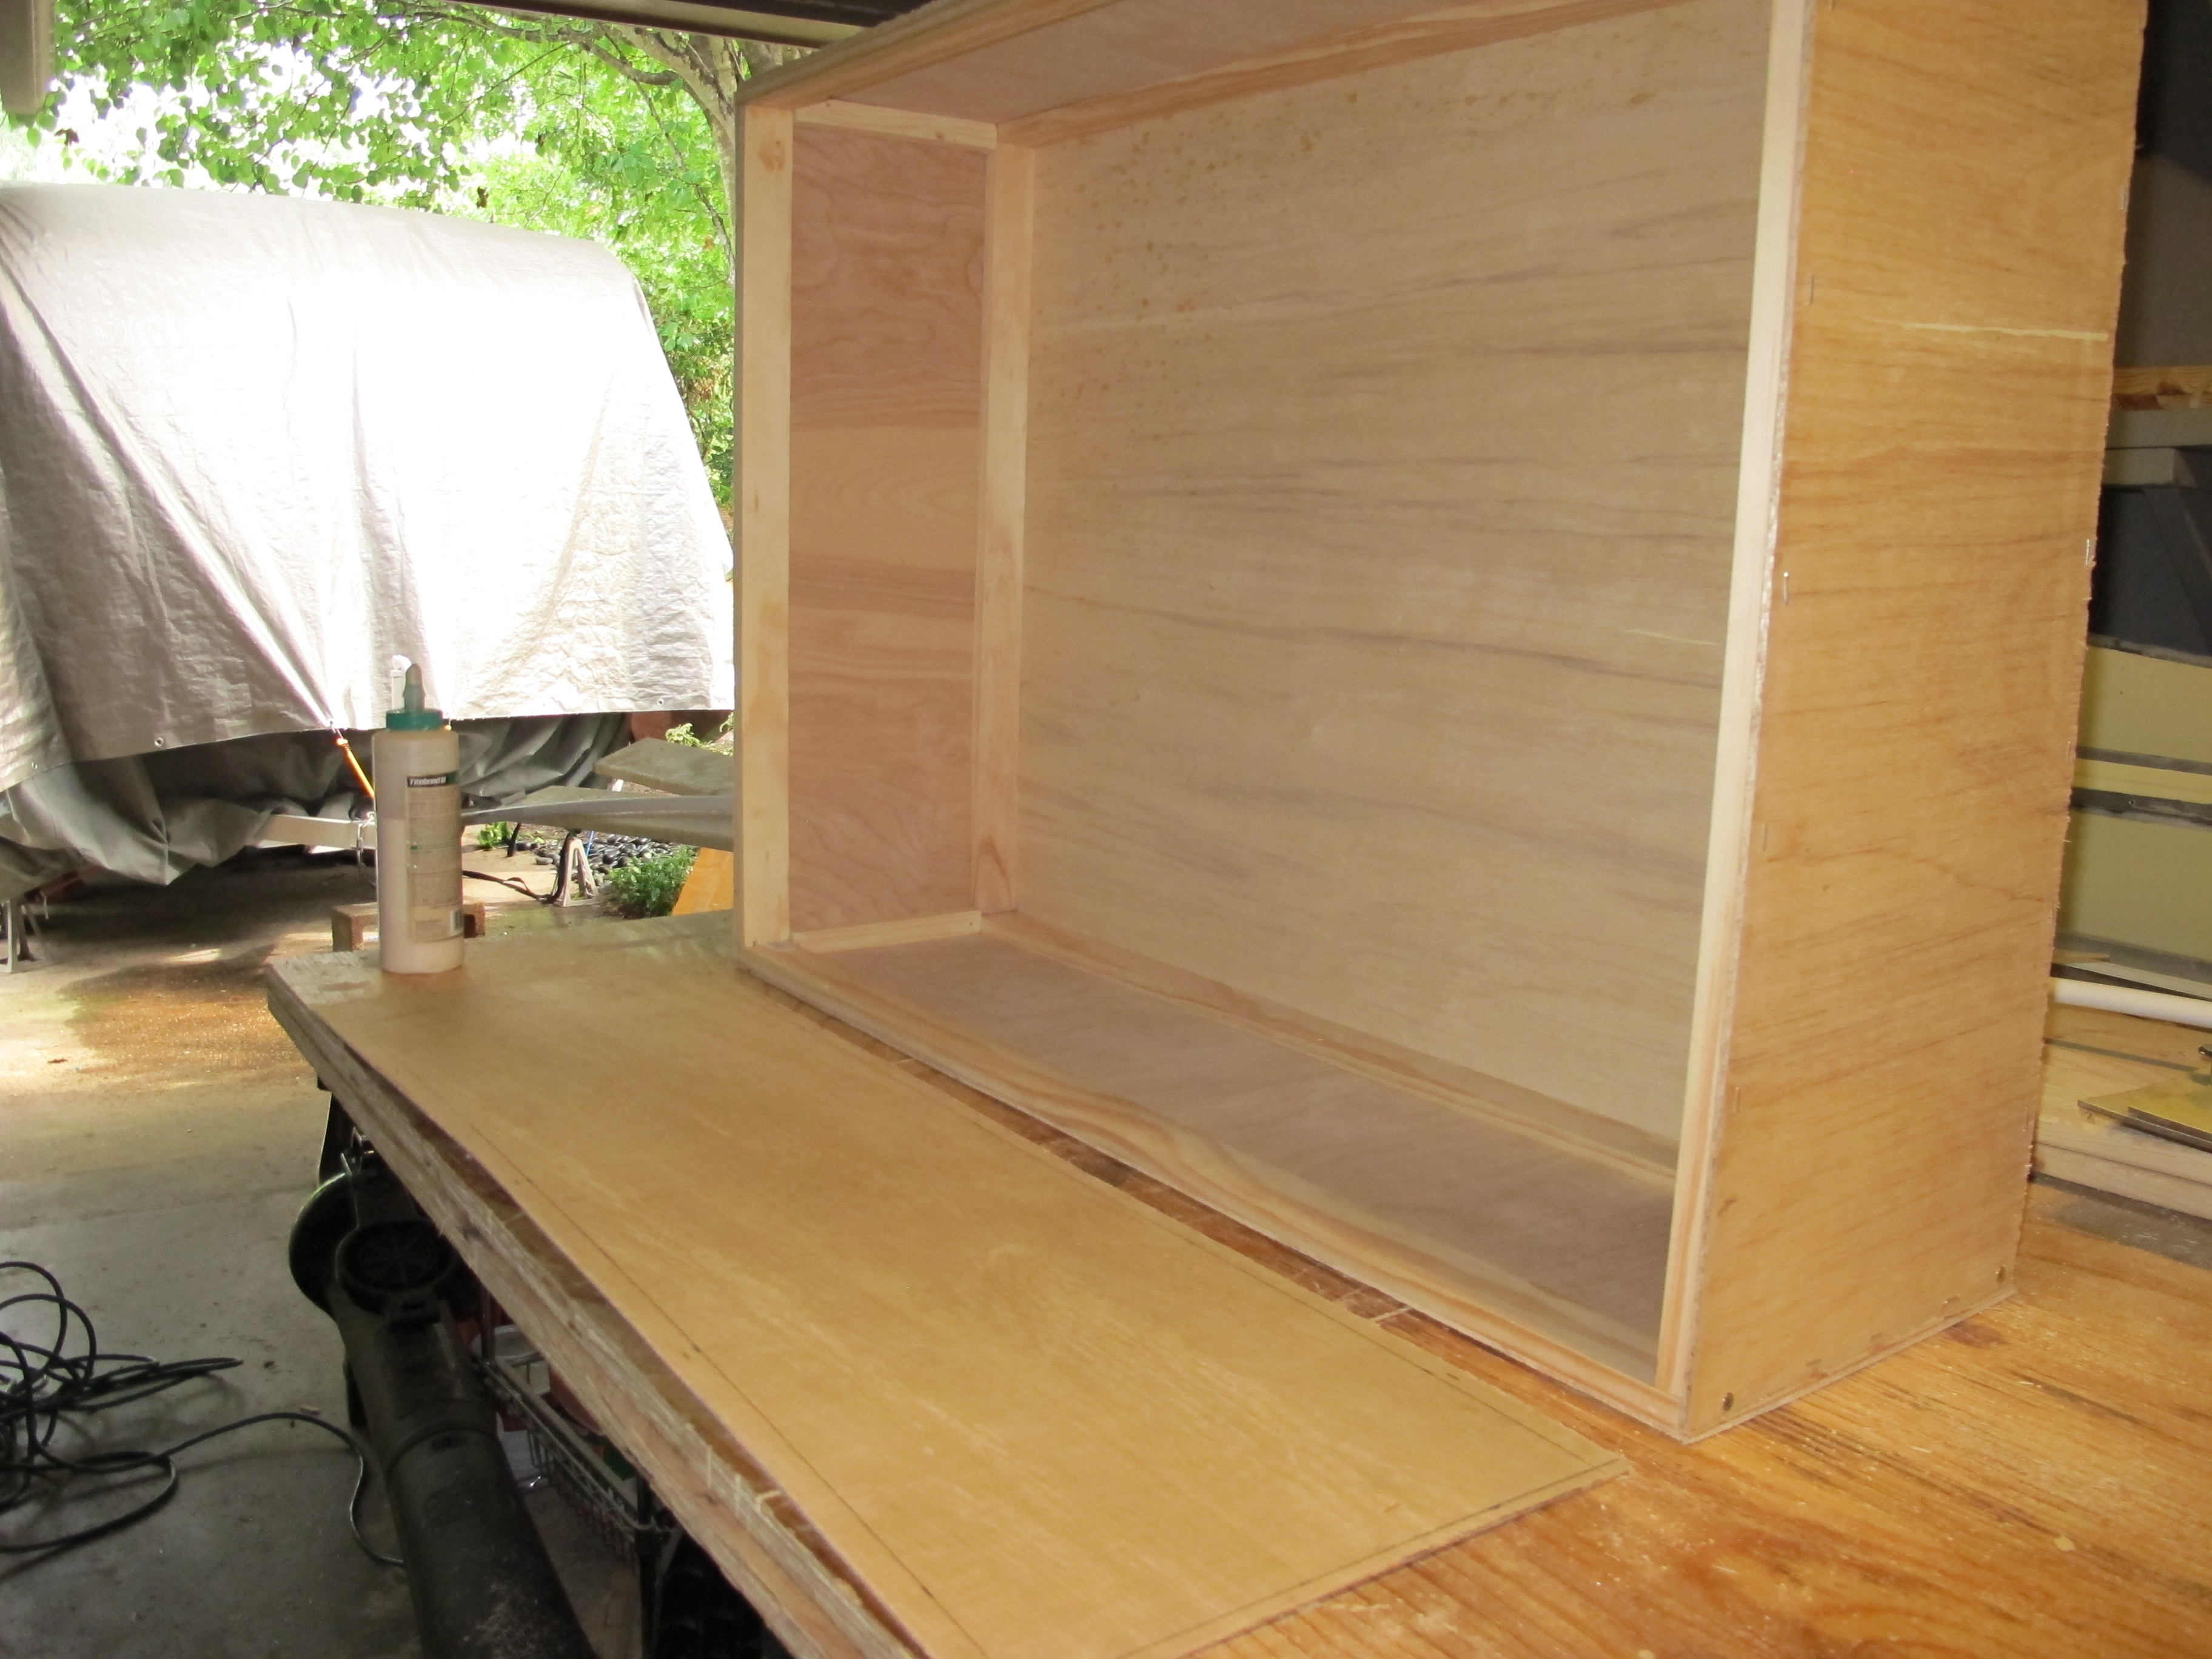
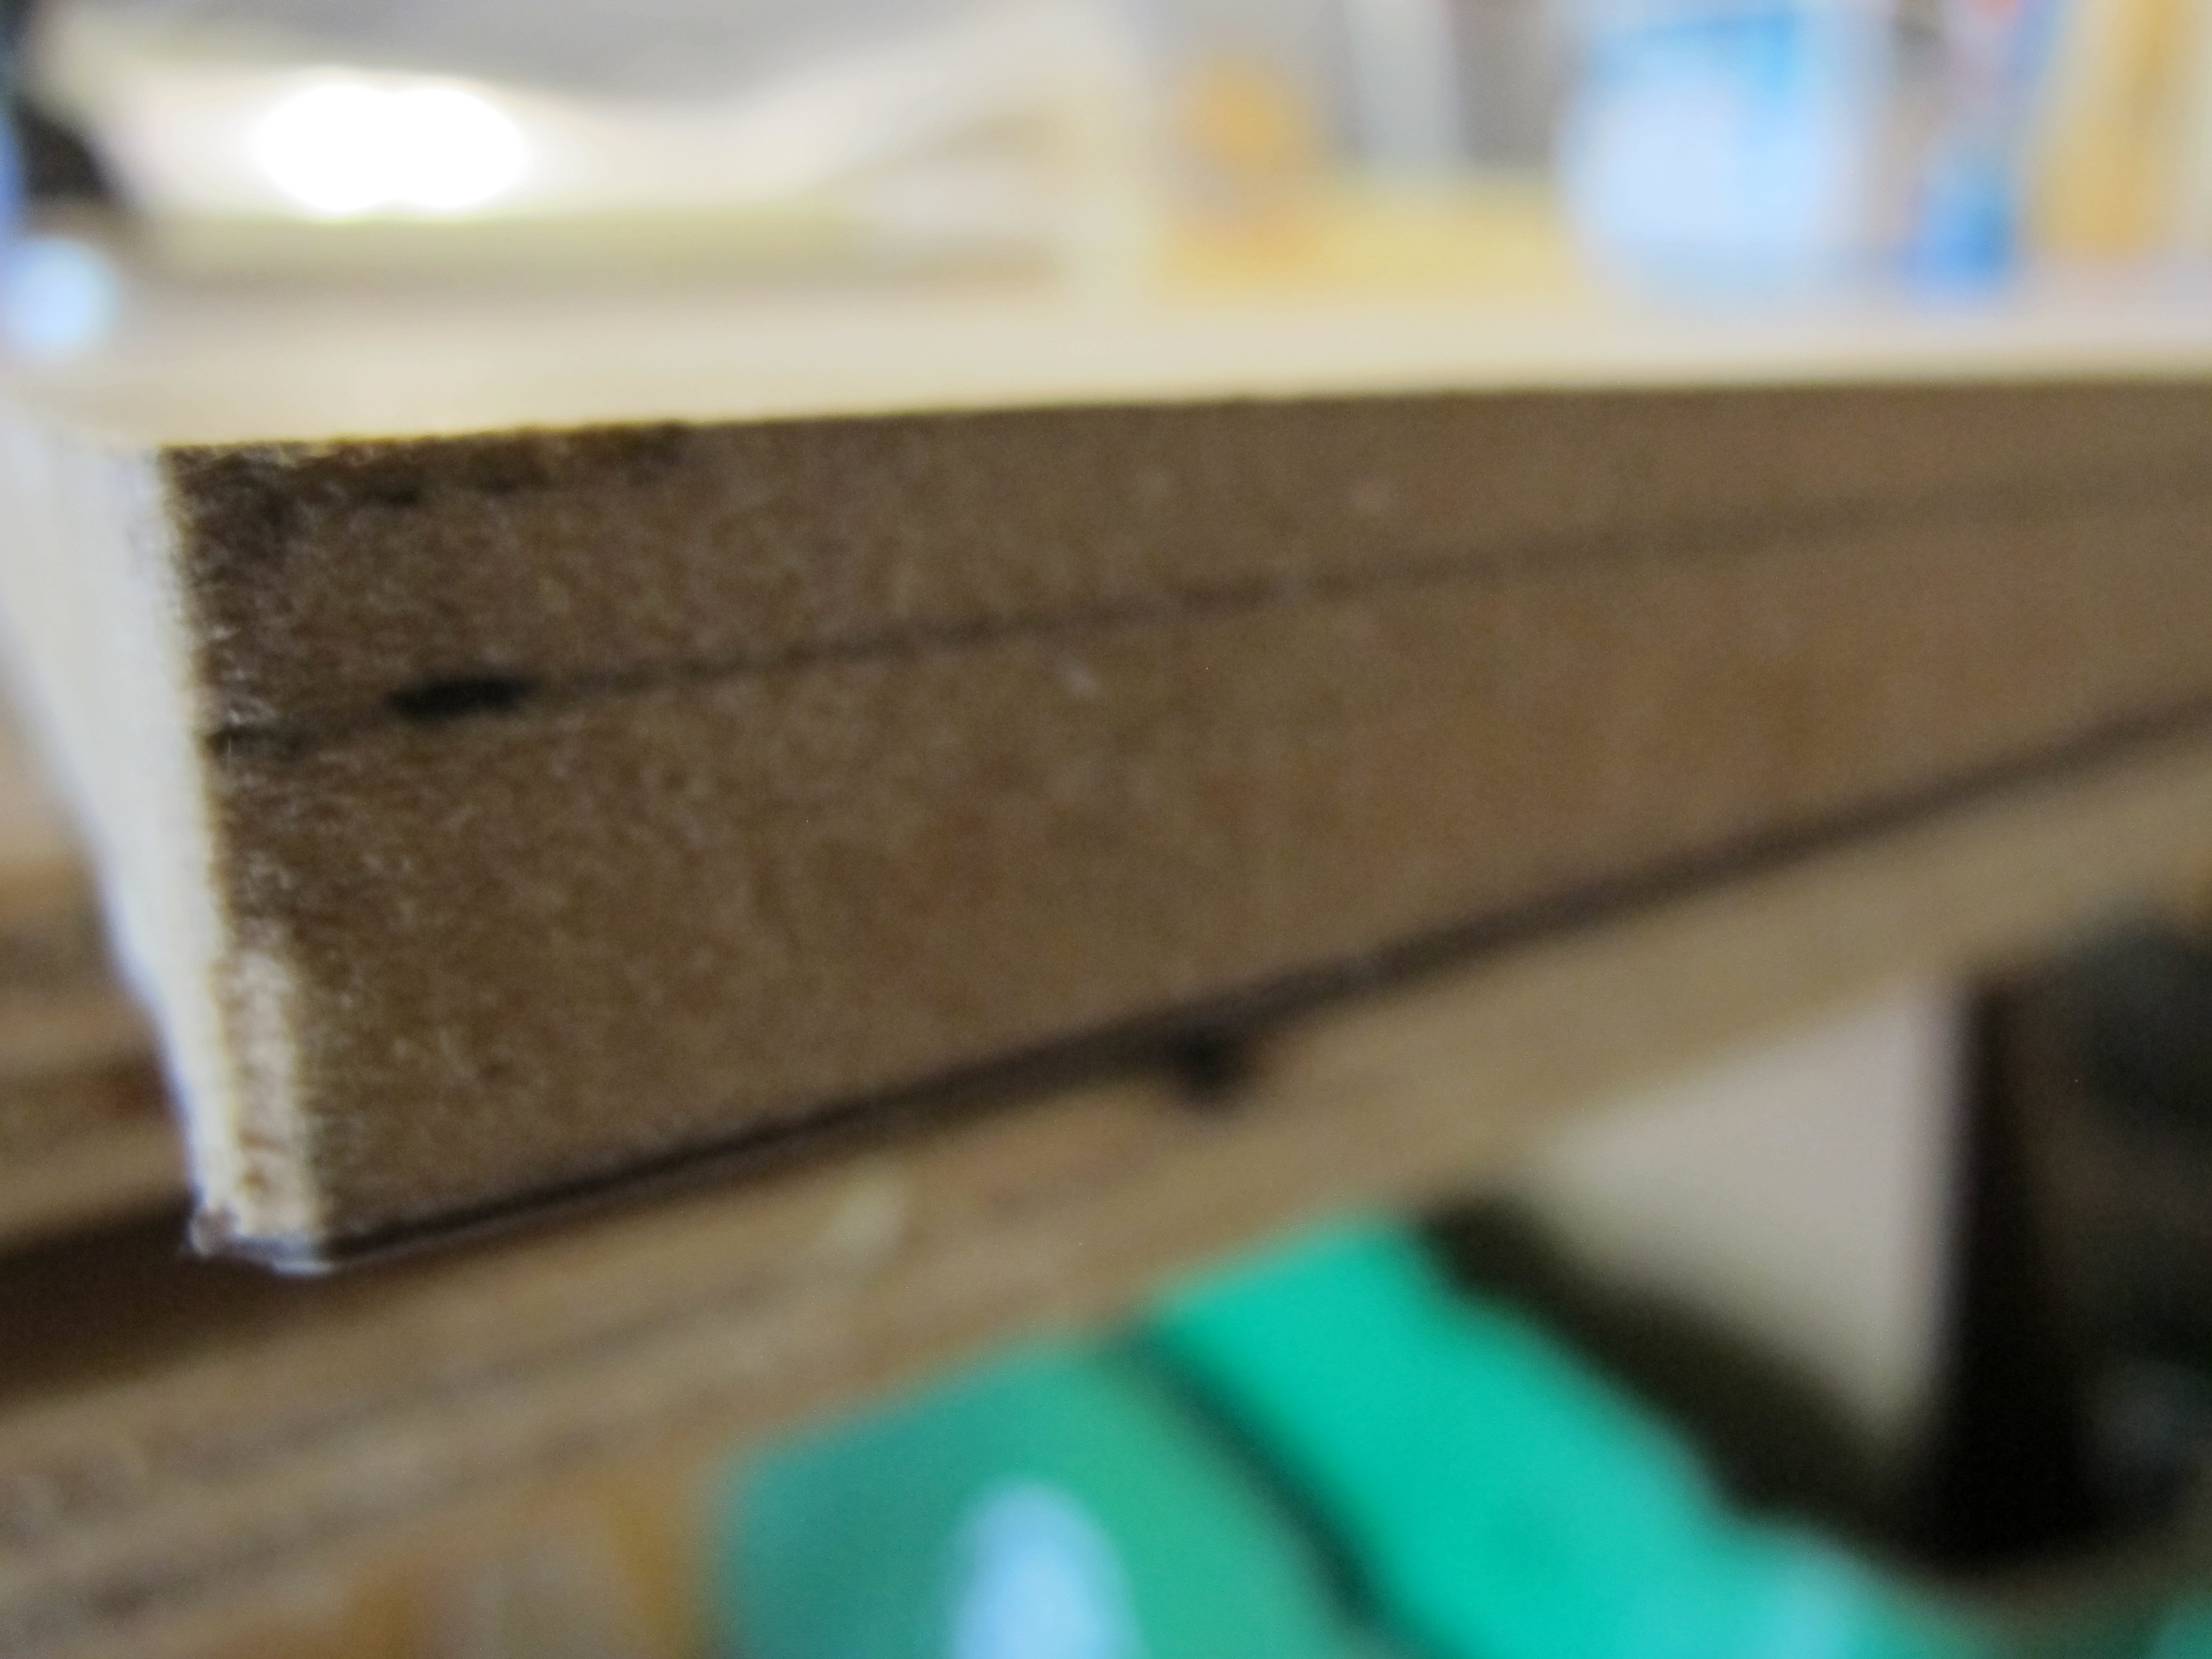
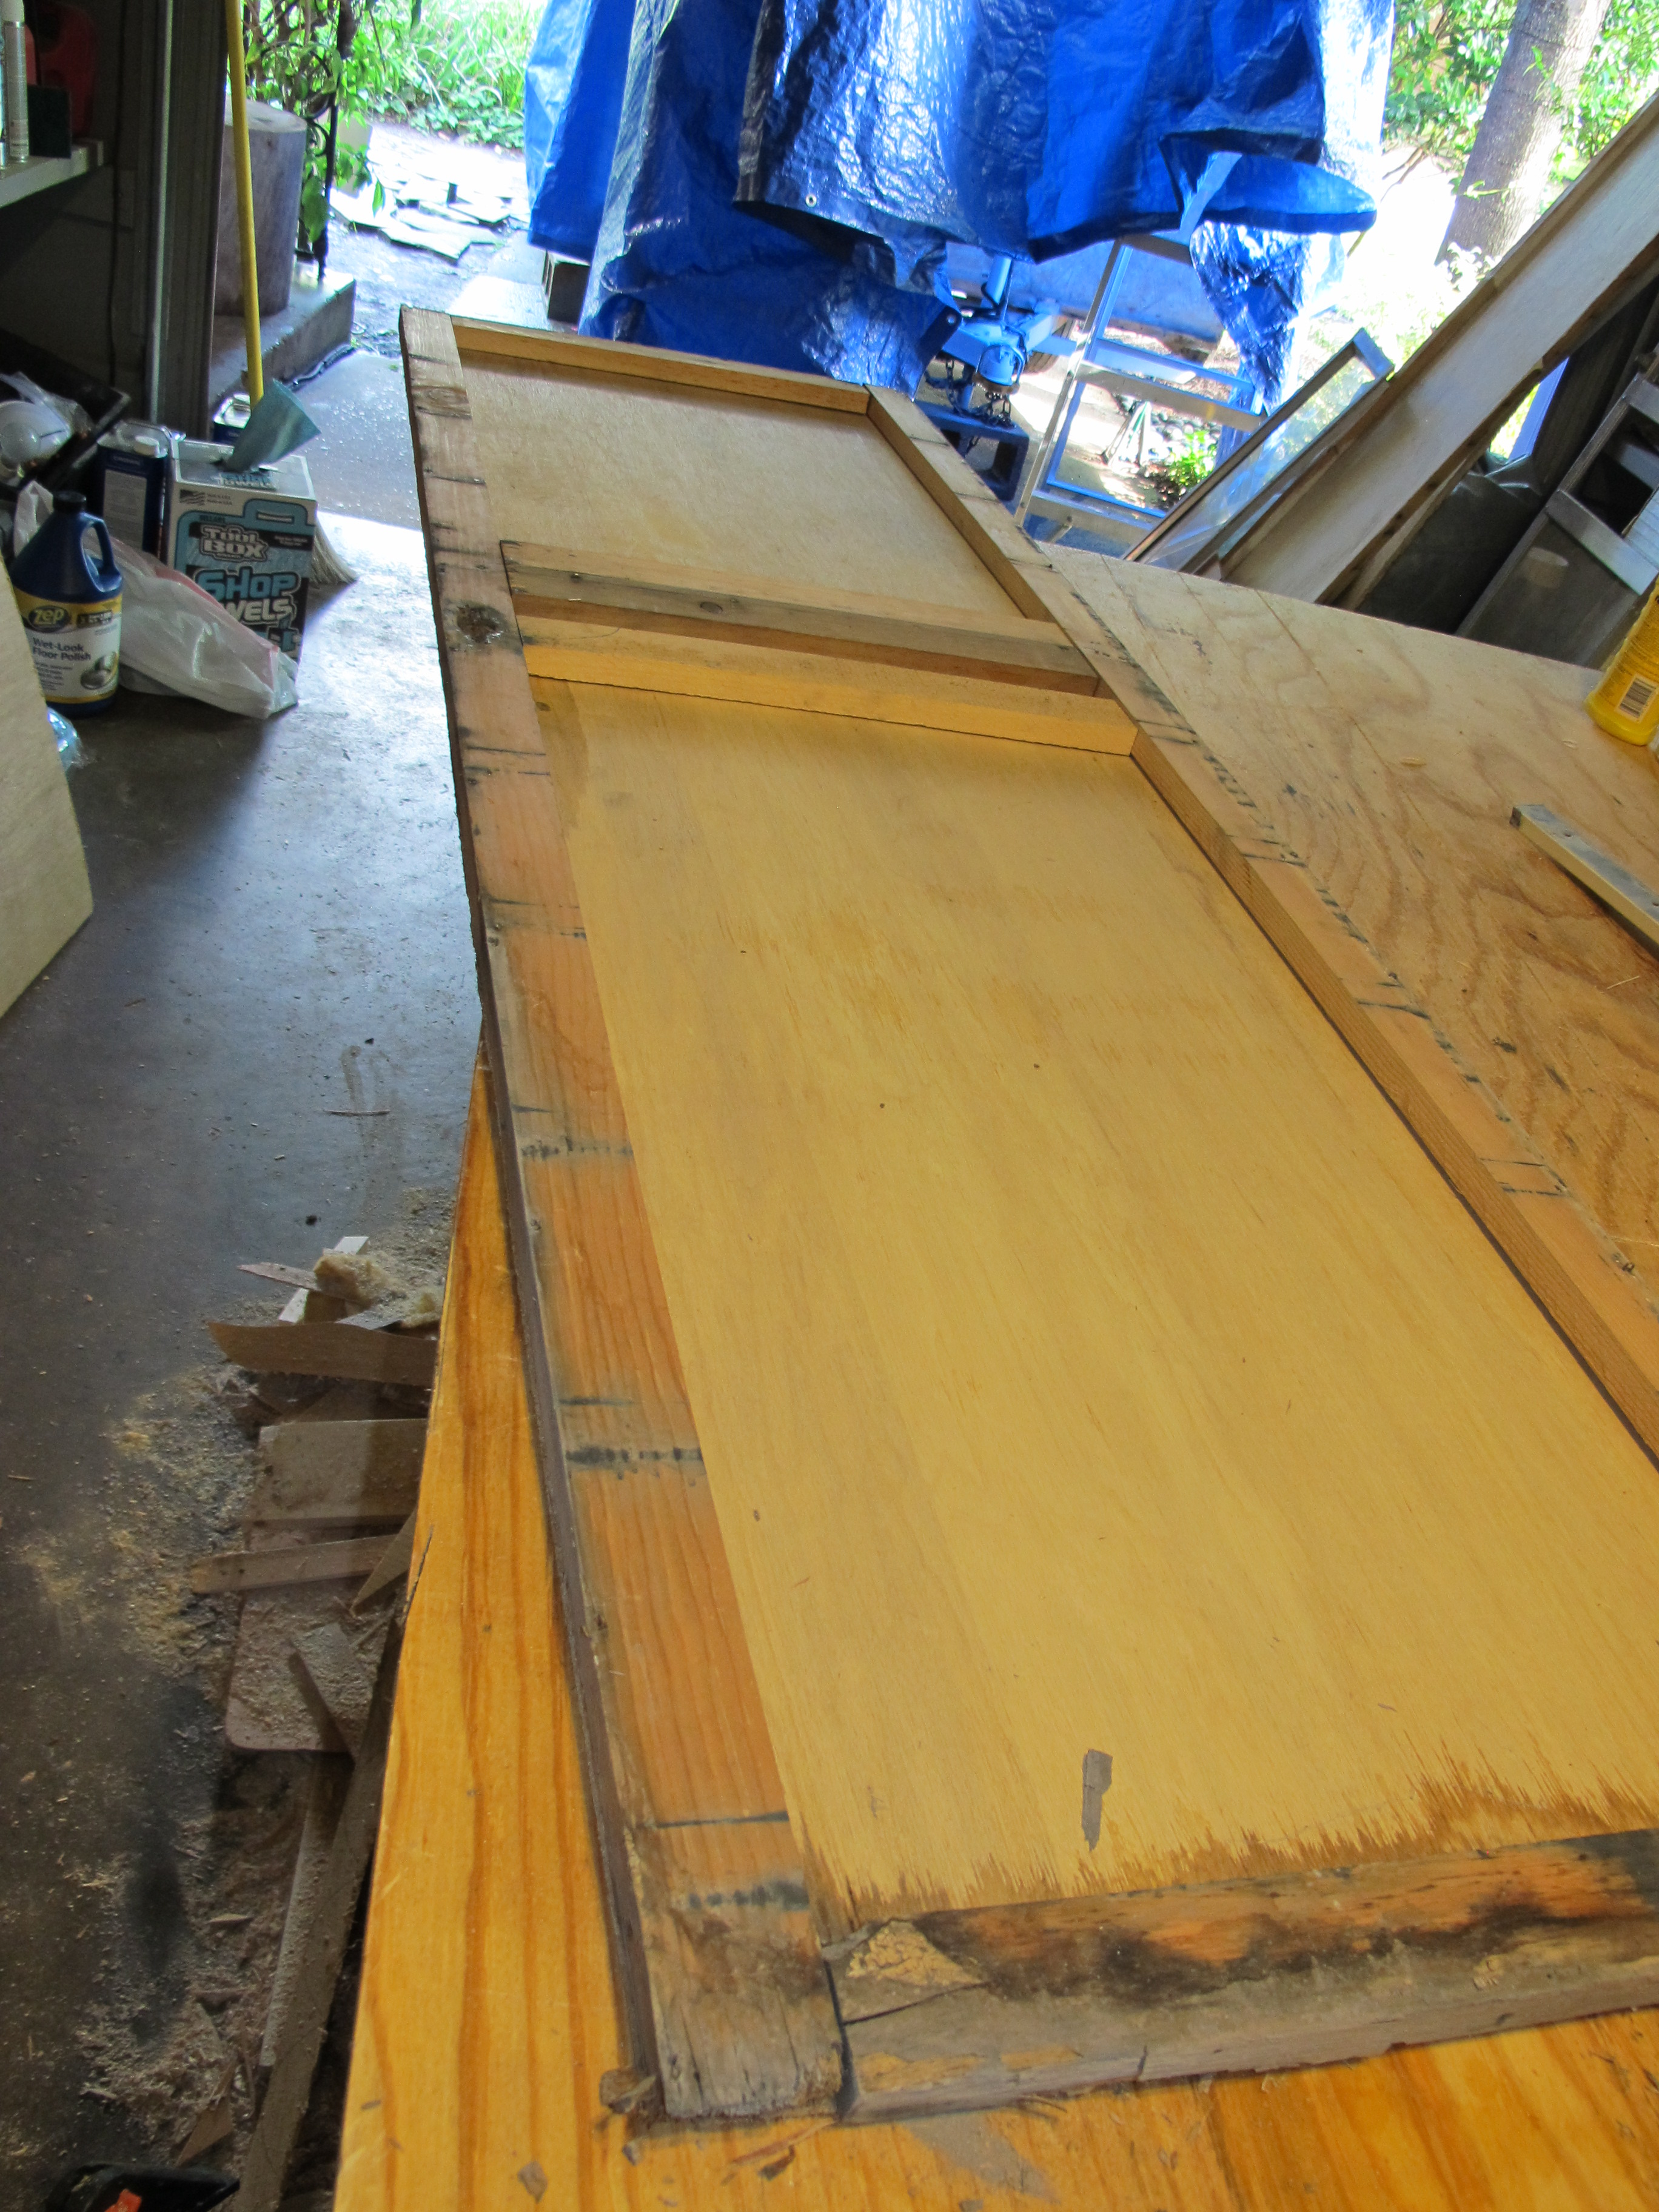
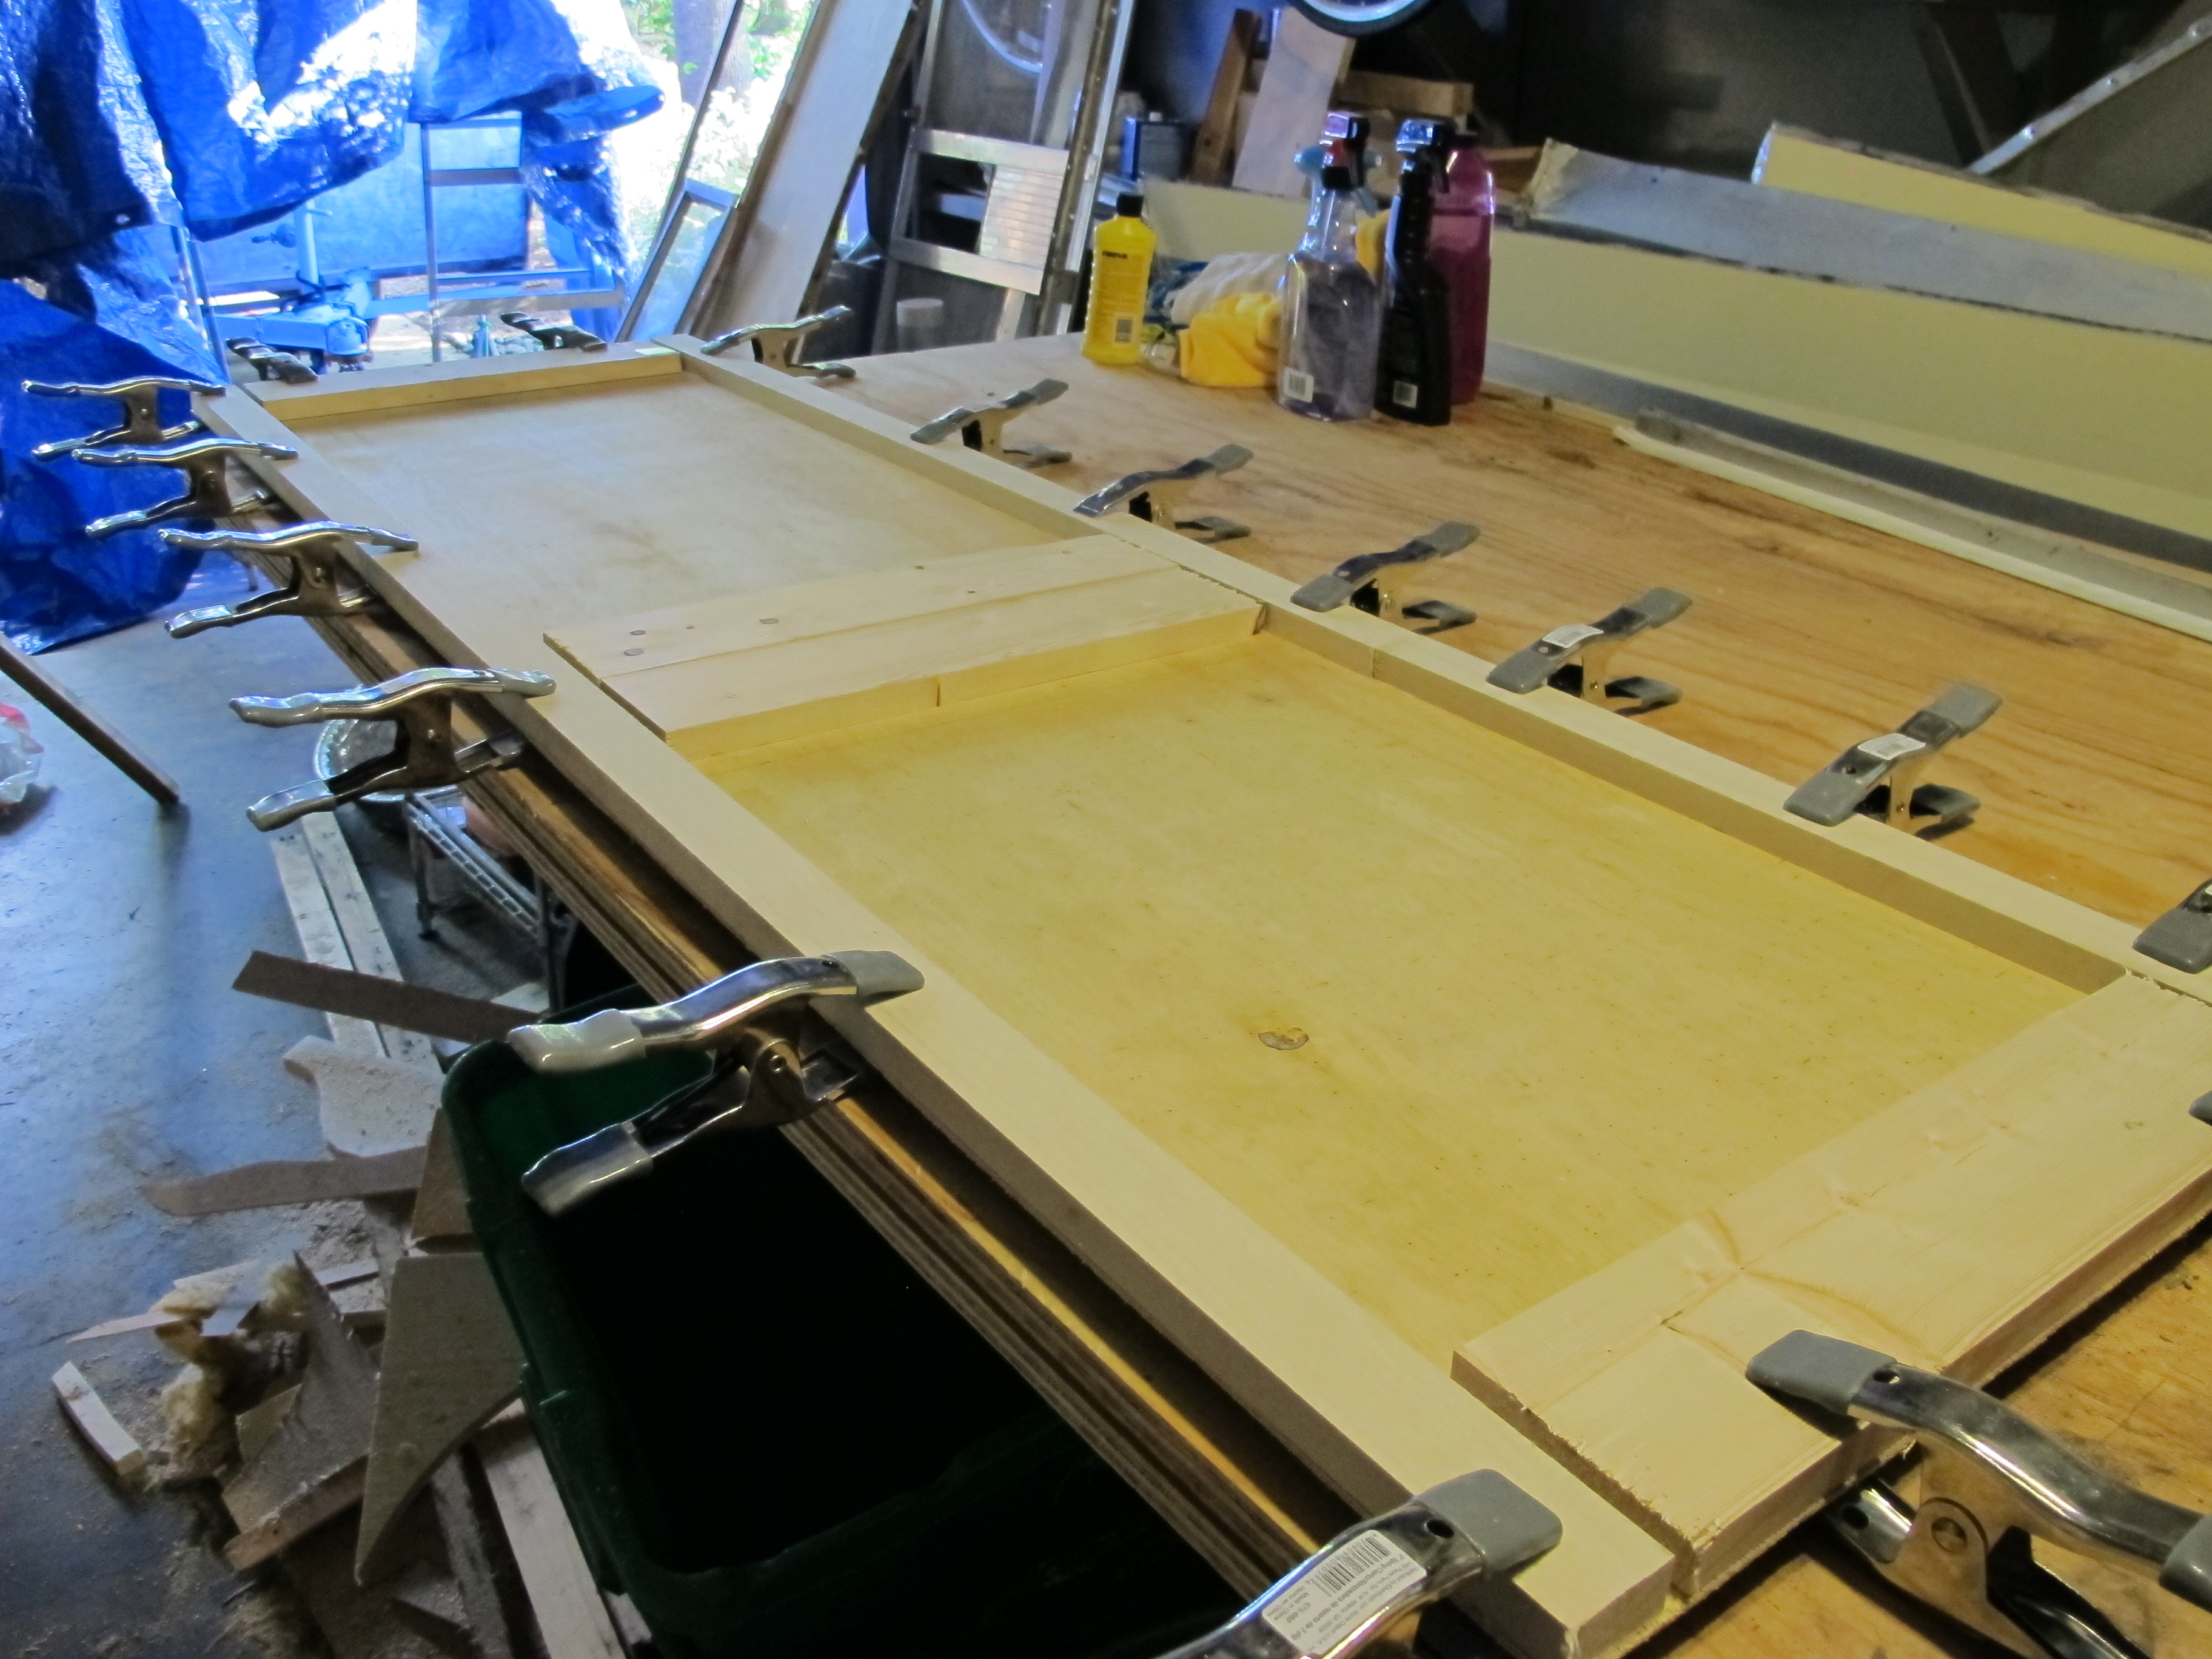
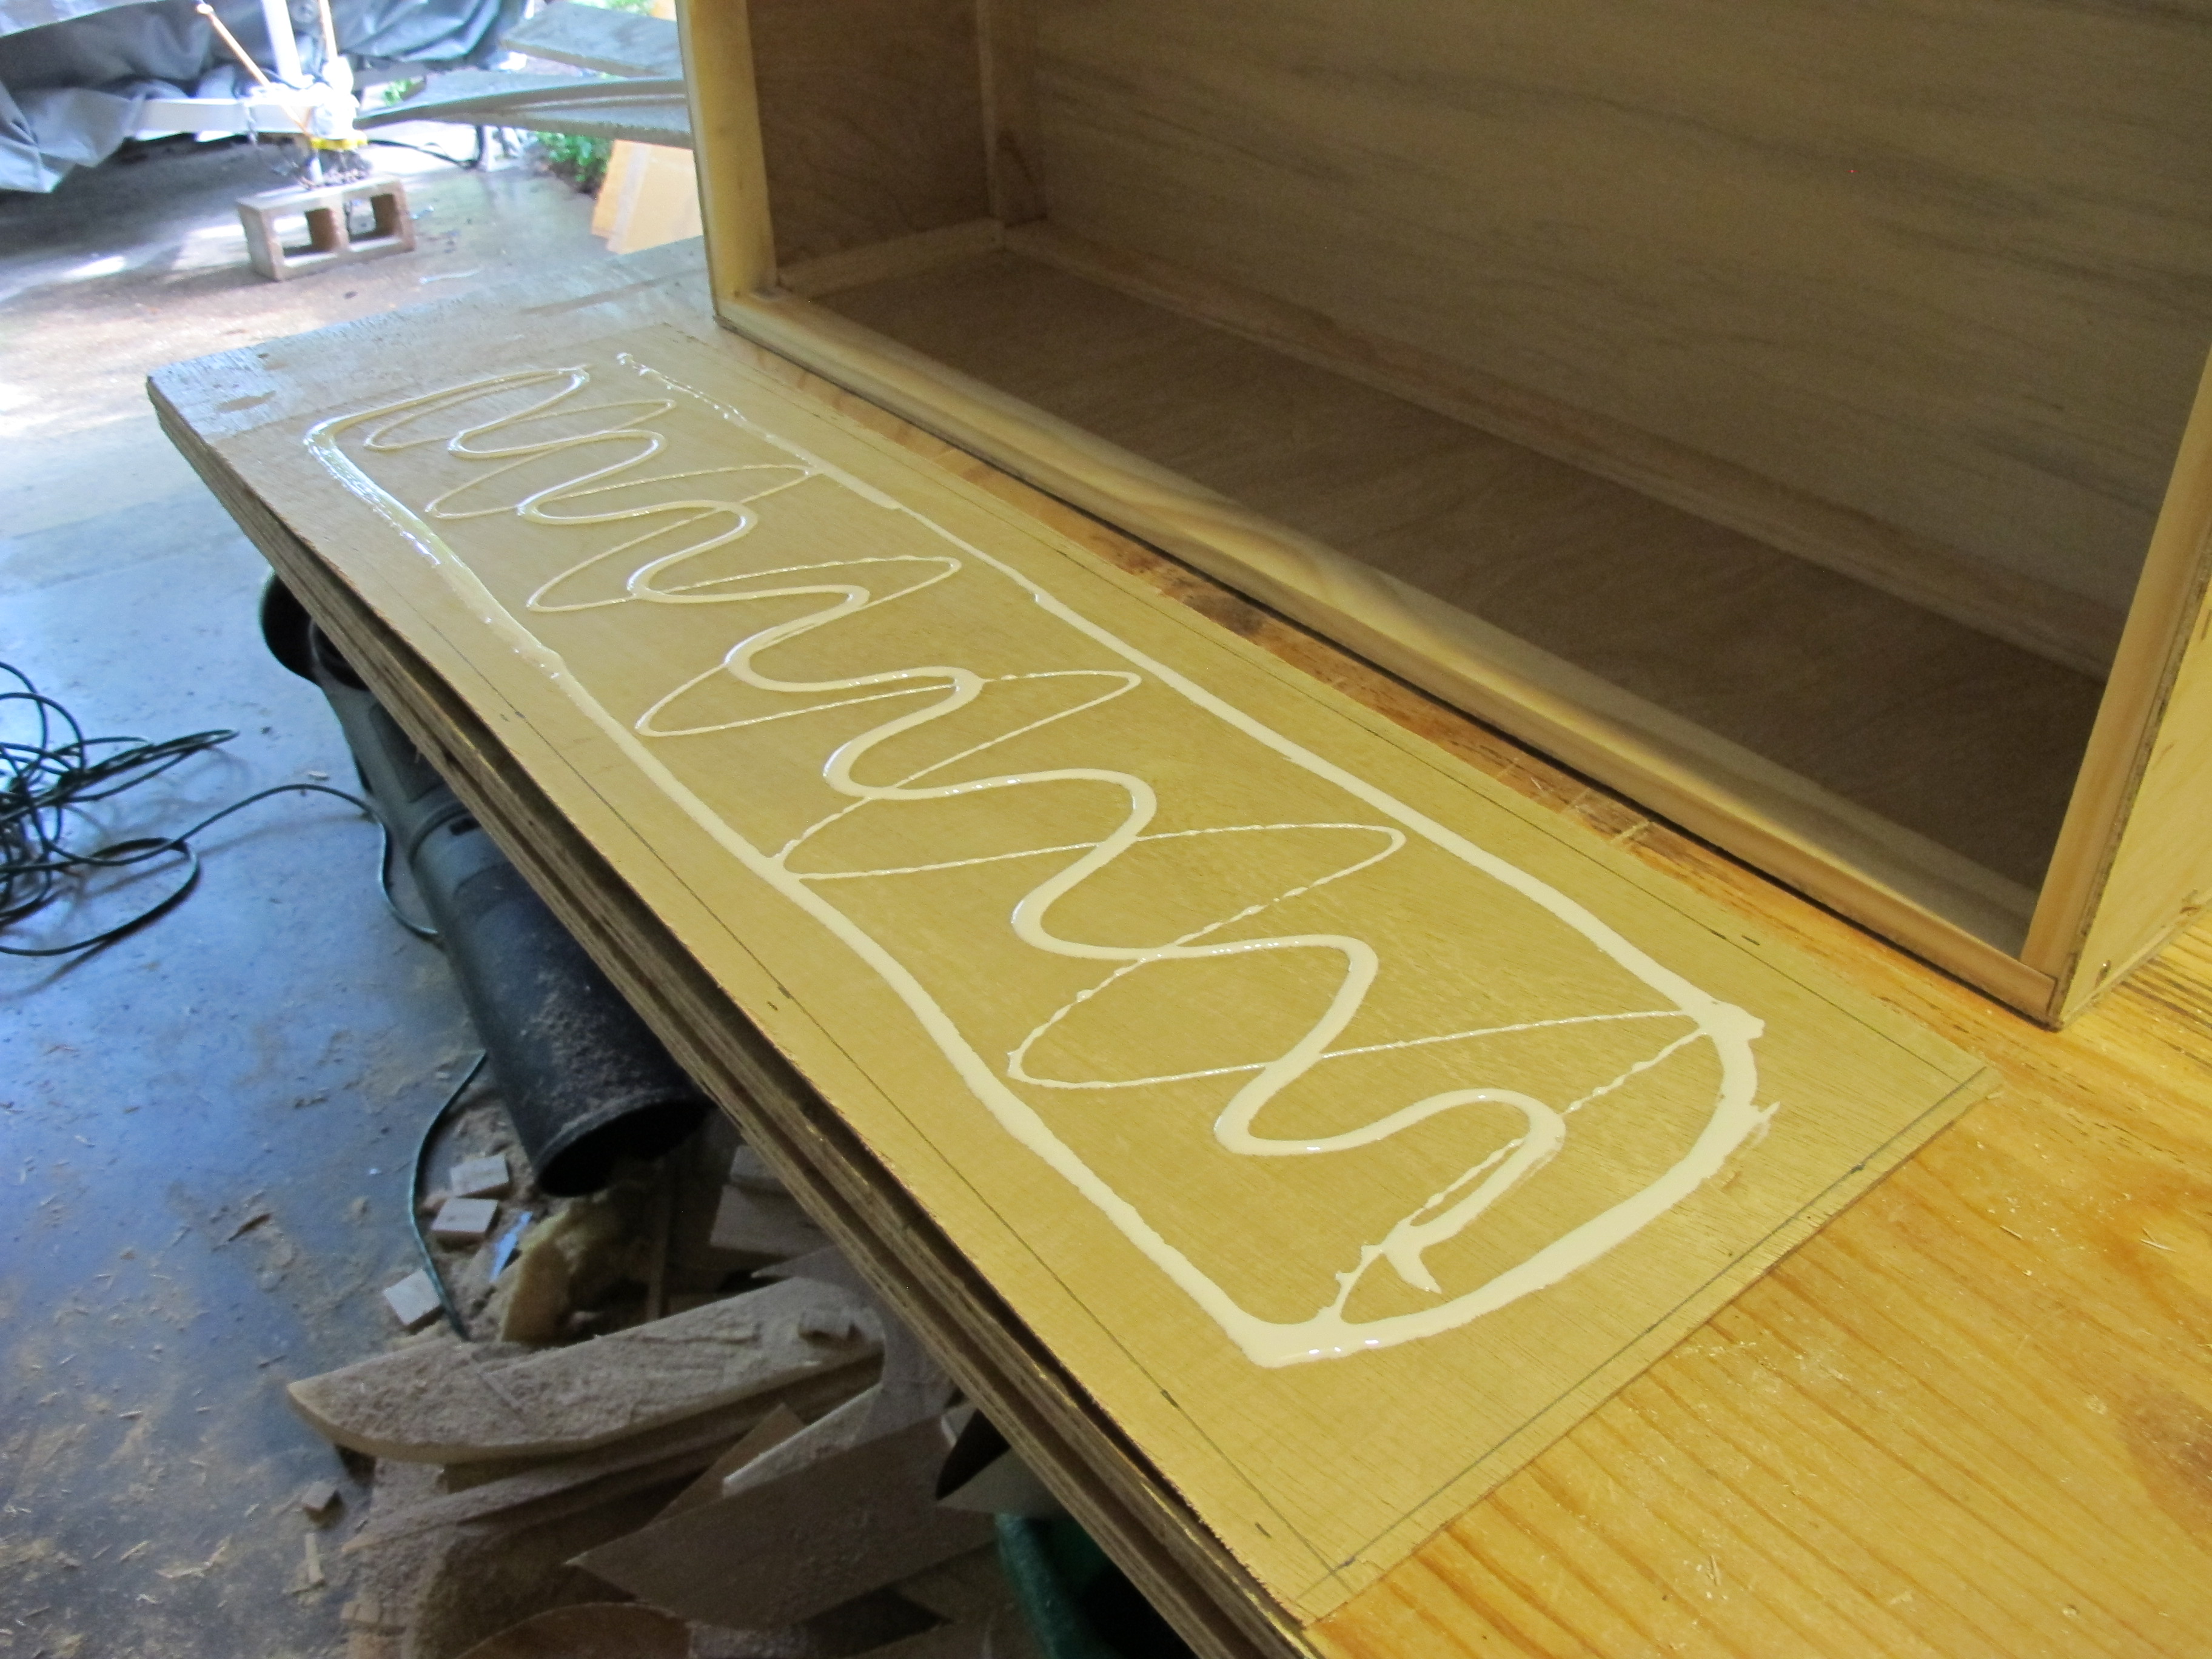
I screwed in the first drawer face, and then this one is going to be glued to the other face so that no screws are showing.

IMG_4649


IMG_4658

IMG_4657

I was able to use a leftover piece of birch that already had shellac applied to it so it made my life a little easier.  The drawer pull is from Anthropologie, they have the best hardware!

Yesterday, I finally got the drain installed in the floor and sealed properly.  I attached a water hose attachment underneath, just to divert the water so that it wasn’t too close to the subfloor.  Now that I finally finished that task, I could install the final piece of paneling on the front wall. smile emoticon

IMG_4663

Newly installed final panel.  I hadn’t added the cross beam on the bottom yet in the pic below, but you get the idea.

IMG_4666


Next, I added some pieces of wood to hold the tail light wires as well as add something for the tail lights to screw into.  I wanted to put them slightly higher, but the welder didn’t leave me enough wires to reach that far.  Hopefully this will still look ok.   I lost a bit of time today because I had to redo the window framing.  It wasn’t quite the right size the way I had screwed it in before.  Oh well, this just means it will be less frustrating when I get ready to re-install the windows later. In the pic below, I have run the tail light wires to the support boards, but I still need to run an extra piece to lead to the license plate light as well as the side running lights.  Luckily, my welder taught me that the brown wire is the “hot wire”, i.e. the one I need to connect the running and plate lights to. smileIMG_4665

After finishing this task, I decided it was time to finish laminating the last remaining pieces of wood that I needed to install for the countertop around the stove as well as the pieces for the sliding doors above the kitchen.

IMG_4660

Laminate is cut and ready for contact cement.

IMG_4661

Contact cement is on!

IMG_4662

After 20 minutes, I attached the laminate and applied pressure. I will wait a day before using the router to trim the edges.

IMG_4670

Today, I used the router to trim the edges and then added the cute owl hardware I picked up at Anthropologie. I think they turned out pretty nice!


Today, I finished up the drawer project.  I added some pieces of wood under the drawer to keep it aligned and make sure it is supported once it is full of stuff. IMG_4680

IMG_4681

IMG_4668

In this pic, you can see the additional pieces of countertop I added today now that the laminate has been applied.

I also attached the stainless steel backsplash with contact cement.  All it needs now is some trim and it will be ready to go!  In the picture below, you can also see how the new sliding doors look in the cabinet.  IMG_4672

And here’s how the drawer will look under the bed.  Obviously I still need to add the benches, etc. but this gives you an idea.

IMG_4685 IMG_4684

Tomorrow, I have an electrician coming over at 8am to look at the wiring in the camper and add an outlet for my mini fridge.  Hopefully it won’t take him very long because I have an important date to take my 5 year old cousin to the zoo at 10am.  I will resume my restoration activities in the afternoon once we are done looking at the giant bugs at the zoo. biggrin

Stay tuned for day two updates tomorrow….


Third Time’s a Charm!

Posted on

Plumbing is apparently not one of my fortes.   After installing the PEX pipe and then replacing the faucet with a brand new “vintage style” faucet, my fitting was still leaking!  If you want to laugh at my many failed attempts, you can watch the video below.  I just about gave up on this endeavor […]

Plumbing and Other Disasters…

Posted on

This weekend, my main challenge was plumbing.  I knew I hated the idea of plumbing, but now I know for SURE that I hate plumbing.  Of course, I like to have the use of functioning plumbing in my house and hopefully my camper, however I don’t want to be the one who has to actually install it.  I forged ahead with this task despite my fears and had a frustrating weekend, but in the end, I got most of the plumbing hooked up.  (note that I said most and not all, ugh)

I decided to start with a little video of my various trials with PEX pipe and my leaky faucet.

Ultimately, I decided to order a new vintage-style faucet: http://www.vintagecampers.com/viewpart.php?partID=777.  It’s very similar to the old one although not identical.  The best part is that it won’t leak (I hope).

In addition to plumbing, I also finished the countertop this weekend.  I was supposed to order a slot cutter for my router to cut the groove into the side of the counter for the trim, but it was going to cost me $50 so I decided to try cutting the groove with my oscillating tool instead.  It probably took a lot longer, but it actually worked!

IMG_4544

First, I measured and drew a line where I needed the groove to be cut.

IMG_4545

This is after I cut the groove. It isn’t perfect, but luckily you can’t tell now that I’ve attached the trim.

IMG_4546

I cut the end of the trim and then bent it slightly around the corner to give it a rounded corner.

I had a difficult time cutting the trim.  I didn’t have the proper tool and used my aluminum shears instead.  It took a lot of tries and some elbow grease before I finally got it to cut through.

IMG_4543

This is what it looked like after a few attempts. I had to press and then wiggle the shears from side to side to get it to finally cut through.

Next, I installed the city water connection.  I decided to use an existing hole that was already cut in the floor under the sink, thinking that would be out of sight yet still easy to reach.  Wrong!  rolleyes Once I got it installed and tried to screw the water hose into it, I came to the annoying realization that the beam under it was so close that I couldn’t really get the water hose into the tight space.  I later decided to move it to a more accessible spot still in the floor under the sink.  I’ll be using the previous hole for the sink drain so at least it’s still getting used.

IMG_4548

Original spot where I put the water fill. Bad idea.

After the disaster cutting the PEX pipe the wrong size on Saturday, I got to work today trying to get it right.

IMG_4568

I measured the PEX pipe and marked it, then cut it with the PVC cutters you see here.

IMG_4569

Next I measured the end that goes into the push fitting to 7/8″ since the diameter of the fitting is 1/2″. This is how far it should go into the fitting.

IMG_4571

This is the hand pump faucet after attaching the first fitting. I wrapped it in plumber’s tape to ensure a tight seal.

IMG_4572

This is after I attached the second fitting. You can see that the end is now ready for the PEX pipe to be inserted.

IMG_4575

And both faucets are hooked up! The city water faucet is there for now until my new one comes in the mail. I will switch them out when it arrives.

I started working with the fresh water tank, and after realizing I was going to need several more PEX pipe fittings as well as some sort of adapter for the water fill inlet, I gave up on that for today.  I can only take so much plumbing in one weekend!

Instead of finishing the plumbing job, I decided to work on altering the cabinet to fit my new mini fridge.  I looked and looked and couldn’t seem to find a mini fridge that was the right size for the original opening.  I probably could have found one eventually, but I really didn’t want to spend more than $100, so I figured the best option was to go with the standard size which is 18″ wide.  Since my cabinet opening was only 16 1/2″ wide, I had to make some adjustments.

After a bit of sawing with my jigsaw, I finally got it to fit!  I ended up having the remove one piece completely, hopefully it doesn’t compromise the strength of the cabinet.  I checked and there are several other places where there are plenty of reinforcing pieces, so it should be ok.  I also installed the sink with some sealant, so it’s definitely getting closer to the final product!

IMG_4579

I had to build these little legs to go under the fridge. I will secure them to the floor and I think the easiest thing to do with the fridge is to tie it to the base with some sort of strap or rope.

new trim

Here’s a good view of the trim.

fridge

It fits!

I’m thinking about painting the fridge or covering it with a wrap.  I also might remove the old knob from the original ice box and glue it to this fridge to make it look more retro.


The last thing I got done today was to install the shelf I made for the rear wall.  I also reattached the light fixture, although it’s not fully hooked up yet.  I’m going to call my electrician to come finish the wiring since I want to add another plug for the fridge.  I just want to be sure it’s done right.

IMG_4592

Since it was raining a bit today, I didn’t remove the tarp completely in case you’re wondering what the blue stuff is in the window.

It was so hot today that I felt really exhausted at about 5pm, so I called it quits.  I will resume my work next weekend!  Hopefully my new faucet will arrive quickly so I can install it and test it out. I am so ready to be done with the plumbing part of this project, that’s for sure.  Until next time…


Purple!

Posted on

Did I mention I love purple?  hehe  I couldn’t think of a good title for this post, so I figured I would just go with purple because it makes me happy.  smile

I made a lot of progress today, but overall this weekend, I didn’t get quite as much done as I thought I might.  Luckily, I made up for it today for the most part.

On Friday, I tried to get some things done, but it kept raining and messing up my productivity.  I did manage to seal the tiles and put three coats of polish on them to prevent staining.  I will add a few more coats once I’m a little further along.  I also started to rebuild the door on Friday.  I can’t finish it until the new skin arrives, but I can at least get it ready for the skin.  I will need to do the same with the baggage door.


IMG_4480

This is a picture of the door before I removed the metal frame, hinges, and other hardware. Pretty nasty!


IMG_4485

Here’s the inside of the door. I noticed that the wood along the bottom of the frame is totally rotted. It also didn’t have any insulation inside! I will be adding insulation to it before putting the new skin on.


IMG_4493

And here’s the new birch plywood with frame pieces glued down. I’ll add some twist nails to provide more support later and then shellac the other side.

After that, I decided to try out my new metal polish on one of the window trim pieces.  It works pretty well but I’m still not sure if it’s any better than just using Windex or something similar.  The bulk of the work was done with my steel brush to get the old paint and grime off.

IMG_4477

This is the brand of polish I got from Home Depot.

IMG_4475

Before

IMG_4476

After (this was after lots of scraping with the steel brush, it sounds like scratching on a chalkboard, not enjoyable!)


On Saturday, I did a bit of shopping and then went to my cousin’s house for her son’s 5th birthday party.  I didn’t get anything done on Junebug that day unless you count the cute drawer pulls I picked up from Anthropologie that I will be adding to Junebug’s cabinets.

IMG_4540

The owls are for the cabinet above the kitchenette and the sparkly one is for the little door that I’m going to build for underneath the bed.

Today, I was pretty productive.  The first thing I did was go to Lowe’s to pick up some more wood, a spade drill bit (for drilling bigger holes), and some more stainless steel wood screws for the frame.

When I got back from Lowe’s, I decided to pull out the old countertop so that I could replace it with a new one.  It proved to be very difficult to remove, thanks to the fact that they glued it to the frame.  I finally pried it loose after a lot of sweating and cursing (and help from my neighbor). haha

IMG_4501

IMG_4500


IMG_4502

I had to use the chisel to remove the sink since it was stuck as well.

I used the old countertop as a template for cutting the new countertop.

IMG_4503


IMG_4504

I then used my spade bit to drill a starter hole in the sink cutout so that I could finish the cut with my jigsaw.  
IMG_4505

IMG_4506

IMG_4507

IMG_4508

This MDF (micro density fiberboard) is super messy!


IMG_4509

Done with the cutouts!

Next, I applied the contact cement and then let it set for 20 minutes.

IMG_4510

After 20 minutes, I put some wood strips over the MDF so that I could be sure the positioning was correct for the laminate before it permanently stuck to the board.

IMG_4511

Once it was positioned correctly, I removed the strips and applied pressure.

IMG_4512

And now it’s time for the router to do its job!

IMG_4525

This is after I trimmed the edges and around the hole for the sink with the router. It didn’t do a perfect job, but any blemishes can luckily be covered up with the trim.


Next, I added some more support boards across the rear and attached the rear panel.  IMG_4515

IMG_4516

IMG_4517

All ready for the wiring, insulation, skin, and then the window! I will probably add at least one more piece of wood across for extra support.

IMG_4520

Interior pic. Now you can see how shiny the floors are after sealing and polishing! Almost a mirror finish!

IMG_4539

New countertop as well as towel rack. I also put some leftover stainless steel along the edge to see how it would look. I have another piece that’s one continuous piece that I think I might use. I got my trim pieces in the mail, so that will give it a more professional look once i get ready to fully install the backsplash and any other pieces.

IMG_4538

The oven is back in! I haven’t finished with the countertop yet, it still needs to be screwed in and then trim added.


Overall, I’m pretty pleased with everything I got done this weekend.  I still need to order a new router bit to cut the groove in the new countertop for the new trim.  Unfortunately that’s going to cost me around $50.   Too bad I didn’t already have all these tools to begin with!  That’s about half the cost since I’m starting from scratch.  Oh well, after this I’ll be equipped to do any kind of woodworking project!  Now it’s time to relax and finish doing laundry so I’m ready for work tomorrow.  See you next weekend!


Junebug Does Not Sing in the Rain

Posted on

A couple of weeks ago, I started replacing the ceiling panels in Junebug.  I had already spent countless hours shellacking them to perfection, and wouldn’t you know, I accidentally cut the one that goes over the kitchenette the wrong size and had to scrap that piece. ugh  It was getting late in the day, so I went ahead and put the tarp, then the waterproof cover over Junebug and went inside to make myself something to eat for dinner.  The next day, Memorial Day, Houston had a torrential downpour.  I stayed inside all day and cleaned house and watched movies.  It was a nice, relaxing way to spend my Memorial Day.  On Tuesday, I got up and got ready to go to work.  As I was walking out the front door (it was still raining, fyi), I noticed that Junebug’s cover was pulled up a bit in the front.  My mind immediately thought of the open hole in the ceiling where the panel was still missing.  I didn’t even think to put any support there because I had no idea we were going to get so much rain!  I ran to get the ladder to look at the roof and assess the damage.  It was WORSE than expected.  The tarp over the hole had sunken in and there was about enough water collected in it to fill a bathtub!  I squeezed my way under the tarp to get inside the camper to see if I could lift up the tarp from the inside and make the water come out.  That was pointless, it was way too heavy.  cry  I was freaking out by this point.  I could hear the wood inside creaking and I thought it was about to break at any moment.  Tears filled my eyes, and I knew I had to act fast.  I ran and got the water hose and tried to siphon the water out.  It started coming out but too slowly.  Then I ran in the garage and got the hose that goes to my paint sprayer, it’s much bigger.  When I put it in the water, initially nothing happened.  I had to suck on the other end to get the water flowing and in doing so, I managed to swallow a bunch of nasty water from the roof that had who knows what in it!  I didn’t even care though, I just wanted that water out of there!  Finally I got all the water out.  I then put several pieces of wood on top of the camper to give it some support and create a slope so that the water would run off.  I later went and bought another tarp too, just to be on the safe side.  Unfortunately, a bit of water leaked inside the camper and I dried it up, but it caused my countertop to expand and warp.  mad

IMG_4421

You can see that it’s curved upward on the left corner by the sink. ugh

I didn’t notice the warping until today when I took the covers off Junebug to start working again.  I thought about it for a bit, then decided I would just order a wider countertop trim and leave it.  It’s slightly curved up at the edge, but hopefully no one but me will notice.  I can always remove the countertop at a later date and replace it if it starts to bother me.  I just didn’t have the energy to take on another task in addition to everything I already still have to do.

Today, I had big plans to finish the ceiling panels, apply the laminate to the countertop, and apply the tile adhesive to the floor in preparation for laying the tiles tomorrow.  I only got the first task completed.  Why does everything always take me so much longer than expected??  In the meantime, I also got eaten alive by mosquitoes.  If rain is Junebug’s #1 enemy, mosquitoes must be mine.  I did manage to cut the laminate down to size so that I can apply the contact cement when I’m ready.  Then all it will need is trimming.

I chose purple laminate since my theme is purple and green. smile

IMG_4422

It’s obviously not glued down or trimmed yet, but I wanted to show what the color will look like.

Now that I got the ceiling panel cut the right size, it looks great!

IMG_4433 IMG_4430

I also made a new shelf to look like the original scalloped shelf in the Shastas of this era.  I don’t know why mine didn’t have the scalloped piece.  I think it turned out pretty nice.  I haven’t installed it yet, I just wedged it in to see how it would look.  The rear paneling piece is also just clamped in and not yet installed.  I wanted to lay the tile first before permanently installing that last panel.  It’s really starting to come together though!

IMG_4435 IMG_4437


I’m hoping to get more done tomorrow but it’s supposed to rain again. We’ll see, I’m hoping maybe the forecast will change as it does frequently around here.  In the meantime, I made ABSOLUTELY sure that Junebug was completely wrapped up and protected from the water this time!


Hope

Posted on

“Hope is not blind optimism. It’s not ignoring the enormity of the task ahead or the roadblocks that stand in our path. It’s not sitting on the sidelines or shirking from a fight. Hope is that thing inside us that insists, despite all evidence to the contrary, that something better awaits us if we have the courage to reach for it, and to work for it, and to fight for it. Hope is the belief that destiny will not be written for us, but by us, by the men and women who are not content to settle for the world as it is, who have the courage to remake the world as it should be.” — Barack Obama

Something about this project fills me with hope.  I am enjoying the challenges that come with it on a daily basis and don’t have any misconceptions about how difficult this project is or will be for me, and I’m loving every minute of it.     I am also enjoying the dreams I have of the places I will go when it’s all complete!  I just signed up for my first vintage camper rally this year.  It will take place in Lake Charles, Louisiana the weekend of September 20-21.  I’m really excited at the thought of camping in Junebug for the first time and showing off my hard work to others who have an appreciation for things old made new again.  This means I’ve got only about four more months before I need to be done!  I’d better kick it into high gear!

Yesterday, I came home from work and discovered a letter taped to my front door.

letters

My heart sank.  My first thought was, uh oh, someone has finally gotten fed up with this disassembled, eye sore of a camper sitting in my driveway and they’ve written me a letter to complain about it!  I don’t have an HOA in my neighborhood, thank goodness, and so far, I haven’t had any complaints about my little project being in front of my house all the time.  Luckily, when I opened the letter, it was just from a developer wanting to buy my house instead. haha  smile  I’ve always been the kind of person who sees the glass as half full, so I guess it was out of character for me to think the letter was something negative but I couldn’t help but wonder if my luck had run out.  Not this time!

Speaking of the glass being half full, I’m trying to maintain that outlook about my dating life, and I am afraid me posting about it on here is jinxing it or that’s what I’m telling myself anyway.    A few posts ago, I wrote that I was happy to have found someone and then less than a week after that, I was single again.  rolleyes  Dating is so unpredictable!  I decided that from now on, I will not be sharing any more updates on my dating life.   Maybe somehow that will lift the curse.  And if not, at least the only failures you will know about are my failures with Junebug.  haha

So, I’ve gotten quite a bit done since I last wrote.  Last weekend, I screwed in the replacement pieces of wood that I cut a few weeks ago for the framing.

IMG_4311

I also patched a hole in the subfloor where the old rusty water tank had its drain pipe.  I think I did a pretty good job for an amateur anyway.

IMG_4307

Here’s a picture of the hole from under the camper.

IMG_4304

I cut a piece of aluminum to cover the hole and screwed it over the hole under the camper.


IMG_4310

And here’s what it looks like after screwing the flashing on and spraying with a bunch of rubber sealant. I will also be painting the undercarriage later to make sure it’s all waterproof.


After finishing this task, I screwed the carriage bolt to the other side of my newly made steel crossbeam, and then secured the new overlay on my subfloor to cover the old tiles and create a smooth surface.

Then I screwed in all of the new wall panels.  I had already measured and cut the new birch panels a few weeks ago, so this task was pretty easy.  I used my new electric staple gun to secure them where you couldn’t see the staples, and then I covered the staples with little strips of one inch thick birch plywood held in place with twist nails.  I started drilling pilot holes for the twist nails and they aren’t such a pain anymore!

After that, I decided I really wanted to get all of my tiles laid out and cut to size.  I followed the instructions that Larry shared on his website, http://www.cannedhamtrailers.com/, and it worked perfectly!  I chose purple and white vinyl tiles since my theme is centered around purple. smile


IMG_4328

I am almost finished in this pic, I just had the doorway left. That was the hardest part though!


IMG_4329

I’m so proud of how well this turned out!


IMG_4331

Another view from the rear.

After I was done cutting the tiles to size, I had to remove them so I wouldn’t get shellac all over them.  I wanted to label the edges so I could remember where they went when I got ready to glue them down.  Hopefully this method will work!  I’ll report back on that when I get to that step later.

IMG_4332

Yesterday and today, I got to work shellacking the interior walls and cabinets.  I started out trying to use my spray gun, but that turned out to be quite a mess.  The problem with the paint sprayer is that it wastes a TON of shellac in the process!

I had fun with my painting outfit for a short while until I started sweating bullets in the thing.

IMG_4349 IMG_4345


The paint sprayer kept leaving runs everywhere, so I decided I will save it for the clear shellac since runs aren’t as noticeable with the clear.  I finished the amber shellacking with a brush.  I’m very pleased with how it looks so far!  The only thing that sucks is that the veneer keeps getting wrinkly at the edges due to all of the moisture.  I’m hoping it won’t be too noticeable once everything is finished.

IMG_4372_edited-1

The veneer on the closet turned a beautiful amber color after 3 or 4 coats of the amber shellac.

IMG_4369

The wood on the walls is darker, so I only put one coat of shellac on it. It’s not a perfect match but close.

IMG_4364_edited-1

Here’s a pic of the street side wall.

After finishing this, I decided I wanted to go ahead and cut my new stainless steel backsplash to size.  I had read some really complicated instructions online on how to cut stainless steel and was a little overwhelmed.  I decided that I would just give it a go with my aluminum shears and see what happened.  It wasn’t easy, but it worked in the end!

IMG_4376


IMG_4379_edited-1

I haven’t installed the backsplash yet, the panels are just propped up to see how they will look. Once it’s installed, it will look better. I am excited at how pretty everything is looking so far!

Tomorrow, I’m planning to start spraying everything with lots of clear shellac.  That will start to give it that beautiful shiny look that I’m going for.  Everything is really starting to come together!