This weekend, my main challenge was plumbing. I knew I hated the idea of plumbing, but now I know for SURE that I hate plumbing. Of course, I like to have the use of functioning plumbing in my house and hopefully my camper, however I don’t want to be the one who has to actually install it. I forged ahead with this task despite my fears and had a frustrating weekend, but in the end, I got most of the plumbing hooked up. (note that I said most and not all, ugh)
I decided to start with a little video of my various trials with PEX pipe and my leaky faucet.
Ultimately, I decided to order a new vintage-style faucet: http://www.vintagecampers.com/viewpart.php?partID=777. It’s very similar to the old one although not identical. The best part is that it won’t leak (I hope).
In addition to plumbing, I also finished the countertop this weekend. I was supposed to order a slot cutter for my router to cut the groove into the side of the counter for the trim, but it was going to cost me $50 so I decided to try cutting the groove with my oscillating tool instead. It probably took a lot longer, but it actually worked!
First, I measured and drew a line where I needed the groove to be cut.
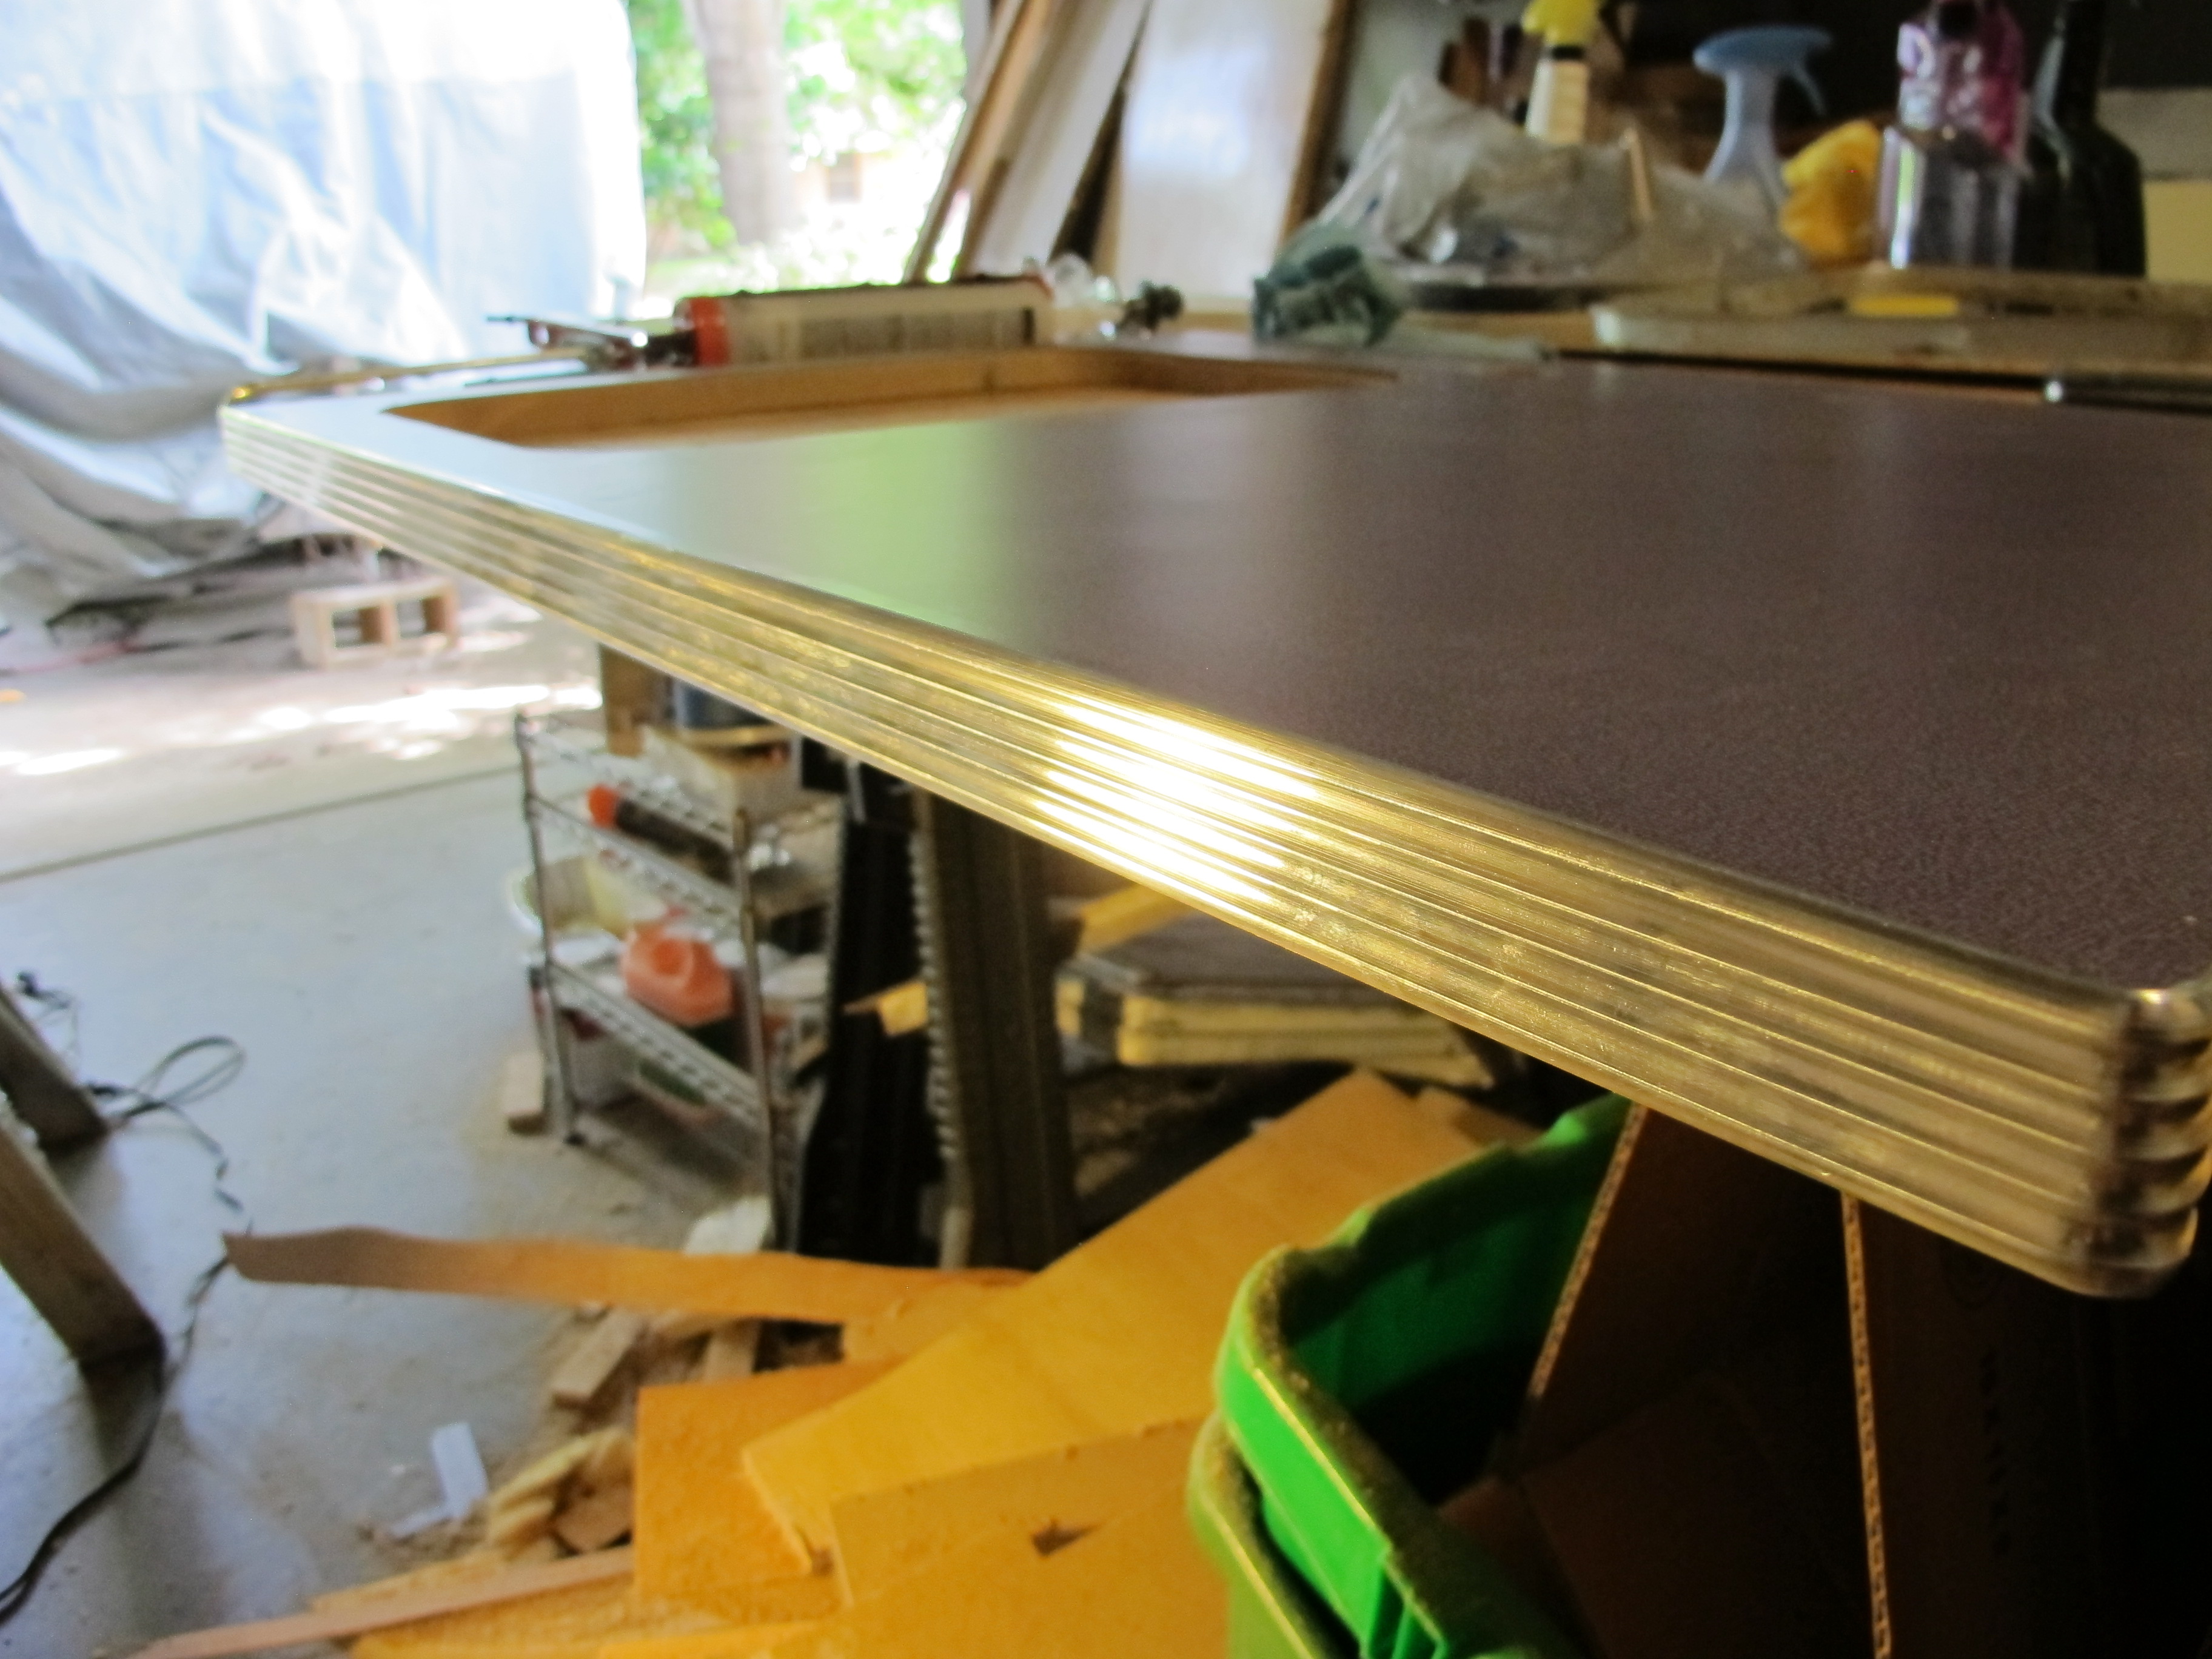
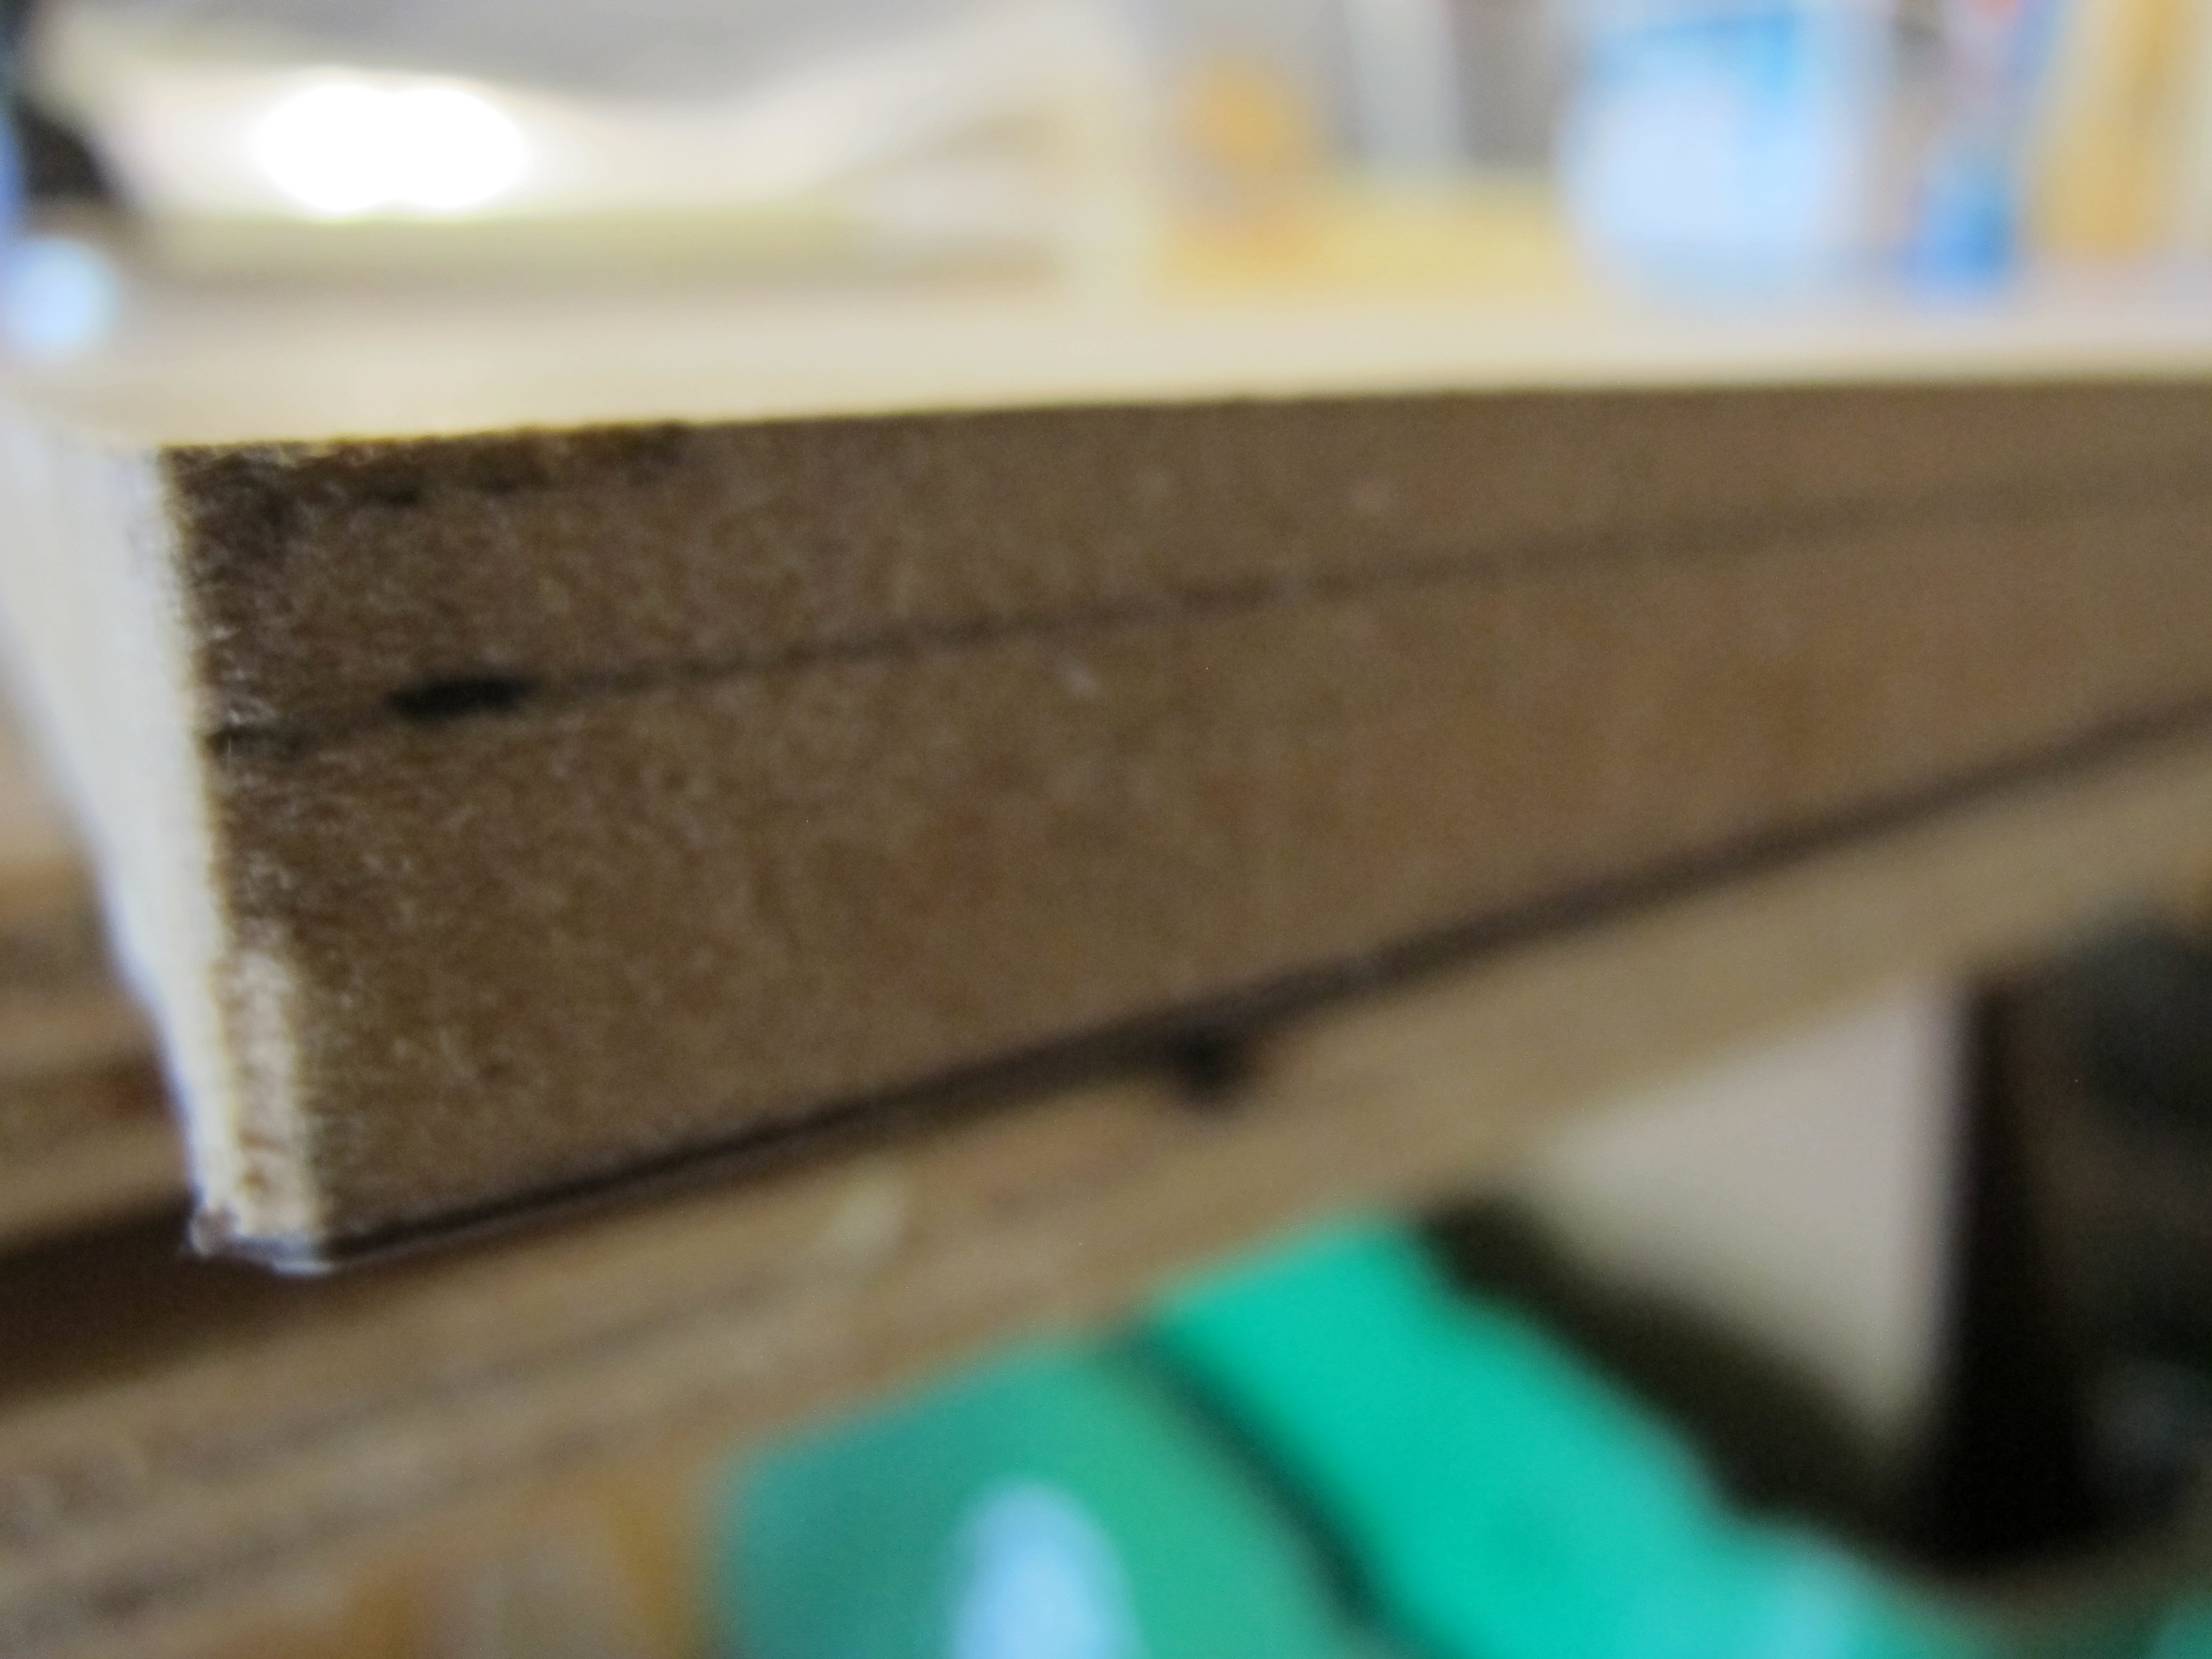
This is after I cut the groove. It isn’t perfect, but luckily you can’t tell now that I’ve attached the trim.
I cut the end of the trim and then bent it slightly around the corner to give it a rounded corner.
I had a difficult time cutting the trim. I didn’t have the proper tool and used my aluminum shears instead. It took a lot of tries and some elbow grease before I finally got it to cut through.
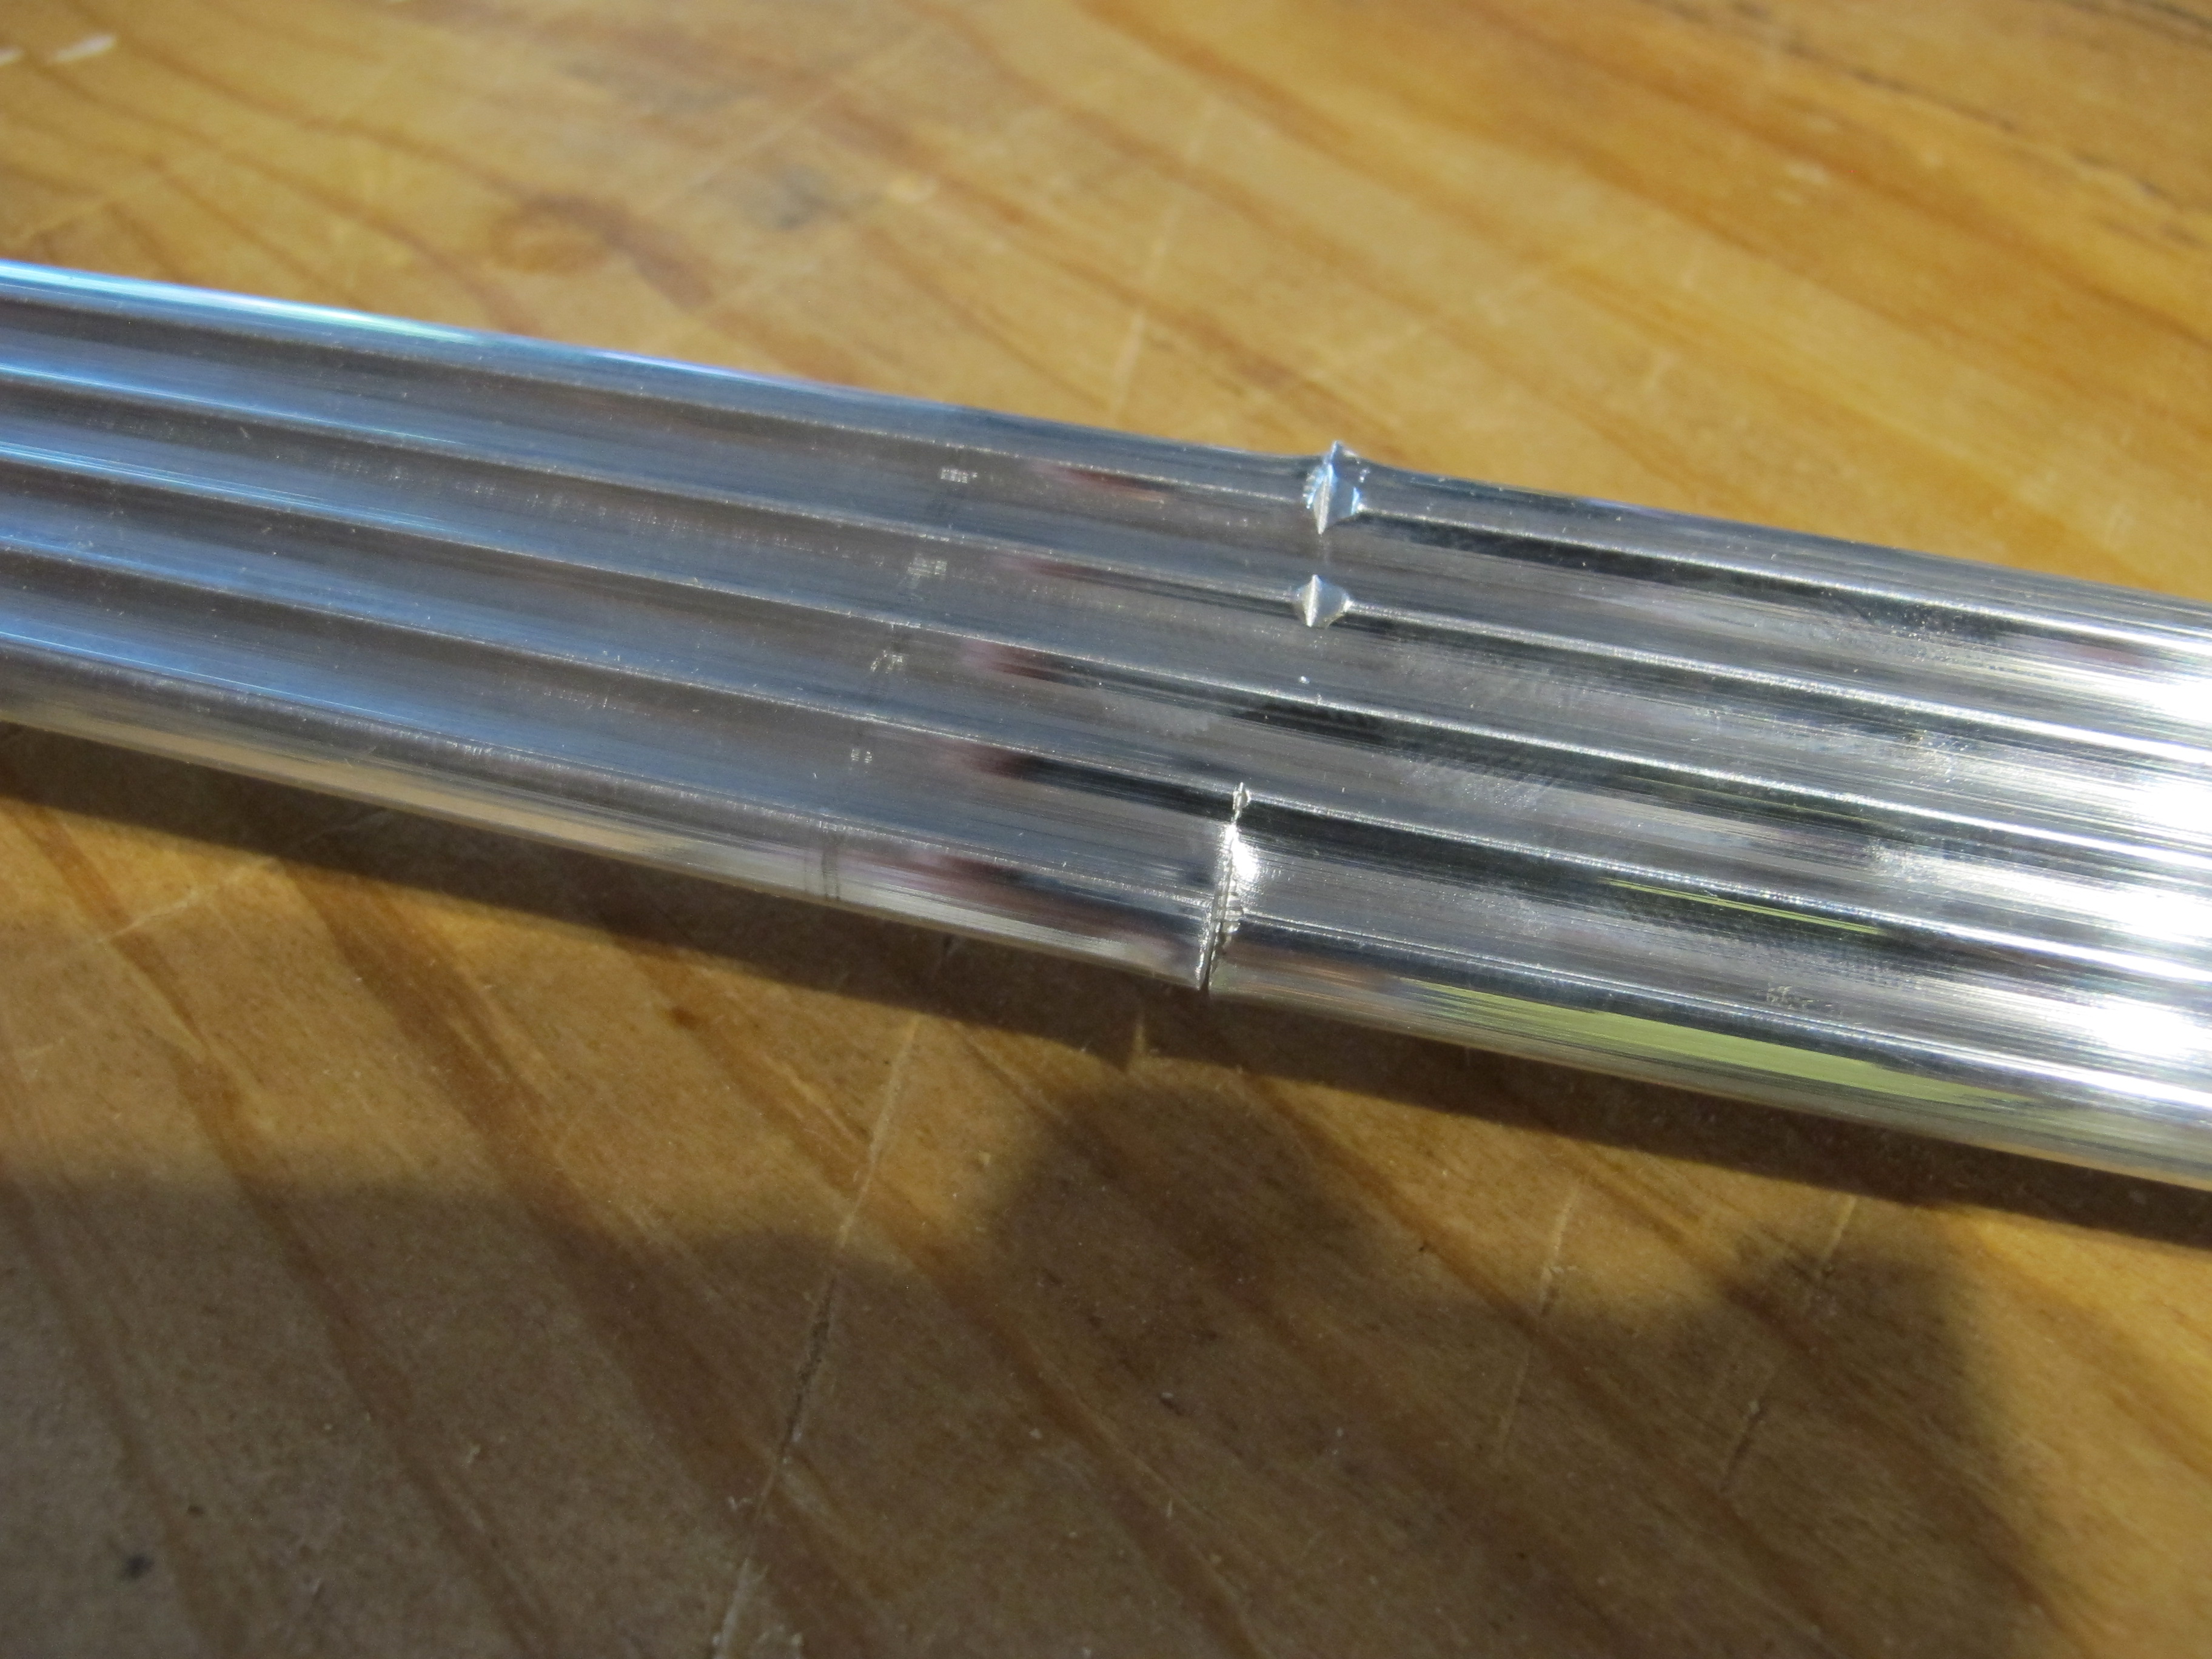
This is what it looked like after a few attempts. I had to press and then wiggle the shears from side to side to get it to finally cut through.
Next, I installed the city water connection. I decided to use an existing hole that was already cut in the floor under the sink, thinking that would be out of sight yet still easy to reach. Wrong! ![]() Once I got it installed and tried to screw the water hose into it, I came to the annoying realization that the beam under it was so close that I couldn’t really get the water hose into the tight space. I later decided to move it to a more accessible spot still in the floor under the sink. I’ll be using the previous hole for the sink drain so at least it’s still getting used.
Once I got it installed and tried to screw the water hose into it, I came to the annoying realization that the beam under it was so close that I couldn’t really get the water hose into the tight space. I later decided to move it to a more accessible spot still in the floor under the sink. I’ll be using the previous hole for the sink drain so at least it’s still getting used.

Original spot where I put the water fill. Bad idea.
After the disaster cutting the PEX pipe the wrong size on Saturday, I got to work today trying to get it right.

I measured the PEX pipe and marked it, then cut it with the PVC cutters you see here.
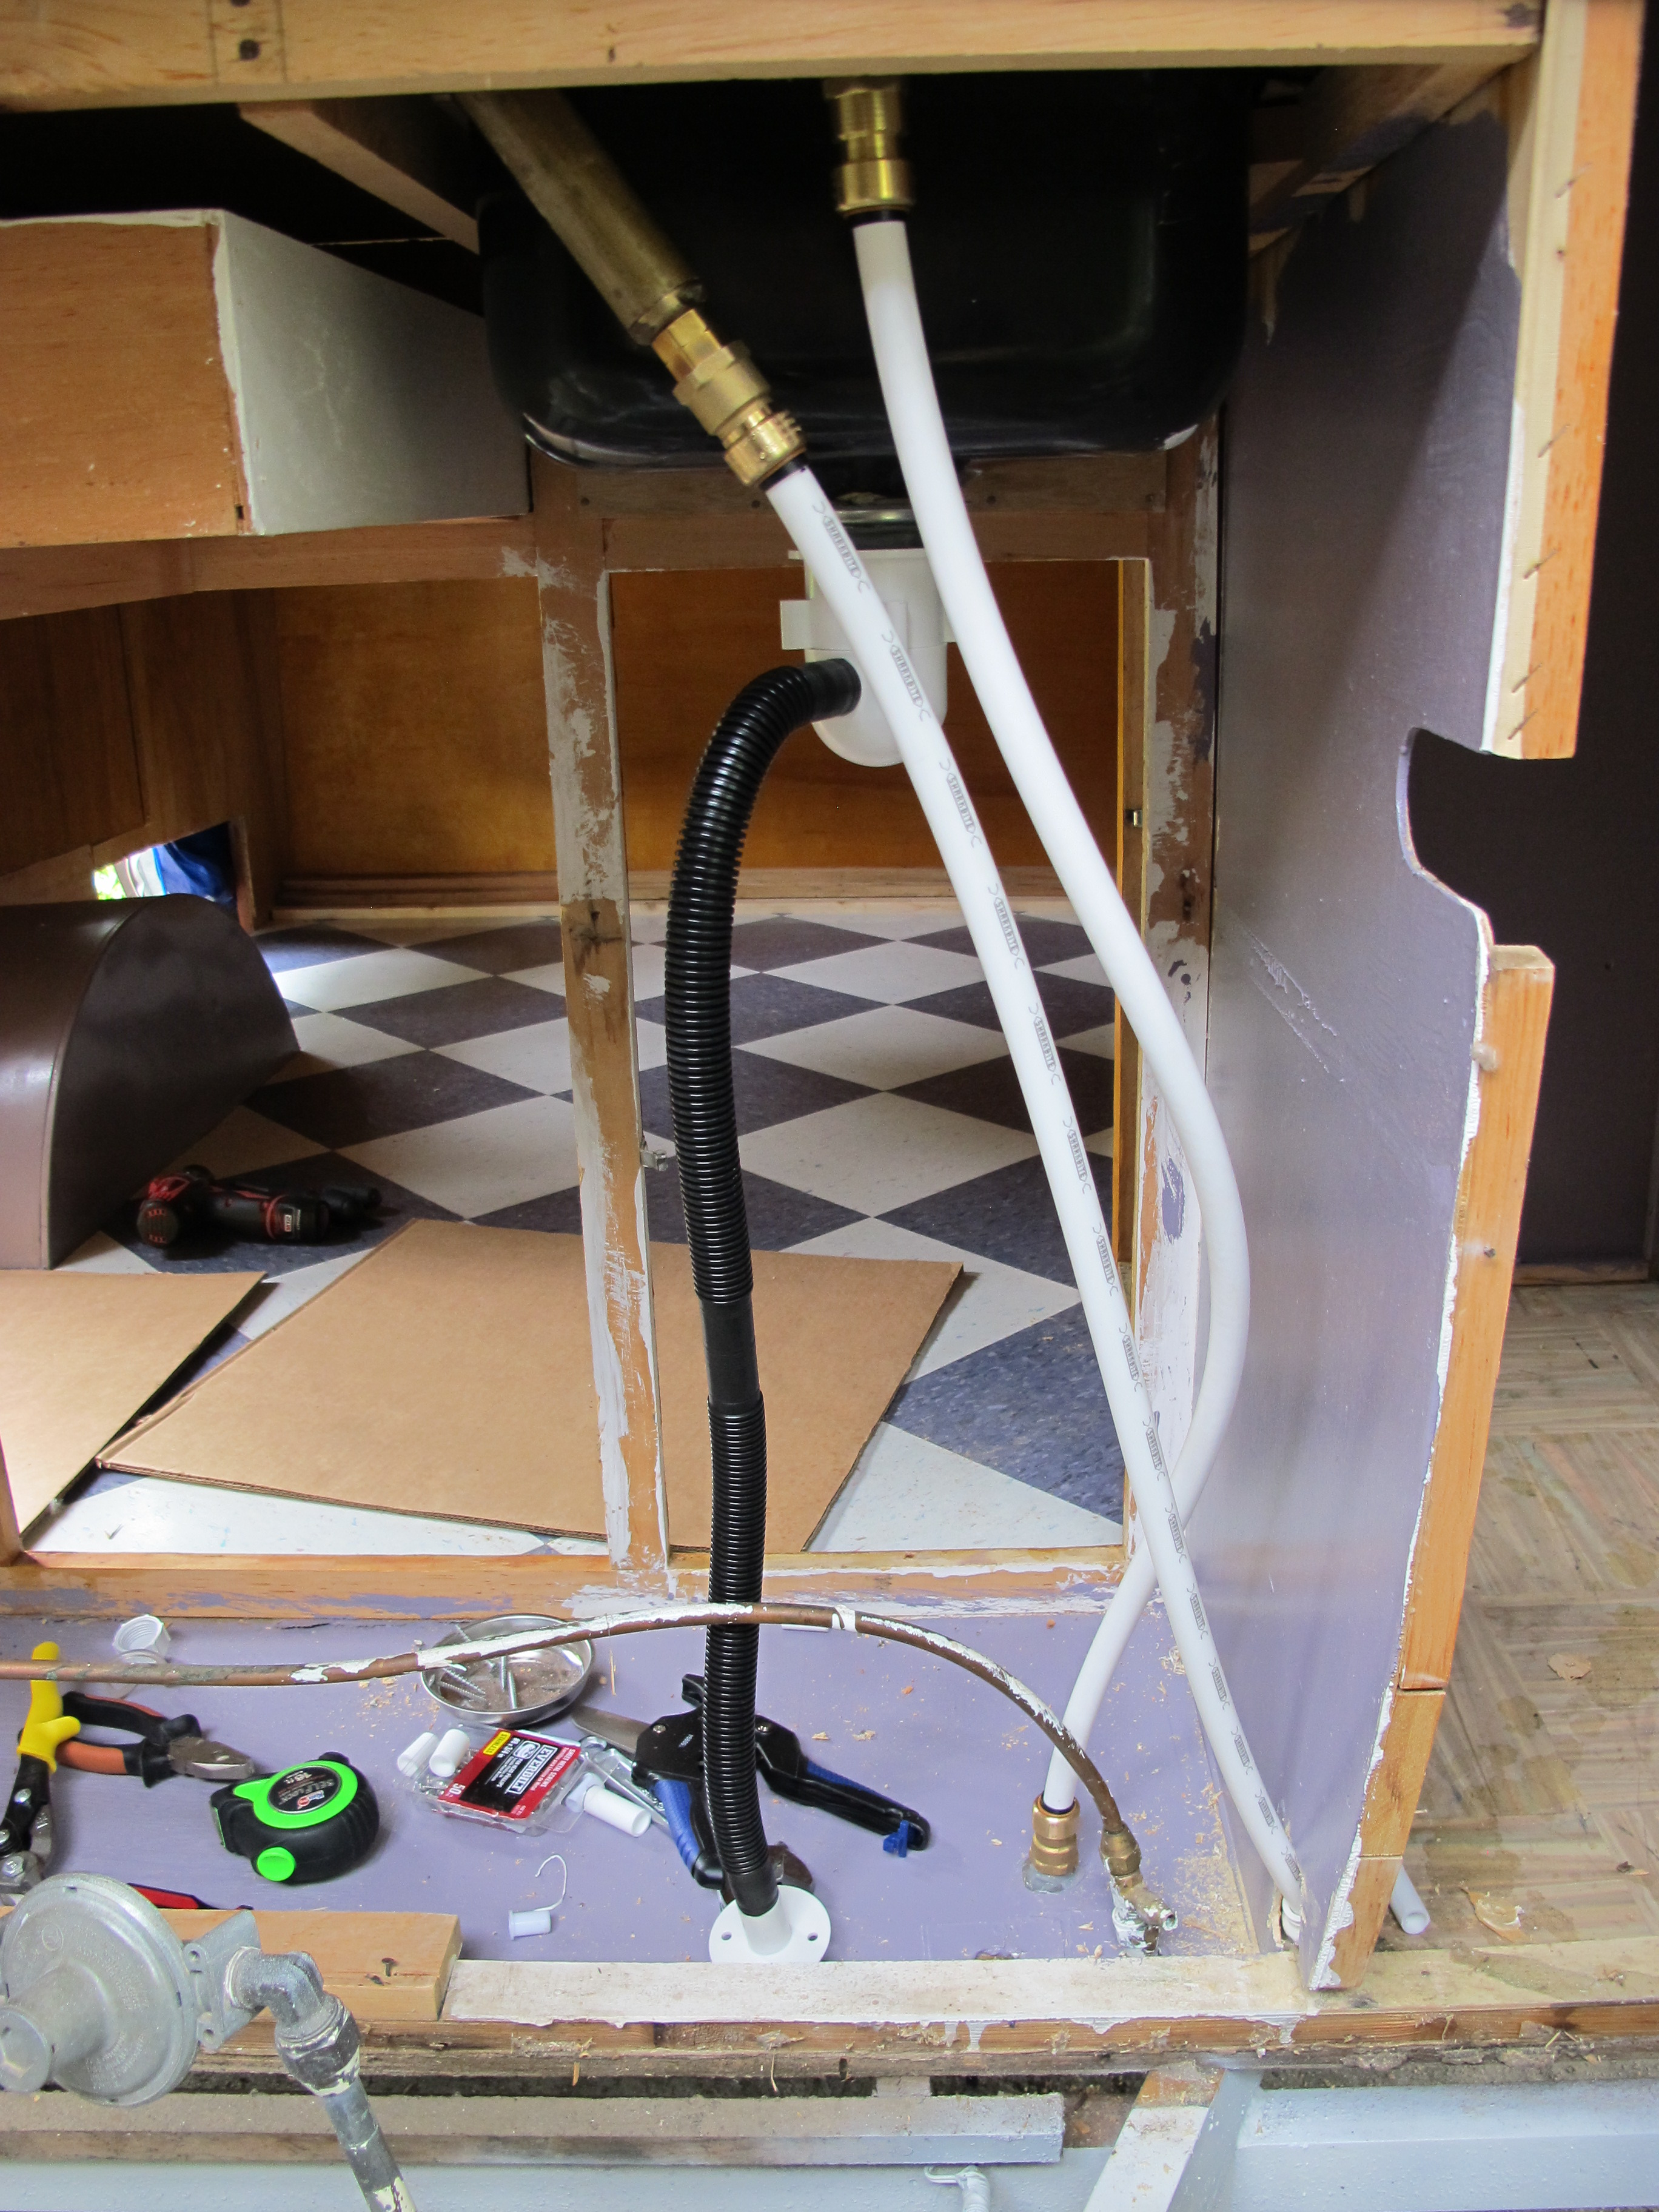
Next I measured the end that goes into the push fitting to 7/8″ since the diameter of the fitting is 1/2″. This is how far it should go into the fitting.
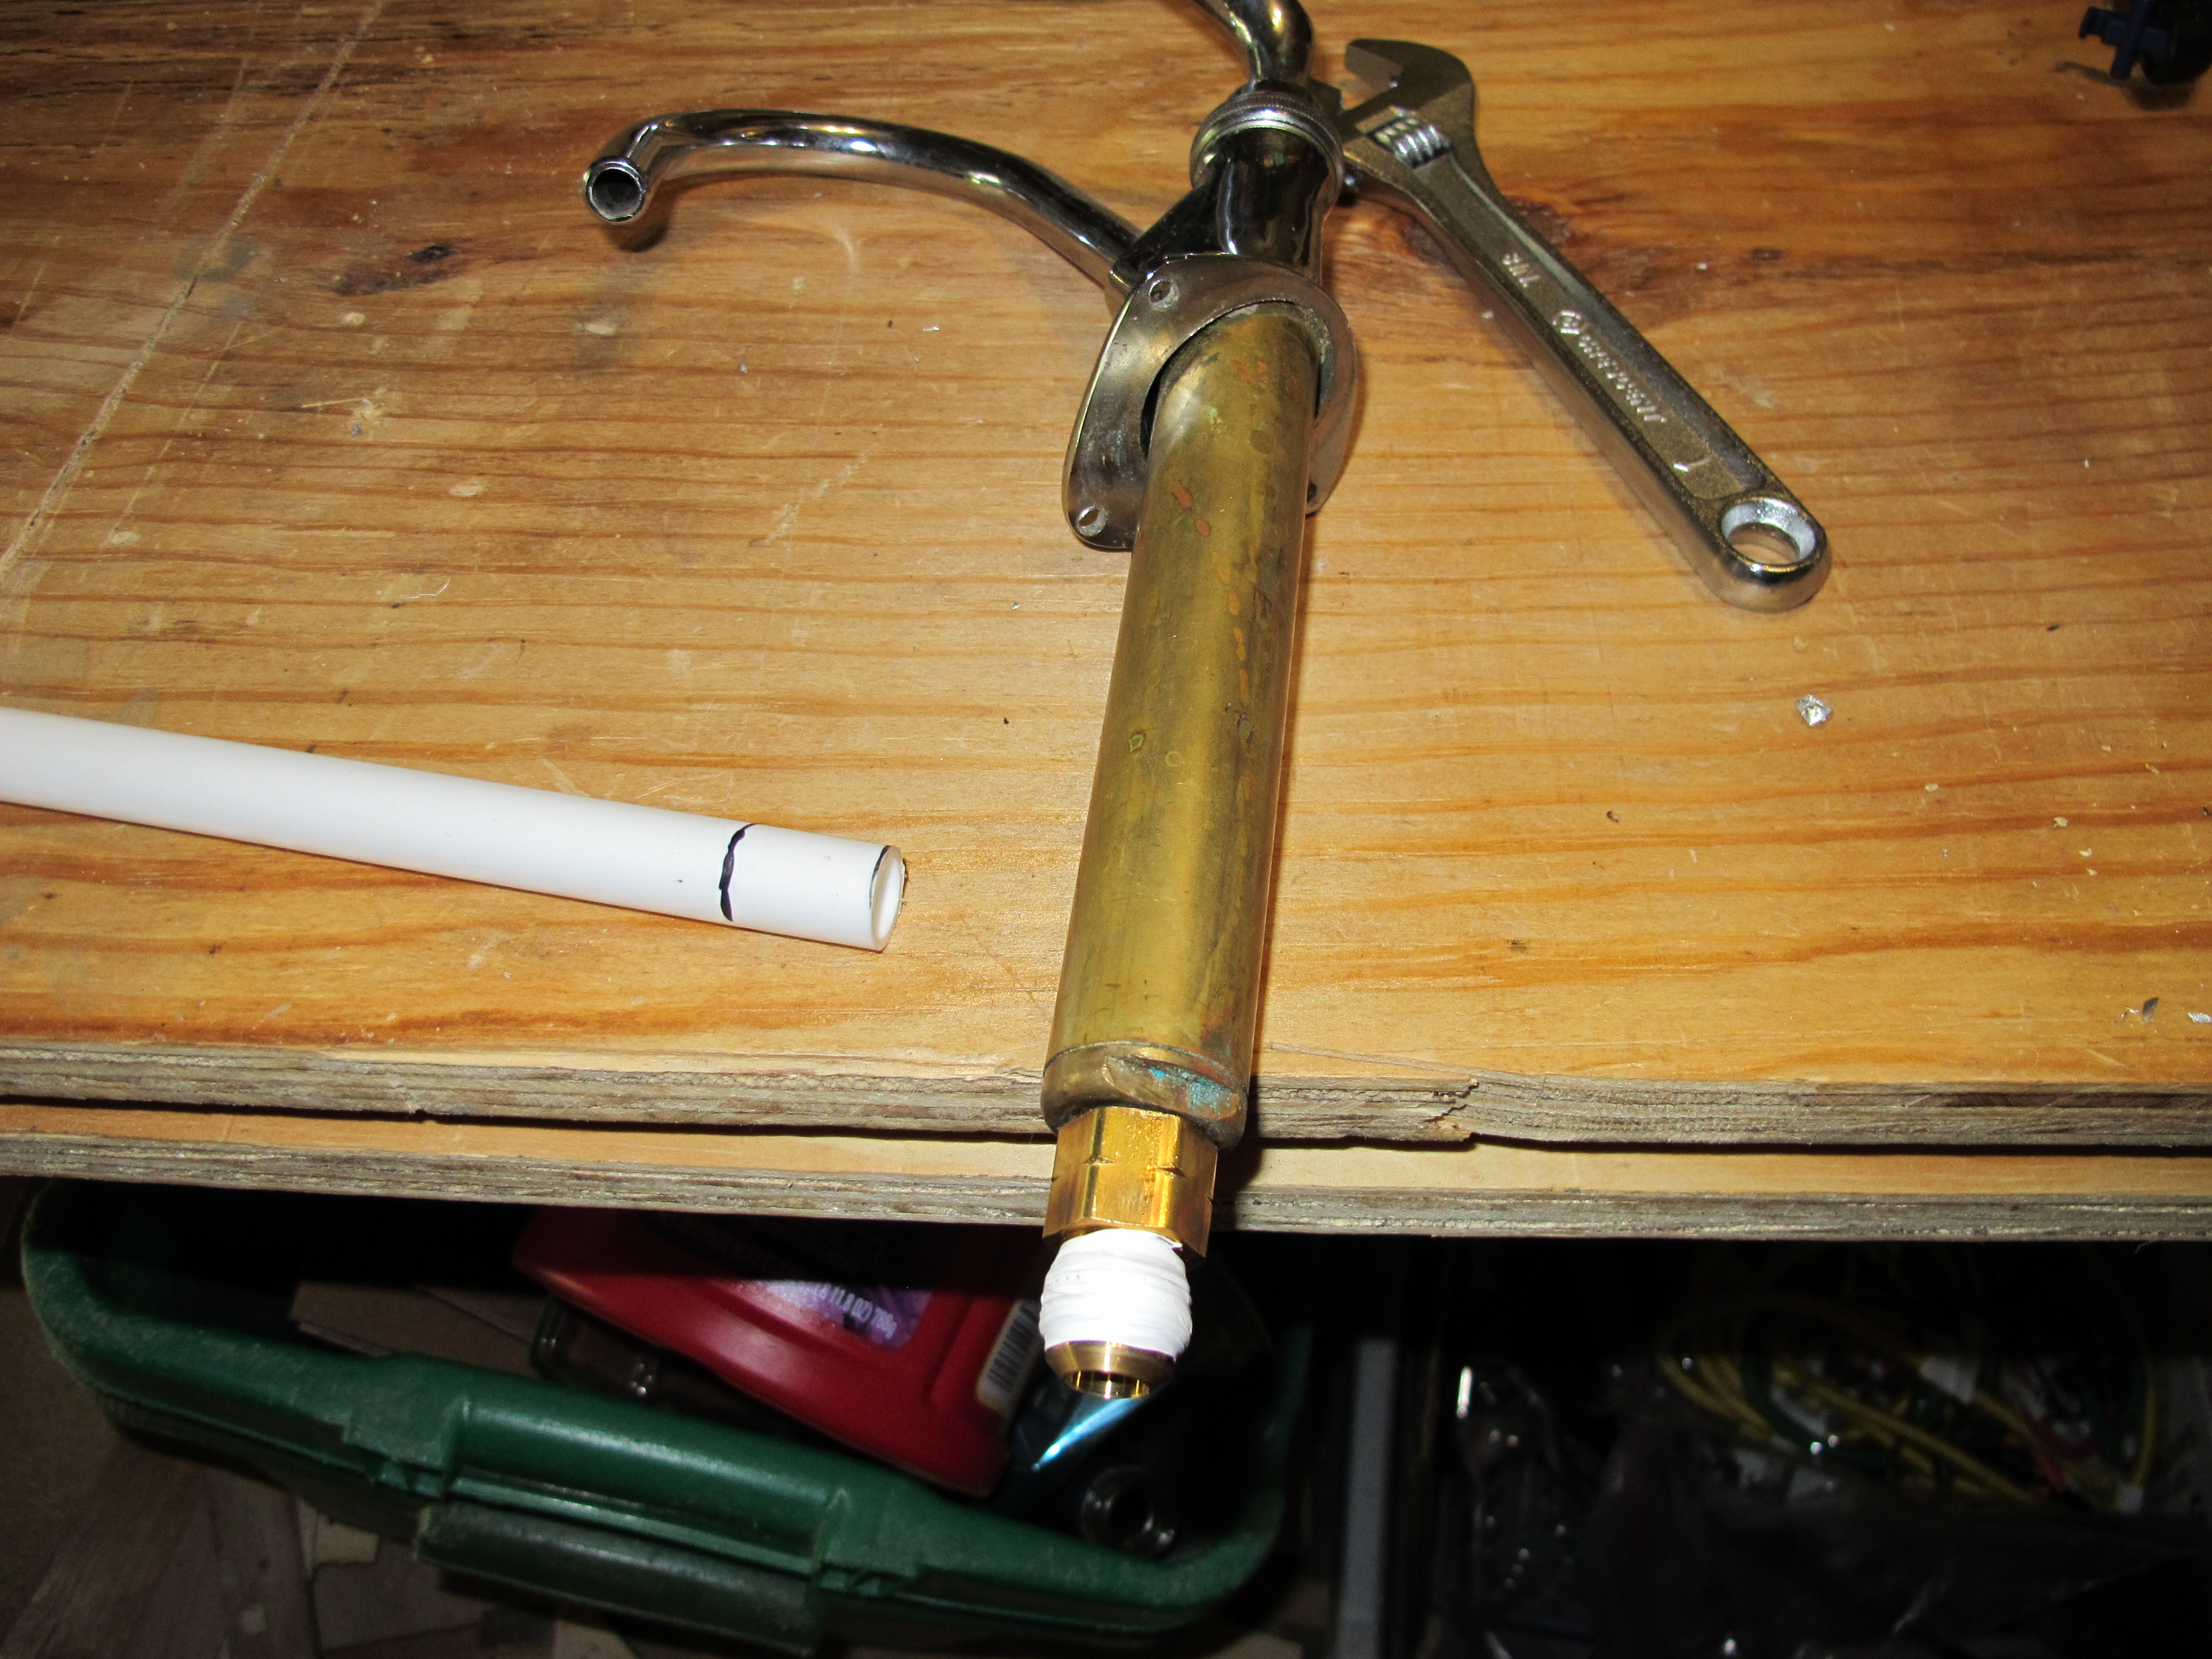
This is the hand pump faucet after attaching the first fitting. I wrapped it in plumber’s tape to ensure a tight seal.
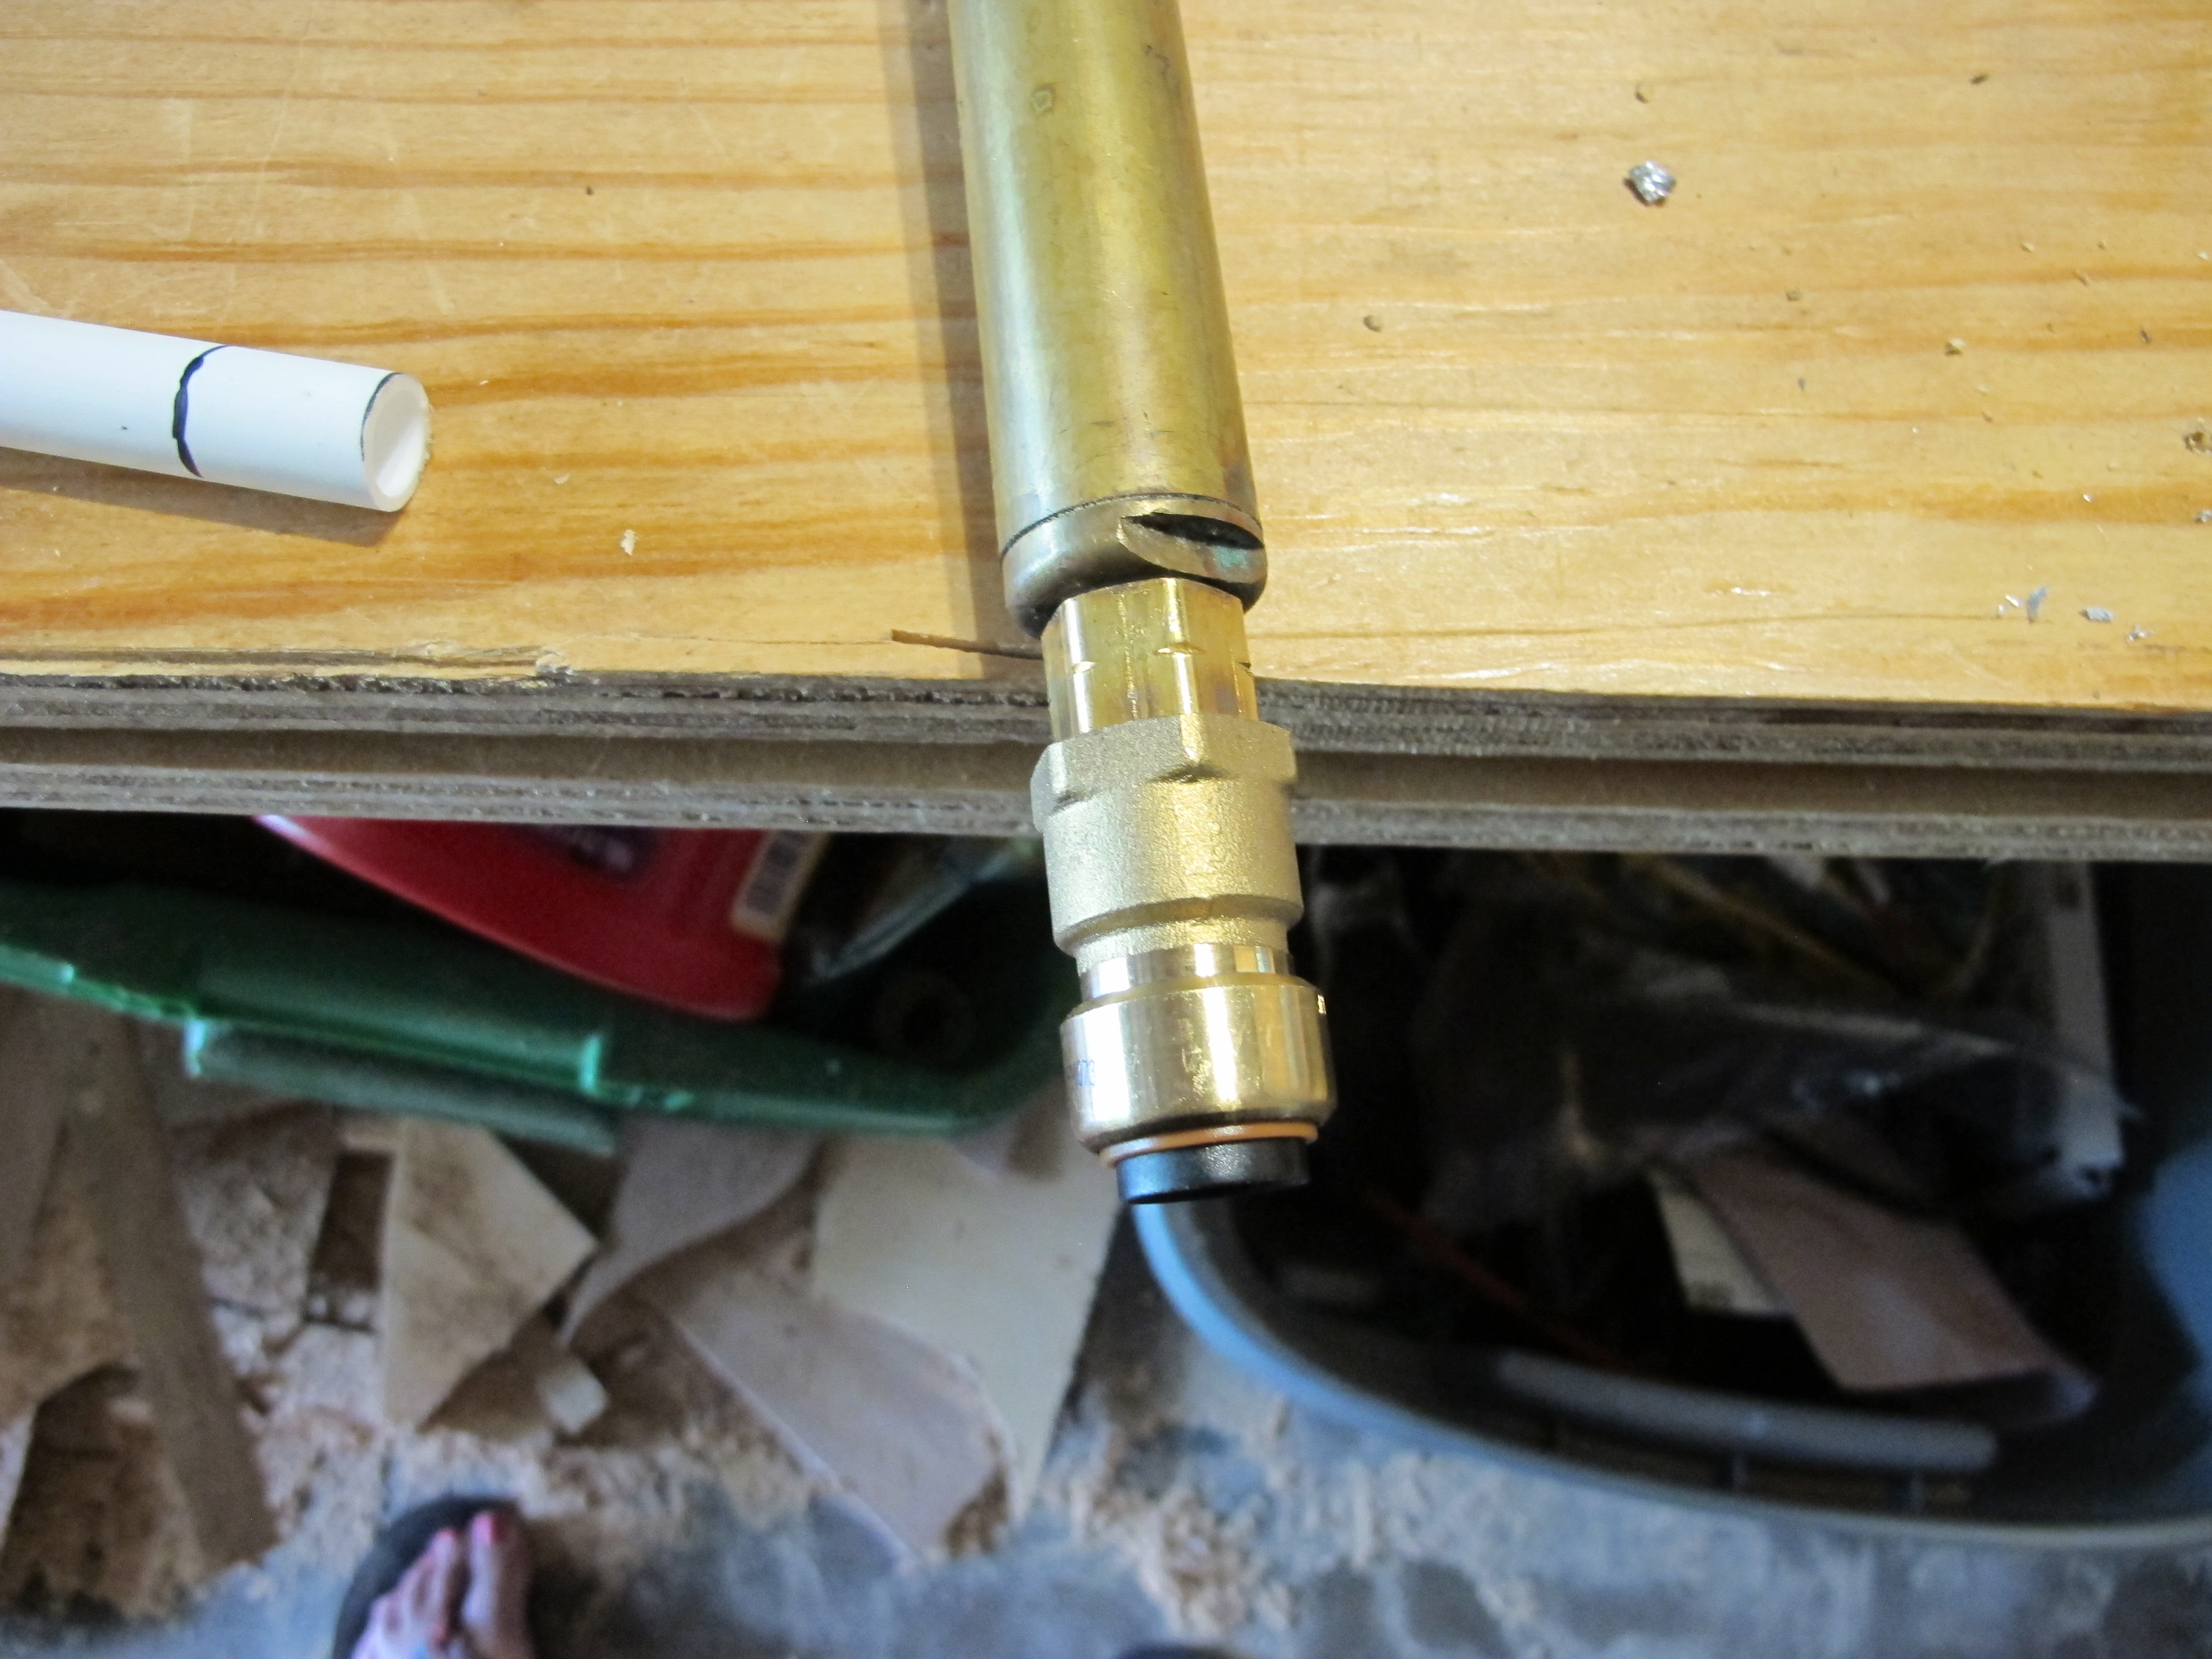
This is after I attached the second fitting. You can see that the end is now ready for the PEX pipe to be inserted.
And both faucets are hooked up! The city water faucet is there for now until my new one comes in the mail. I will switch them out when it arrives.
I started working with the fresh water tank, and after realizing I was going to need several more PEX pipe fittings as well as some sort of adapter for the water fill inlet, I gave up on that for today. I can only take so much plumbing in one weekend!
Instead of finishing the plumbing job, I decided to work on altering the cabinet to fit my new mini fridge. I looked and looked and couldn’t seem to find a mini fridge that was the right size for the original opening. I probably could have found one eventually, but I really didn’t want to spend more than $100, so I figured the best option was to go with the standard size which is 18″ wide. Since my cabinet opening was only 16 1/2″ wide, I had to make some adjustments.
After a bit of sawing with my jigsaw, I finally got it to fit! I ended up having the remove one piece completely, hopefully it doesn’t compromise the strength of the cabinet. I checked and there are several other places where there are plenty of reinforcing pieces, so it should be ok. I also installed the sink with some sealant, so it’s definitely getting closer to the final product!
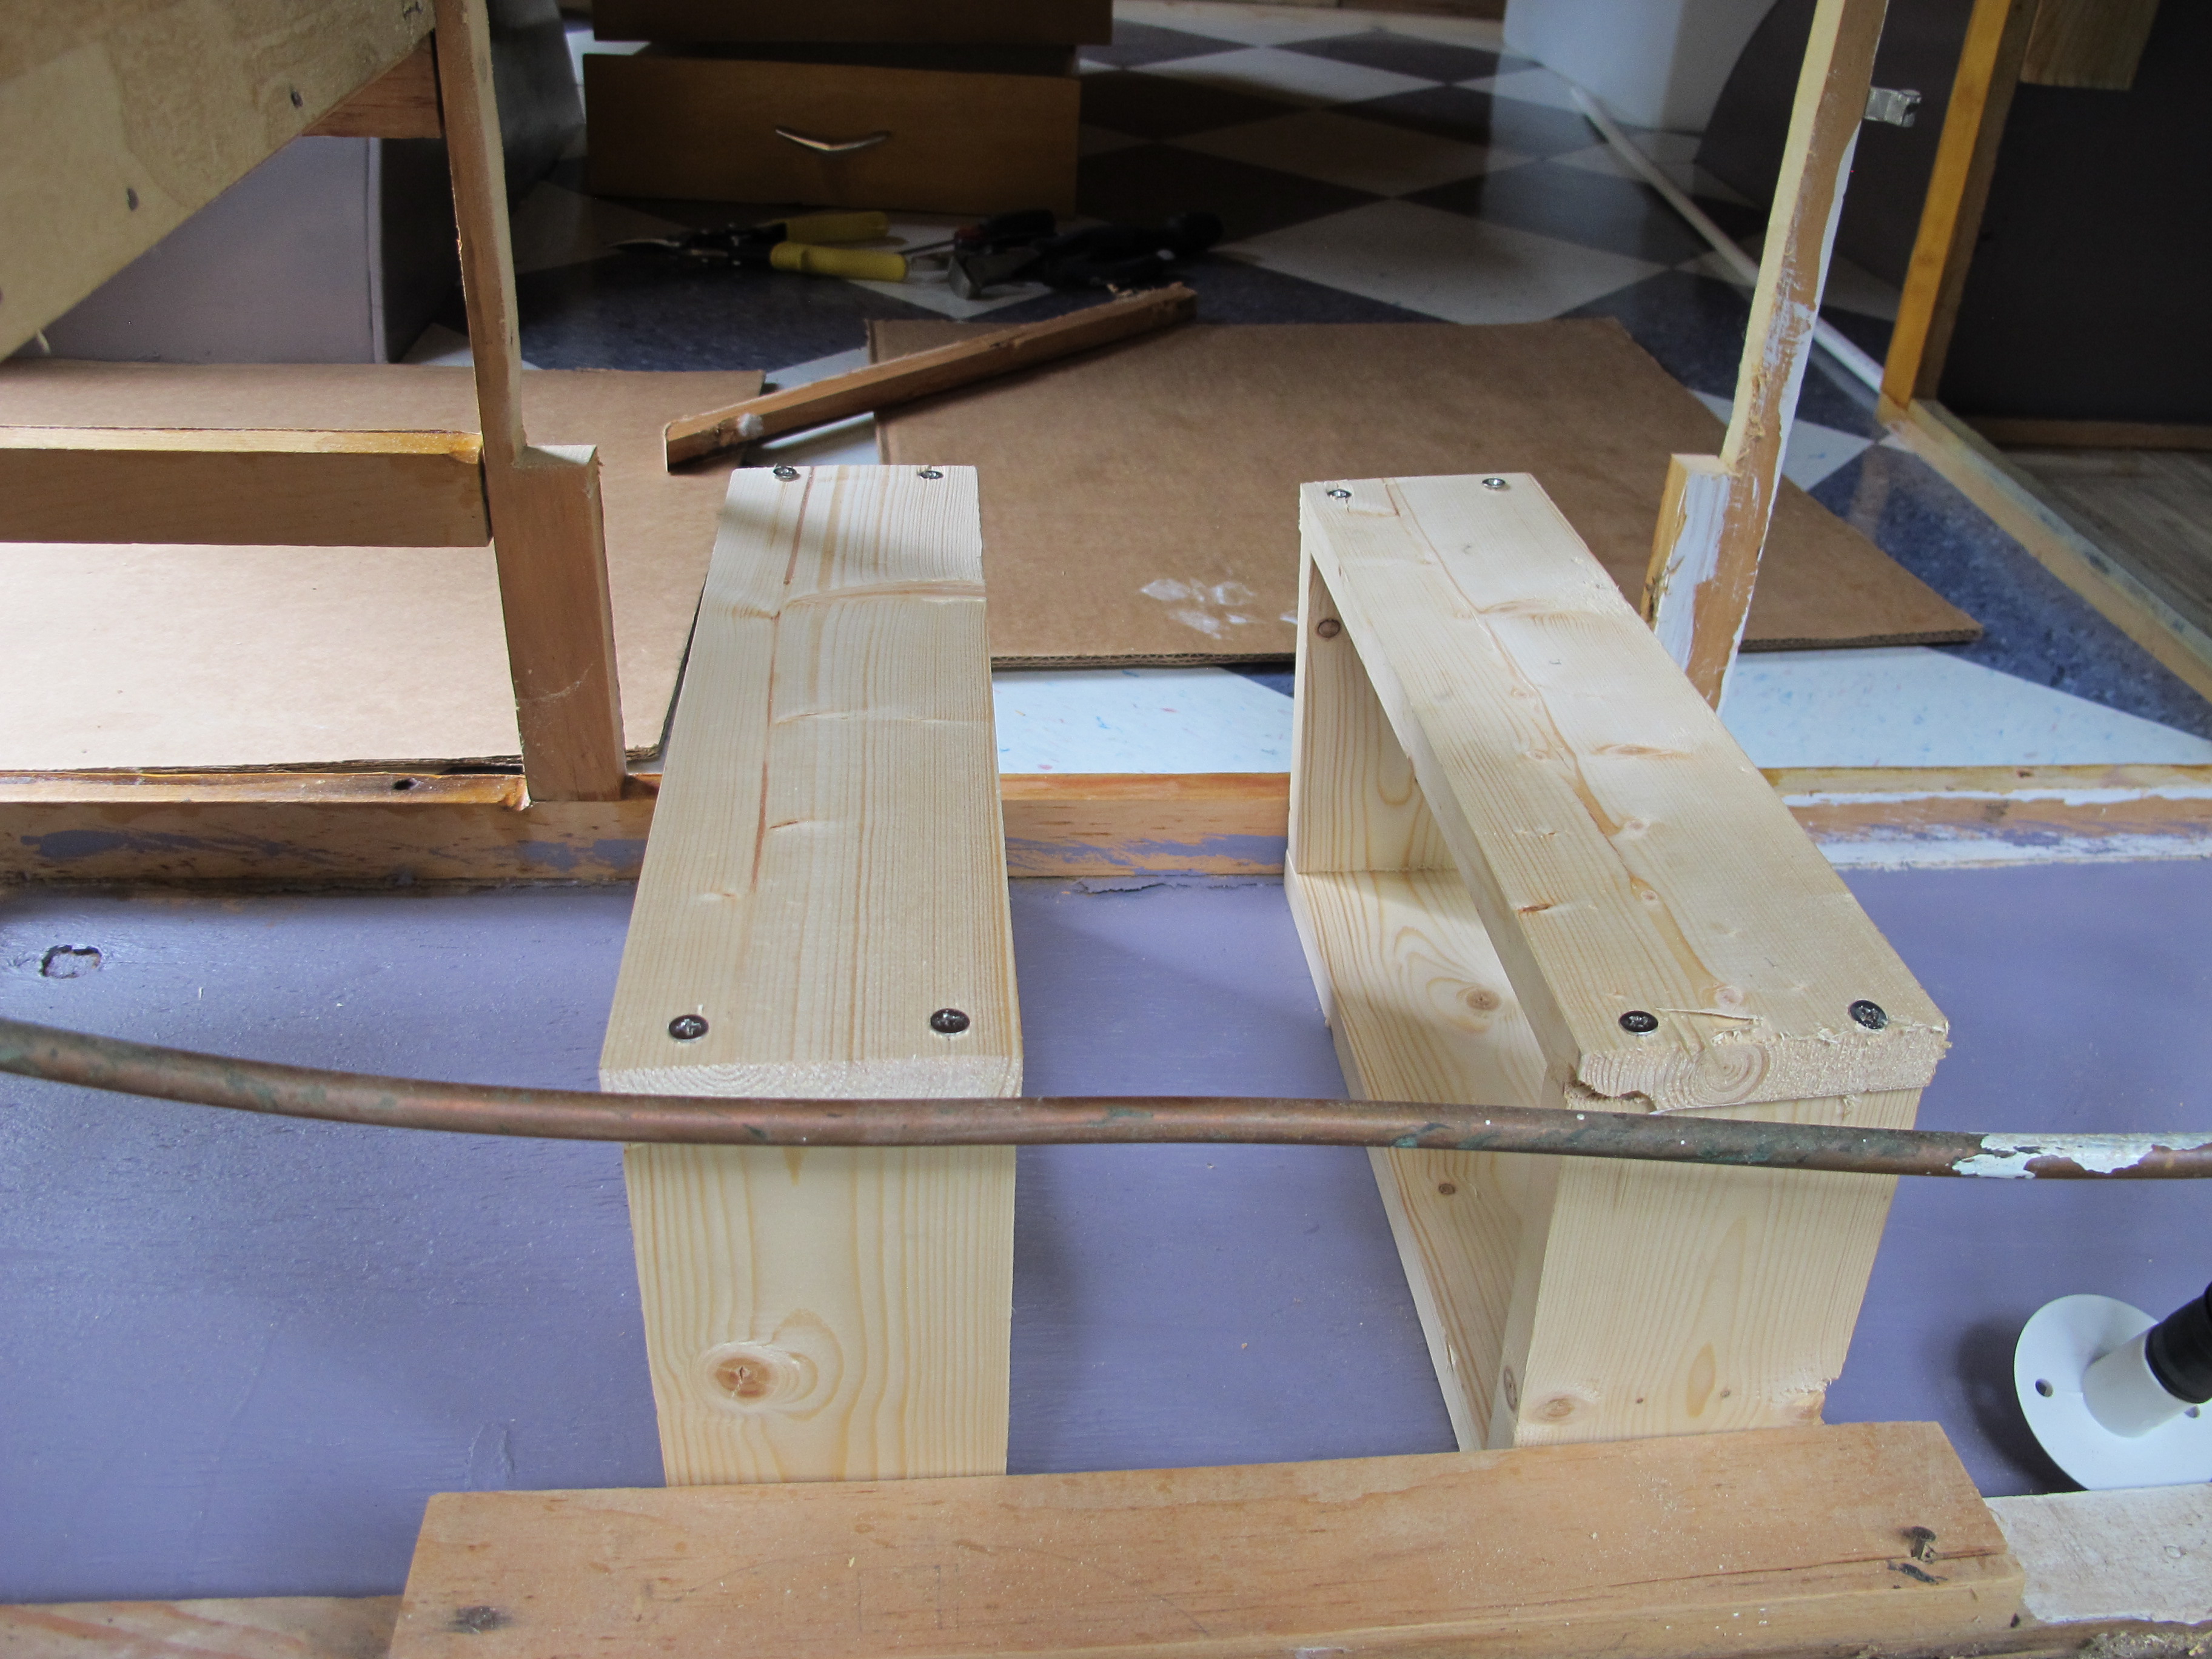
I had to build these little legs to go under the fridge. I will secure them to the floor and I think the easiest thing to do with the fridge is to tie it to the base with some sort of strap or rope.

Here’s a good view of the trim.

It fits!
I’m thinking about painting the fridge or covering it with a wrap. I also might remove the old knob from the original ice box and glue it to this fridge to make it look more retro.
The last thing I got done today was to install the shelf I made for the rear wall. I also reattached the light fixture, although it’s not fully hooked up yet. I’m going to call my electrician to come finish the wiring since I want to add another plug for the fridge. I just want to be sure it’s done right.

Since it was raining a bit today, I didn’t remove the tarp completely in case you’re wondering what the blue stuff is in the window.
It was so hot today that I felt really exhausted at about 5pm, so I called it quits. I will resume my work next weekend! Hopefully my new faucet will arrive quickly so I can install it and test it out. I am so ready to be done with the plumbing part of this project, that’s for sure. Until next time…

I’ve had the same problem with old faucets. In my case the washer was bad. That’s the black disc on the bottom of the stem that screws in the stem. After a while especially since your camper is older than I am albeit not much, I’ll bet that the brass was also deteriorated so that no matter what fix you did it would still leak, Im not a plumber either but Ive had to fix everything cause I never could afford to pay someone to do it lol. Bottom line…. for best results replace with a new one, but you figured that out already. By the way I’m always trying to save a buck on my resto. For my drain an old (but not too old) pool filter return hose did the trick. From the bottom of the sink to an existing floor hole under the dinette seat. Love it when a plumbing issue is EASIER that I anticipated!
Thanks Erik. I’m so glad I ordered the new faucet, I think I would have gone crazy trying to fix the leak in the old one! As you’ll see on my latest post, I had other problems, even after ordering the new faucet, but I finally got everything working and leak free! Good idea on the pool filter return hose, if I hadn’t already bought a new drain hose, I might have tried that too!
Super plumber!
Thanks Mom! I didn’t think so after you wrote that comment, but I can finally say I succeeded, at least with the shore water faucet/connection anyway. Hopefully the fresh water tank will also work when I get ready to finish that part.