Author Archives: jannica61

Christmas Through The Years

Posted on

I reluctantly started taking down the Christmas tree and decorations today.  I always hate this part, it’s usually kind of depressing.  This time, however, I decided to take pictures of each of the ornaments my mom has given me over the last seven years, and share their stories with all of you!  This made it […]

The Ice Box

Posted on

So I spent most of yesterday going to different stores looking for stainless steel screws in the right size to replace all of the rusty screws that I have been removing from poor Junebug’s skin.  Everything I have removed is rusty it seems.  Not to mention the dry rot.  And the water damage.  And some weird white powder all over the wall after I removed the old insulation (what is that stuff??).   Anyway, I didn’t make a lot of progress, and I ran out of time in the evening to write a post since I had to get ready to go to a party at a friend’s house.

After I got back from the store, my neighbor, always curious, came over to see what I had been up to.  He was impressed that I had removed some of the skin myself and bought several new power tools.  We went inside the camper to look at the cabinets, and the next thing I knew, he was helping me remove the old ice box.  This wasn’t on my original agenda for the day, but hey, I’ll take the help when I can get it!  Actually, it has been pretty easy so far to get random help from my neighbors.  I think they are just as excited about this project as I am!  The ice box (and it’s literally an ice box, not a refrigerator), came loose pretty easily, and we thought we could just pull it right out.  But that turned out not to be the case (big surprise).  It was attached to the cabinet toward the front and we couldn’t figure out what in the world was holding it in.  We tugged and pried and pulled and pushed.  Nothing seemed to work, and I didn’t necessarily want to start removing the whole cabinet.  Finally after lots of maneuvering, we discovered the big nails hidden away right behind the cabinet face.  After cutting those with my wire cutters, the ice box slid right out!

Pretty gross behind there!

Pretty gross behind there!

That gaping hole will be the home for a new modern refrigerator at some point.   I can’t wait to rip out this nasty carpet too.  You can see all kinds of stains in it like the one in the picture above.   Gross.

Junebug gets naked

Posted on

Today, I have decided to take on the biggest project yet, removing some of Junebug’s skin in order to repair the open seam in the roof.

This is the worst seam, it's completely open and you can see the insulation when I press on the aluminum.  Definitely needs a repair pronto!

This is the worst seam, it’s completely open and you can see the insulation when I press on the aluminum. Definitely needs a repair pronto!

I just had a nice chat with my new friend, Susan, who restores vintage campers, and she walked me through each of the steps I needed to take in order to complete this repair.  I really hope it turns out like it’s supposed to!  I will be posting pictures of my progress and maybe even some video, depending on what kind of mood I am in.  Stay tuned…

Seven hours later…

So, I spent quite a bit of time initially going to a few stores to get the proper supplies for today’s project.  I discovered a pretty good RV supply and repair shop not too far from my house, RV Masters.  http://rvmastersinc.com/  They were pretty nice and one of the employees gave me some advice and asked that I bring Junebug by when I’m done so they can see her.  I told him I would probably be by  before that if I get in over my head. haha  At least I know an escape route if all of this gets to be too overwhelming.  He reminded me that vintage camper restoration was not a good investment and that it was a labor of love.  I know this already, there’s no way I’m getting back my investment on Junebug.  I don’t even really care since I don’t know if I’ll be able to part with her after all of the time and effort I’m planning to put into her!

So, rather than post pictures this time, I took some videos to show you my progress.  These videos show a lot more than photos can.

Shasta Restoration Part I:

I show all of my tools and the “before” shot of the front of Junebug before I take her apart.  I also take off the eyebrow and window in this clip.  At this point, I am happy and hopeful because everything is going smoothly.


Shasta Restoration Part II:

In this clip, I remove the first panel of aluminum siding.   You can hear and see the frustration and disappointment I am experiencing because not only was it more difficult to remove than expected, but I also am finding quite a bit of dry rot.

After this clip, I called up my friend Susan.  She gave me a pep talk and explained what I needed to do to replace the rotted wood before I could replace the aluminum.   She also said it helps to keep plenty of wine on hand. haha  On that note, I poured myself a glass of wine.   I felt better after that, although I’m still kind of thinking, what have I gotten myself into??  The good part is, I needed to discover the rotted wood in order to know I needed to replace it.  I would hate to fix up the interior of the camper, only to have it ruined because the framing and siding is in horrible condition which would only lead to leaks and structural damage and ultimately ruin all of my hard work.  The bad part is, this is going to take a lot longer than I planned.  This shouldn’t surprise me at all, because so far that has been the case with each little Junebug project.  Guess I’d better reset my expectations going forward!

So, the saga will resume tomorrow.  Tonight, I think I’m going to treat myself to a steak dinner because I worked so hard today.  🙂

Life was not easier back then…

Posted on

My grandma always made sewing look so easy.  She sewed intricate dresses and nightgowns for my barbie dolls and made quilts with embroidered blocks signifying life events for all of her five children and I think most, if not all, of her grandchildren.  For a while there, I think she was cranking out two or three quilts a year plus numerous other sewing projects.  What I didn’t realize was how many hours she had to put into these projects to make every item look as good as it did.  I know you get better and faster at it with practice, but geez!  This curtain project is taking way longer than I thought it would!

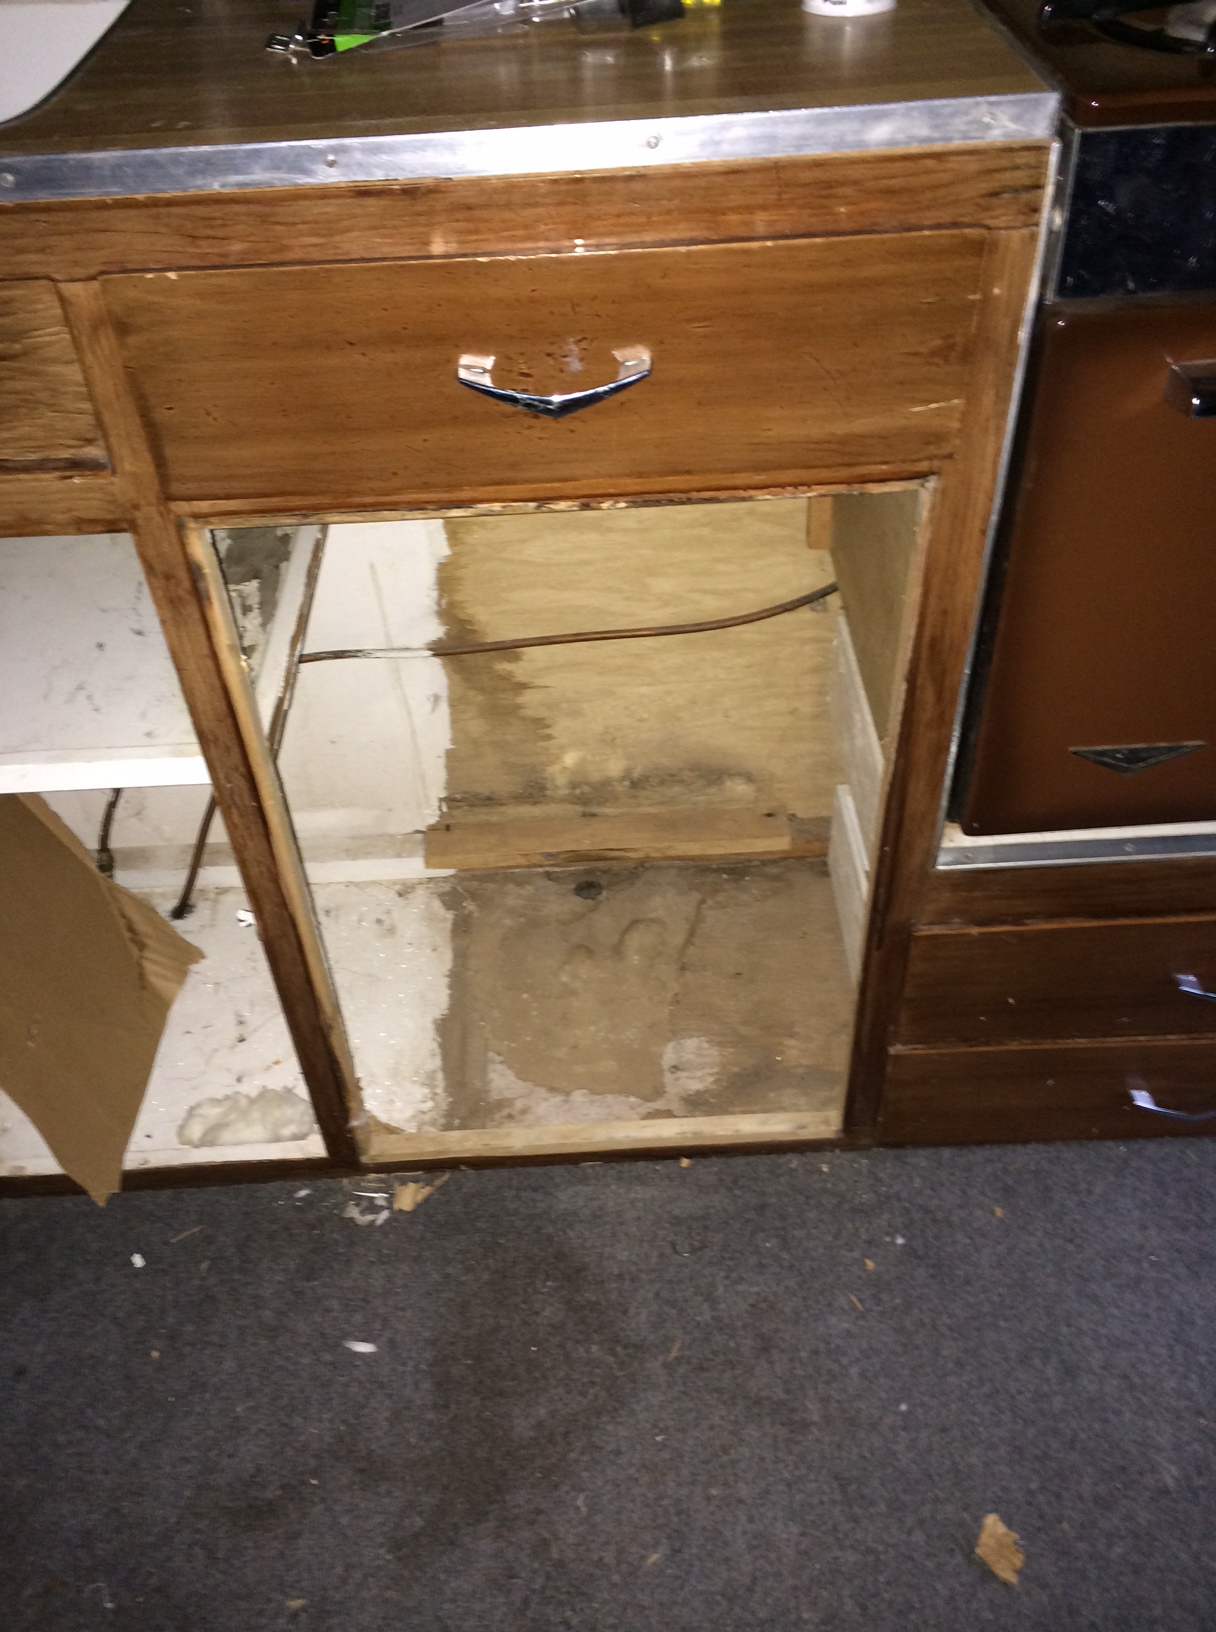
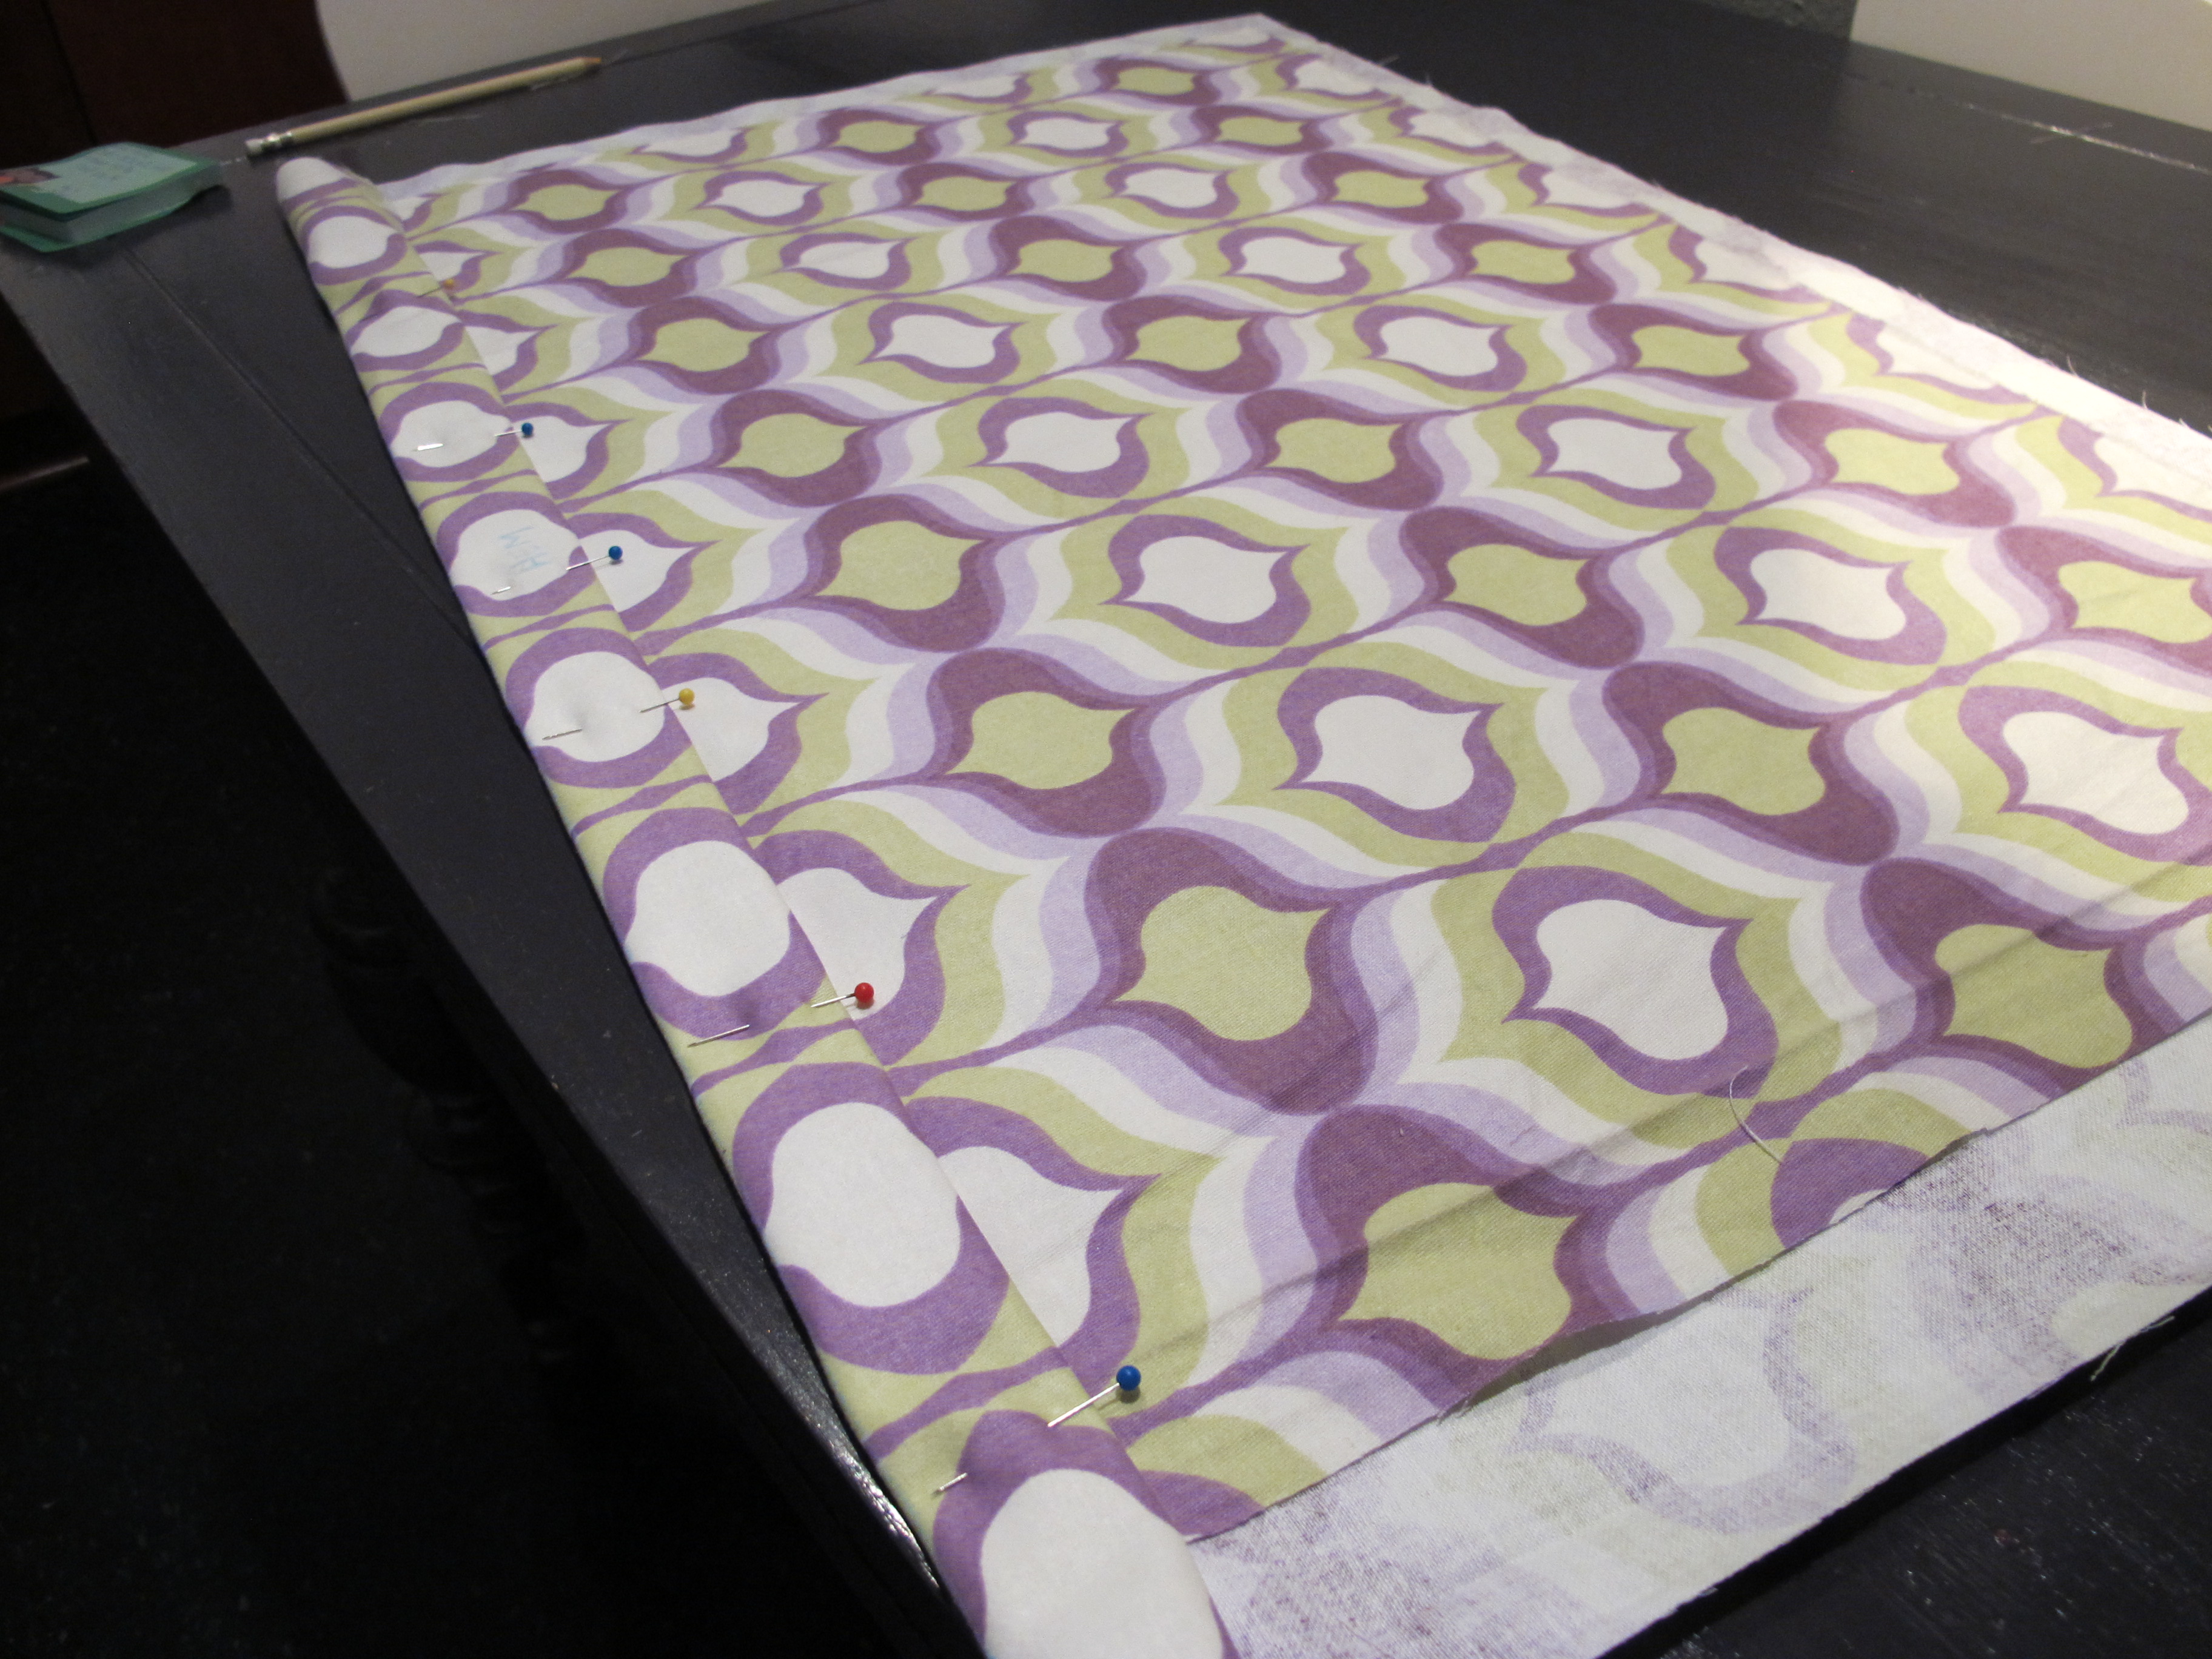
I headed to Jo-Ann Fabrics today to buy one more yard of fabric since I had come up short yesterday.  Wouldn’t you know, they were conveniently all out of the kind I needed.  Just my luck!  I asked a sales person to help me, and we both searched high and low for the fabric.  They had the Waverly Hourglass Seaglass and Coral versions, but not the Hourglass Violet like I needed.  We also couldn’t locate a sku number so she could search the system.  ugh  Finally I gave up and went back home.  It was then that I realized, I only need a few more pieces for the back side of the curtains (facing the exterior).  Since I wanted the pattern to show from the outside, all I needed were pieces and they didn’t necessarily have to look perfect since the window would be in between the onlookers and my fabric.  I decided I would sew some pieces together that I had left over and make this work.

So…. I got my machine out and threaded it.  It had been a while since I threaded the machine, so of course, I had to get out the instruction manual and carefully go through each step.  After all that, I still kept getting the thread all tangled and the backside of the fabric looked like my dog, Baxter, tried to sew it.  😀  After at least 30 minutes and several pieces of trial fabric, I finally got the settings right and my stitches were coming out right.  Fast forward an hour and I finally finished the first two panels for one of the side windows!  Hallelujah!!

Funny side note:  I just ran spell check on here to make sure I didn’t have any mistakes, and it highlighted the word, “sew”.  It asked me if I meant to say “so” or “sue”.  Is sewing so uncommon that the people who created spell check think it’s got to be a mistake??  That made me laugh.  🙂

Side window
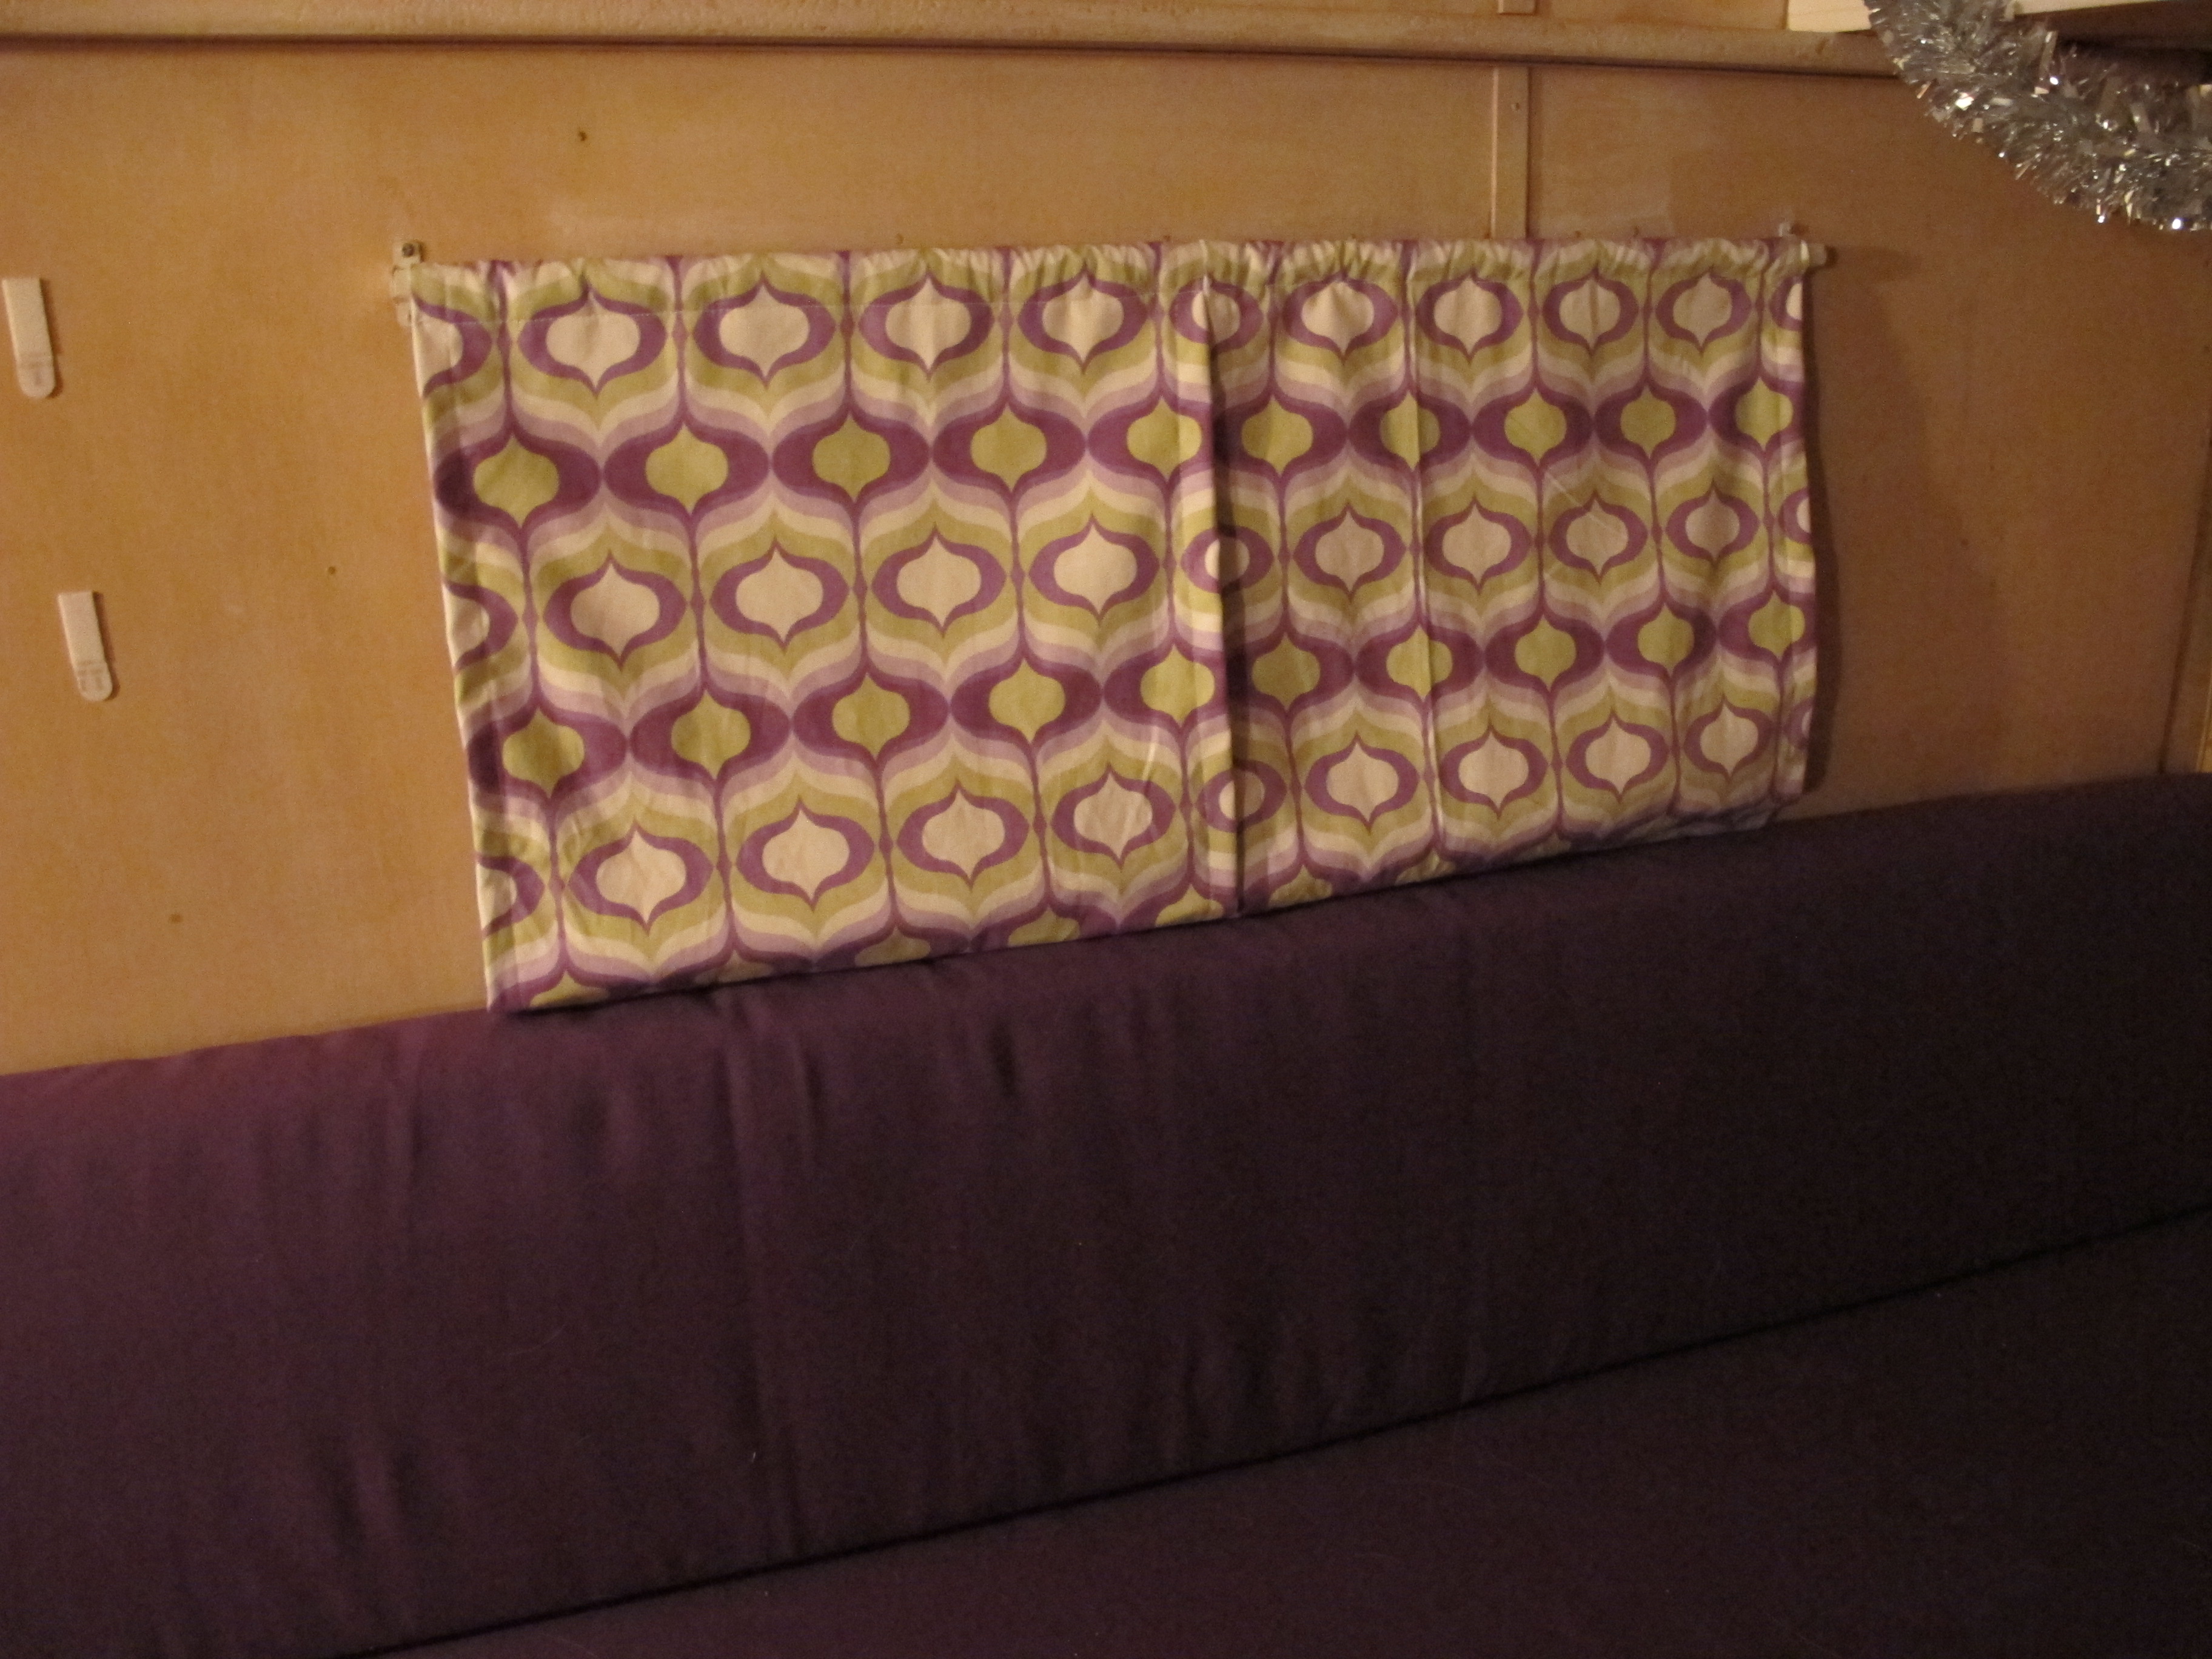
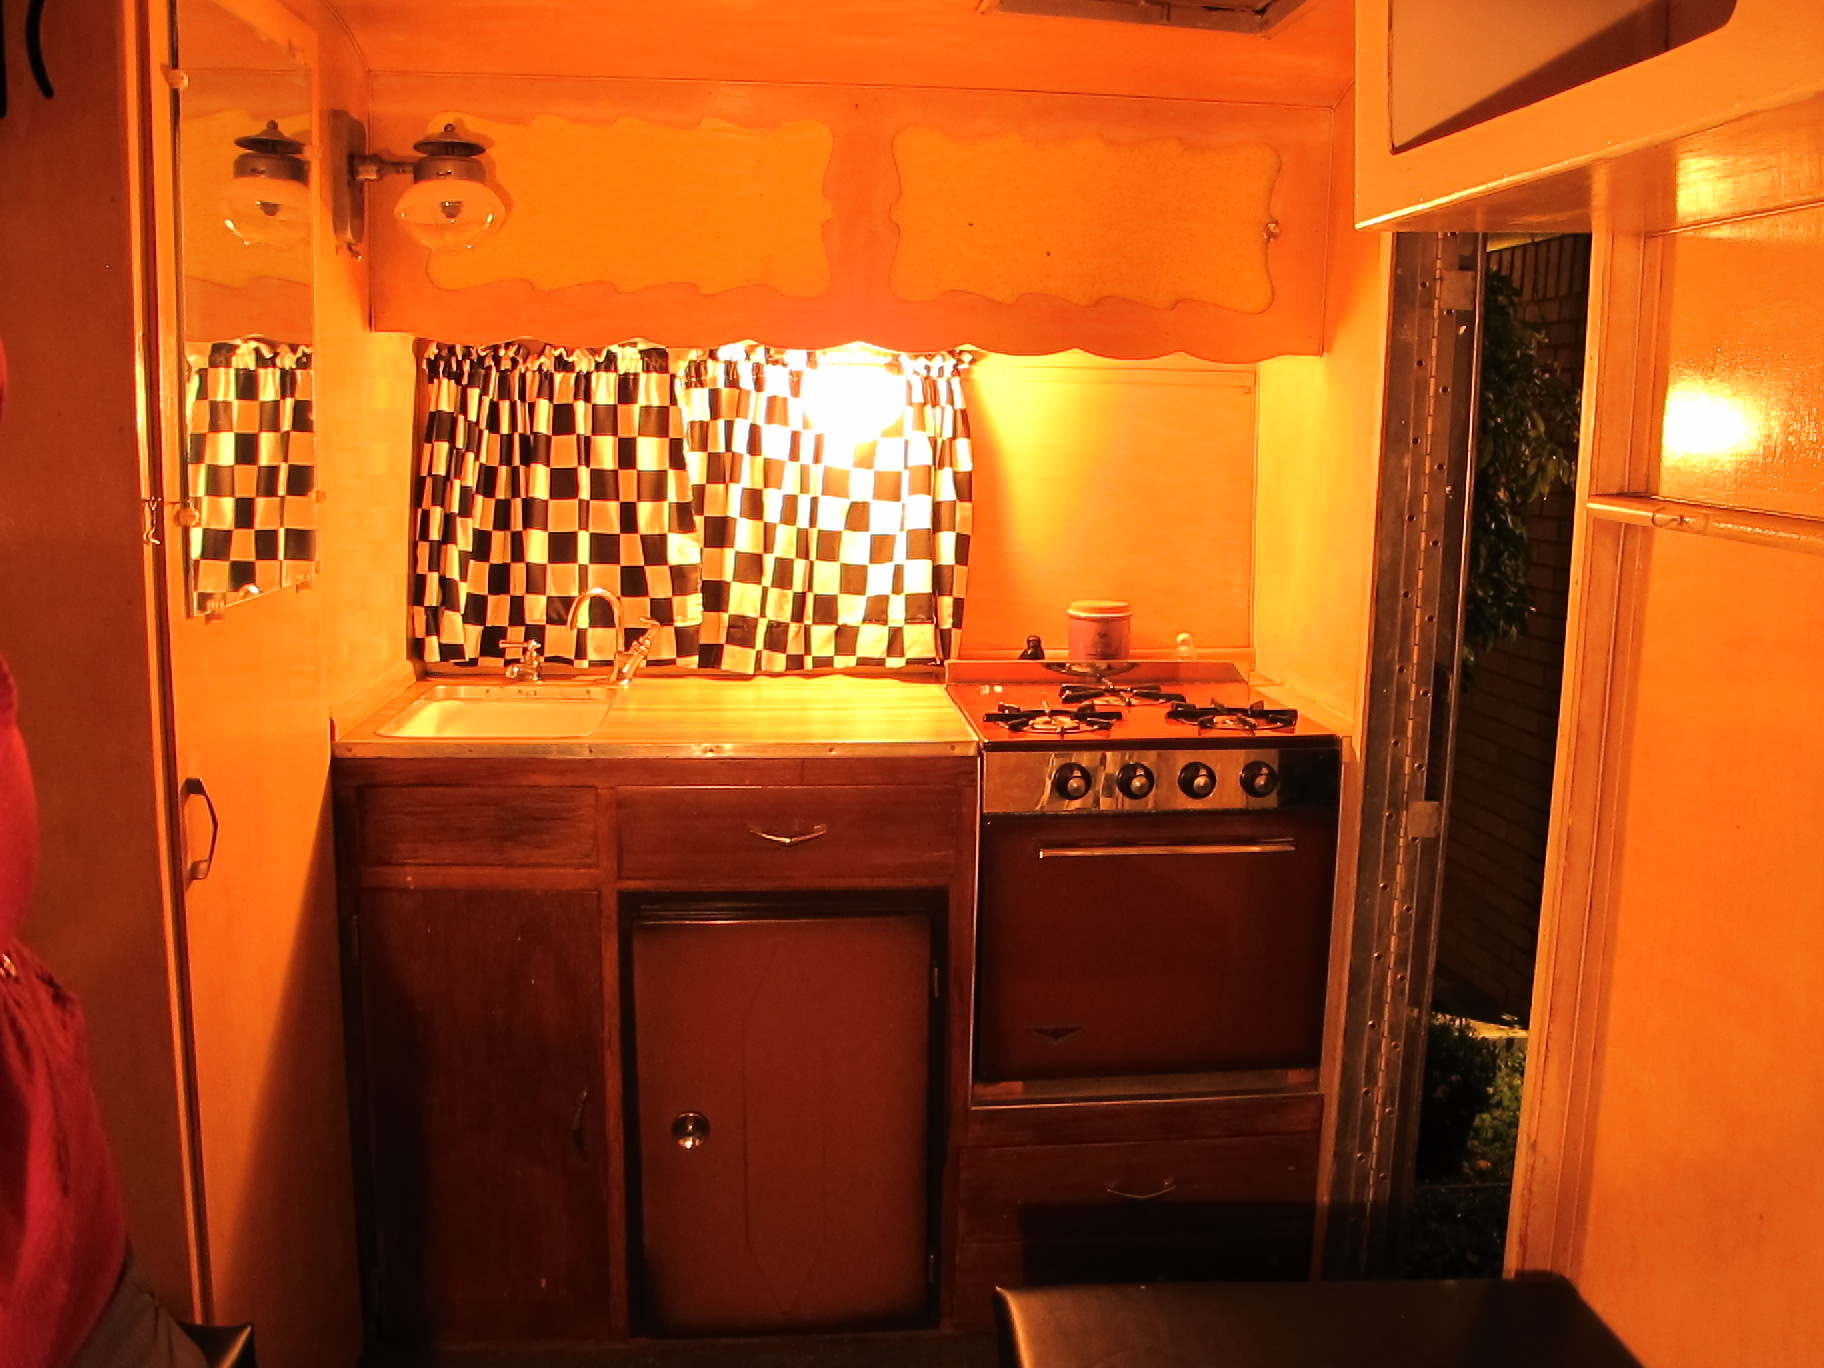
The fabric is a little too long with the seat back up, but it needs to be long enough to cover the window when the bed is made down (see below).

IMG_3949

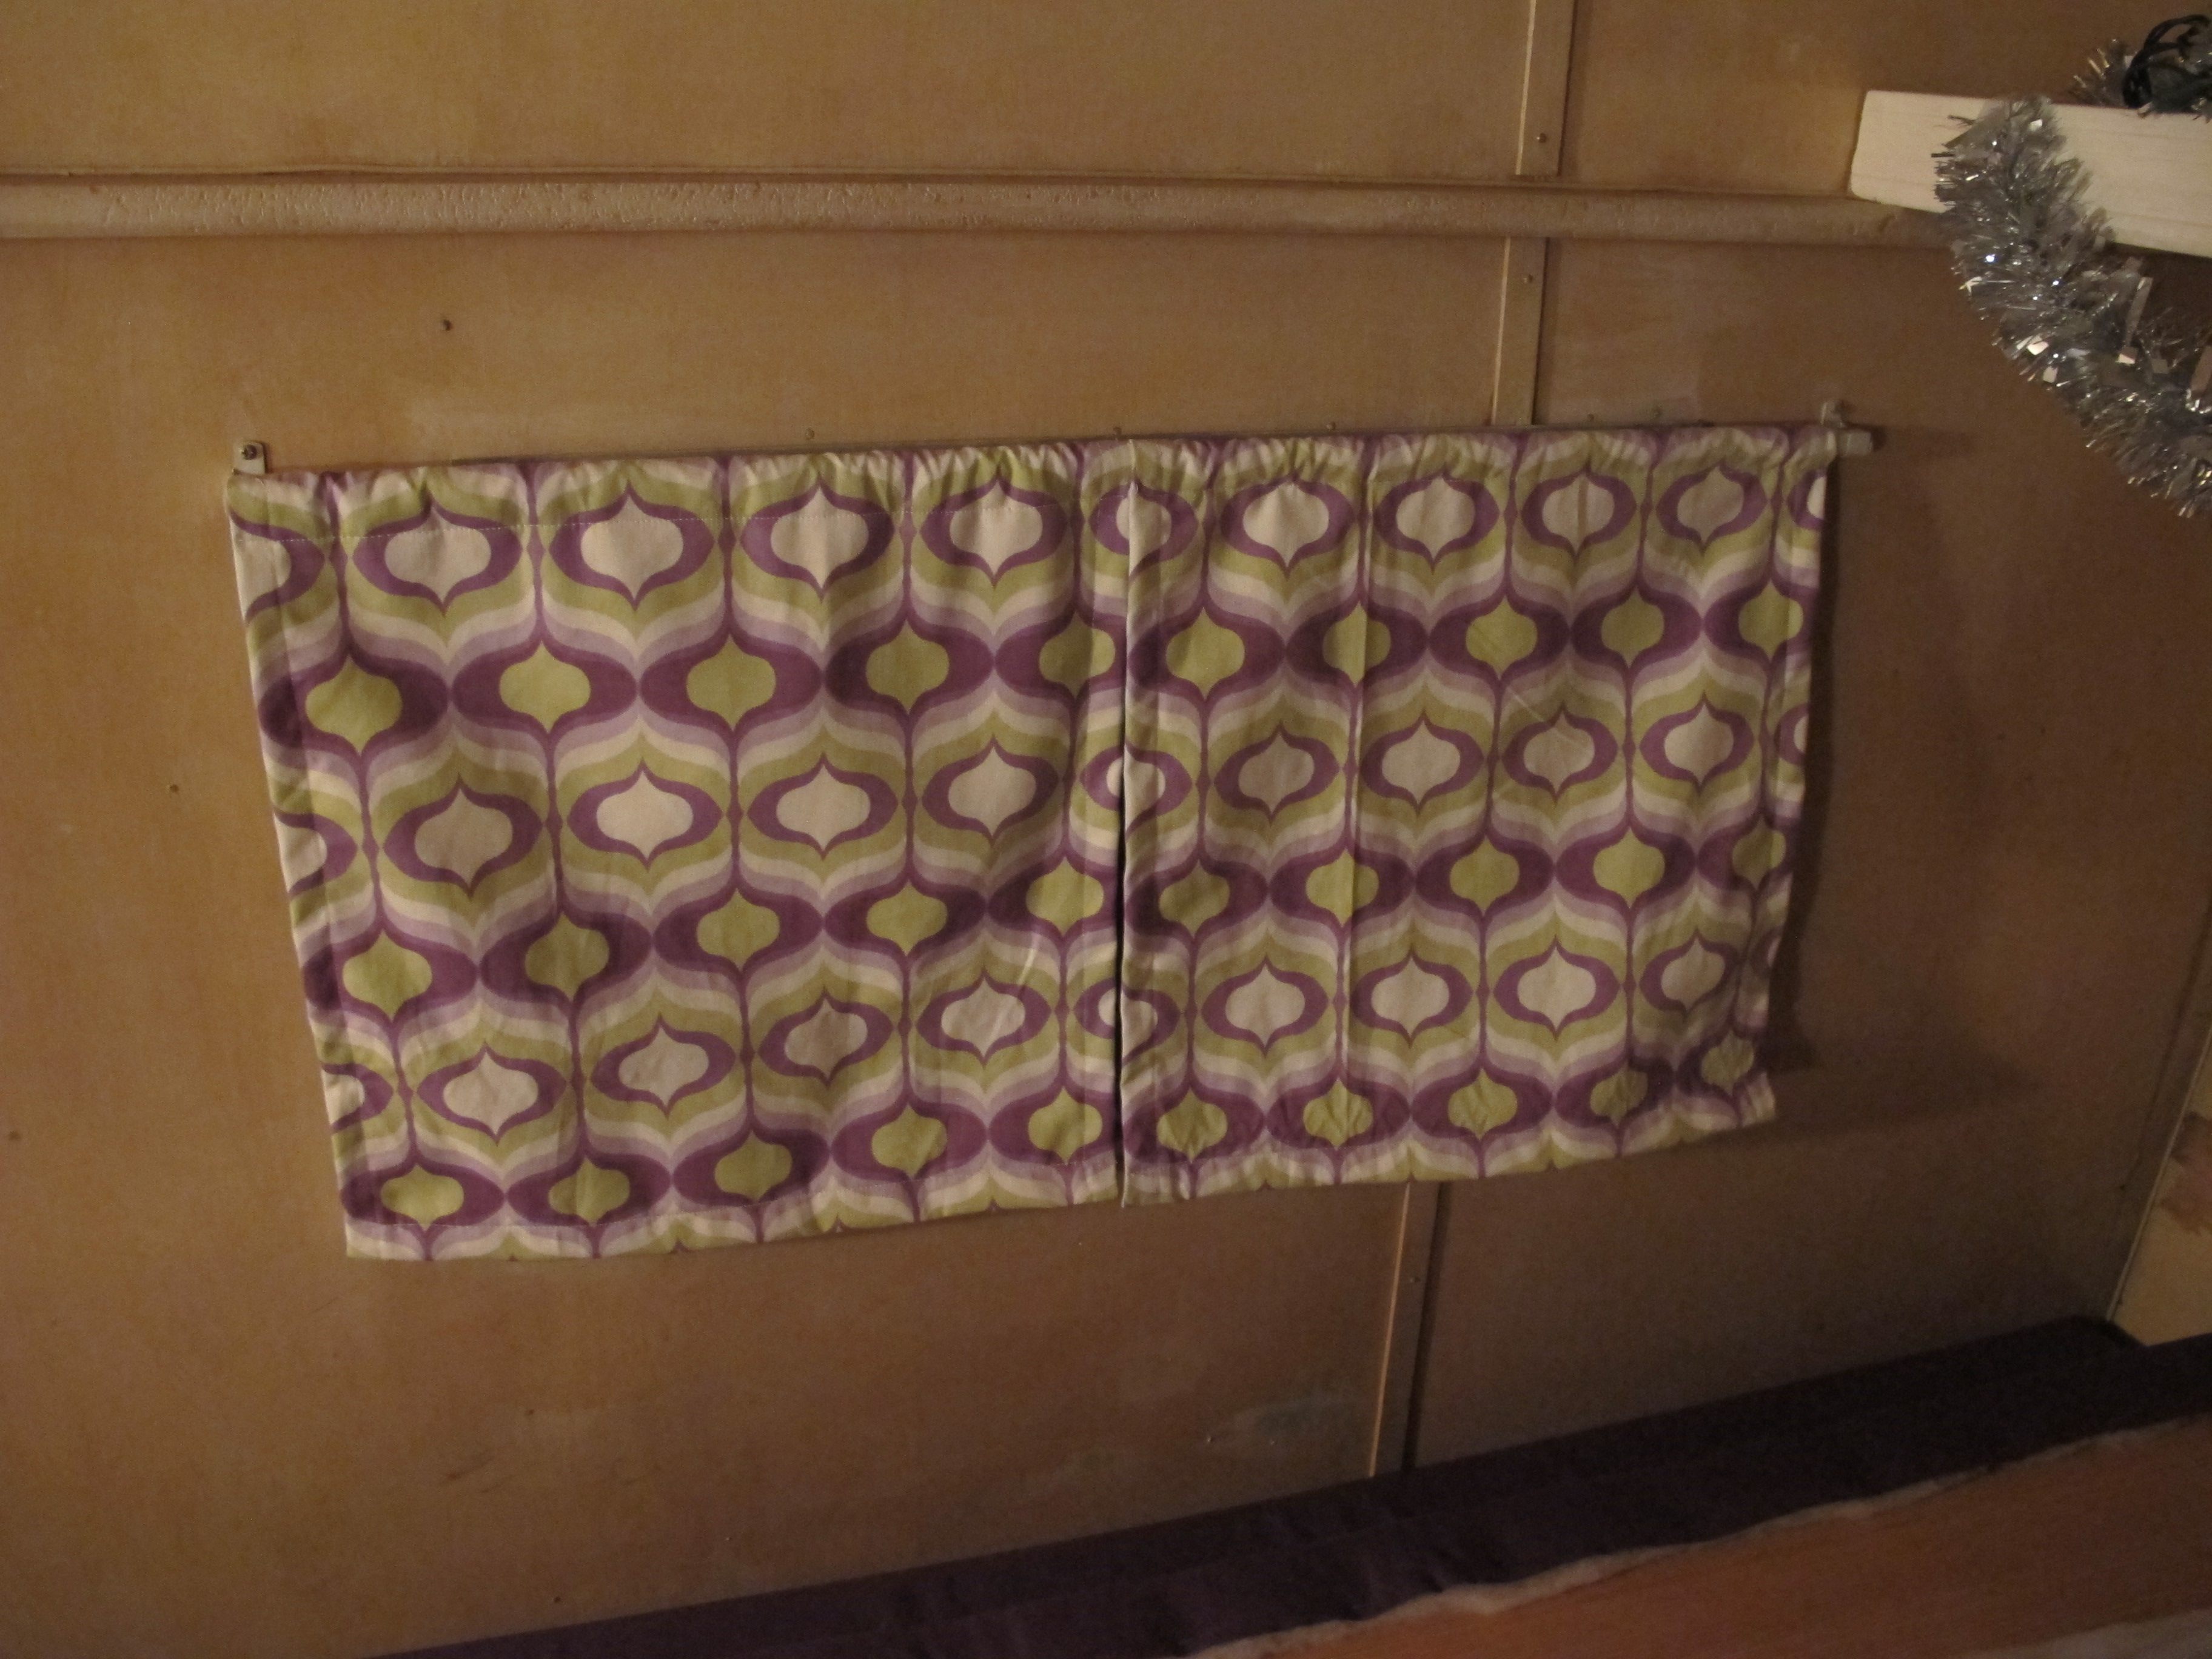
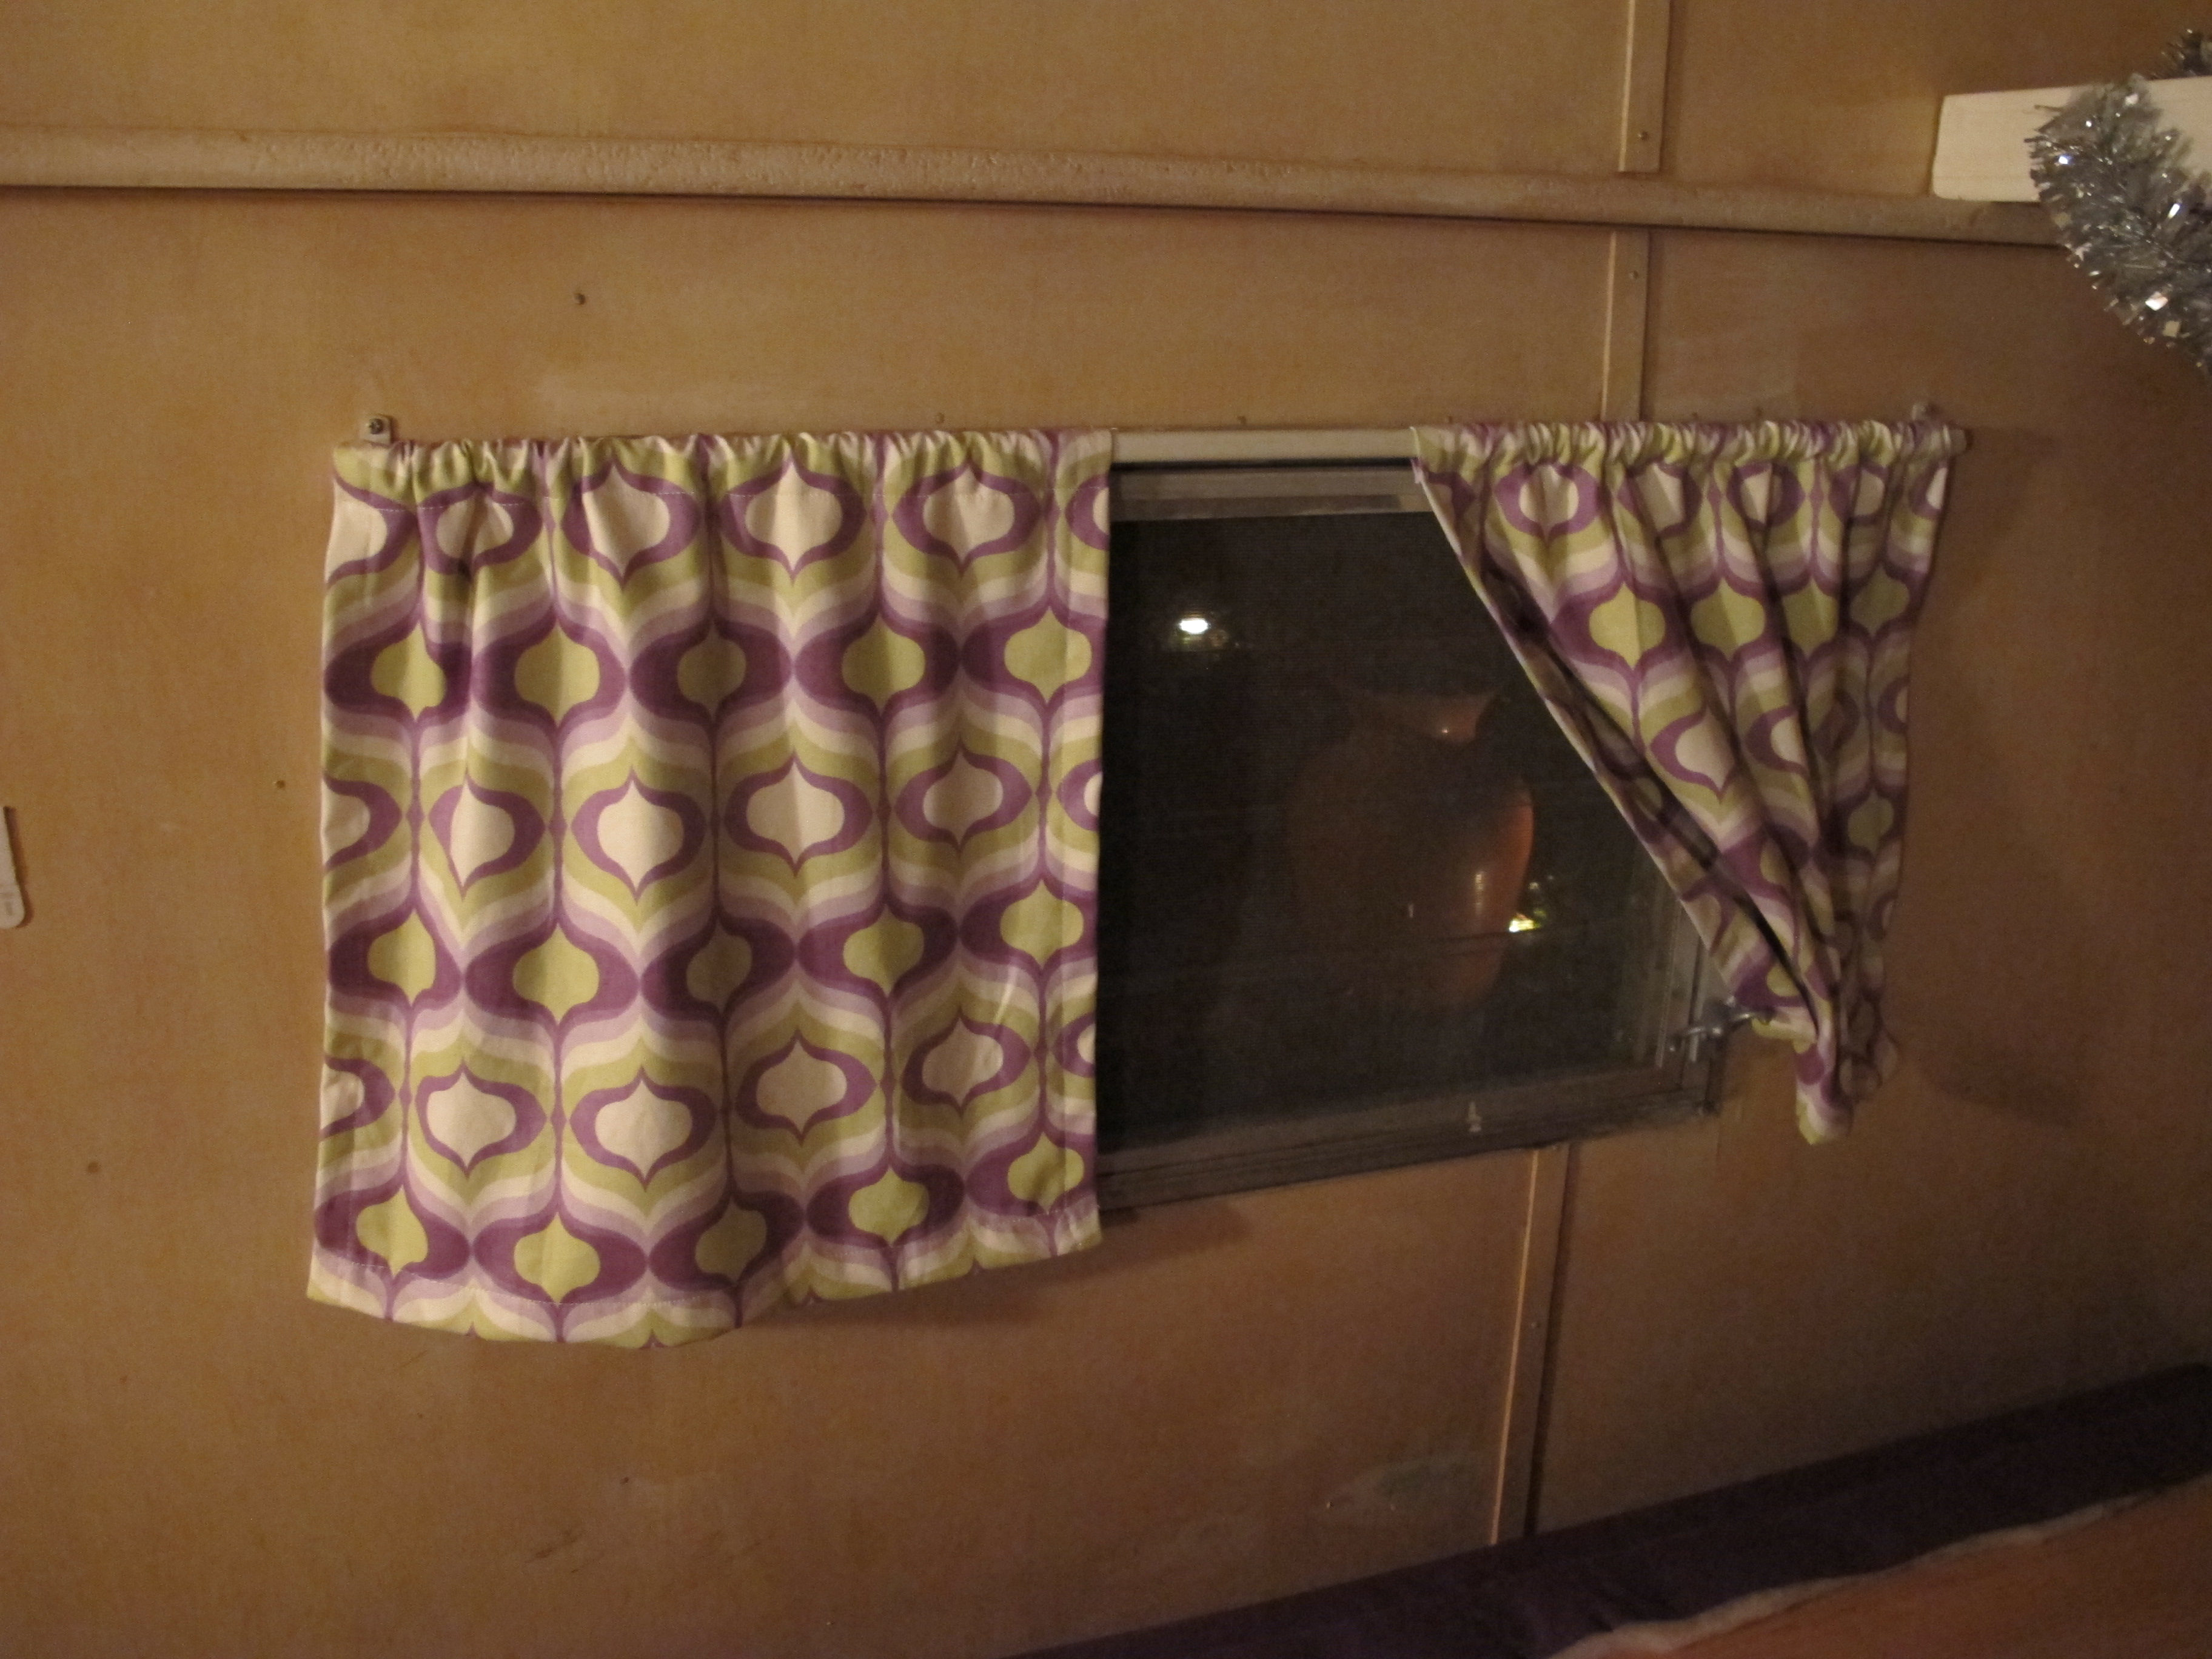
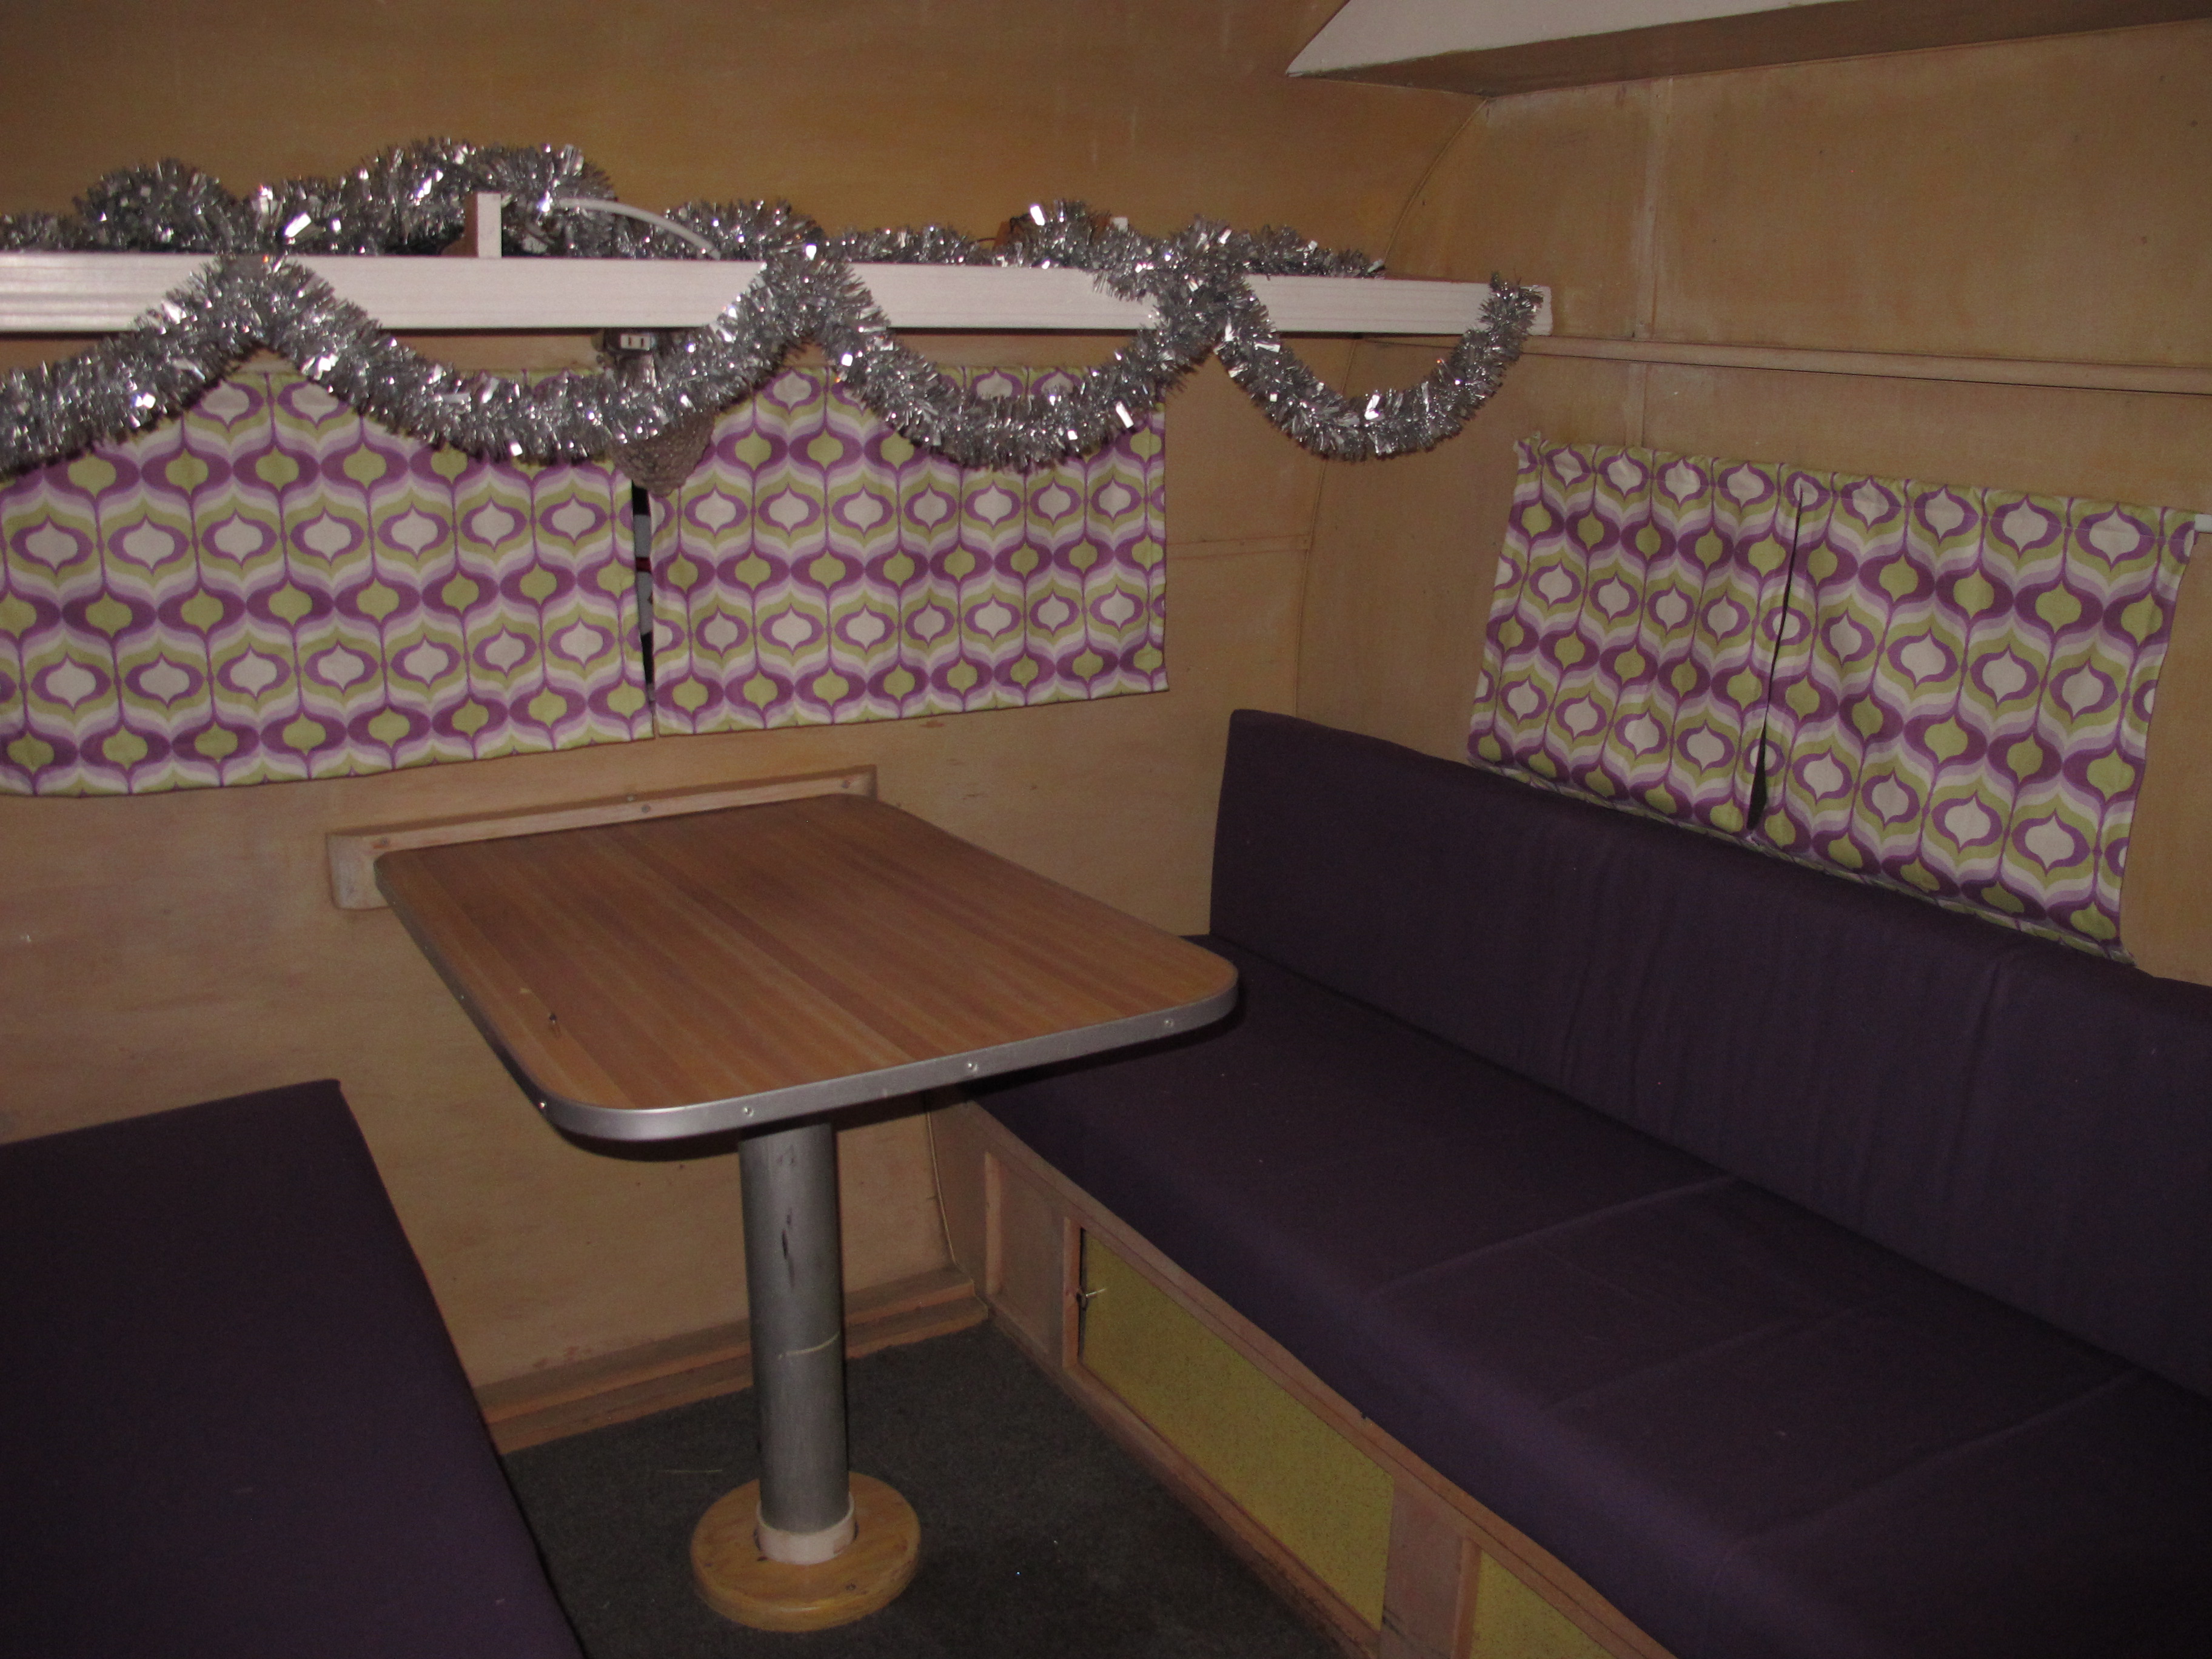
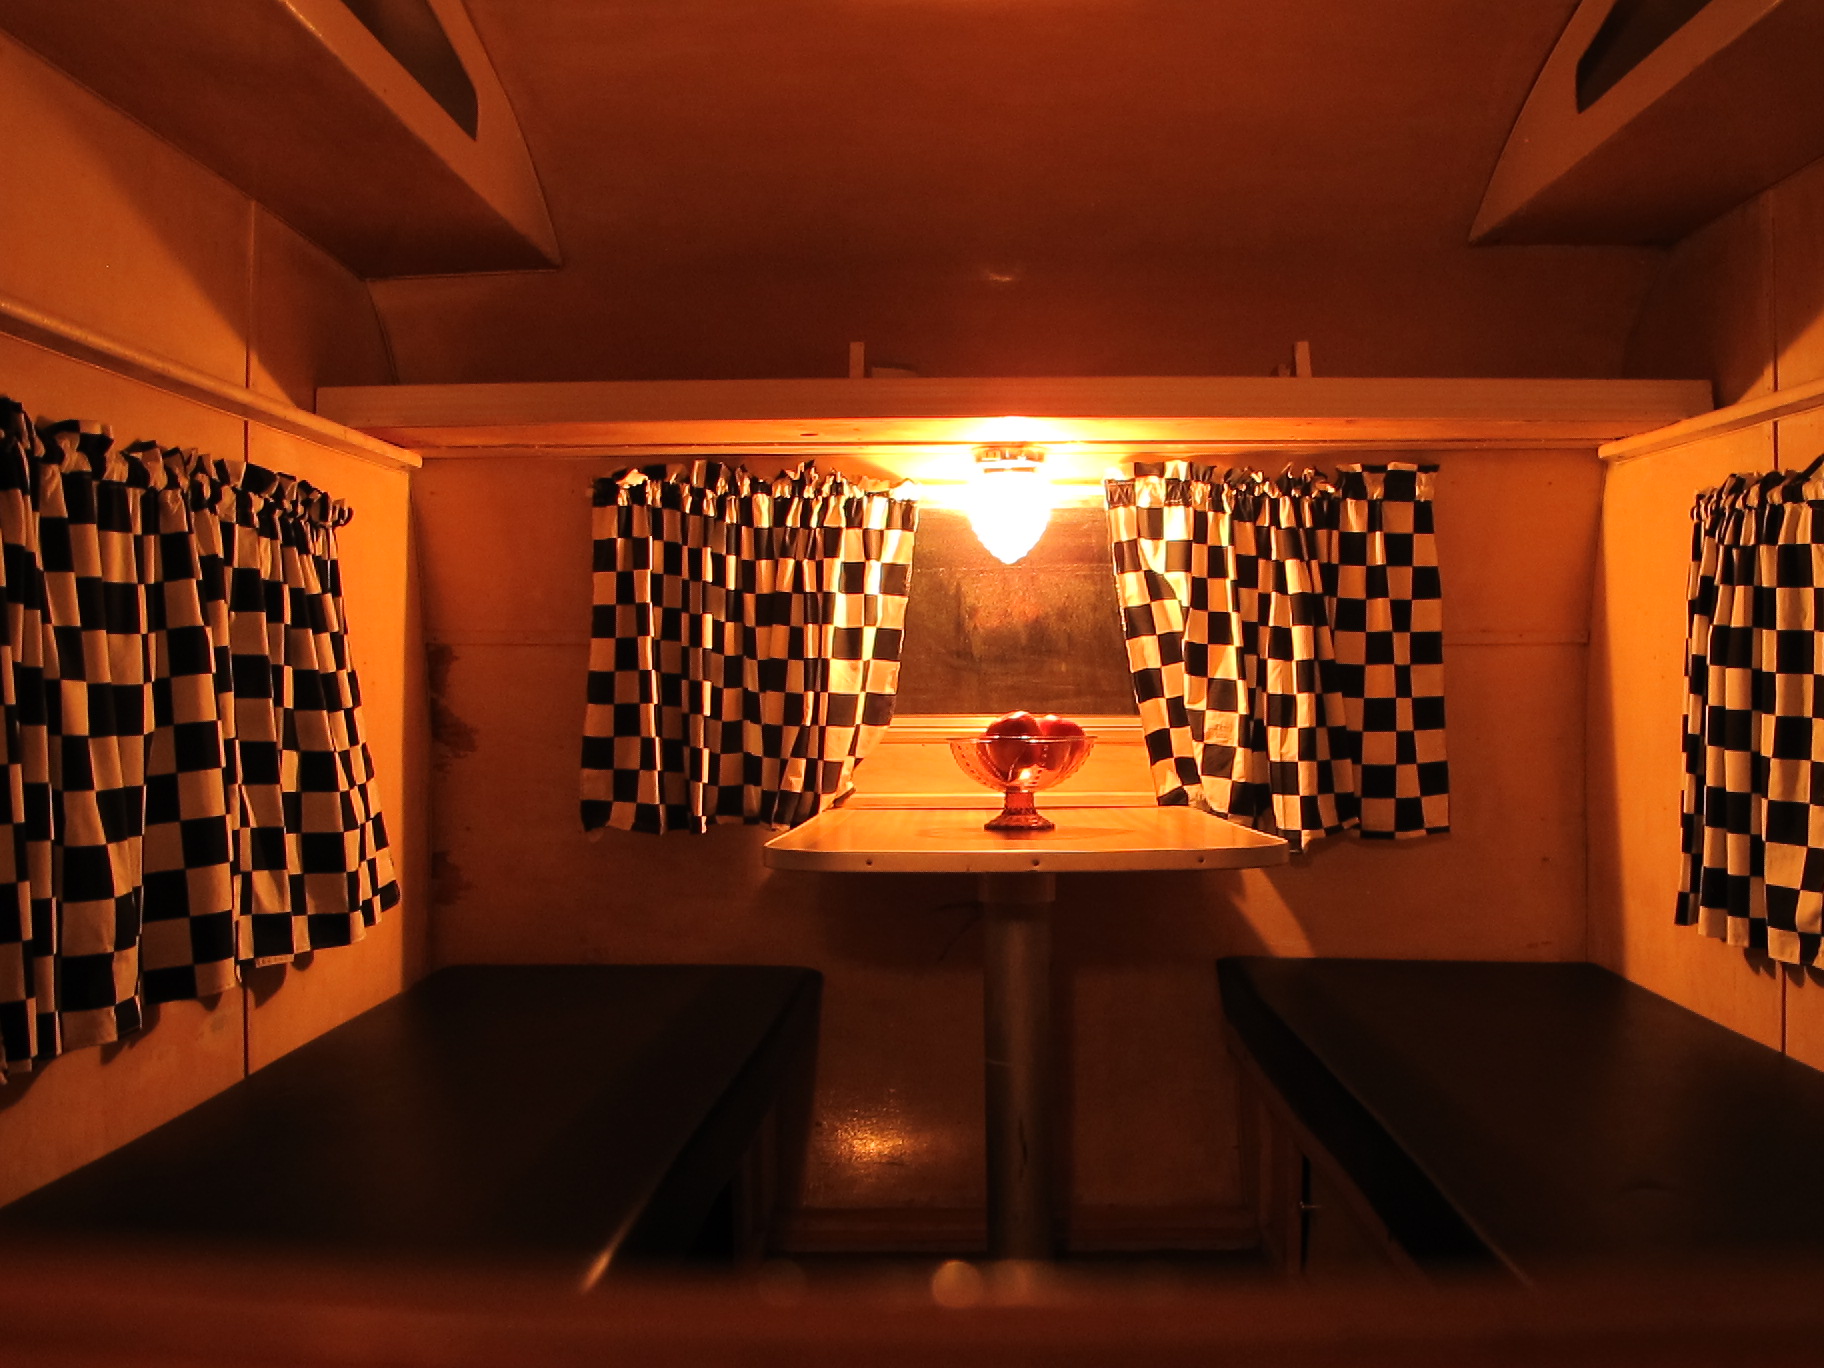
I made two panels for each window so that they could open in the middle.  I think I’ll make some sort of ties for them as well so they can either tie back or tie in the middle when I want them open.  I’m pretty pleased with how this one looks.  Hopefully the other three turn out as good!

IMG_3950


Two hours later….

I finally finished!!  I’m so proud of myself.  I lost count of how many times I had to rethread the machine (not sure if it was my machine or user error), but I finally did it.  I’m pretty satisfied with the result.  All of my measuring seems to have paid off because I think they turned out pretty straight!

Guess I need to take the tinsel down sometime soon.

Guess I need to take the tinsel down sometime soon.

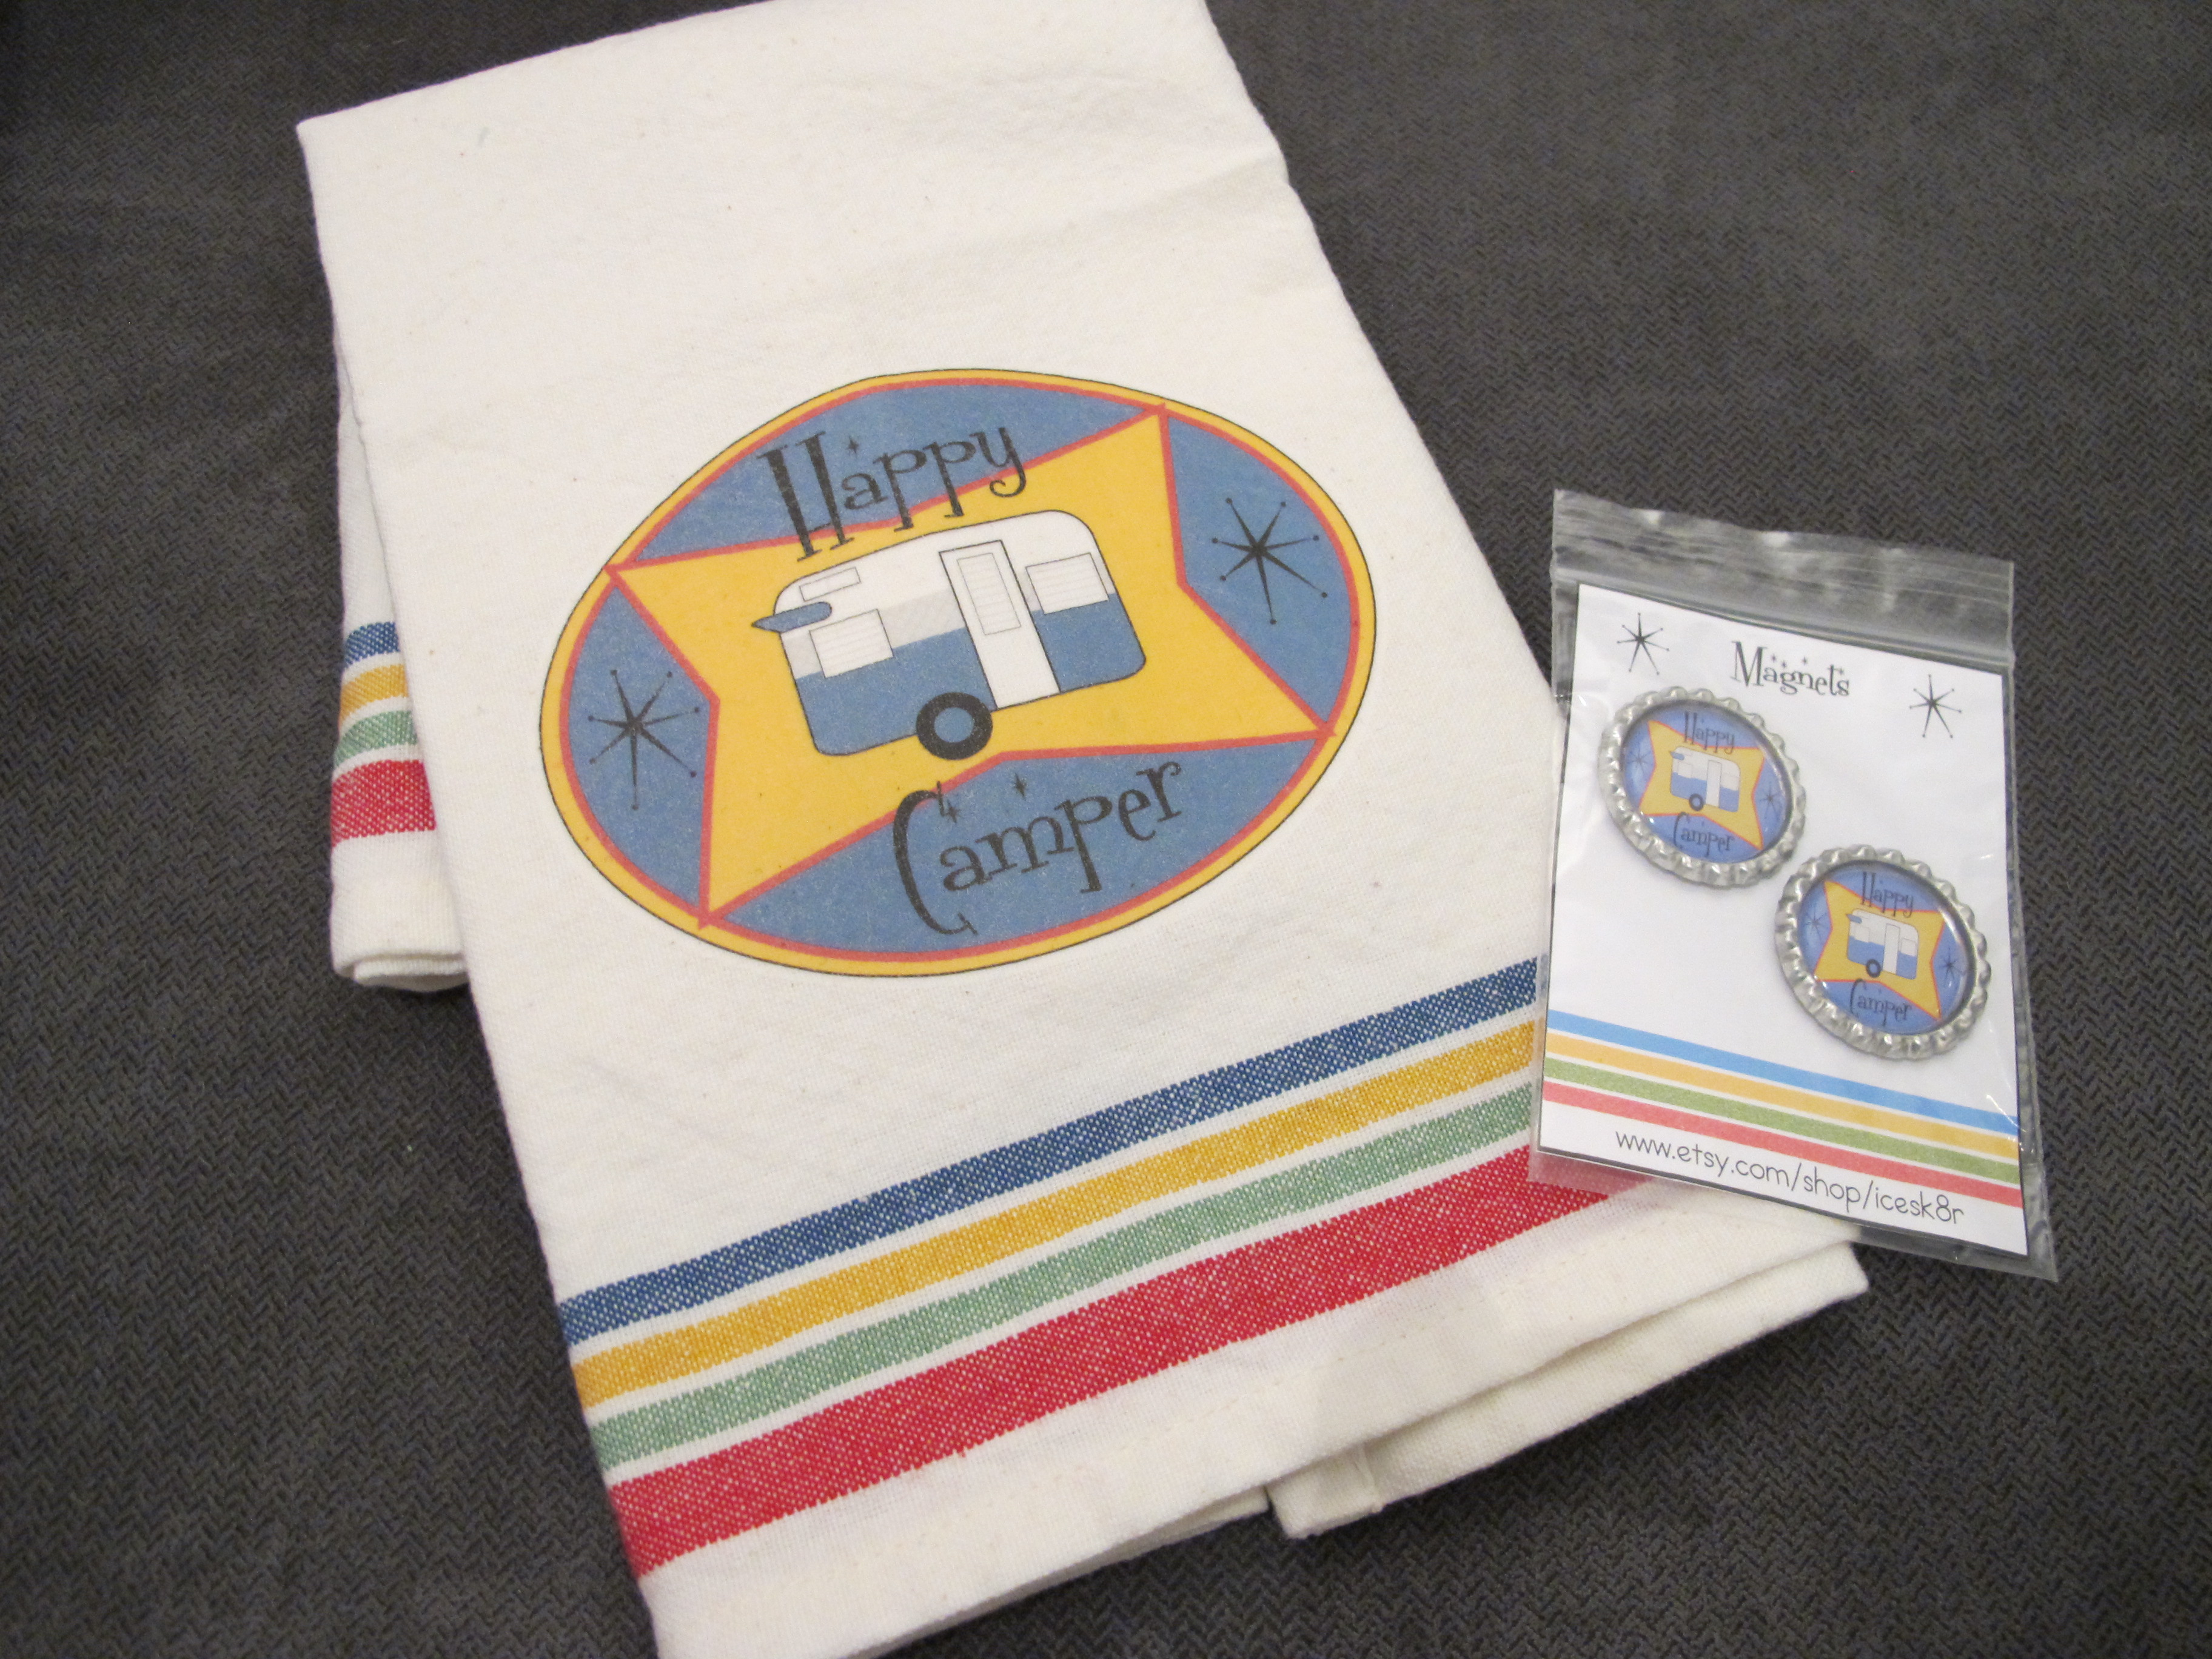
And as an added bonus, my Happy Camper dish towel and little magnets came in the mail today that I ordered from icesk8r at  www.etsy.com.

IMG_3946 IMG_3957


The only curtain panels that had a slight problem were the ones above the sink.  They turned out slightly short.  I think I didn’t realize that the curtain rod was a little higher than the other ones.  Oh well, I can fix that later.  🙂

Now it’s time to make some dinner and relax.  I think my job is done for now anyway.  A bientot!


The Money Pit

Posted on

My mom aptly called Junebug the “money pit” over Christmas.  I didn’t really mind since she contributed $50 toward the money pit as part of my Christmas present. 🙂

I’ve started tallying up what I’ve spent so far on Junebug through http://www.mint.com.  She has her own expense category.

  • Junebug’s purchase price = $3700
  • Tow hitch = $500 (would have been $400, but I got the hitch installed on the Jetta first, then had it removed, then had another one put on the Tiguan. Luckily the owner of the shop let me do a trade and only charged me for labor the second time around!)
  • Travel expenses to/from New Mexico to pick up Junebug = $497.65 (LOTS of gas on the way back, one downside to towing a trailer.  Luckily this didn’t include an additional $40 that was spent when my travel companion locked my keys in the car at the gas station in Fort Stockton)
  • New keys for main door and storage cabinet (because there were none) = $92
  • Porta potty = $107
  • Waterproof cover = $160
  • Leveling jacks = $50
  • Material for curtains and cushions, plus foam for seat backs = $260 (foam is really expensive!)
  • New leaf springs, rewired tail lights and general inspection = $300
  • State inspection and registration = $100 (this would be more if I counted the pain and suffering I had to go through during three trips to the tax assessor’s office and three trips to two different inspection places!)
  • Other miscellaneous items (Christmas decor, etc) = $300
  • WordPress blog about Junebug = $99

Total Cost (so far) = $6165 (yikes)

And.. I’m just getting started!  Below is the list of items that I still have yet to buy but think I need.  Guess my mom was pretty accurate in her description.

  • RV putty tape (for sealing the external seams) = $10
  • Stainless steel screws = $20
  • New drill = $200
  • Jigsaw = $100
  • Pliers with front nose nippers = $10
  • Multi purpose oscillating tool = $100
  • Birch paneling (at least 4-5 pieces) = $20 x 5 = $100
  • New insulation = $270
  • Amber shellac (for the interior wood) = $20
  • Quilted aluminum for backsplash = $40
  • New laminate for table and kitchen counter (probably won’t do that project for a while)= $200 – $300
  • New tile or laminate for floor = $200?
  • Either paint or new doors for cabinets = $40?
  • Several kinds of sealant = $30
  • Awning = $100 – $300 (depending on if I make it myself or pay someone)
  • Air conditioner (before summer) = $200-300 (depending on what kind I go with)
  • New siding and paint job (later) = $3000 or more
  • Electrician to fix the wiring = $100 – $200 (if I’m lucky)

Potential total left to spend (and I probably left out a bunch of stuff I don’t even know I need yet) = $5240

Total for Junebug = $11,405

Hmm, maybe I should have just spent the money on a fully restored one.   I guess that takes all the fun out of it though!

It’s all about the journey, not the destination.

New Year, New Junebug

Posted on

Happy New Year everyone!  I’m hoping that 2014 will bring love and happiness for my friends and family and that there will be many adventures in store for Junebug, Baxter, and me (and a little love and happiness for us would be nice too).  🙂  I stayed in last night because I just didn’t feel like dealing with the hassle of going out.  It seems like New Year’s Eve is always such an ordeal and usually doesn’t quite turn out to be the “epic” night that you dreamed of. I feel like an old lady because I didn’t even make it until midnight! haha  Oh well, I feel pretty good today unlike many of my friends, I’m sure.

My project for today will be sewing curtains for Junebug.  I already have the material, so I just need to do the measuring and get sewing!  I will post some pictures of my progress.

….Nine hours later…

So, I got started on the curtains by bringing the material inside from the camper.  I started measuring everything because I wanted to make two panels for each window so they can open from the middle.  I realized soon after measuring each window that I didn’t have any white thread.  I decided I needed to make a trip to Target.

And.. since Best Buy was open and next to Target,  I thought, why not pop into Best Buy to see if they have the iPhone 5S in gold just one more time?  (they’ve been out the last five times I checked) What do you know, they had ONE left in stock so of course I had to buy it!  Luckily it was on sale and when I traded in my iPhone 4S, I got a credit and the whole thing ended up costing me only $35!  Since I was saving so much on the phone, I thought, maybe I can also get a good deal on a new iPad Air…  Next thing I knew, I was purchasing a new iPhone and a new iPad (on which I did save $50).  AND I wasn’t any further along on my curtains.  Sometimes I can get so easily distracted!

So pretty and shiny!

So shiny and new!

After spending too much money at Best Buy, I made my way over to Target.  I got some white thread among other things and headed back home.  My neighbor came by shortly after and gave me some homemade black eyed peas (for good luck) and some cabbage with meat that was delicious!  I love my neighbors!

So, I finally started measuring and cutting the fabric.  I had to turn my kitchen into a curtain factory.


Kitchen


I cut up all the pieces, and I wanted the curtains to be double-sided so that everyone can see the pattern from the exterior of the camper too.  This means double the amount of fabric!  I thought I had enough but alas, I was short by one yard.

IMG_3929


So.. my curtain making project will extend into Thursday since I will have to make another trip to Joann Fabrics to buy one more yard.

In the meantime, I decided to take a break and eat some of my mom’s delicious homemade cherry pie (gluten free just for me).  Yummy distraction!

IMG_3932

Out with the old, in with the new

Well, I sold my beloved Jetta today.  I put the ad up on craigslist and then only two days later, she was sold!  I couldn’t be happier with the efficiency of the whole process! 🙂 Now that I have Junebug, I needed a vehicle with more towing capacity, so I got my VW Tiguan the […]

Junebug is merry and bright!

Junebug is much more colorful with her Christmas decor and new seat cushions.

Why does work have to get in the way of my hobbies?

Why does work have to get in the way of my hobbies?

I had a rather long and boring day at work today.  I tried my best to be productive, but any time I return from a week off, I struggle to get back into the swing of things.  On a positive note, only one more day of work and then it’s off again for the rest of the week!  I’m going to get back to work on Junebug on Wednesday, otherwise known as the first day of 2014, to get the new year started off right!  I’m trying to decide what project(s) to tackle on my days off.  I really wanted to start big and take off her skin to reveal what kind of surprises she has in store for me on the inside framing.  I’m hoping there aren’t any bad surprises, but you can never tell with a camper that is 53 years old!  I know there is a leak and water damage to the interior paneling, so I’m really hoping there isn’t any dry rot going on under there.

I wanted to share some pictures of what Junebug looked like inside when I first brought her home…

Here's the kitchenette area.  It has the original propane stove and oven as well as the ice box.  You'll also see the original gas lamp in the upper left corner.  I don't think I'll use that since it probably gets pretty warm.

Here’s the kitchenette area. It has the original propane stove and oven as well as the ice box. You’ll also see the original gas lamp in the upper left corner. I don’t think I’ll use that since it probably gets pretty warm.

Here's the dinette.  The seats are covered in black vinyl and all the curtains are black and white check.  Not completely hideous, but not my style.
Here’s the dinette. The seats are covered in black vinyl and all the curtains are black and white check. Not completely hideous, but not my style.

Here's the closet, which I have turned into a bathroom.  I hate the thought of using a porta potty, but in the middle of the night, I do not want to venture outside to find the public restroom or go in the woods, so I'm willing to make a compromise.

Here’s the closet, which I have turned into a bathroom. I hate the thought of using a porta potty, but in the middle of the night, I do not want to venture outside to find the public restroom or go in the woods, so I’m willing to make a compromise.

The roof is in pretty poor condition at the moment.  Needs to be resealed and screwed back down to the frame.  I'm hoping it's not that way because the frame is rotted.  I'll find out soon!

The roof is in pretty poor condition at the moment. Needs to be resealed and screwed back down to the frame. I’m hoping it’s not that way because the frame is rotted. I’ll find out soon!

This is the worst seam, it's completely open and you can see the insulation when I press on the aluminum.  Definitely needs a repair pronto!

This is the worst seam, it’s completely open and you can see the insulation when I press on the aluminum. Definitely needs a repair pronto!

Right now, duct tape is my friend.  I know, I know, I shouldn't patch up my camper with duct tape, but it's only a temporary solution until I have the time to do it the right way!

Right now, duct tape is my friend. I know, I know, I shouldn’t patch up my camper with duct tape, but it’s only a temporary solution until I have the time to do it the right way!

Hello World!

Hello World!

So I’ve taken on a renovation project, and Junebug is her name.  She is a 1961 Shasta Compact camper and I love her already, even with all of her imperfections!  I should have started chronicling this adventure back in early December when I first got Junebug, but I wasn’t sure if I had the energy to write everything down.  Today I decided it would be worth it, so I’m giving it a go.

I bought Junebug in Lordsburg, New Mexico on December 7th.  I drove 14 hours to get her and managed to get exposed to bed bugs in a shady motel along the way.  Perhaps that’s why I decided to name her JuneBUG, however I would rather forget that whole incident so as not to sour the experience completely.  The son of my mother’s good friend from college volunteered to accompany me on my journey.  I took him up on the offer, thinking it would be safer, especially since I was carrying a lot of cash and driving a long way by myself (Baxter was there too, but he doesn’t count since I’m pretty sure he would only be able to love someone to death).

After arriving back home with my new camper, I noticed she was leaning quite a bit to one side.  Upon closer inspection (and advice from my friendly neighbors), I realized she had two different springs installed.  I took her to the nearest trailer shop to be inspected and repaired.  Luckily leaf springs were only about $30 each, so she got two new leaf springs as well as rewired tail lights.  Apparently the previous owner had installed the wrong sized leaf spring on one side and wired the tail lights backwards.   I’m not sure what he/she was thinking, but I’m glad someone here was able to set her straight.  Next I set about trying to find the leak in the roof.  I knew that vintage canned ham trailers such as Junebug were prone to leaks, and she was no exception.  I could see the water damage to the interior wood and needed to find the source(s).  In the meantime, I ordered a waterproof cover for her so that I could protect her from the frequent Houston downpours.

I only had two weeks until Christmas, and I planned to take Junebug to my grandma’s house near Austin, so I had to get moving to get her ready!  The house was going to be full, and I wanted this to be Junebug’s first official excursion as well as my first experience not having to fight over the right to have my own bedroom at my grandma’s over the holidays.  It’s funny how if you are married, you automatically get rights to your own bedroom just because there are two of you, even if there are others who are older and single who (in my humble opinion) should get first dibs.  Oh the injustice!

It’s getting late, so I will continue catching everyone up to date on Junebug’s adventures tomorrow night when I have more time.   A demain!

Junebug dressed up for the Christmas card photo!

Junebug dressed up for the Christmas card photo!

My little Jetta pulled Junebug all 14 hours back to Texas.  She really struggled on the hills, so I've now purchased an SUV to tow Junebug in the future.  It was worth a try, but I can see why you don't see more cars towing little campers on the highway. :)

My little Jetta pulled Junebug all 14 hours back to Texas. She really struggled on the hills, so I’ve now purchased an SUV to tow Junebug in the future. It was worth a try, but I can see why you don’t see more cars towing little campers on the highway. 🙂

This is the hotel we stayed in on our way back from Lordsburg.  This is NOT the hotel with the bed bugs.  I'm sure the bed bugs were in the Days Inn in Van Horn.  The El Capitan was very nice and we actually secured the last room in the whole town thanks to the ice storm passing over the area.

This is the hotel we stayed in on our way back from Lordsburg. This is NOT the hotel with the bed bugs. I’m sure the bed bugs were in the Days Inn in Van Horn. The El Capitan was very nice and we actually secured the last room in the whole town thanks to the ice storm passing over the area.

This is a picture of Baxter and me right after we purchased Junebug. I am super excited that my dream of owning a vintage camper has finally come true!

This is a picture of Baxter and me right after we purchased Junebug. I am super excited that my dream of owning a vintage camper has finally come true!

The morning after the ice storm, the roads were clear and we set out to return to Texas with Junebug.